

Cooking with Mattie
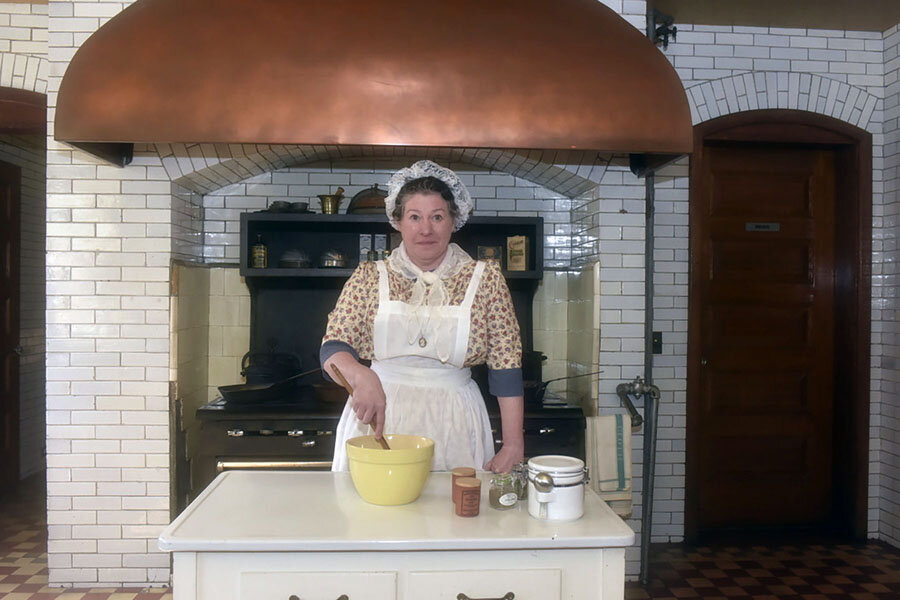
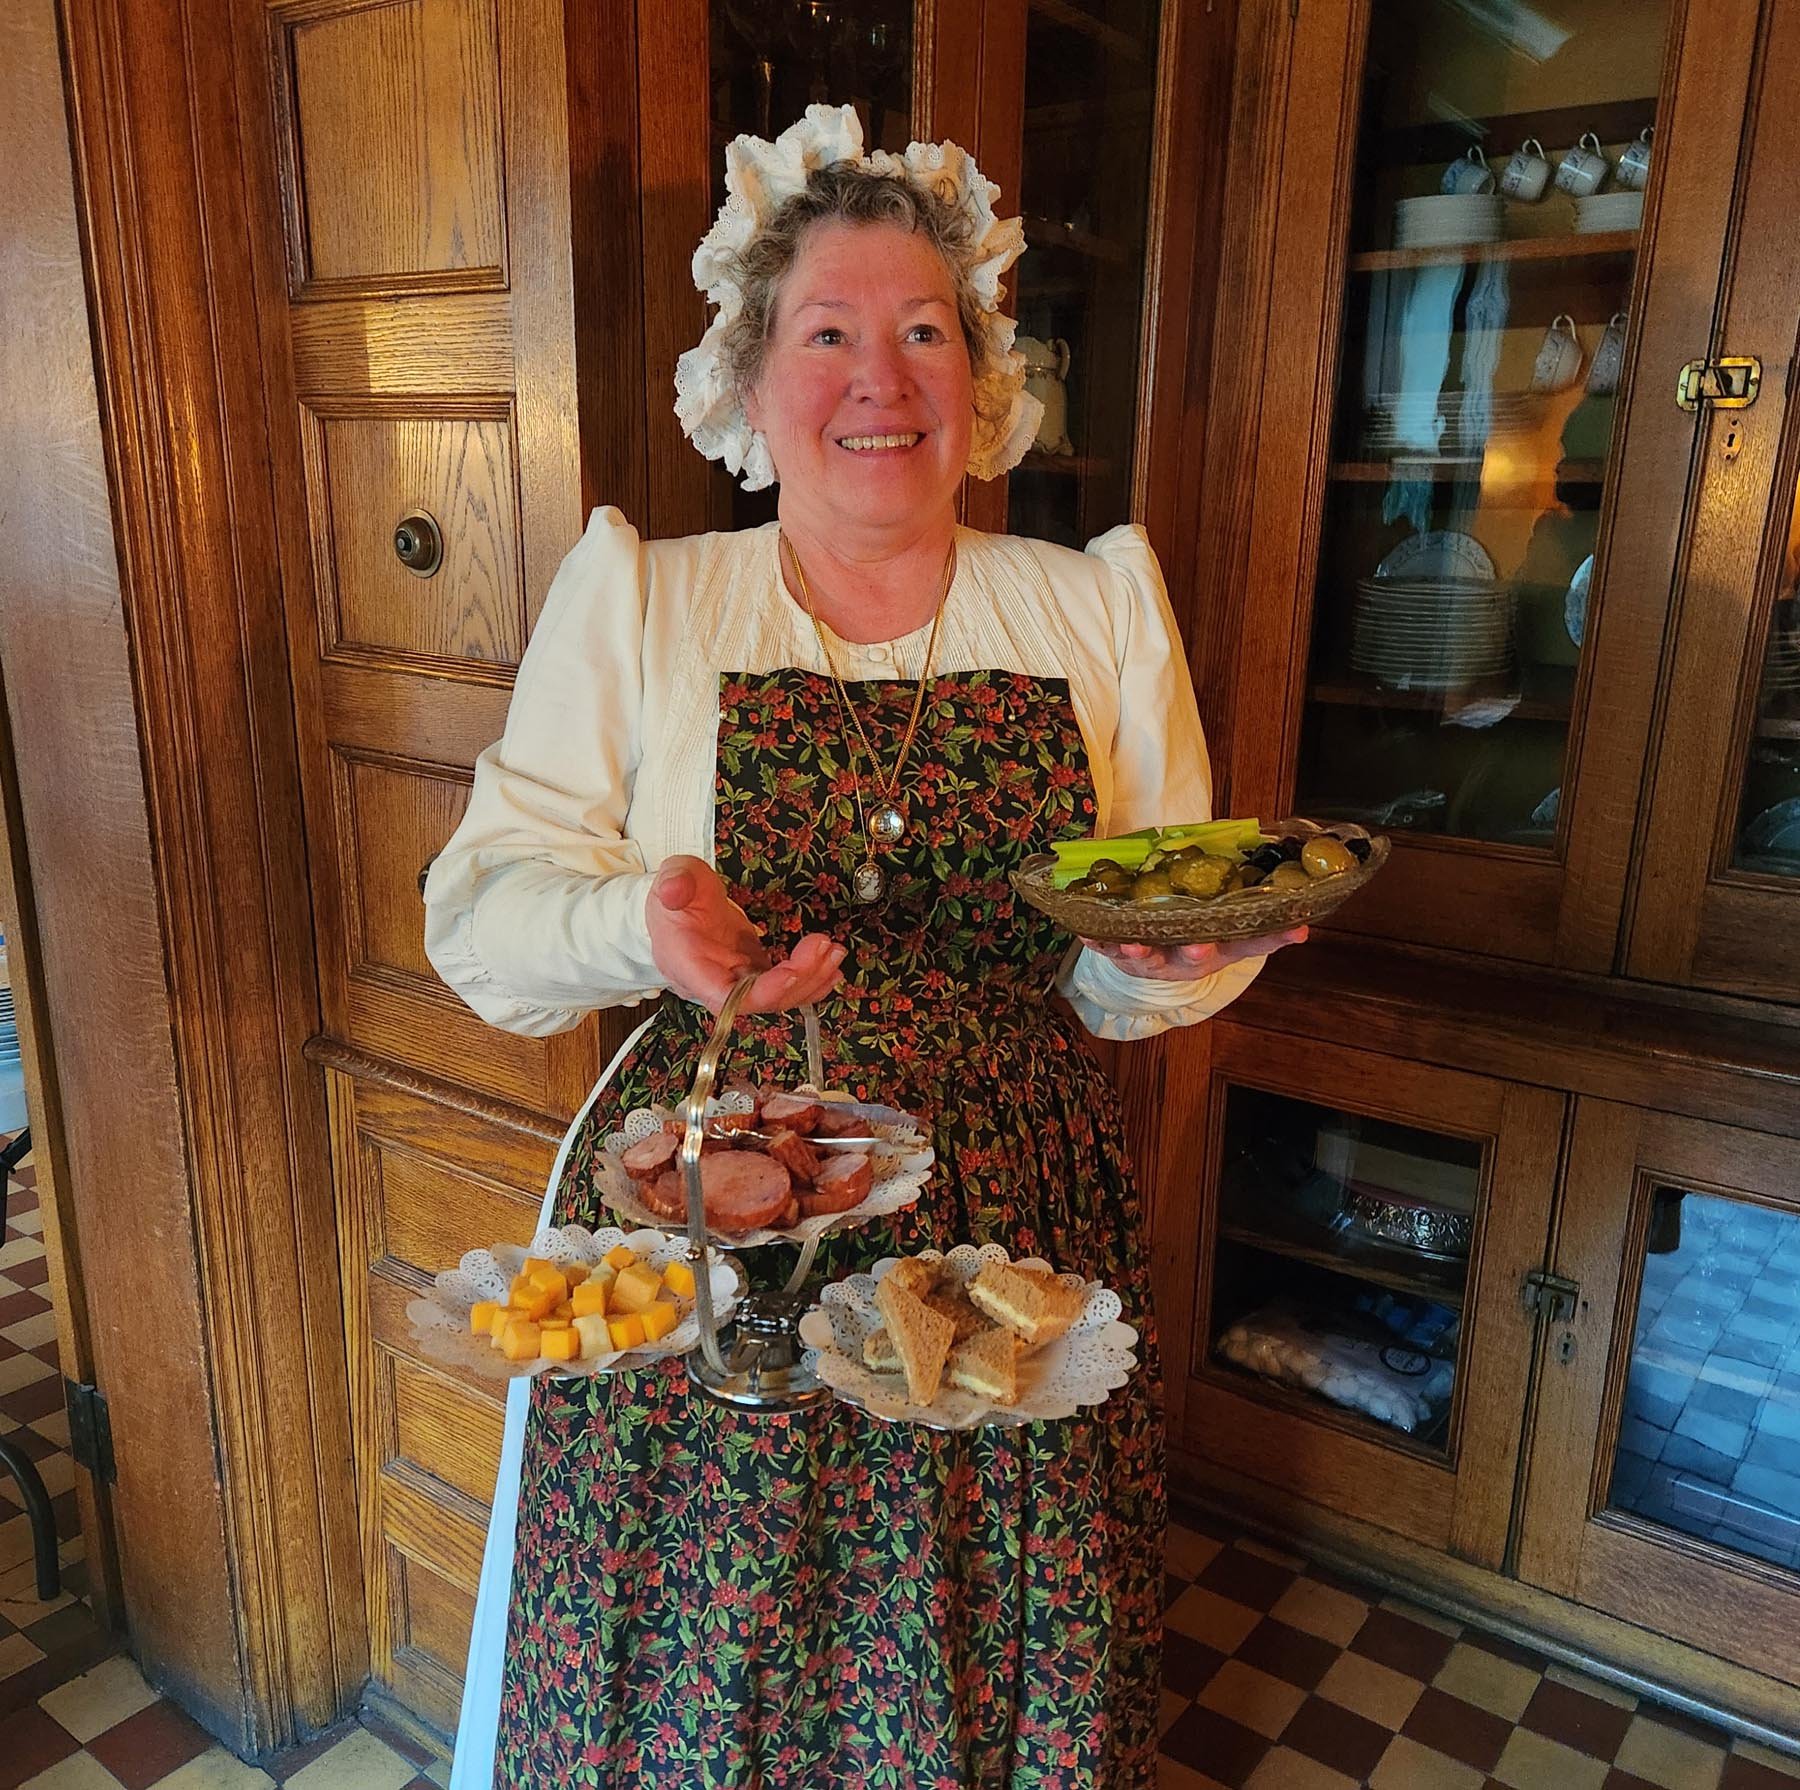
Mattie Williamson was the Glessners’ beloved cook from 1892 until her retirement in 1912. In March 2020, Mattie made her return to the house, as portrayed by Ellie of ElliePresents (shown above). In this column, Mattie will share historic recipes and cooking techniques, and will update the recipes for modern cooks so that you can try them at home. Enjoy this taste of the past! If you have questions for “Mattie,” email her at elliepresents@gmail.com.
TO SEARCH FOR A SPECIFIC RECIPE
Press Ctrl/Command + f on your keyboard and type in your search term in the window that will pop up. It’s an easy way to search for a recipe or specific ingredient!
VIDEOS
Meet Mattie (NBC News, March 3, 2020)
Afternoon Snack & Chat (Association of Midwest Museums, April 11, 2022)
Aspara-guess What! (posted May 1, 2024)

Mattie would have had two fresh vegetable choices in early May: the first things to come up in the spring are rhubarb and asparagus. We have cooked with rhubarb several times in this column. This month, it is asparagus’s turn.
Asparagus has been eaten by people for millennia. It was probably first cultivated by early farmers from grasses that grew along rivers in North Africa, Asia, and southern Europe. It became a popular home garden vegetable in the U.S. but was not commercially grown here until the 1860s. We know that Frances Glessner was fond of it because it shows up on many menus listed in the Bills of Fare.
“People are suspicious about asparagus. Otherwise sane cooks will insist on cooking it in special pans or turning the spears three times counterclockwise but never under the light of a full moon.” (The Flavor Thesaurus, Segnit, 2010)
When very fresh, asparagus has a deep, nutty flavor and is ever so slightly bitter, but in a good way. If old or overcooked, it takes on a sulfur tone which can be most unpleasant to many people. Three major mistakes are made with asparagus: improper storage, cutting the stems at the wrong spot, and overcooking. For storage, it helps to think of the stalks of asparagus as the stems of flowers. Like flowers, asparagus begins consuming its own sugar as soon as it is harvested. This causes it to wilt and dry out. Store it in a tall glass of water, upright in a cool place. Replace the water every day.
When ready to cook, never cut the ends. Grasp each stalk in both hands, one at the center and one near the end. Break the rough, fibrous end off. Each stalk will break at exactly the right spot to yield the best part; discard the broken ends. When cooking, just barely steam, roast, or blanch the stalks. Watch carefully. The color will change from deep to bright green. Immediately remove from heat, rinse in very cold water, or if roasting, pop into a cold place to stop cooking. When ready to serve, add to a warm sauce or soup as in some of the recipes below or immerse in warm water for just a few minutes. This will keep it bright green and nutty. Overcooked asparagus will turn yellowish, emit a sulfur smell, and the stalks will become limp. No one wants a stinky, limp stalk of asparagus.
This month Mattie has made:
Asparagus Soup
Egg & Asparagus Aspic
Asparagus & Almond Scones
Asparagus in Ambush
Asparagus-shaped Marzipan
Asparagus Soup
1-2 lbs. fresh asparagus, 2 bunches
4 cups fresh spinach, this will create a deeper green color, but is not required, use at cook’s discretion
2-3 Tablespoons olive or any sweet oil
1 sweet onion, finely chopped
4 cups vegetable or chicken broth
1 Tablespoon lemon juice
½ of a freshly grated nutmeg, about 1 teaspoon
Plain, full-fat yogurt or sour cream for garnish
Salt and white pepper to taste
Sauté the onion in oil until clear and fragrant, salt lightly. Meanwhile, chop asparagus into small pieces reserving the flowery tops. Toss the asparagus pieces and spinach (if using) with the onion and stir briskly; add the nutmeg. Pour the broth over and reduce heat to simmer for about 10 minutes. Watch for the change of color to bright green.
Remove from heat, and puree with an immersion blender or place into a stand blender. As we have discussed in this column many times, Mattie would have forced through a food mill until the mixture was thoroughly smooth, discarding any fibrous matter. Mattie’s method removes all fiber and thus much of the bitterness of the asparagus. A blender will break up these fibers and leave them in your finished product, your choice.
Cool the mixture thoroughly. When ready to serve, lightly steam the asparagus tops you have saved, place them on top of each bowl of soup as a garnish with a few dollops of yogurt or sour cream. This is a bright, delightful soup for spring and is equally delicious served warm or cold.
Egg & Asparagus Aspic
Aspic is complicated, please don’t fight me. Historically, aspic was made from cooled broth which had gelatinized. Yes, at its base it is made from rendered animal bones. If this bothers you, skip to the next recipe. By Mattie’s time, unflavored gelatin would have been added to make the process simpler and the finished product more solid. Mattie would have made and used aspic in many forms for cooking at Glessner House. You can certainly make a fine aspic using only unflavored gelatin which you will buy in powdered form. If it makes you feel better, by all means do that. News flash, all true gelatin is made from bones and sinew, sorry about that folks. However, there are three common forms of vegetarian gelatin: agar made from algae, Irish moss made from seaweed, and vegan gel made from vegetable gum, predominately tapioca. Mattie would have started with meat, skin, and bones. In this case, chicken.
For the Broth
2-4 chicken thighs, with skin, bone in
2-3 each: carrots, stalks of celery, small onions, all chopped
2-3 bay leaves
Salt and white pepper to taste
Place all ingredients into a cotton tea towel and tie tightly. Place in large saucepan with at least 6 cups of water. Bring to boil then reduce heat and simmer for 3-4 hours. Taste broth for salt. Remove bag of ingredients, set aside. Open bag and remove the vegetables and bay leaf, discard. Remove meat from chicken and save for another use. You may also add this chicken to your aspic if desired. The broth should be clear.
If it is not, drop in some egg white (you can use the extra whites you have left over from the yolks in the Egg Bread from last month’s column* which we are using again this month. This is certainly what Mattie would have done.) Bring the broth back to a simmer until the egg whites are cooked. They will pull the particulate matter from the broth. Discard the egg whites or feed them to one of the servants as the eggs contain many nutrients, just not attractive ones.
Thoroughly cool the broth. The fat will rise to the top. Mattie would have kept the fat on to act as a barrier and preservative until ready to use. Remove the layer of fat to reveal gelatin. Bring the gelatin back to a liquid state when ready to make your aspic by simmering at a low temperature.
For the Aspic
6-8 stalks of asparagus
1-3 hard-boiled eggs depending on the size of your mold
2 Tablespoons unflavored gelatin
½ cup water
½ cup vinegar
1 Tablespoon lemon juice
2 cups prepared broth
1 Tablespoon sugar
Salt as desired
Break the ends off the asparagus and cut the remaining pieces the length of your mold. Bring the gelatin you made from broth to a rapid boil and toss in the asparagus. Reduce heat and simmer for 3-5 minutes. Remove the asparagus whilst it is still bright green and quickly rinse in cold water to stop cooking. Cool the broth.
Mix the powdered gelatin with the water, set aside to slightly solidify. Mix the cooled broth, gelatin, vinegar, lemon juice and salt if needed. Thoroughly grease a mold. A small bread pan will create a nice shape. Pour about an inch of the gelatin mixture into your mold. Keep the remaining gelatin mixture at room temperature or slightly warm so it does not begin to set up. Place the partially filled mold in a cold place for about 10 minutes. Remove mold and lay asparagus lengthwise into mold, top with another layer of broth/gelatin mixture. Return to cold place. After about another ten minutes, add a layer of eggs placed longways, to fill the length of the mold. Fill in all gaps with broth/gelatin mixture. Repeat until mold is full. Chill fully, overnight is best. Slice and serve as a side dish at a luncheon or as a salad course for dinner.
Asparagus & Almond Scones
10-12 asparagus spears, steamed but still bright green
2 ½ cups unbleached flour (whole wheat flour can be used for half the flour for a more artisanal treatment)
1 Tablespoon sugar
1 Tablespoon baking powder
½ teaspoon salt
5 Tablespoons butter
¾ cup buttermilk
1 cup grated mild white cheese
1 teaspoon cayenne pepper
¼ teaspoon white pepper
½ cup of sliced or slivered almonds
More buttermilk for glaze
Steam the asparagus until just tender but still bright green, chop into small pieces about the size of dice. Sift dry ingredients together three times. Cut butter in until mixture resembles small peas. Add buttermilk, then cheese, then asparagus pieces and nuts. Place on floured board and knead lightly. Shape into rectangle, then cut into triangles. Set triangles onto parchment covered baking sheet, brush tops with buttermilk. Bake at 425˚ for 12-15 minutes.
Asparagus in Ambush
This is quite an old recipe, dating back to the mid-1700s. It had a resurgence in Mattie’s time and took on the amusing moniker “in ambush.” The origin of the name is murky, but it appears in many late-19th century cookbooks with this title including The Fanny Farmer Cookbook (1896), which is in Mrs. Glessner’s cookbook collection. Essentially, you are making a thick custard, adding asparagus, and filling a cavity in a roll with this mixture, thus ambushing and containing the vegetable. Modern “Ambush” recipes sometimes call for using biscuit or crescent roll dough or even tortillas.
3 stalks asparagus per person
1 large roll or thick slice of bread per person (pictured is a roll made from the Egg Bread recipe from last month’s column*)
1 cup milk
2 eggs
1 Tablespoon lemon juice
1 Tablespoon butter
Salt and white pepper to taste
Break the stems of the asparagus and cut the remainder into 1-inch pieces. Steam or boil until just barely tender. Cool as described above. Take a roll and cut about half an inch off the top; remove the top and set aside. Dig out the crumbs from the center and toast them in a warm oven until dry; set aside. Heat milk, add well-beaten eggs and breadcrumbs, add salt and pepper to taste. When a thick gravy is formed, 3-5 minutes, add cooked asparagus.
Spoon into the cavities of the rolls, place tops onto rolls. Rub top with a bit of butter and return to oven until slightly brown, 2-3 minutes. This makes an excellent breakfast or simple luncheon. This historic recipe is quite bland. The modern palate will prefer it if a bit of cayenne pepper, nutmeg, or cloves are added.
The alternate way of making this dish involved thick slices of bread. Using a biscuit cutter, make a hole in the center of each slice of bread. Make the sauce as above, add asparagus. Fill the hole with the mixture, serve very hot.
Asparagus-shaped Marzipan
I suspect you were wondering how I was going to make a dessert out of asparagus. Well, I didn’t make one using asparagus; I made one that looks like it. Mattie and I made marzipan in the July 2020 column.*
Make marzipan according to recipe. Tint green with food coloring. Mattie would have gotten her green food coloring from the Watkins** salesman who probably came around regularly to the back door of Glessner House. Shape the tinted marzipan into spears the same size as asparagus and use slivered almonds to create the “flower” at the top and the “thorns” on the side. Et voila! An asparagus dessert.
And there you have it dear readers, the most delicious, and first, spring vegetable. Next month, in June, Mattie would have been at The Rocks, the Glessners’ summer home in New Hampshire, and we are going to prepare chicken. Have a lovely May!
*Fun hint: you can search Cooking with Mattie columns on your browser by pressing Ctrl/Command + f on your keyboard and typing in what you are looking for (search term) in the window that will pop up. It’s an easy way to search for recipes that have been included in previous columns.
** J.R. Watkins began selling liniment door to door in 1868. By 1895 the company had added pepper, cinnamon, vanilla, flavored extracts, and food coloring. They had hundreds of salesmen all over the country. Their 1904 company slogan was, “When you deal with a Watkins agent, you patronize a reliable man.” The business attempted to replace independent, itinerate traveling spice merchants with their well-trained and vetted door-to-door salesmen. You see, traveling spice merchants often had extremely rakish reputations. The Watkins man was held to a higher standard of behavior and was considered far more respectable than their predecessors had been. Certainly, a fine home such as Glessner House would want to trade with vendors who were above reproach.
The Delightful Delectable Egg (posted April 2, 2024)
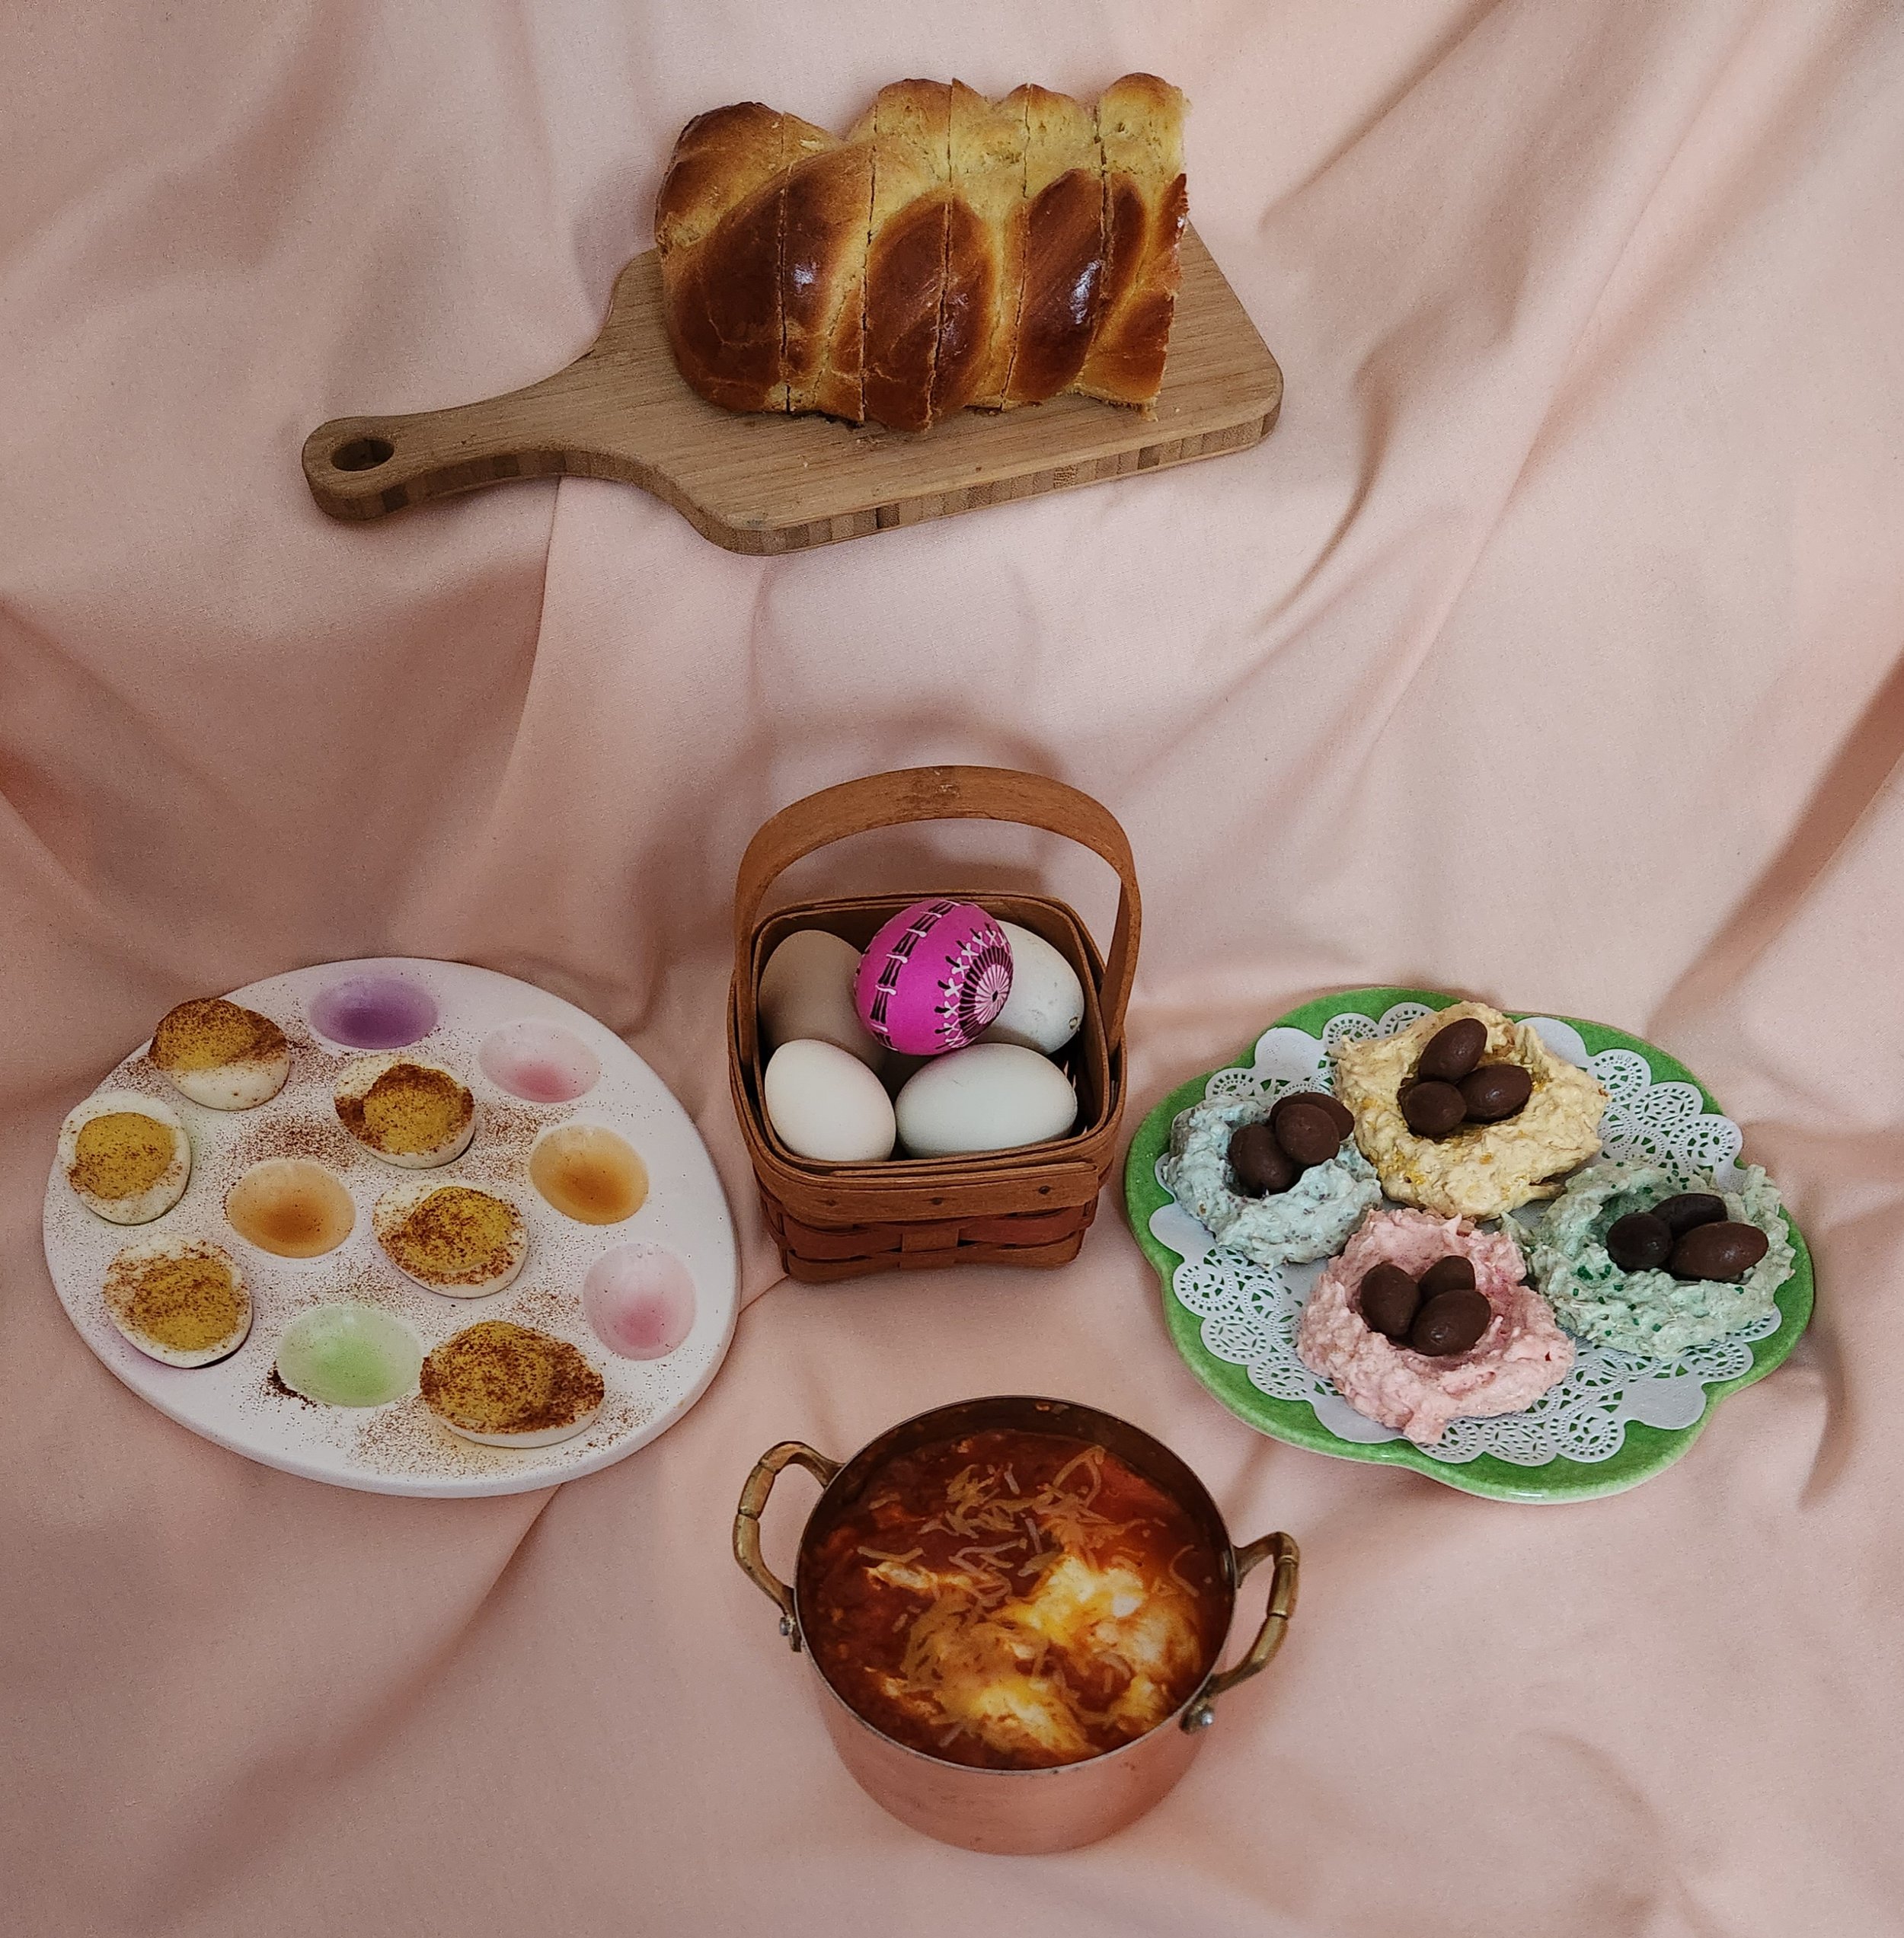
Mattie Williamson would have known that eggs are a nearly universal food. They could be used in every course of every meal served. In fact, Mattie would not have been able to do her job at all were it not for eggs. At The Rocks, the Glessners’ home in New Hampshire, there would have been chickens to provide fresh eggs. In Chicago, Mattie would have eggs delivered from a local producer, or picked them up herself at the South Water Street Market. In Mattie’s time, eggs were about twenty cents a dozen making them one of the most economical ingredients and certainly the one that provided the most food value for the price.
This month Mattie has made:
Egg Bread
Deviled Eggs
Eggs à la Dauphine
Bird’s Nest Cookies
Egg Bread
2¼ teaspoons active dry yeast, one package
⅓ cup warm water
2 eggs plus 3 egg yolks
¼ cup sweet oil (any vegetable oil will do)
2 Tablespoons raw sugar or honey
½ teaspoon salt
3+ cups flour
1 egg plus 2 Tablespoons water for egg wash
Mix the yeast into the warm water in a large glass or ceramic bowl, let sit until foamy, about five minutes. Meanwhile, mix the eggs, egg yolks, oil, sugar or honey, and salt together until thoroughly blended. Add this mixture to the yeast and blend. Add two cups of the flour and stir until a soft dough is formed. Turn the dough out onto a floured board or cloth and knead in another cup of flour, more or less, as needed. Knead until dough is no longer sticky, five to ten minutes. Form into a ball, well oil and place in a bowl, cover and set in warm spot until double in bulk, about 1½ hours.
Punch down and form into three long ropes. Braid the ropes, tuck the ends under, and place on a greased baking sheet or onto parchment paper. Brush the top with egg wash and let rise for another hour. Heat oven to 350˚, brush again with egg wash and bake until golden brown, about thirty minutes. This is a rich bread suitable for sandwiches and makes the best French toast ever! You and your family will really enjoy this recipe. We know Mattie won awards for her breads. She certainly would have won a blue ribbon for this one! This is that recipe that regular readers will want to try. It is truly wonderful.
Deviled Eggs
Most modern cooks believe that deviled eggs always contain mayonnaise. In Mattie’s day, the term “deviled” meant the inclusion of mustard and cayenne pepper. Both of these ingredients were considered so spicy as to be from the devil. Eggs, as we know, take well to the addition of any and all seasonings. No need to add mayonnaise to your deviled eggs, but they will be creamier in the mouth if you do. These deviled eggs have a different look but are still delicious.
4-6 eggs, boiled
1-2 teaspoons melted butter
¼ teaspoon salt
¼ teaspoon cayenne pepper
1 Tablespoon prepared mustard
1-2 Tablespoons vinegar
Paprika to sprinkle
Boil the eggs and cool in an ice water bath. Peel eggs. Cut in half lengthwise. Carefully remove the yolks and mash fine with all other ingredients except paprika. Make a smooth paste and then roll into little balls that resemble the original egg yolks. Place these balls into the egg cavities, sprinkle with paprika for service.
Eggs à la Dauphine
2 eggs per person
1 cup prepared tomato sauce. The modern cook can use prepared tomato sauce purchased in a jar. Mattie would have stewed tomatoes with the addition of salt, pepper, and a little sugar. She would have put this up in glass jars.
A bit of grated cheese
In a small vessel, place tomato sauce and heat until steaming. Drop eggs into the sauce, place over a slow heat and cook very slowly until eggs are poached to desired tenderness. Sprinkle a bit of cheese over the top and brown in a hot oven. Serve with toast points for breakfast or luncheon.
Bird’s Nest Cookies
3 egg whites (Mattie would have used the whites from the Egg Bread to be truly thrifty)
1 cup sugar
2 cups grated coconut, unsweetened (if using sweetened, reduce the sugar to ½ cup)
1 Tablespoon Mexican vanilla
¼ teaspoon cream of tartar
Dash of salt
Food coloring of choice
Chocolate eggs
Whip the egg whites with cream of tartar and salt until frothy. Add the vanilla. Gradually add the sugar while continuing to beat the eggs until stiff peaks form. Fold in the coconut. Divide the mixture into several bowls and tint with food coloring of choice. Mattie would have gotten hers from the Watkins man who probably came round to the back door of Glessner House. Stir the food coloring in thoroughly and place on parchment lined baking sheets. Make a dent in each mound of coconut mixture so that they resemble a nest. Bake in a slow oven (275˚) for about an hour until firm. When thoroughly cool, fill the nests with chocolate eggs, jellybeans, or candy of your choice.
Mattie and I both wish you a warm, sunny, and delicious spring!
Mattie’s Salute to the Noble Tuber (posted March 5, 2024)
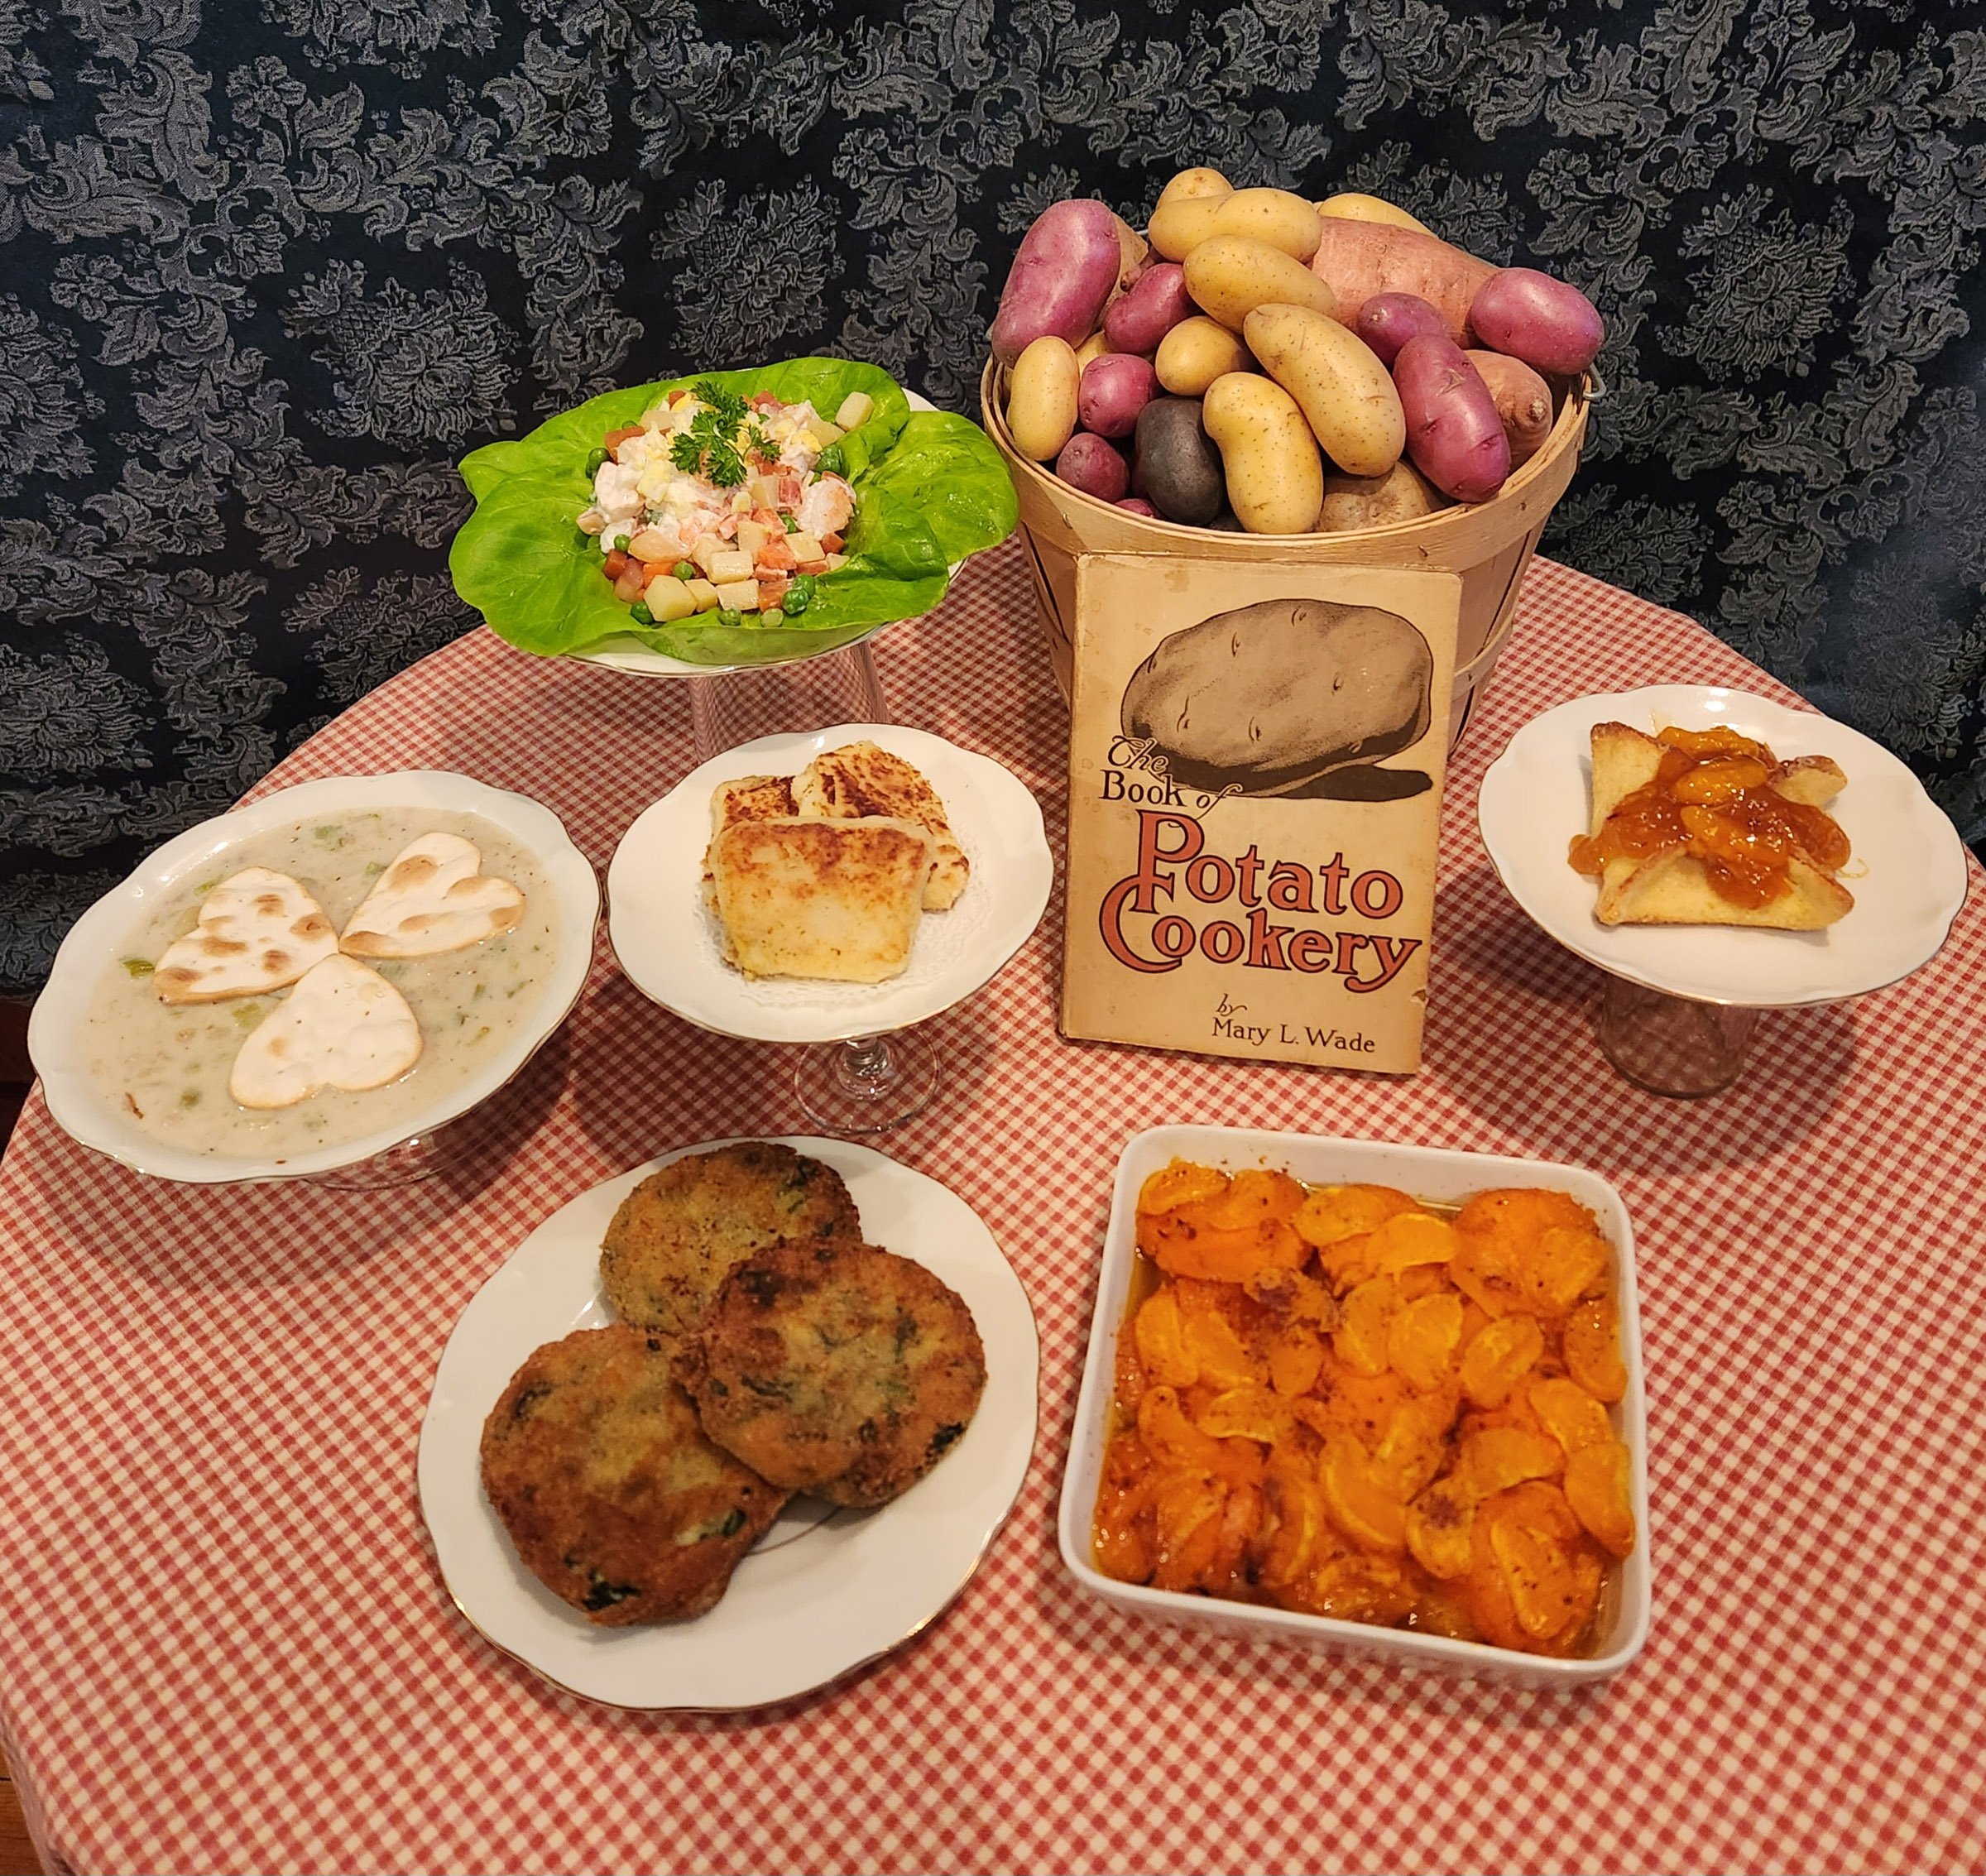
Frances Glessner has, in her library, a book entitled The Book of Potato Cookery, by Mary L. Wade. The subtitle is: “More than one hundred recipes suitable for the tables of rich and poor alike, showing how to prepare economical and nutritious dishes from the ‘noble tuber’.” All of the recipes for this month’s column come from that book. Mattie will be making:
Chilean Potatoes
Potato and Spinach Croquettes
Sweet Potatoes with Orange
Clam Chowder
Russian Salad
Orange Dumplings
“Please Ellie (or Mattie),” I hear you saying, “tell us which potatoes are best for which dishes, we are often confused.” Just as with selecting the right apple for pie versus applesauce, choosing the right potato for your dish is important. Russet potatoes, which are often called baking potatoes, are best for baking and frying. They are termed “starchy” potatoes and will produce a fluffy inside when baked but are not great for mashing as they can become glue-like. Anyone who has ever tried to make mashed potatoes in a pinch when the only potatoes in the kitchen are russets will back me up on this.
There are also “waxy” potatoes, these are most often found in our stores as new potatoes, fingerlings, and the smaller red potatoes. Waxy potatoes are for potato salad or stew--any recipe where you want the potato to retain its shape in the finished dish. They have many more eyes as a rule and are harder to peel so I cursed them as a child on the farm when my grandmother wanted all the potatoes peeled perfectly, but they are the best for salads, hands down. Some potato varieties offer a balance between starchy and waxy and are considered “all-purpose,” meaning they work in any dish. All-purpose varieties include Yukon Gold and larger red potatoes. Mattie would have known which potatoes she wanted for each treatment and have them stored in the cool basement of Glessner House in bins.
Chilean Potatoes
3-4 medium all-purpose potatoes
4 Tablespoons butter
5 or 6 drops of Tabasco sauce
¼ cup milk
Salt to taste
2 Tablespoons of flour, or enough to coat
Boil potatoes in their jackets, cool until safe to handle then remove skin. Mash with butter, milk, Tabasco sauce, and salt. Mash very smooth. Press firmly into a small loaf pan or any mold you like. Set to cool in ice box or refrigerator. When cold, cut into slices (if molded, unmold into individual portions). Roll in flour and sauté in hot oil until just brown. Serve on lettuce leaf or doily as a side dish.
Potato and Spinach Croquettes
2 cups mashed all-purpose potatoes
2 eggs
½ cups cooked spinach, chopped fine
2 Tablespoons butter
Salt and pepper to taste
1 or 2 eggs, well beaten, for dipping before the crumbs
1 cup or so of bread crumbs
Mix the first five ingredients together. Cool. Shape into croquettes. Roll in egg and then crumbs and fry in deep fat. Mrs. Glessner was very fond of many types of croquettes and lists them often in her Bills of Fare.
Sweet Potatoes with Orange
1 sweet potato for every two persons
1 large or 2 small (Cutie, a.k.a. mandarin) oranges per person
2 Tablespoons maple syrup or honey
1 Tablespoon grated orange rind
¼ teaspoon salt
¼ teaspoon nutmeg, freshly grated
1 Tablespoons butter
Juice of two oranges mixed with 1 Tablespoon lemon juice and 2 Tablespoons water
How could I not make a dish that calls for oranges when Mr. Glessner might be dining? This will resemble sweet potato casserole made with orange juice that many folks find on their holiday tables. No baby marshmallows, please!
Cook sweet potatoes in their jackets in boiling water until a knife can be inserted all the way through. When cool enough to handle, remove the skins. Slice the cooked sweet potatoes. In one large casserole dish or individual dishes layer the sweet potatoes, then layer some orange segments, drizzle with syrup, a little salt and a little nutmeg, and dot with a few pieces of butter. Repeat the process until the dish is full. Mix orange and lemon juice with water and add the rest of the syrup if you have not used it all. Pour over the finished dish. Bake in moderate oven, 350˚for 30 to 40 minutes or until top begins to brown and liquid is bubbly.
Clam Chowder
4 cups raw diced waxy potatoes (the modern cook might like to use fingerlings or baby potatoes and leave the skins on to save time and add color to the dish)
1 pint clams, canned are just fine
3 slices of bacon
1 Tablespoon flour
1 small onion, finely chopped
2 or 3 ribs celery, finely chopped
1 teaspoon salt
½ teaspoon white pepper
1 pint hot milk
4 crackers, broken into pieces
Fry the bacon, remove the bacon from pan and set aside. Add the onion and celery to the grease in the pan and fry until light brown, then add the flour. Reduce heat, add the diced potatoes, and just enough water to cover, put a lid on the pot. Simmer until the potatoes are tender, about 20 minutes. Stir, add the clams, milk, and cracker crumbs; add salt and white pepper to your taste. Serve with more crisp crackers for crumbling on top. If desired, you may crumble the bacon on top as well for a garnish, unless of course one of the other servants has come into your kitchen and made a sandwich with the cooked bacon whilst your back was turned, ahem.
Russian Salad
1 cup cold, cooked waxy potatoes, cut into dice
1 cup cold, cooked carrots, cut into dice
1 cup cold, cooked peas
3 Tablespoons oil
½ teaspoon salt
1 ½ Tablespoons good vinegar
A few teaspoons paprika
6 shrimp, cooked and cooled, cut into pieces the same size as the vegetable dice
4 Tablespoons mayonnaise
1 hard-boiled egg
1 Tablespoon chopped parsley
The trick with any Eastern European salad is to have all the pieces the same size. My mother served our country in the Peace Corps; she was posted to Ukraine. One of the lessons she brought back was about cutting the pieces for salad. The ladies there taught her to start with the smallest ingredient, in this case, peas. Cut every other ingredient the same size as the smallest one. They say this causes everything to blend together in the mouth and makes each bite perfect. They are absolutely correct, and it works for all sorts of salads, fruit ones, too.
Mix the cooked vegetables lightly with the oil, vinegar, salt and paprika. Arrange on a bed of lettuce leaves. Mix the shrimp with the mayonnaise. Place on top of vegetables and garnish with hard cooked egg. A little sprinkle of paprika on top is nice. Garnish with chopped parsley.
Orange Dumplings
1 cup corn flour
1 cup unbleached all-purpose flour
¼ teaspoon ginger
3 teaspoons baking powder
1 cup cold mashed all-purpose potatoes
1 egg, beaten until light
2 Tablespoons butter
Enough milk to make a stiff dough
Several oranges, peeled, seeded and divided into segments
¼ cup raw or white sugar
¼ cup butter, melted
Sift dry ingredients. Add the potato, butter, and egg. Mix and add enough milk to make a stiff dough. Roll the dough about a half inch thick. Cut into squares or circles. Brush each piece with melted butter, lay a few orange segments onto each piece and sprinkle with sugar. Bring the four corners together if using a square, pinch the circle together if using a circle. Brush with butter and sprinkle with more sugar. Bake in a moderate oven, 350˚ for 25-35 minutes until light brown. Cool. For service, top with Orange Sauce.
Orange Sauce
2 Tablespoons corn starch
¼ cup cold water
1 cup boiling water
Juice of one orange
Grated rind of one orange
1 teaspoon lemon juice
½ cup raw or white sugar
1 Tablespoon butter
Mix the corn starch with cold water. Blend all other ingredients in a saucepan, add the corn starch slurry. Heat to boiling and reduce to simmer, cook 10 to 15 minutes or until it begins to thicken and is no longer cloudy. Add the butter and stir. Keep warm and drizzle over the baked dumplings. Vanilla ice cream or whipped cream on the side is a nice addition. Mrs. Glessner was fond of molded ice cream as any regular reader knows. I must chuckle a bit. A scoop of ice cream is, in fact, potato shaped. Tee hee.
Happy St. Patrick’s Day to those who celebrate, enjoy the coming of warm weather here in Chicago. Next month--eggs for Easter and spring.
Heart-beets for Valentines’ Day (posted February 5, 2024)
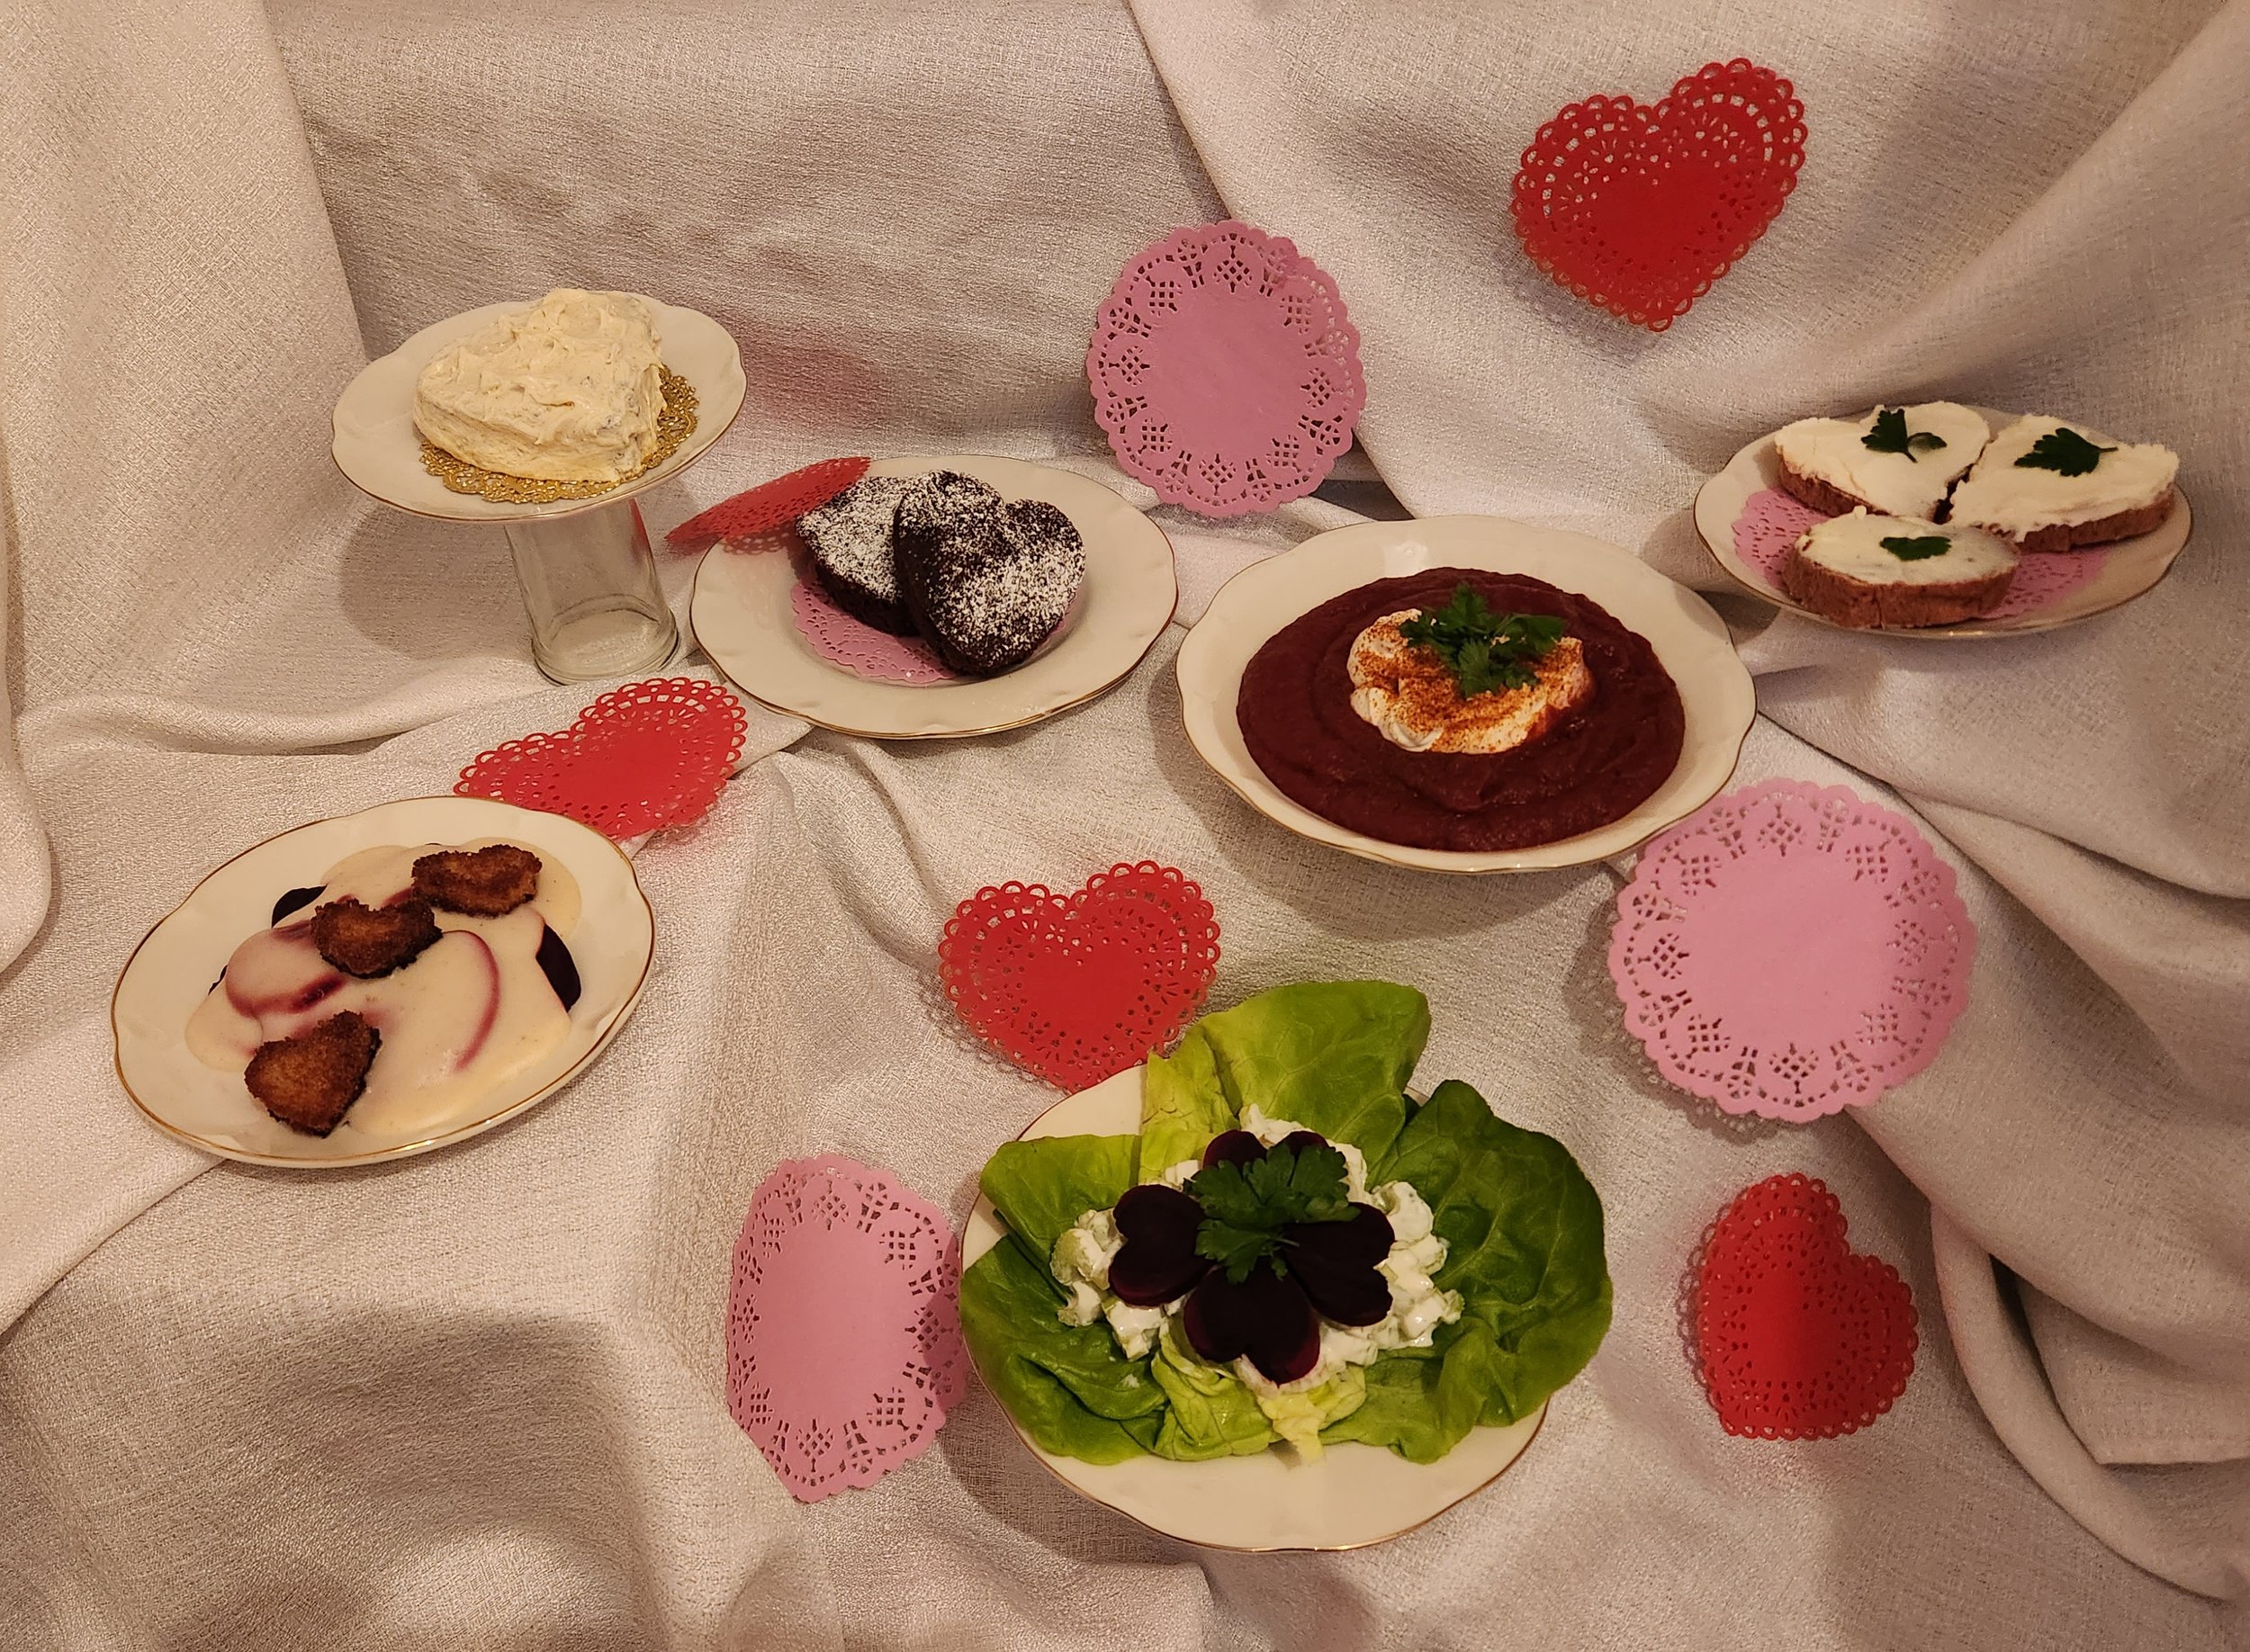
Clockwise from top left: frosted Mahogany cake, cake with powdered sugar, beetroot bread with cream cheese, borshch, celery salad with beets, creamed beets with croutons.
We are trying something special in 2024 in the Cooking with Mattie columns. Each month will focus on a particular ingredient and how Mattie might have used it in cooking for the Glessner family between 1892 and 1912. Last month we featured honey. In February, in honor of Valentines’ Day, we are featuring beets.
Beets make a showing on several Glessner House menus, in many different forms. They were a versatile ingredient that Mattie could easily call upon to give some color and zest to drab winter days. Additionally, when they are sliced, they often resemble hearts. This makes them fun and whimsical for February parties, and we know Frances Glessner loved to be a bit whimsical on occasion. This month we will be making:
Celery and Beet Salad
Cream of Beets with Croutons
Beetroot Bread
Borshch*
Red Velvet Cake
Celery and Beet Salad
1 stalk of celery per person
1 medium-sized beet per person
1 Tablespoon mayonnaise
1 Tablespoon sour cream
1 teaspoon lemon juice
Lettuce for plating
Parsley for garnish
Longtime readers will recall that celery was highly prized in Mattie’s day. It was considered a very special ingredient, especially on a winter table. Mixing beets with celery adds color to a cold weather menu and showcases that the Glessners could afford to entertain with celery.
Chop the celery very fine and set aside. Scrub the beets and cook in boiling water until tender. Cool until easy to handle and then carefully scrape the skin off. Slice or cube in a similar size to the celery. For a festive look, use a small cookie cutter to cut into heart shapes. Mix the mayonnaise with the sour cream and lemon juice. Stir this dressing into the celery first, then carefully place the beets on top. Do not over mix or the entire thing will turn pink. Plate on a lettuce leaf and garnish with chopped, fresh parsley. This salad was served by Mattie on November 20th, 1892, and probably many other times as well. Beets were one of the specific foods that Frances Glessner listed in her “Things Mr. Glessner Likes” instruction manual.
Cream of Beets with Croutons
In many of the cookbooks in Mrs. Glessner’s collection, beets are served one of three ways: as a salad, creamed, or pickled. We have covered pickled beets previously in the in the Summer Picnic column, September 2023. However, when beets appear on the Glessner House Bills of Fare, they are most often listed as “Creamed Beets with Croutons.” Yes, I made a face when I read this, but we’re going to try it folks, because Mattie did.
One large or two small beets per person
Boiling water
1 Tablespoon butter
1 Tablespoon unbleached flour
1 cup milk
Salt and pepper to taste
Croutons made from toasted bread
Scrub the beets and cut off any greens but leave at least an inch of the tops on. Plunge into boiling water deep enough to cover. Set a kettle on the boil so that you can replenish the water to keep the beets covered. The cookbooks tell us that fresh beets will cook in one hour; “winter” beets will require up to four or five hours of cooking time according to the historic cookbooks. Yikes! They are done when a sharp knife or skewer can be inserted all the way through.
Remove from heat and rinse in very cold water until cool enough to handle. Scrape the skin off and remove the tops and bottoms. Slice the beets about ¼ inch thick, set aside. Meanwhile, melt butter in a saucepan, add the flour and stir until the flour just begins to brown, add the milk a little at a time until a creamy sauce is formed. Salt and pepper to taste.
Place the beets into a serving bowl and pour the cream sauce over. Do not leave the beets in the sauce whilst waiting for service, you will have pink sauce! Pour the sauce over the beets right before service. Garnish with toasted bread croutons.
Beetroot Bread
Step One:
¾ cup unbleached flour
3 or 4 beets, cooked and finely grated to equal 1 cup
2 Tablespoon butter or oil
1-2 teaspoons warm water in which the beets were cooked in Step Two
1 teaspoon active dry yeast
Scrub the beets thoroughly, do not peel, rub a little oil or butter all over them, cover them with foil and bake in a 350˚oven until tender (about an hour). Remove, let cool enough to handle, peel and grate, set aside. Meanwhile begin cooking the beets for Step Two.
Back to Step One now. Mix the yeast into a bit of water, add flour to the grated beets, add the yeast, stir thoroughly, add 1 Tablespoon of butter or oil and stir until a dough forms, cover and set aside for 45 minutes.
Step Two:
1 ½ cups unbleached flour
5 or 6 cooked beets, grated to equal 1 ¾ cups
1 Tablespoon orange zest
1 teaspoon salt
Water as needed
With the second group of beets, scrub them and cook them in boiling water until tender. Make a second dough by mixing all of the Step Two ingredients, cover and set aside for 45 minutes.
Step Three:
Combine both doughs together and knead vigorously for 5-10 minutes. Put the finished dough into a greased bowl, cover and let rest in a warm place for 45 minutes. Bake in whatever pans you like. Mattie has chosen to use pans that make heart-shaped loaves. Slice when cool and spread with cream cheese or butter, garnish with parsley if desired. Serve with the soup.
Borshch*
For 4 servings
¼ cup olive oil, divided
1 onion, diced
3 cloves garlic, peeled & roughly chopped
1 pounds (4 or so) fresh beets, peeled, cut into quarters
3 unpeeled medium potatoes (any kind will do), also quartered
1 large carrot, washed, peeled, cut into 2-inch chunks
One head Napa cabbage (or substitute other cabbage), about 3 cups
3 chopped tomatoes (or use 15 oz. canned)
1 C dry white wine
3-4 cups vegetable broth
2 bay leaves
2 Tablespoon apple cider vinegar or the juice of one lemon
3 whole cloves
1 teaspoon dried thyme
¼-½ teaspoon cayenne pepper powder
1 teaspoon freshly ground white pepper
¼ teaspoon ground nutmeg
Salt and pepper to taste
Chopped flat leaf parsley for garnish
Fresh sour cream to garnish if desired
A sprinkle of paprika on top if desired
Heat oven to 375ᵒ. Coat the beets, potatoes, and carrots with 2 Tablespoons olive oil, wrap in foil, roast veggies until tender, but not quite all the way cooked. Heat pot on medium flame, add 2 Tablespoons olive oil, chopped onions and garlic. Cook for a couple of minutes, stirring to prevent sticking. Next, add the cabbage and tomatoes, stir occasionally while this cooks down for a few minutes and starts to smell wonderful, add in the wine, bay leaves, cloves and simmer uncovered ten minutes until the alcohol from the wine evaporates.
Next, add in broth and bring to a slow boil. Stir in roasted veggies, bring up to a slow boil again. Add more broth if needed, simmer for 15 minutes, then add thyme, cayenne pepper, white pepper, garlic powder, and nutmeg. Simmer, covered until all veggies are cooked through, stirring once and again. When veggies are soft, stir in the salt and black pepper, let simmer again for a couple of minutes. Remove from heat. Fish out the bay leaves and cloves, add the chopped parsley. You are done if you like rustic, chunky soup, so jump ahead to serving.
If you want the soup smooth, finish by using a hand blender to puree in the pot or in a stand blender or food processor in small batches. Mattie would have used a food mill to thoroughly smooth the soup.
Serve piping hot with a big dollop of sour cream, a sprinkle of paprika, and some parsley as a garnish.
*A note about Borshch, with no “T”: Ellie has a friend who is Russian and when she saw Borscht written on a menu, she laughed, “There is no T in Borshch!” the parenthetical (you idiot American was actually nearly audible). Ellie said, “Really? I was sure there was, it’s always written that way.” “No. No T.” She was adamant.
Never one to take only one source as expert, Ellie sought a second opinion from a friend who is Ukrainian. Borshch is originally from Ukraine. She confirmed, no T, none at all, doesn’t belong there. Sometime later, Ellie was at The Bagel, a deli in Chicago, and there they had a sign for the daily specials clearly written “Borscht.” Perhaps there is a “T” in Borscht in Yiddish? And guess what? There is! And here is why. While the original Ukrainian word ends in "shch", not "sht", the "t" was substituted when the word was borrowed into Yiddish. In Bulgarian the combination "sht" corresponds to the "shch" in other Slavic language - the Bulgarian pronunciation is the one used by Yiddish speakers. The word then made its way into American English from Yiddish, hence the “T”.
Mahogany or Red Velvet Cake
First, let us talk about the concept of “velvet” cake. In Mattie’s day, when she was a young cook, cakes nearly always contained dried fruit and nuts. They are the descendants of puddings, which were steamed. When ovens, such as the lovely gas oven at Glessner House, became more reliable, baked cakes came into their own. At first, they were merely baked forms of the puddings. But gradually, cooks learned that other methods were possible. Enter the “velvet cake.” These were cakes that did not contain fruit and nuts, they were smooth all the way through, had a soft, light crumb and almost melted in your mouth. They were to food what velvet fabric was to textiles.
Chocolate was just coming into easy use in the late 19th century. The processing of chocolate evolved dramatically in Mattie’s time. By the middle of the 19th century Dutch-processed cocoa powder was readily available. Enter the Mahogany Cake. This was truly the first chocolate cake that most modern palates would recognize. It came about because early powdered chocolate, mixed with buttermilk and baking powder, caused a chemical reaction that produced a red color. This color was prized and eventually transitioned into red velvet cake which utilized beet juice and later red dye to create the color. This cake is still red, even without beets. Mattie might have snuck some beet juice in just to enhance the color. She’ll never tell. Sprinkling with powdered sugar is fine for modern tastes, but Mattie would have frosted it. Mrs. Glessner served cake at nearly every luncheon, supper, and dinner. She often bought them from The Women’s Exchange so Mattie would not have been tasked with baking them. Here is a simple recipe.
½ cup butter
1 ½ cups white sugar
2 eggs
1 teaspoon cinnamon
1 Tablespoon Mexican vanilla
3 Tablespoons Dutch processed cocoa
3 Tablespoons water that your beets have been boiled in
2 ½ cups sifted unbleached flour
1 ½ teaspoons baking powder
1 cup buttermilk
1 teaspoon baking soda mixed into 1 Tablespoon vinegar
Cream the butter and sugar until smooth and light, add the eggs, cinnamon and vanilla, blend thoroughly. Mix the cocoa with the water, add to the creamed mixture. Sift the flour with the baking powder. Mix the creamed mixture alternately with the buttermilk and the flour. At the end, add the baking soda and vinegar. Pour into two 8-inch cake pans or equivalent heart shaped pans for Valentines’ Day.
May you and those you love have a very happy February with lots of hearts! Next month, potatoes!
The Bees are Back in Town (posted January 1, 2024)
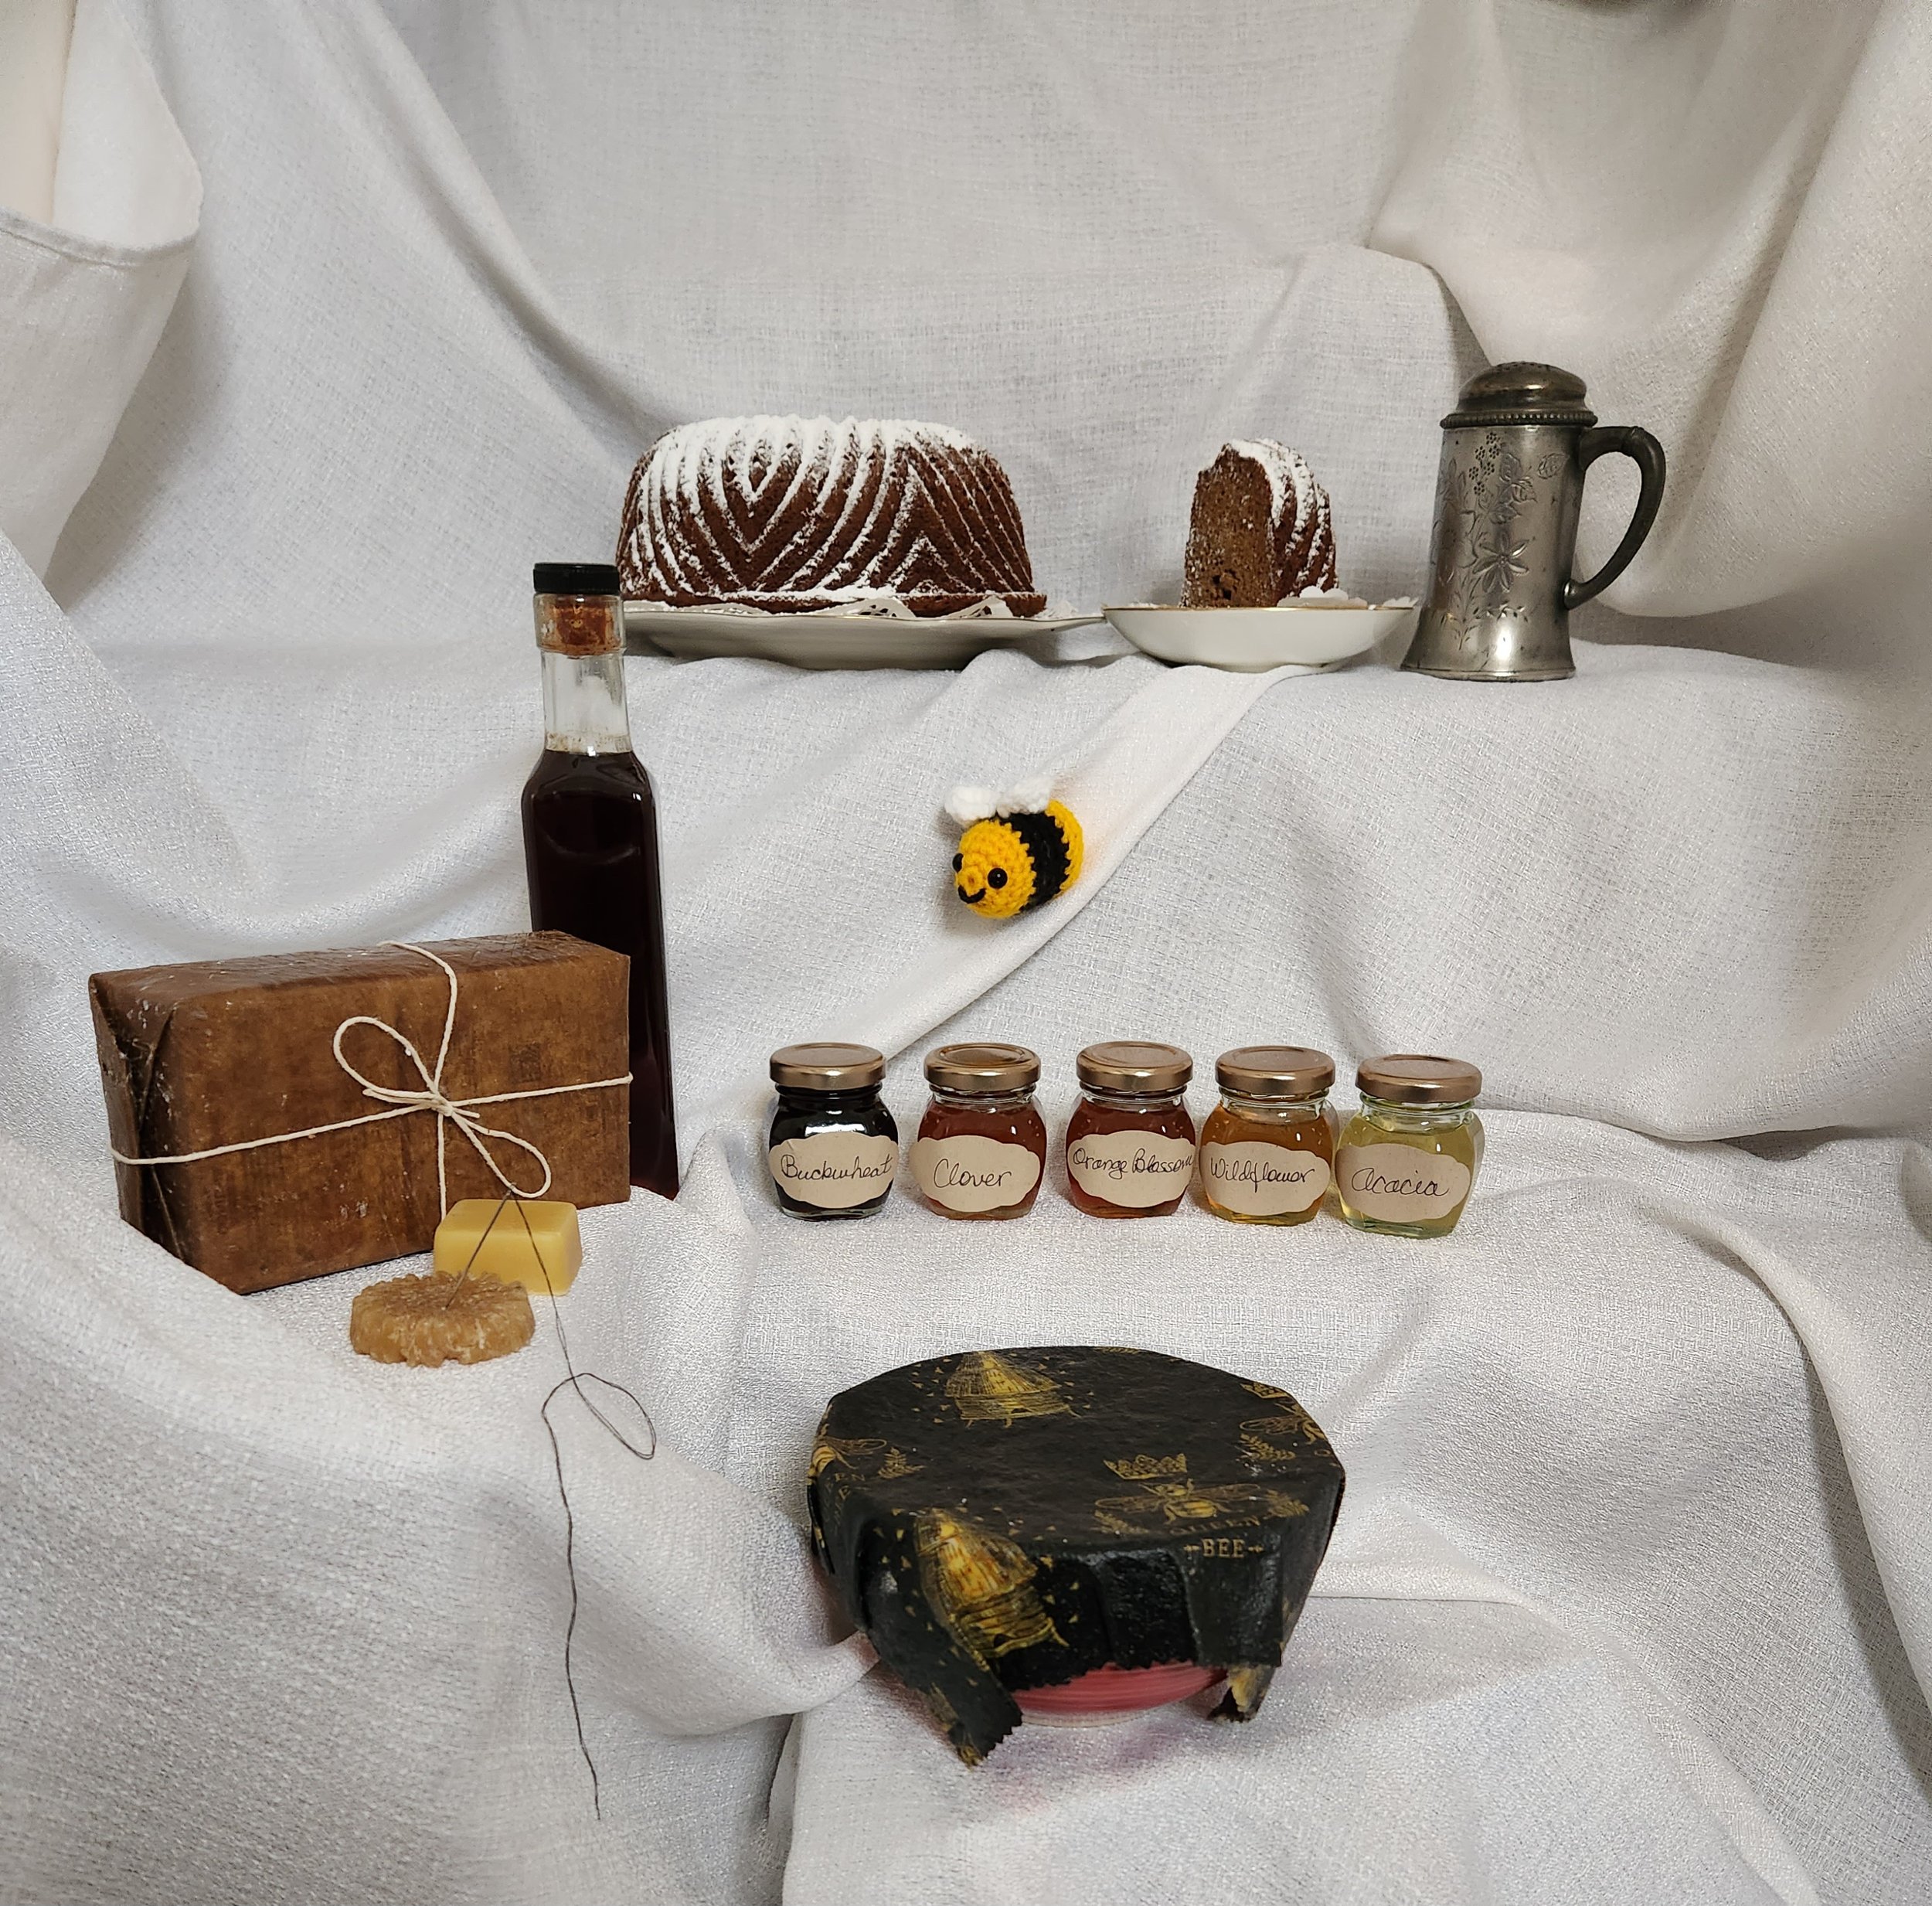
In November of 2021, this column addressed honey. I encourage readers to scroll back to that column if you are looking for more honey recipes and further information about Frances Glessner and her bees. She was an avid apiarist at the Glessners’ farm in New Hampshire, The Rocks. In a 1903 presentation for The Fortnightly of Chicago entitled A Summer With Birds, Bees and Blossoms, she mentions that she was inspired to beekeeping by her Aunt Betsy who had a lovely garden filled with all sorts of plants that bees use to make honey. When she and Mr. Glessner purchased The Rocks, she set about planting what the bees would like best so that she could raise them as her Aunt Betsy had. She gave much of her honey away as Christmas gifts but certainly a lot of it came to Glessner House for use in Mattie’s kitchen. In that first column, recipes for a compote, biscuits (cookies), candy, and two honey-based beverages can be found. This column will focus on the other things Mattie might have used honey and beeswax for at Glessner House, with a lovely cake recipe thrown in for good measure.
Harvesting the Honey
The long bright summer days were o’re.
The bees poetic hum
Was hushed, till near meridian height,
Plodded the morning sun.
Sweet summer—one poetic dream
Of nectar and of flow’rs;
Of hazy halo o’er the lawn,
And sylvan woodland bow’rs;
Arcadian haunts, that poet’s love--
The mystic, the sublime,
Brought down to earth to rear aloft
An apiarian shrine…
by Louise S. Harris, published in The American Bee Journal v. XXIII:13, 1887.
It goes on in that vein for another twelve stanzas, but you get the idea. Keeping bees was a popular pastime at the turn of the 20th century, and one that yielded over 1,000 pounds of honey a year for the Glessners.
Honey is incredibly influenced by the flowers and plants to which the bees have access as they go about their work. Different plants create different types of honey. They are easily distinguished by color, and of course by taste. Modern honey producers often infuse honey with different flavors. This should be distinguished from the honey that is distinct because of the type of flower. Today, one can find honey infused with just about every flavor imaginable. In Mattie’s day, the differences would be because of where the bees made the honey and could vary from very dark, rich Buckwheat honey to mild, light Acacia honey as seen in the photograph.
But what of the sting?!
When asked about the sting, Mrs. Glessner says in her presentation that she herself was stung, “Many, many, many times, but there is this comfort---the sting is acutely painful, but one gets inoculated with the poison, so after frequent stinging, beyond the first hour’s pain, there is no swelling nor irritation, and then, bee stings are said to be a cure for rheumatism.” How very cheerful and upbeat of her! It appears that Mrs. Glessner was amused by the men who worked around The Rocks when they feared being stung by her bees. She tells the reader, “Let any commotion arise among the hives, the man usually rushes to the house, with his eyes fairly bulging out of his head, tells me as quickly as possible that the bees are swarming, and then he seems to melt into the earth….A man who faces a bear with delight will turn pale with terror at the thought of a bee sting.”
The nectar of flowers is not honey until changed by the bees. It is natural sugar, water, a small quantity of albumen, gum and essence or flavoring present in the plants from which it is derived. The heat of the bees causes the excess water to evaporate and is necessary for the chemical change. Bees extract this water, absorb and discharge it before the nectar is deposited in the hive. Formic acid, the active principle of bee-poison, is added to this nectar. This acid is a preservative and chemically changes the natural sugar. This explains why honey does not spoil.
Bees create the comb from wax within their bodies and deposit the honey into the chambers of the comb. Bees treat capped honey by “stinging” the chambers. The cappings of honey are porous until varnished or gummed over by the bees. The legitimate purpose of the sting is to insert formic acid into uncapped honey, and to pierce the cappings of sealed honey; stinging is but a side issue. Did you know that? I surely did not before I started working on these columns. The sting, used in any other capacity for the bees, is merely their protective device, nothing more.
Household Uses for Beeswax
Because Mrs. Glessner preserved some of the comb every year to include in her jars of gift honey, there would be excess that was perhaps not as attractive to display in a jar, but nothing was wasted. Beeswax can be rendered down from honeycombs by wrapping the combs in cheesecloth and boiling in changes of water until the wax is free of all impurities. Mattie would have done this and then used the wax around the house in some of these ways.
Sewing Wax-The beeswax is made into disks, some being honeycomb-shaped. By running the thread through the wax it gives more stiffness and smoothness to the thread for sewing. This would make Mattie’s mending easier.
Wood Wax-Melt together one part of yellow beeswax, two parts of rosin, one part of turpentine, and some lard. Let it get slightly cold and roll out the mass on a slab into sticks or fashion into bricks. A simple wax may also be made by mixing equal parts of beeswax and linseed oil, cooking until thoroughly blended and then cooling in molds for use in polishing furniture. There is a lot of furniture to wax at Glessner House, so this would have come in very handy!
Water-Proof Packing Paper-Take 24 parts of blue soap (laundry soap to which bluing has been added, still available in Mexican and Caribbean markets) and 4 parts of white soap (Ivory has been around since 1879, so that would be the best to use here), 15 parts of beeswax, and boil with 120 parts of water. Dip the packing paper into it, and let it soak well, hang on a line to dry.
A similar method can be employed for fabric to use as wrapping for items in a picnic or for putting over jars which do not have their own lids. The piece shown in the photograph would be nice for wrapping sandwiches or to cover a bowl.
The above recipes all came from The American Bee Journal v. XXIII:43, 1887
Medicinal Uses for Honey
What we consider “modern medicine” was in its infancy in Mattie’s time. Certain things were known to provide comfort, if not actually a cure. Honey definitely fell into this category. Here is one fairly typical recipe for a remedy made from honey. I wouldn’t try this though, you might get flagged by the authorities for attempting to obtain chloroform and morphine!
Honey as Medicine for Lung Diseases
“….use for lung troubles, such as colds, and to give relief to consumptives. Mix together 4 ounces of honey, 2 ounces of gin, 1 drachm chloroform, 1 grain morphine sulfate. Dose for adult, a teaspoonful every 2 hours.”
-Sent to The American Bee Journal by Geo. M. Thomson of Grand Junction, IA published in v. XXIII:31
The bottle seen in the photograph is merely honey and gin with a little lemon added for flavor. Without the addition of harmful drugs, honey mixed with pretty much any strong spirits does make an excellent cough syrup.
Rheumatism Cured by Bee Stings
In the American Bee Journal, v. XXXI:10, 1893, an E.A. Barnwell of Cerra Gordo, Illinois wrote, “In June [of 1885] I was severely inflicted with rheumatism. I tried all the cures that I could think of in the way of liniments, but they did me no good. So one morning I went to take off a case of honey; and the bees went for me. I think I got the honey, but the bees got me. Oh, but didn’t they give it to me? I think there was a thousand on me at once. Did I run? You had better believe I did. I never thought of my rheumatism once; in fact, I never thought of it anymore for six months. I was cured, and forgot it. When the bee-stings got well I had no more rheumatism.” I wonder if this is where Mrs. Glessner heard about the bee sting cure?
Baking with Honey
Honey Spice Cake
3 cups unbleached flour
1 teaspoon salt
1 teaspoon each of cloves, allspice, and cinnamon
1½ teaspoons baking soda
1 cup brown sugar
1 cup honey
¾ cup shortening
5 eggs
1½ cups sour cream
Sift flour, measure, and resift three times with the salt, soda and all the spices, set aside. Press brown sugar through a fine sieve to remove all lumps then cream thoroughly with the shortening and honey. Gradually add the flour in three portions, alternating between each with some of the sour cream until all has been incorporated. Place batter into a well-greased tube pan or into small gem pans. Bake in a moderate (350˚oven) for an hour for a whole cake, 25-30 minutes for gems or cupcakes.
This recipe will make one bundt or tube cake or about two dozen small gems or cupcakes. In lieu of icing, sprinkle the top with powdered sugar. The pewter and silverplate powdered sugar shaker seen in the photo was a Christmas gift to Mattie from her dear friend who is also in service in Pennsylvania. It is perfect for sprinkling sugar over the cake.
Whether it be in the form of wax, syrup for a cough, or sweetener for cake, the produce of bees is most needed and appreciated. May you all find some busy bees smoothing and sweetening your lives in the coming year. Happy New Year from Mattie and the bees!
We Wish You a Mattie Christmas (posted December 4, 2023)
Supper and Musical Christmas Night 1898 was a festive time at Glessner House. Both children had married that year and the first grandchild, John Glessner Lee, was born on December 5, so there was much to celebrate. Mattie planned a simple supper to accompany a musical given by the Glessners on Christmas night, 1898. This meal was recreated for We Wish You a Mattie Christmas, served on December 3 in the dining room at Glessner House. Frances Glessner listed these items in her Bills of Fare.
Sausage
Chicken Timbale
Boned Turkey
Sandwiches
Plain Bread and Butter
Olives
Coffee
Plum Pudding--Burning
Ice Cream--Turkey Form
Cake
Bon Bons
Chocolate
We adapted the menu just a bit but came as close as we could for the guests on December 3rd.
Sausage & Cheeses
Many fine sausages can be found in Chicago today at Eastern European or German markets. My personal favorite is Andy’s Deli & Mikolajczyk Sausage Shop on North Milwaukee Avenue, but there are many exceptionable places. Mattie would probably have had a special sausage man who came ‘round to the back door. She would have served several types of dry, cured sausages along with a few different cheeses as a first course.
Brown Bread & Butter
Mattie was known for her prize-winning bread and rolls. The recipe for Mattie’s brown bread was published in the very first Cooking with Mattie column, you can scroll down to the end to find it. For this dinner, Mattie has baked the bread in Pullman pans so that the edges will be perfectly square. The bread is sliced thinly and spread with fresh butter and cut into pleasing shapes. It would be served alongside the sausage and cheese.
Chicken Timbale
Mrs. Glessner puts timbales on nearly every supper and dinner menu. They must have been a great favorite of hers, or Mr. Glessner’s, because they are literally everywhere on the menus. They may not have been the bane of Mattie’s existence, but they are the bane of mine, I can tell you that! A timbale (rhymes with thimble) is quite simply a custard in an individual container which has been lined with macaroni and forcemeat.
Mattie could acquire many types of macaroni (a generic term for pasta at the time) and it is featured in other forms, but mostly, I think she used it for timbales. A long, tubular macaroni works best for timbales because it will stay in place best. The pasta I used for We Wish a Mattie Christmas was Divella brand from Caputo’s Fresh Market, Mezzani #3. It comes in five grades. They are all ten inches long and tubular. Picture a long piece of macaroni, hollow in the middle. The #3 is ⅜” interior dimension. The larger the number the larger the interior dimension. Caputo’s Fresh Market sells it in sizes 1 through 5.
The next step is the forcemeat. Forcemeat is meat that has been ground after it is cooked. It is a useful way to implement scraps of chicken, beef, and pork. If you are familiar with Deviled Ham, that is a form of forcemeat. For this menu, I made forcemeat from baked chicken, ground up in a modern food processor. Mattie would have first used a meat grinder, and then forced the meat through a fine metal sieve. This forcing breaks up all the fibres in the meat and removes any gristle or sinew which will make the forcemeat rough. Once the meat is thoroughly smooth, it is mixed with milk or heavy cream, finely grated breadcrumbs, and sometimes an egg. Mashed potatoes also work well to help the forcemeat stick together.
To form a timbale, take a greased custard cup or large muffin tin, wind the cooked pasta around the edge and glue it to the edge of the container with forcemeat. A single slice of mushroom can be added to the bottom for decoration. Timbales are often decorated with truffles as well. Once the form has been lined with macaroni and forcemeat, the hollow section in the middle is filled with a mixture of eggs and milk. Timbales are baked in a very slow oven, 300˚, for about an hour. They should be served at barely warm or room temperature and are generally a second or third course at supper or dinner. For a luncheon, they might be served as the warm course along with cold sandwiches.
Turkey Sandwiches
A substantial sandwich on Mattie’s award-winning rolls with cranberry relish would be a festive supper offering.
The sandwiches served at Glessner House were made with sliced roasted turkey breast. Brining the turkey with a solution of water, salt, sugar, white pepper, and tarragon, gives a lovely flavor to the meat. Thin slices of cold turkey are placed on Mattie’s fresh rolls with a small piece of hot house lettuce and some cranberry relish. A little extra cranberry relish should be served on the side.
Cranberry Relish
Technically, this is a marmalade because it contains orange peel. This was perhaps the biggest hit at We Wish You a Mattie Christmas. Many folks asked for the recipe, and two lucky ones took home extra jars! Here it is. Multiply this recipe if you want to have extra for holiday giving.
1 12-ounce package of fresh cranberries
3 oranges
3 green apples
2 sticks cinnamon
Several pieces of nutmeg (save the small pieces of nutmeg that get too small to grate in a jar all year and use them for this recipe)
8 whole allspices
2-3 cups raw sugar
3 Tablespoons Mexican vanilla
¼ -½ maple syrup
Wash the oranges thoroughly. Grate the skin off the oranges. Do not include the white pith, it is bitter. Peel the oranges, remove all white pith, discard. Chop the pulp of the orange into pieces. Place the grated orange peel and orange pieces into a saucepan with 1 cup of sugar and 1½ cup water. Cook for 30 minutes. Add the cranberries, cook another 30 minutes. Meanwhile, chop the apples with the skin on. Add the apples, simmer another 30 minutes. Put the cinnamon sticks, nutmeg pieces, and allspices into a cloth bag or piece of cheesecloth tied closed and drop into the mixture.
Simmer for another 30 minutes with the lid off. Taste for sugar, you may need to add up to another two cups depending on the tartness of your cranberries and oranges. Simmer another 30 minutes until thick. Add maple syrup and vanilla after removing from heat. Stir completely. Let sit until cool and then put into jars. Either water bath can for 15 minutes or seal and refrigerate. This makes an excellent Christmas gift.
Pickles, Olives, and Celery
The Glessners were fortunate to have vast gardens at The Rocks, their summer home in New Hampshire. Mattie would have harvested cucumbers in the late summer and made pickles. These are the pickles that would have been served on Christmas. The olives would be acquired either at the South Water Street Market, from a vendor, or imported in glass jars from Italy.
Those served at Glessner House in 2023 came from Caputo’s Fresh Market. Celery was a delicacy in Mattie’s time. We don’t think of it that way today, but it really was. We talked a lot about celery in the last column. The very best celery, in Mattie’s day, came from Kalamazoo, Michigan, or from truck farmers near Des Plaines, Illinois.
Plum Pudding
“Oh, bring us a figgie pudding…” Believe it or not, words being what they are; fig and plum, and even raisin, used to mean the same thing. They were synonyms. Depending on where you were from, dried fruit could be called by any of these names and simply mean a dried fruit. So, your plum pudding, should you decide to make one, can contain any dried fruit that you enjoy.
You will need:
Solid bundt cake pan, or ring pan, or ceramic bowl of about two quarts. A large cooking pot at least two inches larger in diameter than your pan. This pot should be deep enough to accommodate your pan with room for water and a lid. Water should come up to three-quarters the side of the pan.
2 pounds dried fruit of any variety
1 pound suet or substitute butter flavor Crisco, very cold, and chopped in pieces or grated
2-3 cups bread crumbs (Mattie would have used the crusts sliced off of the Bread & Butter sandwiches)
1-2 cups flour
1 teaspoon allspice
1 ground nutmeg, or 1 Tablespoon
4 eggs
¼ cup dark brown sugar, honey, or maple syrup (3/4 cup)
Milk enough to wet the batter, about 2 cups
Prepare a solid bundt cake or ring mold by greasing and flouring. Chop all the fruit, very fine. Sift the flour and sift again three times with the spices. Whisk the eggs with the sugar until liquid and smooth. Mix the breadcrumbs, fruit, and suet or Crisco. Working very quickly, add the flour and spices, then the eggs. Turn into the prepared pan. Cover with cheesecloth and tie tightly with cotton twine.
Place into your cooking pot, fill the pot up with water to about ¾ the depth of your pan. Place a firm lid on and steam for four hours. Check frequently to be certain the water has not boiled away. You must check a pudding at least every half hour lest it boil dry and be ruined. I’ll bet you wonder how I know this? It will be done in about four hours. Remove from heat, cool in pan for at least half an hour. Unmold into a large dish with a lip. Pour brandy over the top until drenched. Wrap tightly in cheesecloth until needed. If kept more than a month, pour brandy over, every week until desired for service.
Mulled Wine and Spiced Cider
Mrs. Glessner did not specify beverages for this supper except for Coffee and Chocolate. We did serve mulled wine and spiced cider. Don’t’ fuss about either of these things. Go visit any good spice shop. Get cinnamon sticks, allspice, and remember those nutmeg pieces you’ve been saving. Place them all in a small muslin bag or a bundle of cheesecloth. Put the bag or bundle into a pot with several quarts of cider or bottles of red wine. Simmer slowly, serve in glasses with a handle so fingers are not burned.
Hot Chocolate
Boiling water, 4 ounces per person
Dutch processed cocoa, 1 teaspoon per person
Raw sugar, 1-2 Tablespoons per person
Whole milk, 1-2 Tablespoons per person
In Mattie’s day hot chocolate was very different from what we think of today. She would not have even conceived of marshmallows being added! Chocolate was considered a daytime beverage, much like tea and coffee. Chocolate would be served at supper as an enervating beverage.
Boil the water, add the chocolate and stir briskly until completely incorporated. Add the sugar. Taste for sweetness. Pour into cups, add a small splash of milk on top.
Bon Bons
Mattie would have sourced her bon bons from many chocolatiers in Chicago in her day. Perhaps she had a favorite who came ‘round to the door. We sourced our bon bons this time from Andy Deli & Mikolajczyk Sausage Shop on North Milwaukee, where we also got the sausage, big surprise.
Mattie worked with her neighbors, as do I when I cook as Mattie. We have a wonderful richness of sources here in Chicago. May we all be blessed by whomever we believe in this coming year.
Craftswoman, Carver, and Chemist (posted November 13, 2023)
Thanksgiving is quickly approaching at Glessner House, and Mattie would have been very busy with preparations. This month we are going to discuss the first three courses of the Glessners’ Thanksgiving dinner in 1892. It was an eight-course dinner, stay tuned.
Oyster Soup--Hungarian Wine
White Fish--Egg Sauce
Small Potatoes
Celery—Olives—Pickles
Oyster Soup
Frances Glessner clearly favored oysters served raw as the first course. They show up on many menus. For this menu however, she requested an oyster soup. In Mattie’s day oysters were greatly enjoyed in Chicago. Oysters from east coast oyster beds were packed in oatmeal and shipped by rail to Chicago as early as the late 1850s. Chicago’s Brunswick restaurant listed oysters on the half shell on the menu in 1867. The first Long Island oysters arrived in Chicago in 1888 and were prominently featured by George Rector in Rector’s Café Marine at the World’s Columbian Exposition in 1893. Mrs. Glessner knew about oysters, both fresh for eating raw, and canned for soups and other uses. Mattie would most likely have used canned oysters for this soup. Modern cooks can find excellent canned oysters in most supermarkets.
3 Tablespoons butter
¼ cup finely diced sweet onion
2 Tablespoons unbleached flour
1-2 cups milk or broth
1 pint oysters with their liquor
First sauté the onion in butter, then sprinkle the flour over all and stir until all the flour is incorporated. Blend in milk or broth until a nice, thick soup is formed. At this point, Mattie would have forced the soup through a fine sieve to remove any fibrous tissue. The modern cook may choose to use a stand or immersion blender. The goal is a totally smooth soup.
Meanwhile, place the oysters into their own broth over low heat, whether fresh or canned, until they curl up. Canned oysters will be already cooked, so this will take seconds. When the oysters are curled, add all to the smooth soup and either sieve or blend again. Serve as soon as possible. A few crusty bread croutons will make a better presentation. This is a fabulous soup for those who love oysters and can be served with a nice salad and good bread for a complete meal.
At Glessner House, it is merely your first course.
Hungarian Wine
This day, Mrs. Glessner chose Hungarian wine. It would probably have been dry white wine. There are many fine ones still available today. I cannot guess what she would have chosen, but the one in the photograph might suffice. It would probably have been decanted at the Glessner House table, as seen in the photograph.
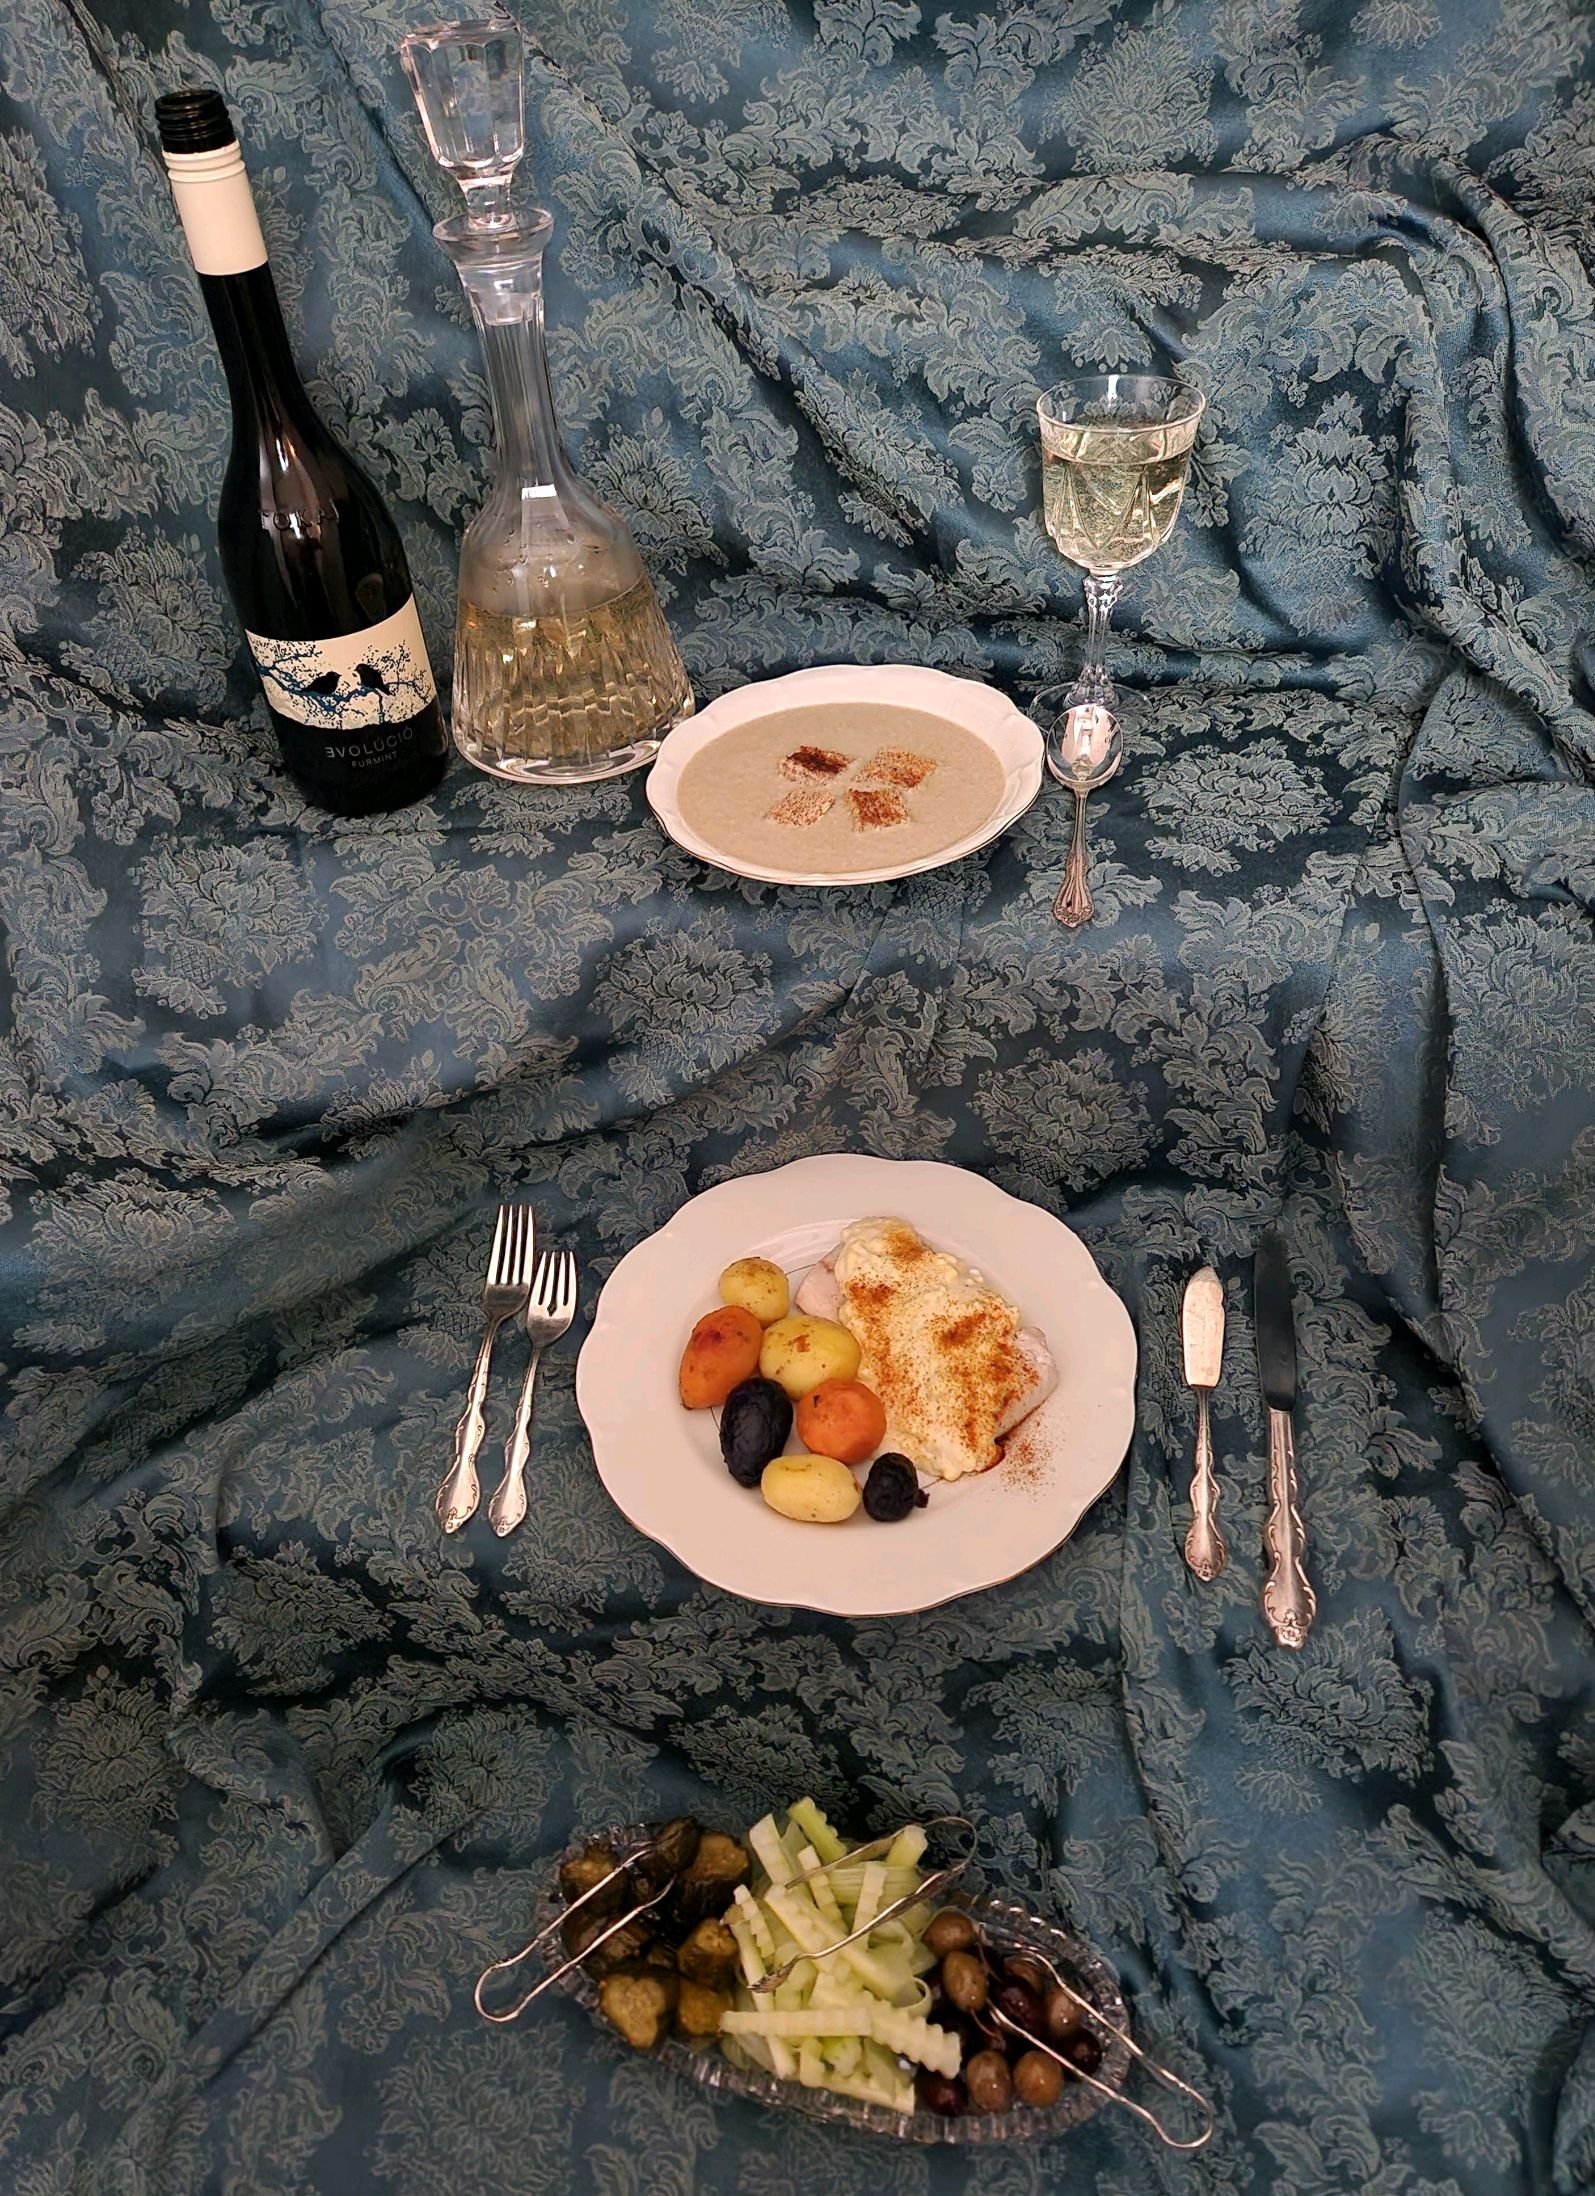
Whitefish with Egg Sauce
One portion of whitefish or any other light fish per person
½ cup dry white wine
2 or 3 whole allspice
A pinch of salt
Lightly poach the fish in wine with allspice and salt until translucent. Remove to a plate. Meanwhile prepare the sauce.
Egg Sauce
⅓ cup fresh butter
3 Tablespoons unbleached flour
1 cup milk or chicken broth
Salt to taste
2 hard-cooked eggs, finely chopped
2 Tablespoons freshly squeezed lemon juice
Melt butter, stir in flour to make a roux, add liquid gradually until a thick sauce is formed. Add the lemon juice and the eggs. Stir quickly and serve as soon as possible over poached fish.
I have a theory about finely chopped or sieved eggs used for sauces in Mattie’s day. Many eggs were prepared every day: shirred, boiled, soft boiled, poached, etc. If an egg was overcooked, it could not be served to the family. Therefore, I think Mattie, and most other cooks of her day, devised numerous sauces and other uses for failed eggs.
Small Potatoes
The only instruction Mrs. Glessner gives Mattie is “small potatoes.” This could have indicated many options. This time, Mattie has chosen to provide potatoes of varied colors. In the photograph, you will see small white, purple, and sweet potatoes, carved to similar sizes and lightly sauteed in brown butter. These are perfectly smooth and absolutely delicious.
3-7 small potatoes per person
Boiling water
Salt to taste
1-2 Tablespoons butter
Scrub the potatoes but do not peel. Place in a large pot of boiling water and boil 6-10 minutes, depending on how small they were to begin with. They are done when a sharp knife can easily be inserted. Remove from water and rinse in cold water until cool enough to handle. Remove the skin, this should almost slide off. Smooth off any rough edges and carve each potato to approximately the same size. You may also use large potatoes and perhaps get two or three smaller ones out of each larger potato. Melt butter in a saucepan and sauté the carved potatoes carefully so as to maintain their shape. Do not overcook; they will fall apart and then you’ll have to tell Mrs. Glessner you are making mashed potatoes instead, and that is not what she requested.
In this interpretation, they are served on the same plate as the fish and egg sauce, but they might have been their own separate course. Longtime readers might notice the silverware presented. There is a fish knife and fish fork as well as a dinner knife and dinner fork. If this were an actual Glessner House dinner, the fish and potatoes might have been presented as separate courses on their own plates and the proper silverware might have been positioned differently.
Celery—Olives—Pickles
Garnishes were an opportunity for Mattie to shine. Mattie missed the celery boom in Chicago by about 10 years. From 1870 until 1887, the Lakeview neighborhood in Chicago was the largest midwestern producer of celery. When this neighborhood was annexed by the city in 1889, the farms were subdivided and built over. Mattie would have obtained her celery from the South Water Street Market which sold celery from truck farmers coming in from Des Plaines, or from Kalamazoo, Michigan growers who shipped their produce by train. In all instances celery was highly prized. Mattie would have spent a great deal of time and effort creating celery garnishes for the Glessner House table.
Here is where the chemist in Mattie comes in. Celery contains large cellulose fiber capillaries; as these dry out, the celery becomes limp. To create either firmly crisp or curled capillaries, soak celery in ice-cold water after slicing or sculpting. Mattie would have practiced certain techniques and only utilized the ones that worked best for her. Please feel free to do the same.
Olives would be imported from Italy or Greece and would have probably included pits. They would have been served to the Glessner House guests on the same crystal dish as the celery and pickles.
Mattie would have made pickles from the cucumbers grown at The Rocks, the Glessner’s summer home in New Hampshire. The ones pictured are Bread & Butter pickles.
Bread & Butter Pickles
4 quarts sliced cucumbers
Several (perhaps 4) sliced sweet onions
1 clove garlic for each quart of cucumbers, plus one or two
⅓ cup coarse salt
5 cups raw sugar
2-3 whole turmeric, sliced into 6-8 pieces or 1 Tablespoon ground turmeric
1 Tablespoon celery seed
3 Tablespoons mustard seed
3 cups apple cider vinegar
First, slice the cucumbers to small slices, about ¼ inch. Place in the largest bowl you have and cover with sliced onion and garlic cloves. Completely cover everything with ice. Sprinkle salt over all and let sit for at least 3 hours. Meanwhile mix sugar, turmeric, celery seed, mustard seed, and vinegar into a saucepan and bring to a boil. Stir until vinegar smell is no longer offensive (about an hour); simmer slowly, adding more vinegar as needed to maintain volume.
After the cucumbers have sat for 3 hours or so, drain cucumbers and thoroughly rinse them. This is very important. Rinse several times in a colander; taste a slice of the cucumber to make certain that enough salt has been removed. Pour all the cucumbers, onion, and garlic into the vinegar and sugar. Pour into glass canning jars. Seal, and water-bath can at least 15 minutes. Mattie would have quarts upon quarts of these pickles for use at the Glessner House table.
I believe Mrs. Glessner would have been proud to serve pickles made from cucumbers grown at The Rocks. Happy fall to all. May your November holiday meals be imaginative, artisanal, and scientific.
Autumn Supper at Glessner House (posted October 3, 2023)
On October 30, 1892, Mattie cooked a modest Sunday supper for the family and several guests. Frances Glessner wrote in her journal for that day, “Last Sunday Mr. and Mrs. Treat, Mr. and Mrs. Coolidge, Mr. Hendricks, Ned Isham, Miss Scharff came to supper.”
The menu, according to Mrs. Glessner’s Bills of Fare, was:
Quails
Lima Beans
Potatoes
Tomato Salad
Ice Cream
Cake
Fruit
Tea and Claret
From the capacious memory and archives of Glessner House Executive Director and Curator, Bill Tyre, we learn that “Mr. Treat was Samuel Atwater Treat (1839-1910) a well-known architect in the firm of Treat & Foltz. Mr. Coolidge was Charles Allerton Coolidge (1858-1936) part of the architectural firm of Shepley, Rutan & Coolidge that took over H. H. Richardson’s practice upon his death in 1886. Mr. Hendricks was R. J. Hendricks, a very frequent guest at dinner. His name appears many times in the Chicago papers when Union League Club events are chronicled. Apparently, he was a member, as was Mr. Glessner. He is listed as a bachelor attendee at many events. The couples in attendance were always listed in a separate section. Ned Isham was Edward Isham (1868-1927), a successful businessman, and son of Edward Swift Isham, law partner of Robert Todd Lincoln in the firm of Lincoln, Isham and Beale. Miss Scharff was Violette Scharff (1864-1942), Fanny’s paid companion and a frequent dinner/supper guest.”
What a simple meal for such distinguished people. However, there is one significant item listed: quail. In Mattie’s day, fresh quail came into season on October 15th and remained obtainable only until January 1st. The law forbade killing them at any other time. Serving quail at an October supper makes perfect sense. Frozen birds and other meats were just coming into availability at that time, but I doubt Mattie would have trusted them.
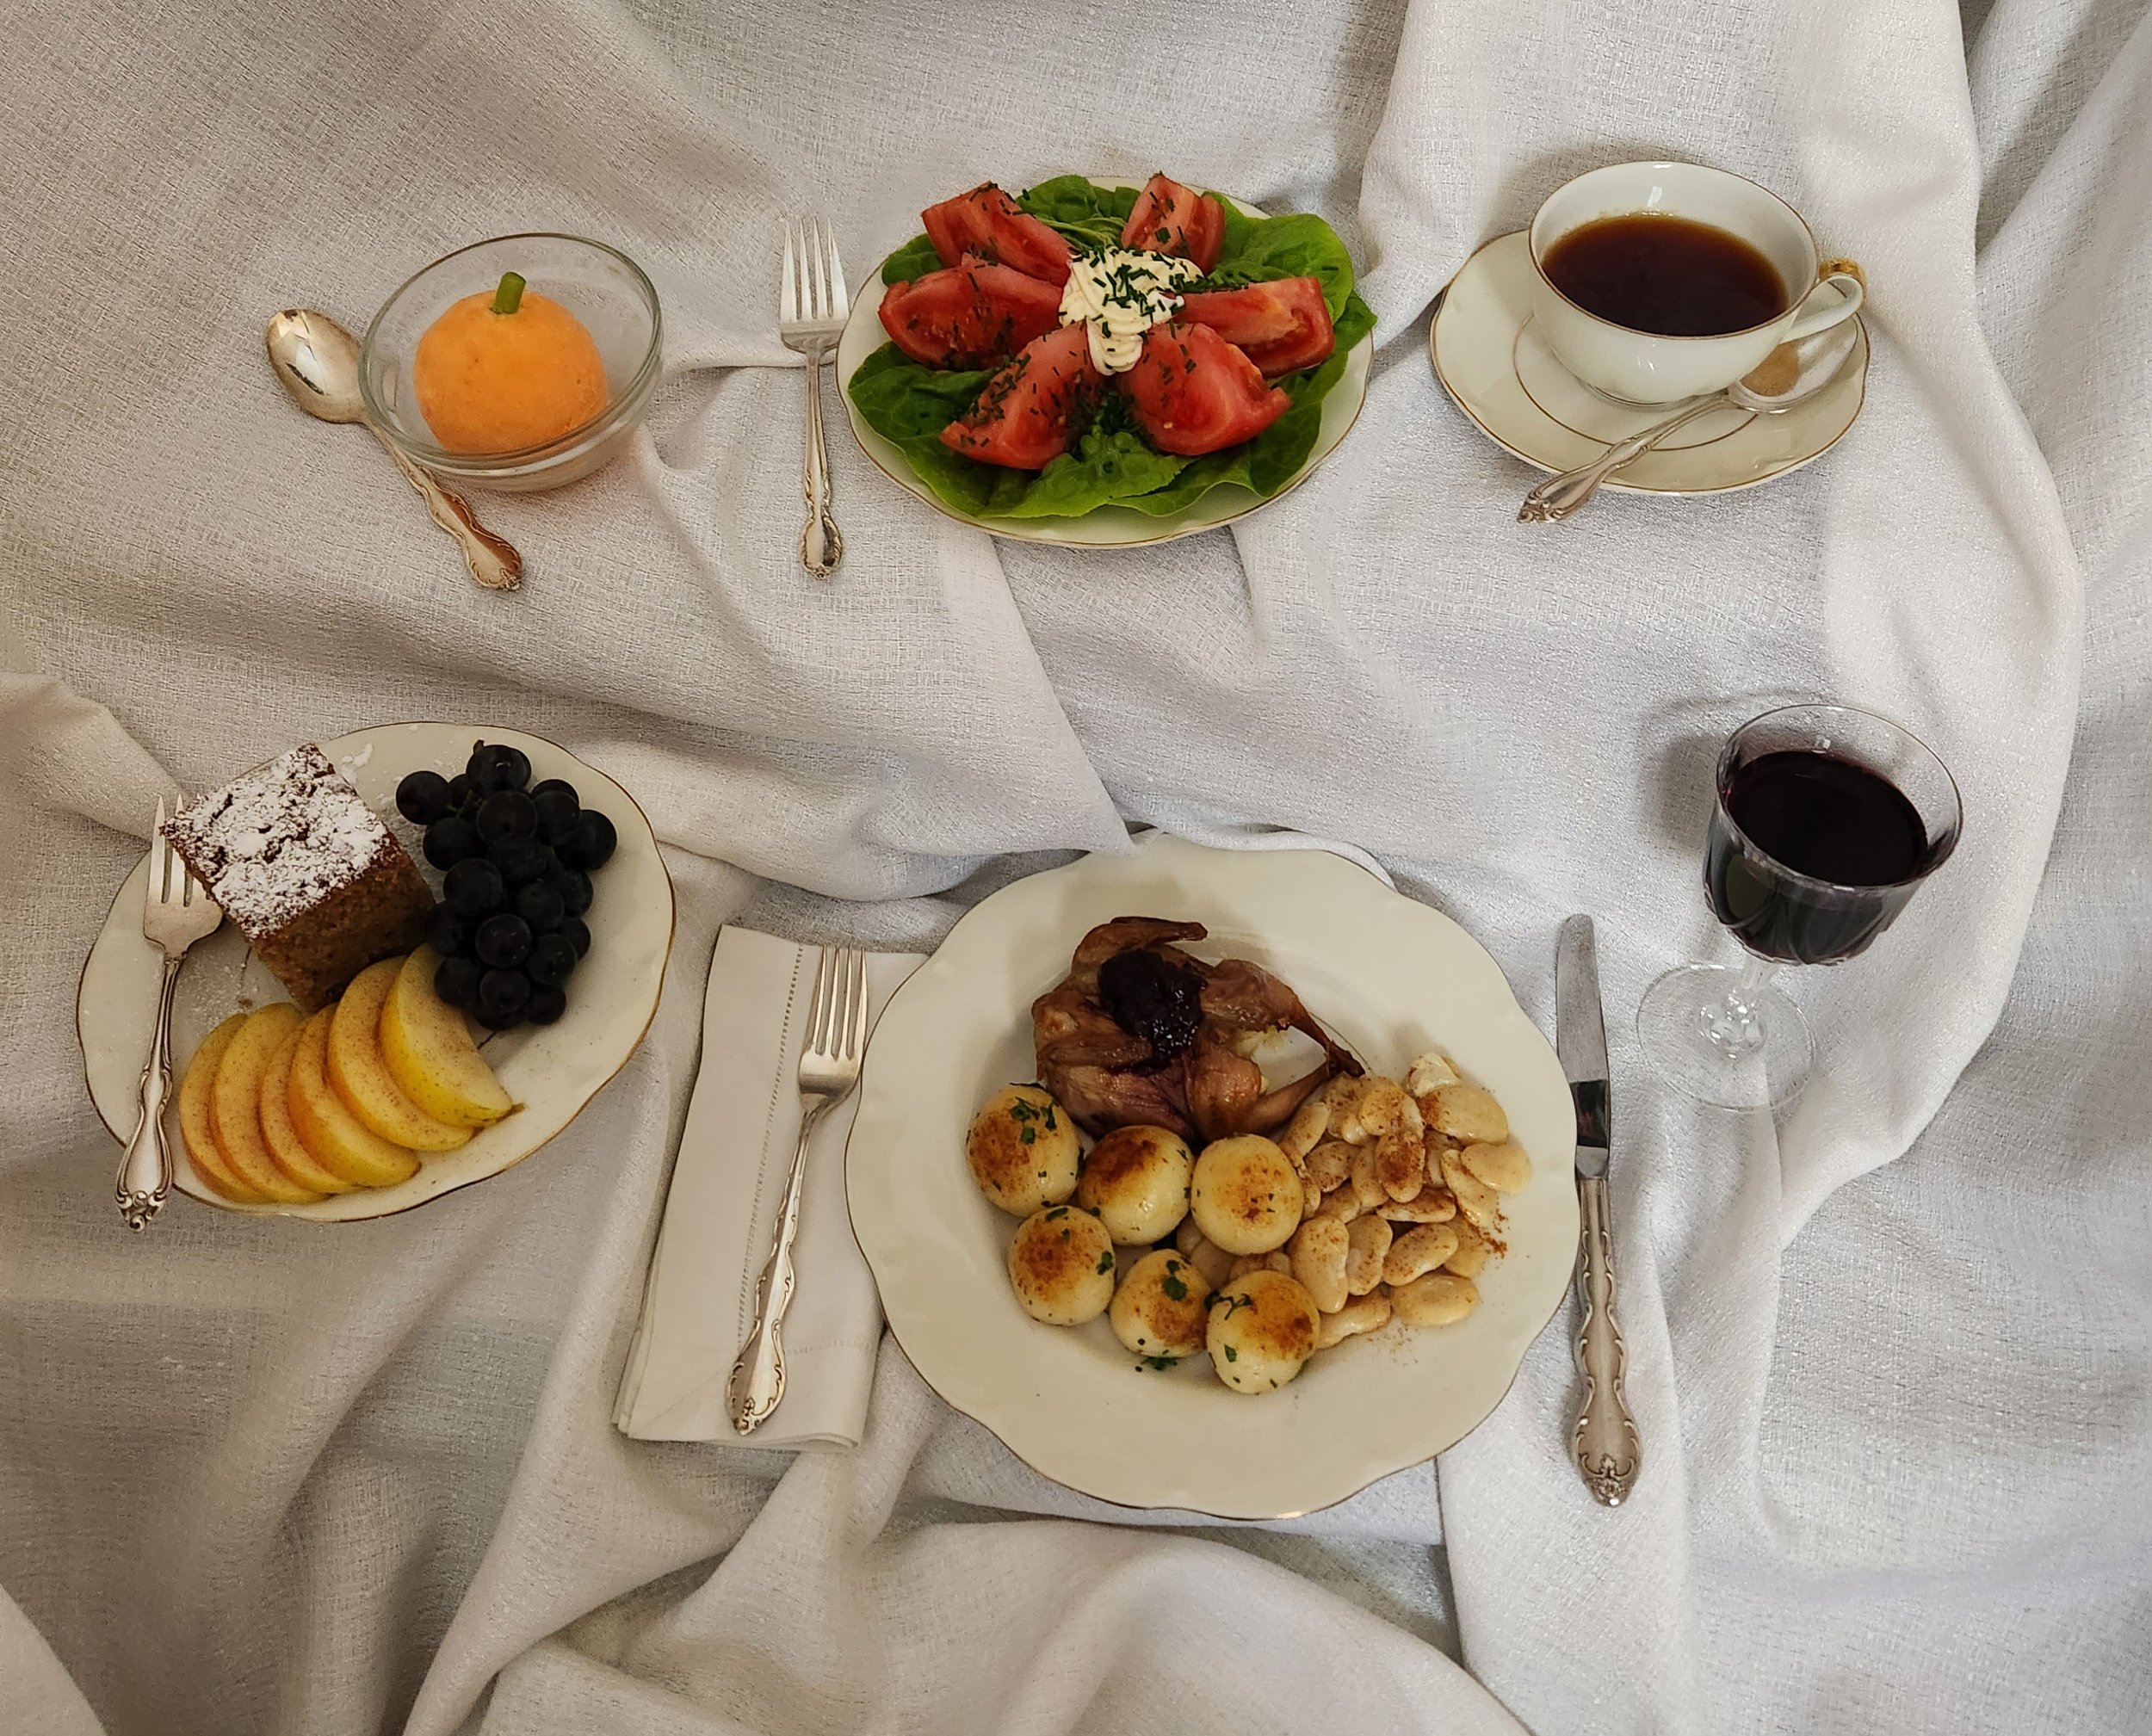
Quail
One quail per person (the cookbooks in Mattie’s time said, “one quail per cover”--a cover is a place setting)
One apple for every four quails
Butter for outside of birds, about 2 Tablespoons, softened
Salt
A small amount of currant jelly per bird
The modern cook will find quails at Chicago Game & Gourmet or Wild Fork. They generally come in a package of four. Mattie would have purchased hers from the South Water Street Market or perhaps gotten them from someone who had recently been shooting. We are assuming that the birds arrive to modern cooks already prepped for cooking. If you would like to know about preparation of recently killed birds that are delivered to you intact, please contact Ellie directly. I highly doubt that Mr. Glessner or son George went out shooting quails, or anything else for that matter. It is unlikely that Mattie would have dressed her own birds at Glessner House, but she certainly knew how; so does Ellie.
The quails will be opened at the breastbone. Turn each one over and salt the inside. Cut an apple into four sections. Put one quarter of the apple, curved side up, inside the quail. Wrap the bird around the apple quarter. Pull the legs together and tie with a soft piece of butcher’s twine or thread. Set quails onto a wire rack over a larger pan to catch the drippings. Butter the outside of each bird. Roast at 400˚ for 20-25 minutes. Check every four minutes, quickly baste, and return to oven. They are done when the skin is only lightly crisped. Do not overcook. Remove quail from rack, discard apple. The bird will retain its shape. Dollop a tablespoon of currant jelly on top of the bird.
Lima Beans*
This will make four to six servings
2 cups lima beans, available canned, frozen, and occasionally fresh
1-2 teaspoons salt, you will need to taste for salt
½ cup heavy cream
2 Tablespoons unsalted butter
Dash of nutmeg
Lima beans are considered a shelled bean, meaning that one does not consume the outer pods in which they grow. Lima beans might have been grown at The Rocks, the Glessner’s summer home in New Hampshire, and Mattie would have shucked and canned them in late summer. Autumn is the perfect time to serve lima beans. They are also available dried and prepared by soaking overnight first. To cook soaked or fresh limas, place them in a pot of unsalted water and cook over a medium heat until just barely tender. This is the point at which Mattie would have canned them. Remove partially cooked beans from the can (the modern cook can purchase these beans canned in metal cans, as opposed to the glass jars Mattie would have used).
Place the prepared beans (canned or par-cooked) in just enough salted water to cover. Cook until nearly all the water is absorbed. In Mattie’s day, lima beans were nearly always served creamed. Once the beans are tender, remove from heat and rinse lightly. Take care not to break the beans. Mix the heavy cream with butter and a pinch of nutmeg. Pour over the beans. Return to heat and simmer slowly until the cream has thickened. Sprinkle a bit of paprika over the top for color when serving.
*The species is Phaseolus lunatus. The difference in their common name is geographical. In the American South and the United Kingdom, they are called butter beans. For the rest of the United States, they are called lima, after the beans’ assumed origin in Lima, Peru. They are also called sieva bean, double bean, or Madagascar bean. So, that’s what you’re shopping for. Ellie found several glass jars and cans of butter beans at Caputos’ Fresh Markets in Elmwood Park, some in the Polish food section and some in the Mexican food section. None were labeled as lima.
Lima beans were the scourge of school lunch programs in the 1960s and 70s; if you know, you know. I think it is because they were not prepared properly. Try them this way, you’ll be pleasantly surprised. The grainy, gritty texture some of us shudder to remember is offset entirely by the cream and butter
Potatoes
4-6 small or new potatoes per person
2 Tablespoons olive or other sweet oil
1 sprig parsley, cut fine
Salt to taste
The trick with this dish is to have uniform sized potatoes. Mattie could have accomplished this in several ways. She could have obtained new potatoes in late July from The Rocks and kept them in cool storage to transport back to Chicago in October, then peeled all the tiny potatoes. Or, she could have purchased larger potatoes, peeled and cut them with a large melon baller or ice cream scoop, and used the extra to make mashed potatoes for the staff. I’m thinking she did the latter.
Boil a pot of water whilst you are fussing with the potatoes. Salt the water.
Once you have uniformly sized round potatoes, pop them into the boiling water for about five minutes. When you can insert a sharp knife into a boiling potato, they are ready to remove from the water. Heat a shallow skillet. Drain the potatoes, pat them dry. When the skillet is hot, add oil, add potatoes, and shake frequently to brown potatoes on all sides. This will take about twenty minutes. Remove from heat, add freshly chopped parsley, salt to taste.
Tomato Salad
1 fresh tomato per person (Mattie would have peeled each tomato by plunging into boiling water for one minute, then removing the peel, and plunging into cold water to cease any cooking)
1 head of Boston, butter, or other soft, leafy lettuce
1 Tablespoon mayonnaise per person
1 teaspoon freshly chopped chives per person
For each plate, lay three leaves of lettuce to cover the plate like a doily. Slice each tomato into six or eight segments and place onto the lettuce in a star shape. Dollop about a Tablespoon of mayonnaise in the center of the star. Dust liberally with freshly chopped chives.
Ice Cream
Regular readers will know that ice cream was served at nearly every Glessner House event. Frances Glessner often requested specific shapes for certain events, such as candles, calla lilies, or books. The ice cream was in the shape of four-leaf clovers for Fanny’s wedding. Some of these molds are in the Glessner House collection and they appear in Cooking with Mattie photographs from time to time.
Mrs. Glessner didn’t specify a shape for the ice cream in this instance. But I would like to think that since this supper took place on October 30th, she might have been thinking harvest or Halloween. So, you will notice in the photograph that the ice cream is a pumpkin. This is super simple, and you don’t need the metal molds that Mattie used. This was done in a silicone rubber mold that is designed to make large, round ice cubes, and fierce snowballs, but that’s another story. The one in the photograph was made with Mandarin orange sherbet, but there are many other options such as pumpkin spice or mango. The stem is a little piece of celery.
Spice Cake
1 cup unsalted butter
1 ½ cup raw sugar
3 eggs, well beaten
1 cup whole milk
1 cup dried fruit: dates, raisins, golden raisins, currants, etc.
1 cup black walnuts, or combined with pecans or English walnuts to equal 1 cup. Black walnuts are expensive and hard to find and have a very strong flavor. Feel free to use a combination of nuts with just a portion of black walnuts.
1-2 Tablespoons flour to dust the fruit and nuts
½ teaspoon each cinnamon, cloves, and allspice
2 cups sifted unbleached flour
2 teaspoons baking powder
In a large bowl, cream the butter and sugar until very light, add eggs and milk, blend thoroughly. Dust all the dried fruit and nuts with flour until thoroughly coated. Add the spices to the dusted fruit. Add all to the creamed mixture. Stir to blend. Sift the flour three times with the baking powder. Add gently to mixture and blend. Turn into a greased and floured pan. A standard bread loaf pan or 8”x 8” pan is the right size; a round cake pan would also be lovely. Bake at 350˚for about 30 minutes. Check when you begin to smell the spices. It will have a slight dome and be browned in places when done. A thin knife or broom straw inserted in center will come out clean. Cool in pan for 30 minutes.
Remove from pan onto waxed paper and press down to as even a brick as possible. When cool, slice in cubes and dust with powdered sugar. For a round cake, do not press down, cut into six or eight wedges, dredge with powdered sugar. I always tell the readers when a historic recipe is especially good. This one is outstanding. I used dates and black walnuts, and it is one of the very best cakes I have made. I will be certain to make it for a Mattie event soon so more people can taste it. I highly encourage you to make this cake.
Fruit
Mattie would certainly have brought fresh apples back from The Rocks, and perhaps grapes as well. She could have obtained either at the South Water Street Market. The fruits featured in the photograph are golden apples, sliced and sprinkled with cinnamon and sugar, and Concord grapes.
Tea and Claret
We are not certain what brand of tea Mattie used, but Ellie uses Barry’s Irish Gold, and if you come to an event at Glessner House, this is the tea you will be served.
The Claret in the photograph is Frances Coppola Claret, but any dark, heavy Bordeaux would suffice.
Welcome to Autumn everyone and Happy Halloween to those who celebrate! Mattie (and Ellie) will be very busy making apple butter, stewing pumpkin, and canning pickles.
Servants Picnic Time Again (posted September 4, 2023)
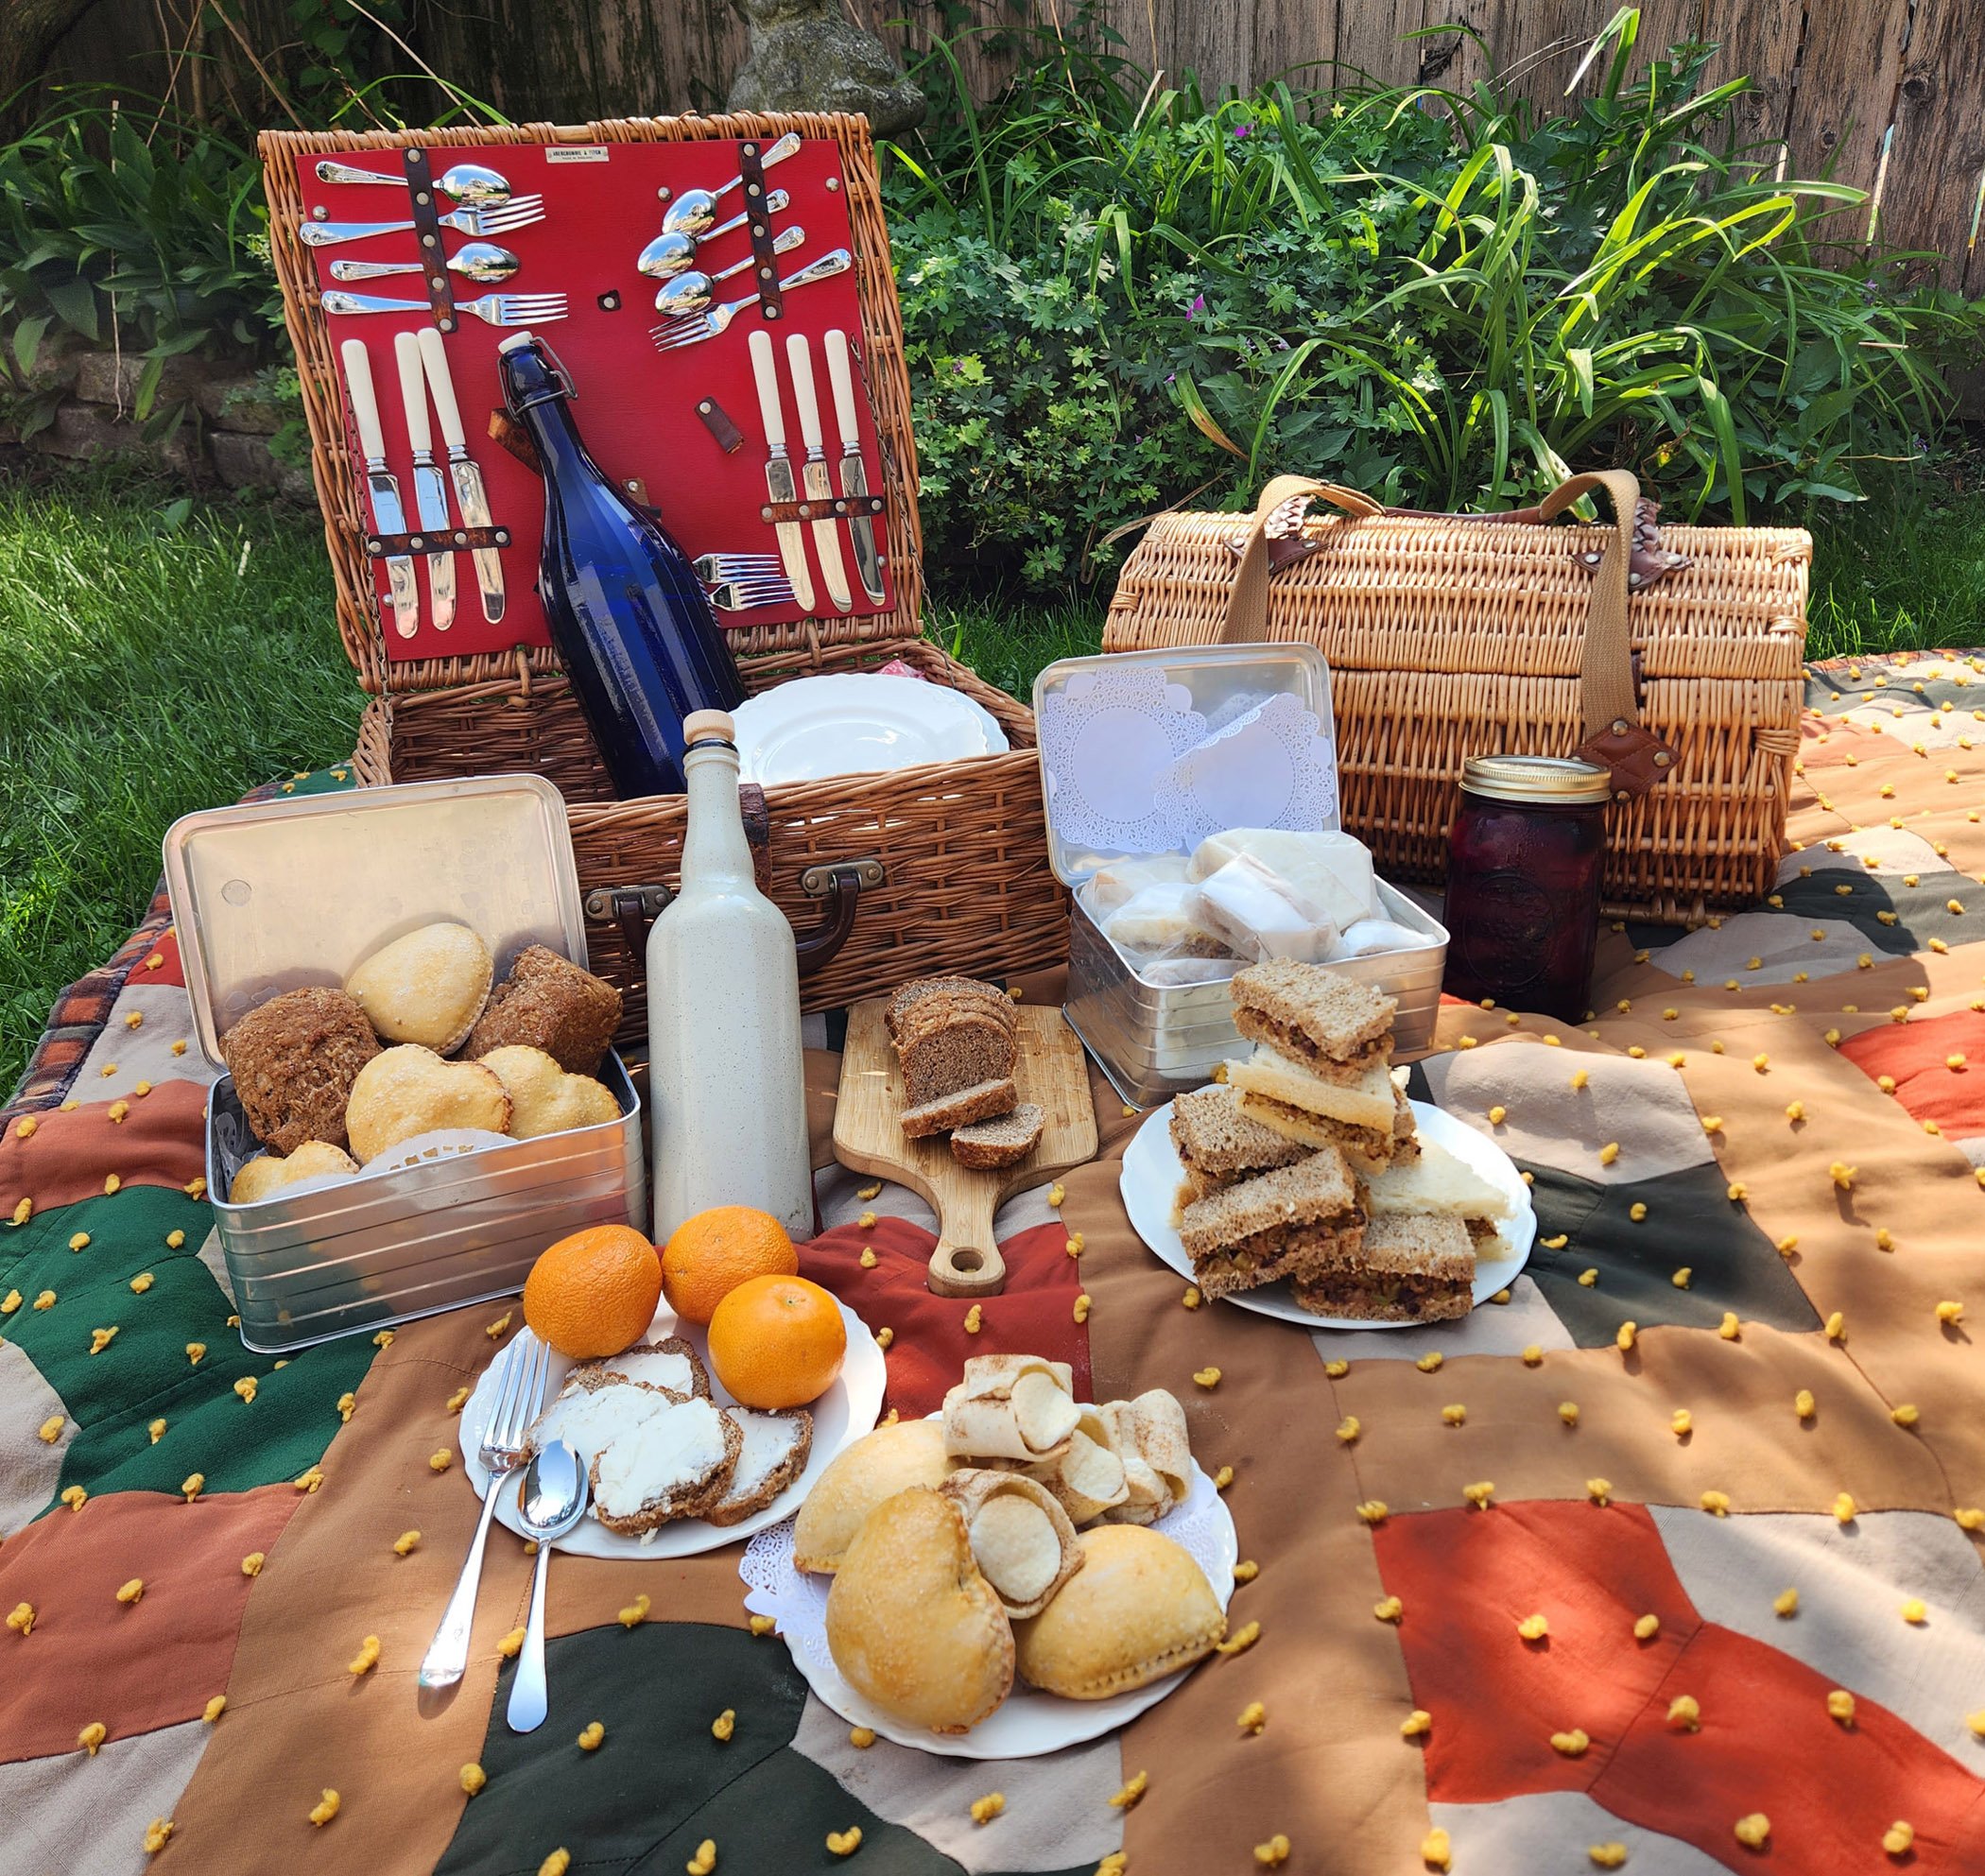
The origin of picnics in America is complicated. The French pique-nique in the mid-1600s became the English Pic Nic in the early 1800s, characterized by each guest bringing an item to share; sometimes wine as well. Guests frolicked indoors in various stages of debauchery and artistic expression. Gradually, these bacchanals migrated outdoors as more and more “city” people sought the pleasure of outings in the country.
In America, the picnic was generally an outdoor event, often taking place in large public parks or cemeteries and far less rowdy than its European ancestor. Country picnics took place near rivers and streams in idyllic settings. At The Rocks, the Glessners’ summer home in New Hampshire, Mattie and the other Glessner servants took this sort of picnic every September. Frances Glessner mentions the annual servants’ picnic in several of her journals. She always listed the food that she herself prepared for the family on the servants’ day off.
The servants all went off for their annual picnic at the Flume. They left everything in apple pie order for us. Fanny and I got dinner, washed the dishes and got supper. We fried chicken, cooked corn, potatoes and beans, made coffee and charlotte russe, and had cake and fruit and champagne. For supper we had scalloped tomatoes, baked apples, beans, farina etc. The servants had a delightful day—and we all enjoyed our part of it.
But what did Mattie pack for herself and her friends on the day they were permitted to take the Glessners’ carriage out for the entire day to spend enjoying the countryside? Let’s imagine a basket packed with:
Date Sandwiches
Olive Squares
Swiss Sandwiches
Pickled Beets
Apple Bread
Marshmallow Baskets
Lemonade or another cooling drink
Beer for those who imbibe
Date Sandwiches
1 cup sugar
½ cup unsalted butter
1 egg
1 cup sour cream
1 teaspoon Mexican vanilla
½ teaspoon baking soda
Flour, enough to roll thin, about 4 ½ -5 cups
18-20 dates, pitted
¼ cup cream cheese
1 egg mixed with 2 Tablespoons water for egg wash
Sugar for sprinkling over before baking
Mix sugar, butter, egg, sour cream, and vanilla together. Add flour and baking soda. Create a stiff dough. Roll out into one long sheet. Dot with split dates and about 1 teaspoon of cream cheese over every date, cover with another thin sheet of dough. Press well together and cut into squares, hearts, or rounds. Brush tops with egg wash and sprinkle with sugar.
Bake in hot oven until nicely browned, about 10-12 minutes. These may be made nicer by icing with a thin icing made by mixing powdered sugar into freshly squeezed lemon or orange juice. This same pastry may be used for the marshmallow baskets.
Olive Squares
Several thin slices of brown bread
8 olives, pitted and chopped very fine
2 stalks celery, chopped very fine
1 small pickle, chopped very fine
1 teaspoon each prepared tomato catsup and mustard
½ teaspoon salt
Pinch of pepper
2-3 Tablespoons butter
Chop the olives, celery, and pickle very fine. Mix the catsup, mustard, salt, and pepper together and combine with the chopped vegetables. Slice brown bread very thin and spread with softened butter, then spread with the olive mixture. Place another slice of buttered bread on top and then slice into pleasing shapes. Wrap in waxed paper and store in cool place until ready for the picnic basket.
Swiss Sandwiches
Several slices of fresh bread
1 cup grated Swiss cheese
½ cup walnuts, finely chopped
1-2 Tablespoons unsalted butter, enough to make a paste
Salt and cayenne pepper to taste
1-2 Tablespoons butter for spreading on bread
Slice the bread thinly. Mix the grated cheese with the chopped nuts, enough butter to make a spreadable paste, salt, and cayenne pepper. Spread each slice of bread with a thin coating of butter. This keeps the bread from getting soggy if the sandwiches must be kept for a time. Spread the cheese and nut mixture on one side of a slice of bread and top with another buttered slice. Cut the crusts off and then into pleasing shapes. Wrap in waxed paper and place in picnic basket.
Apple Bread
3-4 apples, peeled, cored, and grated; should be about 3 cups
An equal amount of whole wheat flour, about 3 cups
1 cake compressed yeast or 2 ½ teaspoons granulated yeast (for the modern cook, this is one package) dissolved in ¼ cup warm water
¼ cup brown or raw sugar more or less, to taste; honey or maple syrup may also be used
1 teaspoon each cinnamon and nutmeg
Pinch of salt
Corn meal for dusting the bottom of the pan
Grate the apples and measure the amount. Measure an equal amount of flour, add cinnamon, nutmeg, and salt, sift together or stir briskly to mix. Mix the flour into the apples. Dissolve the yeast in warm water and add it to the flour and apple mixture, stir in the sugar, honey, or maple syrup. Mix thoroughly in bowl. The apple will begin to absorb the dry ingredients; continue mixing until all are combined. Add a little bit of warm water if the flour is not completely absorbed. Add more flour, enough to make a dough that can be kneaded.
Knead for 10-15 minutes adding flour until the dough is no longer sticky. You will notice, as you knead, that the dough gradually becomes sticky again. This is because the moisture in the apples is being absorbed by the flour; add a little more flour each time this happens. There will be a tipping point as you knead when the moisture ratio is equal, this is when you stop kneading.
Make the dough into a ball, cover with a cloth (the modern cook may use plastic wrap) and let rise for about an hour. Punch down lightly after raising, place into small loaf pans. Bake in 350˚oven for 25-30 minutes depending on the size of your loaves. Wrap tightly in waxed paper when cool. Slice at picnic time and serve with fresh butter or cream cheese spread on each slice.
Marshmallow Baskets
When making cookies or a pie, roll out some of the dough thin and cut with a diamond-shaped cutter in size about four inches between its long opposite points. The above recipe for pastry used for the date sandwiches may also be used. Place a marshmallow in the center and fold the two opposite long points over it and press them together. Bake at 325˚for 6-8 minutes. Watch carefully. In baking, the marshmallow will swell and lift the joined dough which will be left like the handle of a tiny flat basket when the cooling marshmallow contracts.
A summer picnic is a wonderful idea. Everyone should try one! Perhaps wait until the weather cools off just a bit.
Happy August Birthdays! (posted August 1, 2023)
In August of 1910, Frances Glessner’s journal (at this time being written by John Glessner) mentions August birthdays and Mattie’s participation in them.
There have been two birthdays this week – Alice’s on 17th, when she & George & Mrs. Hamlin came to supper & Mattie made her a birthday cake - a fig cake. She had many presents, & among others a gilt bag & some antique tea spoons from Frances & me. On 20th was Anna Robertson’s birthday, & there was another cake, this time Lady Baltimore, for her, & again many presents, including a coral necklace & gold chain made by Frances & piece of gold money.
We might begin with a bit of background. Alice refers to Alice Hamlin Glessner. She married the Glessners’ son George in 1898. Mrs. Hamlin was her mother. Anna Robertson was Mrs. Glessner’s sister.
The two cakes mentioned are vastly different. The fig cake hearkens back to the early 19th century and hearth cooking, whilst the Lady Baltimore represents the most modern baking fashion of 1910. Fig cake is a rich, heavy cake with a distinct, if not actually strong, flavor. Its method is not far different from a pudding, which would have been steamed rather than baked, in earlier times when reliable ovens were not available. This is a transitional cake. It lies on the fault line between cakes that are heavy, rich, and full of dried fruit, to light, airy cakes full of whipped egg whites, white sugar, and white cake flour.
The Lady Baltimore Cake might be the poster child for the new wave of cakes that came about after the invention of lighter flour made especially for cakes. In 1894, Addison Inglehart developed a highly processed flour which he called Swan’s Down Cake Flour. It is lower in protein, and more finely milled, thus yielding a lighter cake. You will recognize the name. It is still sold today.
The fact that Mrs. Glessner chose these two cakes for two different family birthdays, in the same month of the same year, makes me think that she always knew someone someday would want to write The Culinary History of a Prairie Avenue Cook, because I really do.
Whereas some form of Fig Cake appears in countless cookbooks throughout the middle to late 19th century, Lady Baltimore Cake is decidedly a 20th century invention. And we know where it came from and why.
Prominent author Owen Wister, best known for The Virginian and a biography of Ulysses S. Grant, and sometimes credited as the “father of western fiction,” wrote a romantic novel entitled Lady Baltimore in 1906. The main character of the novel is a reluctant bridegroom who visits a bakery in a fictional town thought to be based on Charleston, South Carolina. He is tasked with ordering a Lady Baltimore cake for the wedding. But, instead, he falls in love with Eliza, the young woman who takes his order and he marries her instead, all because of a cake. This transpires over many chapters narrated by a gentleman from the north who delights in commenting on the traditions, prejudices, and foibles of the southerners he encounters.
The narrator of the novel, a traveler who took his mid-day meal always at the Women’s Exchange, describes his meeting with the cake thus:
I stepped forward to the counter, adventurous, but polite. “I should like a slice, if you please, of Lady Baltimore,” I said, with extreme formality…She replied, “Certainly,” in her regular Exchange tone…I returned to the table and she brought me the cake, and I had my first felicitous meeting with Lady Baltimore. Oh, my goodness! Did you ever taste it? It’s all soft, and it’s in layers, and it has nuts—but I can’t write any more about it; my mouth waters too much. Delighted surprise cause me once more to speak aloud and with my mouth full, “But dear me, this is delicious!”
If you read that novel, wouldn’t you want to find that cake post haste? But did the cake actually exist, or did Wister make it up in his artistic imagination?
It did exist. It was served at The Women’s Exchange Tearoom in Charleston. Regular readers will recall that Chicago also had a Women’s Exchange and that Mrs. Glessner instructed Mattie to obtain cakes from them for large parties. The summer cooks fed Mr. Glessner the cakes from there as well.
Women’s Exchanges were formed in many cities beginning in Philadelphia in 1832. I encourage all readers to research them. Many still exist and they are a fascinating topic and perhaps worthy of their own space in the future. They were non-profits established by philanthropic women to enable other women to earn a living selling their hand-made items such as embroidery, sewing, fancywork, and baked goods. Ladies like Mrs. Glessner and the other organizers enhanced their philanthropic status through such work and were able to display their organizational skills to better the lives of less fortunate women.
Sisters Florrie and Nina Ottolengui were longtime managers of the tearoom in Charleston, and the recipe for Lady Baltimore cake is probably theirs. Alicia Rhett Mayberry is also often credited for the cake and for the distinction of having her niece and namesake, Alicia Rhett, play India Wilkes in Gone With The Wind.
The style of the cake is referred to as a white or silver cake. It is distinguished by its use of only egg whites, no yolks. It is flavored with almond extract, which is clear, so there is not a brown tint from vanilla. It uses Swan’s Down Cake Flour and white sugar. It is everything that a fig cake is not. But to be fair, a fig cake is everything that Lady Baltimore is not.
Please try them both.
FIG CAKE
3 cups unbleached flour
2 cups raw or brown sugar
1 teaspoon each: cinnamon, nutmeg (always freshly ground, people!), baking soda, and salt
1 cup dried figs, finely chopped (may substitute 1 cup of fig preserves but reduce sugar to 1½ cups in that instance)
1 cup toasted nuts: pecans, walnuts, almonds, or black walnuts would be especially nice
1 cup buttermilk
1 cup sweet oil (any non-animal liquid oil, corn, canola, soybean, etc.)
4 eggs
1 Tablespoon Mexican vanilla
For the Glaze
½ cup butter
1 cup raw or brown sugar
1 Tablespoon maple syrup or honey
1 Tablespoon Mexican vanilla
This is a very simple cake. Measure and sift the dry ingredients together three times. Add the chopped figs and toasted nuts and stir to coat them with the dry ingredients. This is the method used in steamed puddings as well to better suspend the fruit and nuts within the cake. Mix the buttermilk, eggs, oil, and vanilla together and add to the dry mixture. (If using fig preserves, add it with wet ingredients, but still stir the nuts in with the flour.) Stir thoroughly but do not over beat. Bake in a well-greased Bundt or tube pan for about an hour and a half at 325˚. Mattie would call this a slow oven cake. When the cake is cool enough, turn out onto a platter. Make the simple glaze by combining the first three ingredients in a saucepan until melted. Remove from heat and add the vanilla, then pour over the still-warm cake. It will harden as it cools.
LADY BALTIMORE CAKE
1 cup raisins
1 cup sherry or rum
2 cups cake flour
¼ teaspoon salt
2 teaspoons baking powder
½ cup of butter
1 ¼ cups white sugar
¾ cups milk
1 teaspoon almond extract
4 egg whites, at room temperature
Center Icing
1 cup white sugar
½ cup water
1 teaspoon Mexican vanilla
1 teaspoon almond extract
Hard Icing
2 cups white sugar
½ cup water
3 egg whites, beaten until frothy
½ teaspoon cream of tartar
Juice of 1 lemon
1 teaspoon almond extract
1 cup chopped pecans, toasted
This is a cake in several steps. I highly suggest that you get your entire mise en place in place at the beginning. Mattie would have needed perfect quiet and time in the kitchen alone to complete this cake. It is not for the faint of heart.
First the cake. Put the raisins into a small bowl and cover them with the sherry or rum. Set aside several hours. I did this when I started, and they were ready by the time I was ready for them. Grease and flour two 8 inch cake pans and line the bottoms with parchment paper circles (this gives a smoother surface for icing), set them aside. Preheat the oven to 350˚. Cream the butter and sugar together in a large bowl. Sift the flour with salt and baking powder. Beat the eggs until stiff but not dry. Gradually add the flour mixture alternately with the milk to the butter and sugar. Blend thoroughly. Stir in the almond extract. Now, if your eggs have begun to fall and weep, re-beat them until no moisture appears.
Add one third of the eggs to the cake batter by folding in with a large spoon or spatula. Then, gradually fold the cake batter into the remaining egg whites, fold very gently. Take care to keep all the air possible in the eggs. Pour carefully into the prepared pans and place quickly into a 350˚oven. The cake will be done in about 20 minutes.
Whilst the cake is baking, make the center icing which is just a simple syrup with the sugar and water. Cook over low heat until transparent. Do not boil. Remove from heat and add the vanilla and almond extract. Stir, set aside.
Check the cake at 20 minutes. It should spring back quickly when touched with a finger. It will not brown. Take care not to over bake. Remove from oven when done. Set on a cool, preferably marble, counter to cool more quickly. Working with warm but not hot cake is the secret to success. Line an area of counter with parchment paper large enough to accept four 8-inch cakes. When the cakes can be touched safely with a bare hand on the bottom of the pan, invert onto parchment paper. Take a serrated-blade knife and slice each cake in half horizontally. You now have four cakes. Place each cake, cut side down onto parchment paper. When the cakes are completely cool to the touch, pour the center icing over each cake. This glazes them and makes them less likely to crumble.
Immediately begin making the hard icing. Remember, you have been soaking the raisins and have already toasted the nuts, they are set aside. To make the hard icing, cook the sugar and water just as for the center icing. Then bring to a boil and boil until you have reached 238-240˚. This will take about 15 minutes. If you are not using a thermometer, you want soft-ball stage. This means a drop of the sugar in a bowl of cool water will form a malleable ball. While your sugar cooks, beat your egg whites until frothy. When the sugar is ready, pour in a very thin stream into the egg whites…very thin stream people, continue beating constantly.
This is where Mattie would have needed someone in the kitchen to help. Mattie would have had a Dover Beater which is the hand-cranked eggbeater. We do not have evidence that she had an electric mixer although they did exist. Perhaps Mrs. Glessner provided her one just because she needed it for this cake. I cannot see how one person could do this without an electric mixer or an assistant. When all the sugar has been added, add the cream of tartar, the lemon juice, and the almond extract. Continue beating for about five minutes. The icing will begin to look like snow in a 1950s cartoon.
Drain the raisins, save the rum or sherry for another use. Blot the raisins dry. To assemble the cake, put a doily on your desired plate or cake stand, then place 4-inch strips of parchment paper around the edges. This enables you to decorate the cake then pull the parchment paper out when complete leaving the cake sitting pretty on the doily. Mattie would have known this trick. This cake is too delicate to be moved after frosting.
Once the plate is thus prepared, place one layer of the cake cut side down on the plate. Spread the top with the hard icing then sprinkle raisins and nuts liberally over the top. Repeat with the next layers until all four layers have raisins and nuts in between them. Do not put raisins and nuts on the top layer. Use the remaining icing to frost the top and sides of the entire cake. Make little curling motions with your knife to create wave-like peaks on the surface of the cake. When the icing is dry, remove the parchment paper barriers and serve the cake on the doily-covered platter.
Candles are a nice touch on both of the cakes and have been a Western world tradition for over 200 years. Certainly, the Glessners would have supplied candles.
If you are celebrating an August birthday, I wish you many happy returns of the day! Please let me know if you make one or both of these cakes. And don’t forget to make a wish!
Cooking without Mattie (posted July 17, 2023)
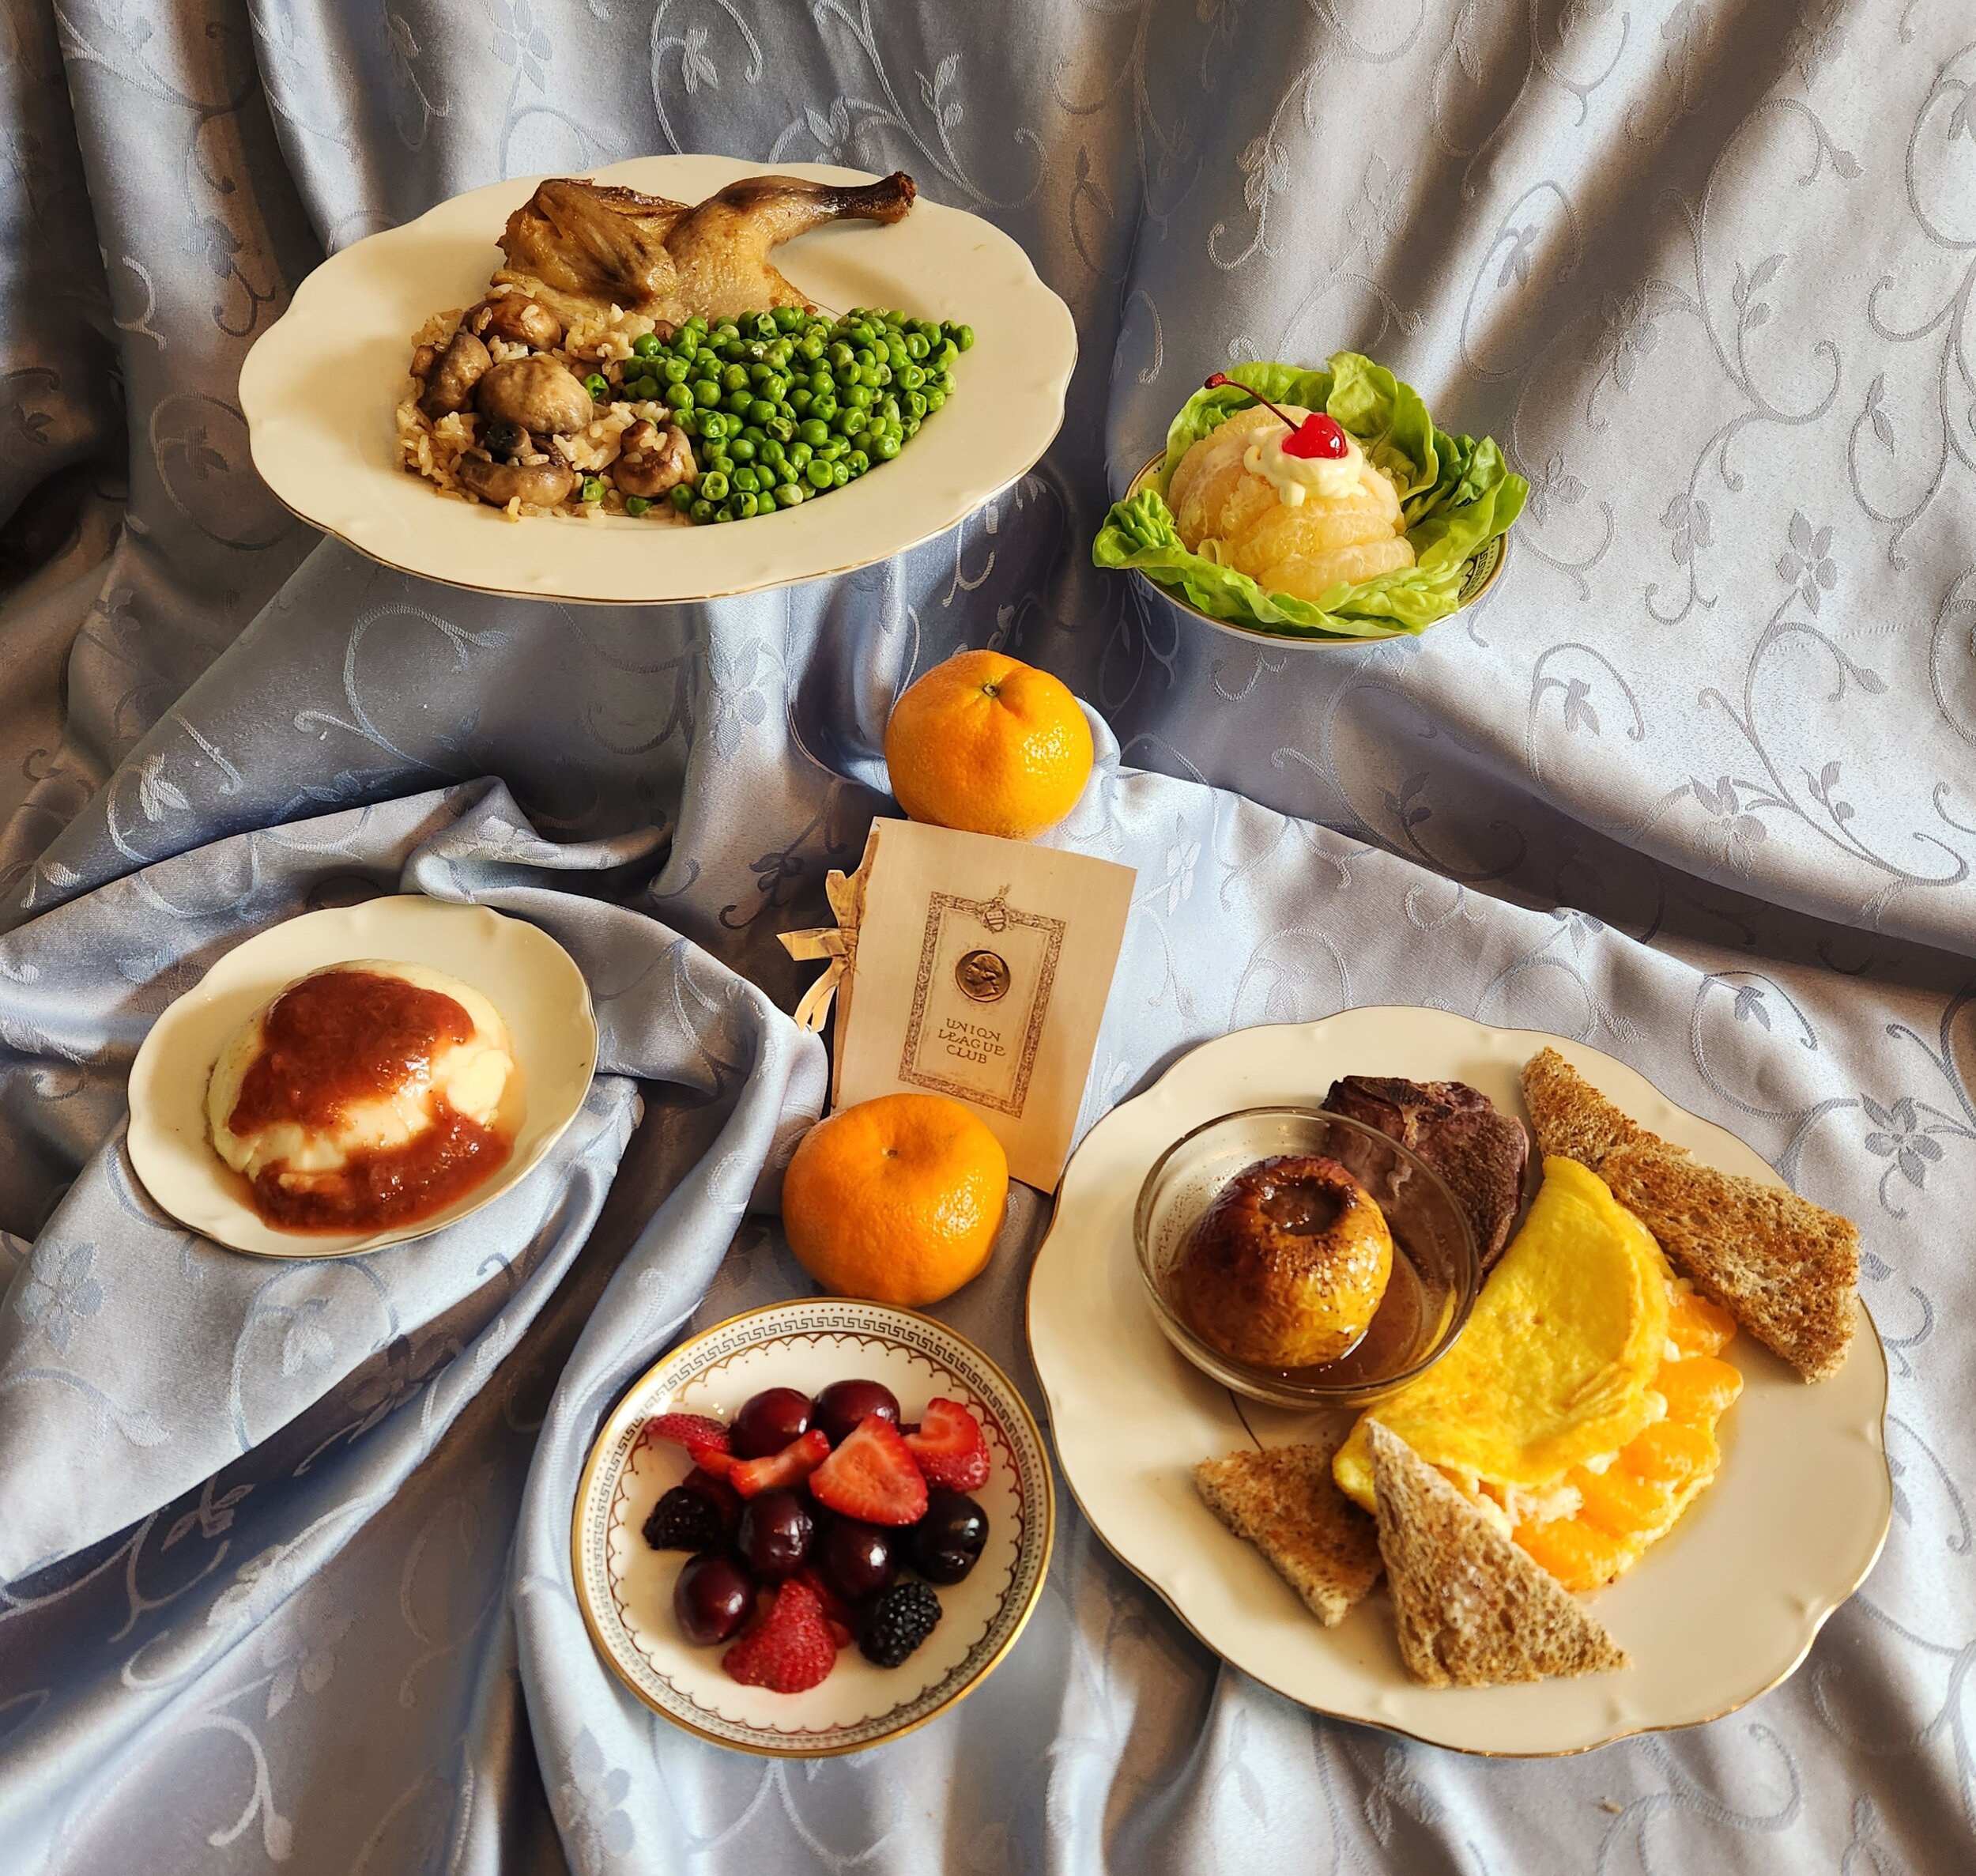
Frances Glessner and the rest of the family, including Mattie and most of the servants, decamped Chicago in early May for The Rocks, the family home in New Hampshire. This left Mr. Glessner behind to “fend for himself,” except he probably didn’t. Mrs. Glessner would have hired someone to cook for him and left perhaps one male servant at home to tend to the house. In 1901 she penned a document entitled Articles Mr. Glessner Likes which included a list of Things Mr. Glessner Does Not Like.
At first reading, this might look like a simple list of favored foods that a wife left for the servants caring for her husband in her absence. But I believe it was a bit more than that. Mrs. Glessner was uniquely qualified to make these lists as she had assisted her mother in running a boarding house in Ohio whilst she was growing up. She would have understood basic cooking practices and been able to discern what was simple from what required a professed cook like Mattie.
Mattie was a “professed cook;” she had training and experience and could manage very sophisticated menus. Whomever was cooking for Mr. Glessner in the summer might not have her expertise. When viewing this document one can draw some conclusions. I believe Mrs. Glessner was not only listing foods her husband enjoyed, but also foods that a plain cook could not mess up, in the absence of Mattie. Therefore, we bring you this month, Mr. Glessner’s Bill of Fare for a typical day in the absence of his wife, and more importantly, Mattie. Try not to mess it up.
BREAKFAST
Baked Apple
Orange Omelet
Broiled Lamb Chop
Fresh Fruits with Always an Orange
Toast
Baked Apple
1 apple per person
1 Tablespoon brown sugar
1 Tablespoon butter
1 teaspoon cinnamon
½ teaspoon nutmeg
½ teaspoon of lemon juice plus 1 t grated lemon rind
1 Tablespoon maple syrup if available
Hot water
First, core your apples; do not peel them. Place the cored apples into a small baking dish that will fit the number you want to make. For one apple, use a ramekin or small custard dish. Mix the butter, sugar, lemon juice, rind, and spices into a slurry. Stuff the core of the apples with this mixture. Drizzle maple syrup over the top, if desired. Place just enough hot water into the pan or dish to come up about ¼ the way to the top of each apple. Bake in a 350˚oven for about 20 minutes or until apple peel is wrinkled but not undesirably so. Remove from oven. Spoon juice in pan over apples periodically until service.
Orange Omelet
1 egg per person, separated
2 teaspoon powdered sugar
1 Tablespoon hot water
Pinch of salt
½ teaspoon orange juice
1 orange, peeled and all the membrane removed
Separate the egg(s). Beat the yolk until thick, adding the orange juice, hot water, and salt. Whip the egg whites until very stiff. Slowly and carefully fold the whites into the yolk. Butter an omelet pan or small skillet. Gently place the eggs into the pan and watch carefully. Cook until slightly puffed. Make a careful slice with a dull knife into the center of the omelet, add the orange segments and sprinkle with the powdered sugar. Fold the omelet over onto itself, sprinkle the top with more powdered sugar.
Broiled Lamb Chop
1 lamb chop per person
Salt, pepper if desired
Small amount of oil
Heat a cast iron pan. Lightly grease with oil. Place the salted lamb chop onto the pan and cook 2-3 minutes, turn, cook another 3-5 minutes or until desired doneness. Serve with breakfast.
Fresh Fruits
Mattie would have kept a keen eye on what fruits were fresh at every time of year. In summer in Chicago, cherries would be coming in from the nearby farms in northern Illinois and eastern Michigan. There might also be strawberries, raspberries, blackberries, blueberries, and other early summer fruits. This is a great time for the left-in-Chicago cook to showcase her fruit selection talents. Remember, always an orange.
Toast
Mrs. Glessner specified toast as a favorite of Mr. Glessner, probably because it was difficult to ruin. Simple sliced bread, toasted, with the crusts cut off, would be just fine for Mr. Glessner’s breakfast.
LUNCHEON
Mr. Glessner would likely have eaten the midday meal at one of his clubs. If it was a luncheon, with other men, he would have eaten a set menu provided by the club. If it was simply lunch on his own, he might have ordered off the menu. Chances are, he had a lunch order known by the club. He belonged to both The Chicago Club (Michigan and Van Buren) and the Union League Club (65 West Jackson). Both of their locations were near his office which was first at Jefferson and Adams and later at Michigan and Harrison. Mr. Glessner stayed in Chicago whilst the rest of the family went to The Rocks because he had to work. Mrs. Glessner anticipated that her husband would take his mid-day meal downtown and therefore does not list lunch preferences for Mr. Glessner in her document.
DINNER
Squab
Mushrooms with Rice
Peas
Grapefruit Salad
Custard with Jelly
Always an Orange
Squab
These are small birds, the fledgling pigeons, and they were most prized in Mattie’s day. Today, a Cornish game hen, or poussin would be the closest we can come without sourcing from a game supplier. Small birds were eaten often in the late 19th and early 20th centuries. Butterflied, or cut in half and broiled, served with rice and mushrooms, these would mimic Mr. Glessner’s dinner for us today. Apparently, Mr. Glessner enjoyed mushrooms.
Small Cornish game hen (this would work with a bone-in chicken breast as well)
Salt, pepper (if desired)
Butter or other sweet oil such as olive oil
Cut the bird down the back and open it up flat. Rub olive oil all over. Salt, pepper (if desired). Place in hot oven 450˚or in broiler if you have one, a grill also works. Cook for approximately 25 minutes, turn and baste frequently if you wish to obtain nice, crispy skin.
Make rice according to normal directions, one cup rice for two cups water, add one teaspoon salt and one Tablespoon oil or butter, bring to boil, simmer 20 minutes. Meanwhile clean five or six small mushrooms per person, melt butter in a pan and sauté until liquid has reduced and mushrooms have shrunk in size. Add the mushrooms, and the sauce they have cooked in, to the rice, stir. Serve alongside bird.
Peas
Canned peas were available for sale readily in Chicago in the late 19th and early 20th centuries. This would be a simple dish for Mr. Glessner. Today, we know that frozen peas are most healthful, unless you have a garden, in which case, use those.
Cook peas according to package or can directions. Place on plate with a small amount of butter and salt.
Grapefruit Salad
A simple grapefruit salad can be made by peeling and quartering a grapefruit and removing all the membrane from the fruit. Arrange over lettuce with a small dollop of mayonnaise at the center. A maraschino cherry makes a nice addition.
Simple Custard
2 cups milk
¼ cup raw sugar
3 eggs well beaten
1 Tablespoon Mexican vanilla
½ teaspoon each ground nutmeg and cinnamon
Pinch of salt
For the custard, put milk into a double boiler (readers know you can also use a small saucepan with a mixing bowl that fits inside.) Cook until just boiling then remove from heat. Meanwhile beat the egg yolks until very light, gradually add the sugar and beat thoroughly. Add the hot milk and vanilla. Pour into individual cups and place into a larger flat pan or dish. Fill the dish with hot water and put in oven. Bake at 350˚for about an hour until a thin knife inserted in center comes out clean. Cool and unmold, top with whipped cream or jelly. This dessert might sound like a lot of work, but Mattie would know that it is very simple and could be trusted to someone who was not a professed cook. You’ll be fine with this. Try it. It’s yummie!
The suggestions left by Mrs. Glessner tell us many things about their household and about how Mrs. Glessner viewed her role in it. Leaving instructions for the staff as to what her husband did and did not like to eat was one of the ways that Mrs. Glessner demonstrated her value. She had the foresight to understand what would be easiest for cooks who were not professed. This gives us an insight into Mrs. Glessner that cannot be ignored. She was a woman, operating in her sphere at the time, who knew what was needed and provided it in perfect harmony with her surroundings. Brava Mrs. Glessner. Meanwhile Mattie is in New Hampshire caning fruit and bottling honey.
Happy Summer Everyone!
Send for Our Free Fat Reducer! (posted June 5, 2023)
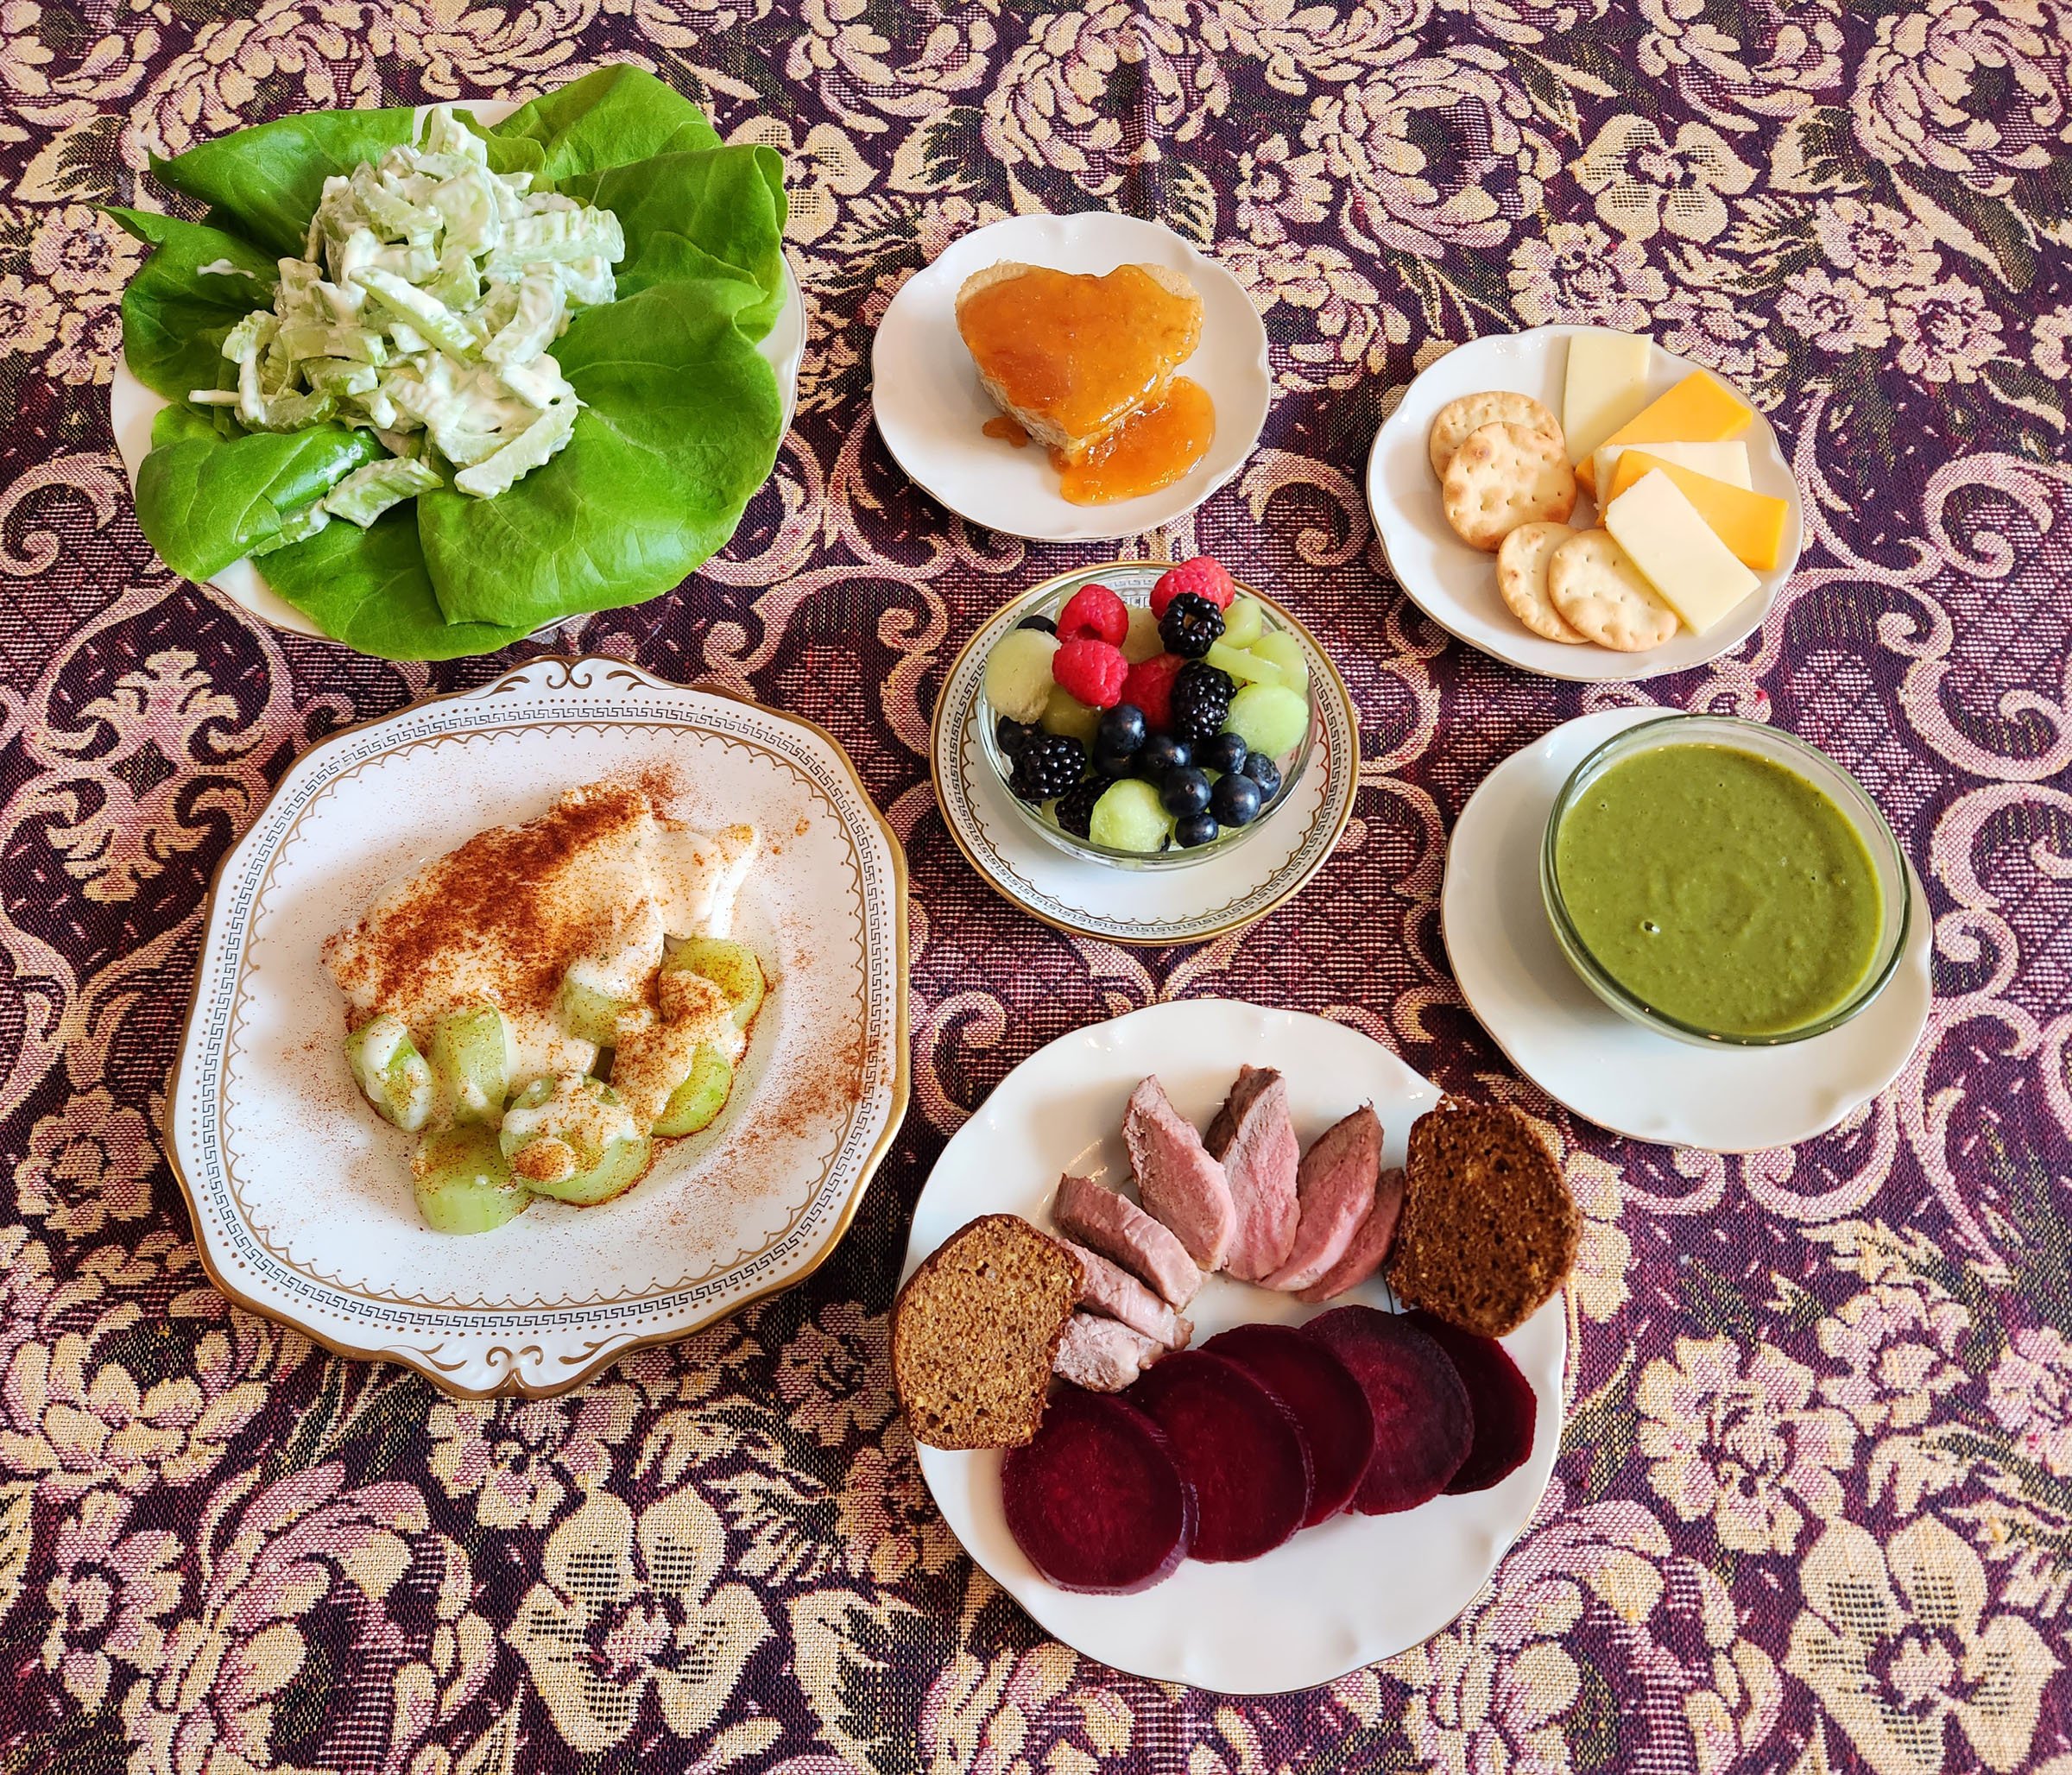
“So, how did they fit into those tiny dresses if they ate all that food?” This is honestly the most common question I get when I am cooking and serving authentic Victorian and Edwardian meals. “They did, because they didn’t.” That is the simple answer.
The desire for a perfect figure, for both men and women, has been a pursuit since earliest recorded history. There are diet recommendations dating back to the Han dynasty in China (c. 2695 BC) and exercise regimes almost as old. Please do not get me started on sculptures! Nearly every culture has a history of advice to those plagued with excessive avoirdupois. In Mattie’s day, recent scientific discoveries, such as the concept of calories, and the benefits of a vegetarian diet, emerged in popular literature and commercial efforts. Both of Chicago’s major newspapers, The Chicago Tribune and The Inter Ocean had regular columns and articles regarding weight reduction. Advertisements appeared in both papers for “fat reducing” diets (often called dietaries) the most prominent being from Mr. Kellogg in Battle Creek, Michigan.
The Inter Ocean had a regular column written by Madame Therese. On November 22, 1903, she wrote out a diet to follow for weight reduction:
“(Breakfast)A poached or boiled egg, one cup of either coffee or tea sweetened with saccharin, one slice of toasted bread, either graham or wheat, and for fruit, either an apple, an orange, or a bunch of grapes….The noon meal may be…three ounces each of soup and fish, roast or boiled beef, veal, game, or poultry, six to eight ounces; green vegetables, two ounces; bread, one ounce; fruit, three or four ounces. Last of all, or with the meal if desired, five ounces of any light, sour wine….The evening meal should be taken at about 6 o’clock, and may consist of the following articles:
Beefsteak, fowl, or game, five ounces; salad, one ounce; caviar, one and one-half ounces; bread, one ounce, and either fruit or water, five ounces. The glass of mineral water may be taken two hours after this meal also.”
It would be entirely possible to follow this method and still attend a luncheon at Glessner House. You will note that all the elements of the suggested diet are featured in Mrs. Glessner’s Bill of Fair for a luncheon Mattie created for Mrs. Eddy in 1901. Abby Spencer Eddy was the sister of Delia Spencer Caton, who became the second Mrs. Marshall Field. Mrs. Eddy lived at 1601 S. Michigan Avenue. Mrs. Glessner was good friends with both Mrs. Eddy and her sister.
Mrs. Eddy’s Luncheon
Macedoine of Fruit
Pea Soup
White Fish—Cucumbers
Duck Breast
Beets
Corn Bread
Celery Salad
Cheese—Crackers
Rice Pudding with Jelly Sauce
Cake
Fruits—Candies—Coffee
By carefully measuring the portions, which Mattie would already be doing as they were just standard portions for the time, and eliminating the cheese, crackers, and desserts, this menu could easily have been part of a reducing diet.
Macedoine Salad
This is a simple fruit salad. For the most desirable presentation, select or cut the fruit all to the same size based on the smallest ingredient. With a salad including berries, try to cut the larger fruits to the size of the berries.
Pea Soup
1 pint of young green peas
1 small bunch of fresh parsley
2 shallots, chopped fine
1 quart vegetable or chicken stock or broth
Boil the peas with the shallots until the peas are very tender and beginning to break apart. Add the parsley and cook for just another 5 minutes or so. Remove from heat and cool slightly. Push through sieve or food mill (the modern cook may use an immersion or stand blender but, as regular readers know, this combines the fibers. Mattie’s method would remove them). Add the stock and heat, but do not allow to boil or overcook as it will “spoil the color.” For a richer soup, you may add ¼ cup of heavy cream (the modern cook might use yogurt). This recipe will produce six 3-ounce servings.
White Fish with Cucumbers
1 4-ounce portion of fish per person (the fish will reduce by about 25% during cooking, therefore, if the diet prescribes 3 ounces of fish, that’s a 4 ounce raw portion)
1 teaspoon salt
Juice of one lemon, about ½ cup, halved
1 cup dry white wine
1 medium cucumber, peeled and sliced into one-inch slices
1 Tablespoon unbleached flour
1 Tablespoon butter
½ cup milk
White pepper if desired
Paprika for dusting
Clean the fish and cut into 4-ounce portions. Heat a saucepan of water until just simmering; add a dash of salt and ½ cup of wine. Slip the fish pieces gently into the water and simmer until no longer translucent, about 12 minutes. Remove from heat, leave in the liquid, set aside. Boil a pan of water with a dash of salt and add the cucumbers. Cook until fork tender, about 10 minutes. Remove from heat, leave in water.
In a saucepan, melt butter, stir in the flour; gradually add ½ cup wine and milk, and salt to taste. White pepper might also be added here. Remove the fish and the cucumbers from the water they have been cooked in. Plate the fish with the cucumbers on the side and the sauce over all. Dust the top with paprika. (If one were following Madame Therese’s diet, one would ask for Mattie not to sauce her dish.)
Duck Breast with Beets
One half duck breast per person
1 Tablespoon olive oil
Salt and white pepper to taste
1 beet per person, thoroughly scrubbed
Cut several crosswise slashes in the skin of each duck breast. Sprinkle with salt and white pepper. In a saucepan, heat the oil. Place the duck pieces skin side down and sear. Reduce heat to simmer and cover. Simmer ten minutes then turn over and simmer until done (Modern cooks will want to achieve a temperature of 140˚) about 20 minutes.
Remove duck from heat and set aside, covered.
Meanwhile, boil a saucepan of lightly salted water (about 1 teaspoon per quart). Add beets and cook until fork tender. Remove from heat and set aside. When cool enough to handle, scrape the skins from the beets and remove the tops and bottoms. Slice into pleasing circles. Remove skin from duck and slice into 6-ounce portions. Plate and serve with the beets.
Corn Bread Muffins
1 cup cornmeal
1 cup unbleached flour
1 teaspoon baking soda
1 teaspoon salt
¼ cup molasses
1 cup milk with 1 teaspoon vinegar or lemon juice added to create sour milk. (The modern cook may use cultured buttermilk)
2 eggs, well beaten
2 Tablespoons melted butter
Thoroughly grease muffin pans sufficient for 12 muffins. Place in hot oven (400˚). Sift together the cornmeal, flour, and salt. Dissolve the soda in the milk and then add to the dry ingredients. Add the molasses and beat thoroughly. Add the eggs, then the melted butter. Place batter into hot muffin tins and put back in oven for 20 minutes.
Celery Salad
2 stalks celery per person
1 Tablespoon mayonnaise
Lettuce leaf
Clean and cut the celery into small slices. Dress lightly with mayonnaise and serve on several pleasing lettuce leaves.
Rice Pudding
2 cups boiled rice
1 pint milk
4 eggs
¾ cups sugar
1 Tablespoon flour
1 teaspoon lemon extract
Fill a large pan with hot water and place in low oven (325˚). Slightly beat the eggs. Add the sugar and flour and mix with the rice. Then add the flavoring and lastly, the milk. Pour into individual molds or one large dish and place into the pan of water in the oven. Bake for about an hour or until a knife inserted in the center comes out clean. Cool before service and dress with any desired jelly. Apricot is nice and is Mattie’s favorite (alright, full disclosure, it’s Ellie’s favorite, but she imagines that Mattie and Mrs. Glessner would approve).
To complete the menu, use a simple 1234 cake (in the second Mattie column, posted April 22, 2020), always an orange, and some simple bon bons which the reducing ladies would certainly avoid.
See? It could be done. One could be a proper early-20th century lady, lunch at Glessner House, and still maintain the diet. Here’s hoping that no one reading this feels like they need to reduce. Happy Summer everyone!
Mattie Goes to the Fair (posted May 1, 2023)

On June 6, 1893, Frances Glessner wrote in her journal, “Mattie told me on Wednesday that she was going to be married in July and would not go to The Rocks with me. I told her I could not consent to it and would hold her to her agreement to see me through the summer.”
In June of 1893, the World’s Columbian Exposition was in full swing. It opened in May and was an easy distance from Glessner House. Is this where Mattie met the presumed suitor who was so quickly forgotten? He must have been left in the dust because Mattie continued in Glessner House employ for another nineteen years.
Twenty-seven million people saw the World’s Columbian Exposition in Chicago between May 1 and October 30, 1893. That might not seem like such a huge number today but remember that the entire country only had sixty-three million people at the time. Nearly half our nation’s population came to Chicago for the Fair, or else a whole bunch of Chicagoans went multiple times. I would like to believe that at 50¢ admission, Mattie’s $5 per week pay would have enabled her to visit several times; that is, if she could get the day off.
The Mattie I envision would have used her time at the Fair to enrich her mind by taking in the thousands of works installed at the Palace of Fine Arts, now the Museum of Science and Industry. It remains the only permanent building still standing from the Fair. Most of the buildings only looked real; they were constructed like a theatre set, with a simple stucco finish known as staff that was spray-painted white (spray paint is one of the many inventions credited to the Fair). Certainly, Mattie would have visited the Woman’s Building where Bertha Honoré Palmer left her indelible mark as President of the Board of Lady Managers. Upon the opening of the Fair she stated,
“Even more important than the discovery of Columbus, which we are gathered together to celebrate,
is the fact that the General Government has just discovered women.”
Curiously, one of the most significant female exhibitions at the Fair was not housed in the Woman’s Building, but rather in Machinery Hall. This was the Garis-Cochran Dishwashing Machine. This modern marvel was not only on display as demonstration, but also in use by several of the food vendors throughout the Fair. Mrs. Cochran originally intended her invention for home use. Her servants often chipped dishes, so she invented a machine that wouldn’t. However, its $350 price tag (that’s $11,000 today) put it out of reach of most homeowners. Hotels and restaurants, however, couldn’t get them fast enough. Her first sale was to the Palmer House. Chicago was very good to Mrs. Cochran. The Exposition judges awarded her the highest prize for “best mechanical construction, durability, and adaptation to its line of work.” Mattie would have no doubt been astonished to see the demonstration of 240 dishes washed and dried in two minutes!
Watching all that hard work, not being done by her, may have made Mattie a bit peckish so perhaps she sought out some lunch. If she ventured to the Midway Plaisance--this was the less esoteric and perhaps more entertaining aspect of the fair--she certainly didn’t go see Little Egypt, the hoochie-coochie dancer, but I really want to believe she saw Houdini, who was performing there in June. The sights and sounds would be alluring enough, but the two-acre plus village dubbed “Old Vienna” smelled of grilled sausages, baking bread, and beer. She might have purchased a Vienna sausage on a bun, soon to be known far and wide as the hot dog. She needn’t take notes on how to prepare one at Glessner House.
Nothing even faintly resembling a hot dog ever appears in Mrs. Glessner’s Bills of Fare, but Mattie might very well have enjoyed hers at the Fair. We don’t know if Mattie would have indulged in a beer, but she could have had a Pabst Blue Ribbon if she liked. The blue ribbon was part of the Pabst packaging, but they later claimed to have been named a winner of the Fair. Truth is elusive on this point, but the labels still bear the boast, 130 years later.
Mattie needed to double back though, to the Agricultural Building because, as she was standing in line for her hot dog, a small boy ran up and pressed a card into her hand. It read, “Visit the Heinz display on the second floor of the Agricultural Building for a free prize.” Not only would Mattie get a sample of Heinz pickles but a tiny charm or pin as a souvenir. More than one million pickle charms were distributed at the fair. So many guests came to the stall in an out-of-the-way spot to claim their secret prize that the other vendors near Heinz threw them a party to say thanks for all the traffic that came to their booths, too.
Mattie was very frugal with her money, we know this from some of her correspondence later in life, but I’d like to think she would spring another hard-earned 50¢ to ride Mr. Ferris’s Wheel. Chicago could simply not resist trying to outdo Paris. In 1889, when Paris hosted the World’s Fair, they debuted the enormous Eiffel Tower. Four years later, Chicago boasted the tallest moving thing ever constructed: the Ferris Wheel. A rider at the top was farther off the ground than he or she could be in any conveyance on earth, except for a hot-air balloon. With a ticket price equal to that of an entire day’s admission to the Fair, it was an expensive thrill indeed.
Perhaps after a ride on the wheel, Mattie might have craved a little something sweet before she headed back to her work at Glessner House. So many new foods were showcased at the Fair, it would be hard to decide. Being a cook though, I’d like to think that Mattie would want to know how certain dishes were made, and perhaps try them herself in her own kitchen. Fritz and Louis Rueckheim had a stall selling “Candied Popcorn and Peanuts.” They weren’t officially called “Cracker Jacks” for three more years, but the basic recipe was first eaten at the Fair (this claim is also in mild dispute). We know Mattie made candy many times; I’d like to think she tried her hand at replicating this treat. Perhaps with the addition of some candied orange peel, she might even get Mr. Glessner to try it!
I wonder if she was also asked to attempt the other famous dessert to debut at the Fair, the flat chocolate confection later to be known as the “Brownie.” Although Bertha Honoré Palmer was the President of the Board of Lady Managers and in charge of the subsequent Favorite Dishes cookbook published after the Fair, the recipe for “brownies” does not appear there. The legend goes that Mrs. Palmer asked the chef at the Palmer House to come up with something new for the ladies to be served at the Fair. Mrs. Glessner would certainly have been aware of this; she might even have been served one. Chocolate does not appear on menus at Glessner House except in the form of bon bons or as a beverage. In fact, chocolate cakes were relatively new in Mattie’s day. We are still several years from Devil’s Food which didn’t make an appearance until 1902. The processing of cocoa that makes so many of our modern chocolate delights possible was in its infancy. This makes the new Palmer House recipe even more innovative.
Let’s try our hand, and Mattie’s, at replicating some of the new flavors introduced at the Fair.
Candied Popcorn & Peanuts
4 quarts popped popcorn
1 cup raw peanuts
4 Tablespoons butter
1 cup dark brown sugar
½ cup light corn syrup
2 Tablespoons molasses
¼ teaspoon salt
Heat your oven to a low heat, about 250˚. Pop the popcorn, combine with peanuts, stir thoroughly. Place mixture onto deep cookie sheet or other metal pan and place in oven. Meanwhile, combine the rest of the ingredients and bring to a boil. Continue to cook until the mixture reaches hard ball stage (290˚). Remove the popcorn and peanuts from oven and quickly pour the candy over them to coat. Stir quickly. Spread flat on the pan and put back in the warm oven. Stir several times to break up the pieces. Leave in oven about 10 minutes more, stirring twice. Remove from oven, stir again to coat as much popcorn as you can.
Cool and store in a jar with a tight-fitting lid, except, it won’t last long. The modern person will notice that the caramel does not completely coat every kernel of popped corn as Cracker Jack does today. Having no photographs of the original, I’m not certain if this is right. If you want that effect, either double the caramel recipe or halve the popcorn. The mixture in the photograph was made with this recipe.
Not called “Brownies” until 1898
2 cups semi-sweet chocolate, either chips or broken up candy bars
½ pound butter
1 cup raw sugar
1 cup flour
4 eggs
1 ½ cup chopped walnuts
1 Tablespoon Mexican vanilla
Melt the butter with the chocolate in a double boiler or a metal mixing bowl that will sit inside a saucepan half full of water. Blend sugar and flour and pour melted chocolate over it, blend thoroughly. Add eggs, one at a time, then vanilla. Pour into an 8x8 inch pan, sprinkle walnuts over top and press lightly. Bake in a slow oven (325˚) for one hour. While still warm, brush with glaze.
For the Glaze
1 cup water
1 cup apricot jam or preserves
½ teaspoon unflavored gelatin
In a saucepan, blend water and jam, stir in gelatin until dissolved. Cook over medium heat until it begins to bubble, but not boil. Stir constantly for two or three minutes until thickened. Brush over top of baked “not yet brownies” while still warm. The glaze will settle and create a nice topping.
Mattie’s brother Alex and his wife came for a visit in October of 1893, towards the end of the Fair. He was the manager of the Glessners’ farm at The Rocks. Mrs. Glessner mentions, “Mr. and Mrs. Williamson have been here a week. They have gone to the Fair.” I certainly hope Mattie was able to tour the Fair a second time with them.
At the end of the day, after a long walk around the Fair and many new sights, sounds, and tastes, I’d like to imagine Mattie laying her head on the pillow and dreaming of the installation of one of Mrs. Cochran’s dishwashing machines at Glessner House, such a lovely thought to drift off to sleep after an exciting and delicious day.
The Hospitality of Pineapples (posted April 2, 2023)
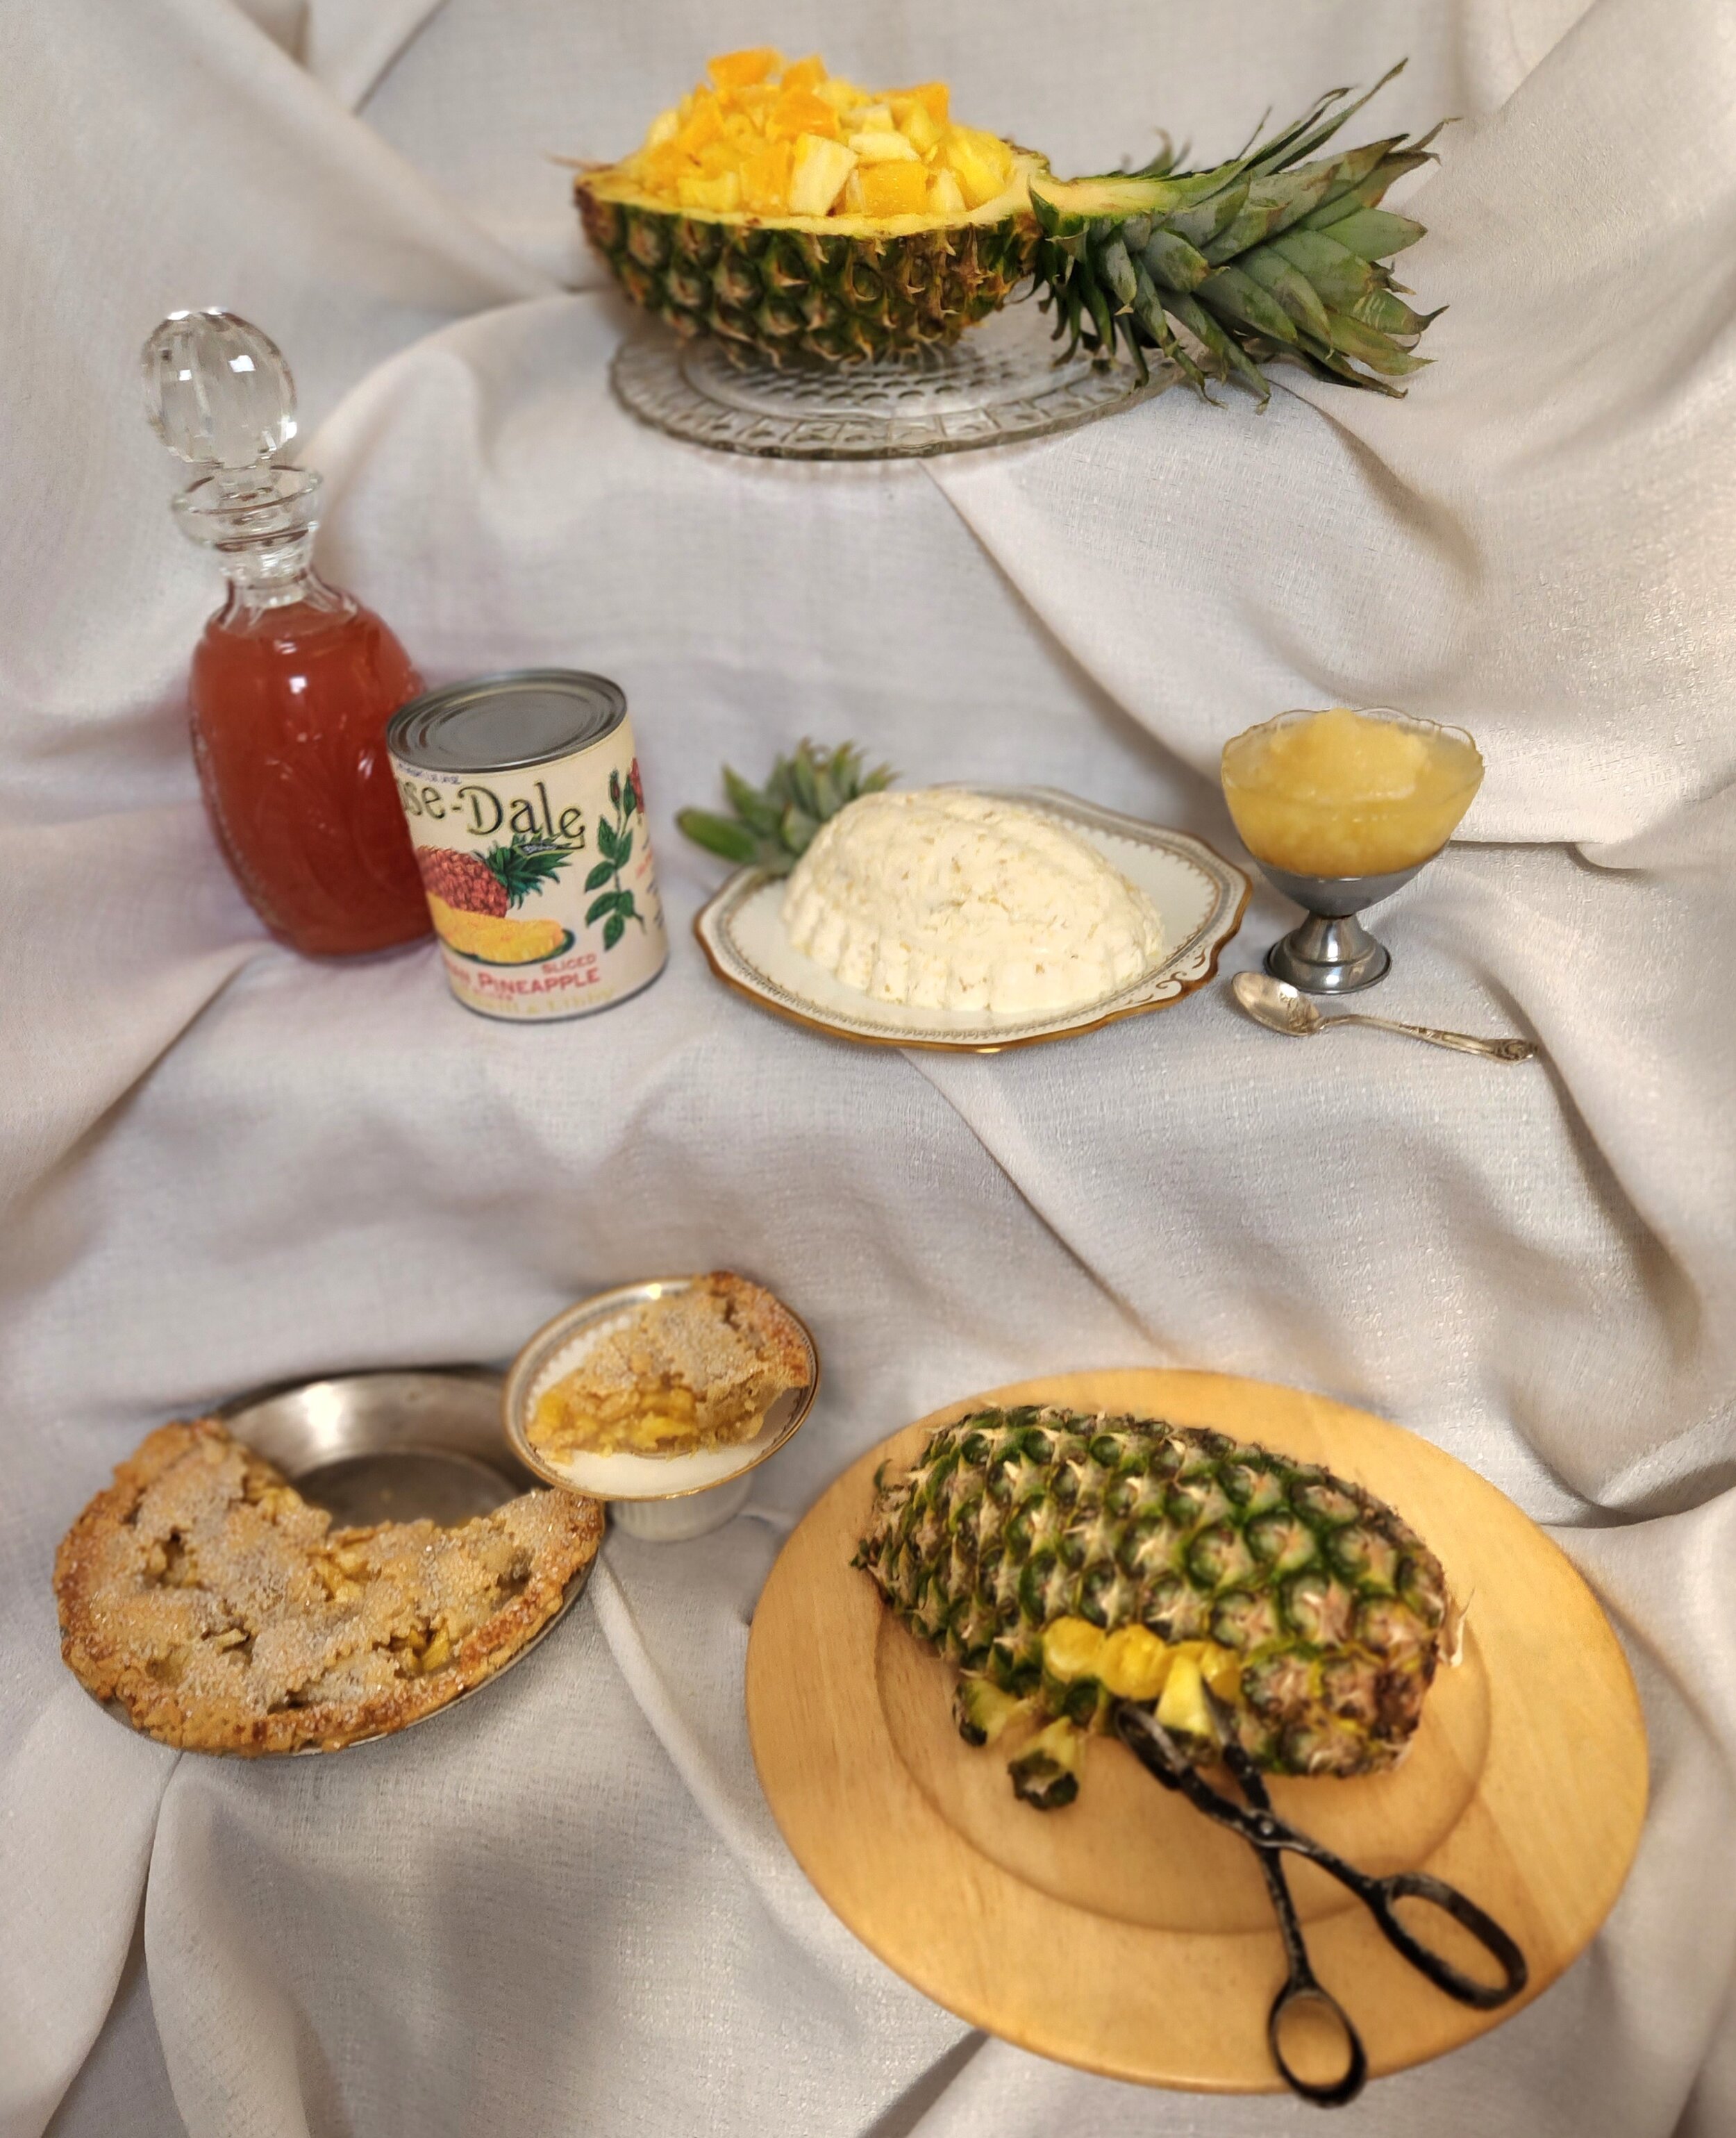
Pictured from top to bottom, left to right: Ambrosia in a pineapple shell, Fruit Punch, canned pineapple, Pineapple Bavarian Cream, Pineapple Frappé, Pineapple Pie, half pineapple with pineapple-eye snips."
Because they only grow naturally in warm climates, pineapples were exotic and highly prized in Europe in the 16th through 18th centuries. Possession of pineapples was considered a sign of wealth. Serving them to your guests was the height of generosity and welcome. Pineapples became a symbol of hospitality in America as well during the Colonial era. George Washington was especially fond of them and wrote, when speaking of fruits, “none pleases my taste as do’s the Pine.”
Pineapple motifs were popular in furniture, wallpaper, and other decorative arts. Glessner house has at least two items sporting pineapple finials – the silver oil lamp in the parlor and the brass letter holder in the library.
As popularity grew, more growers began to produce pineapples so that, by the beginning of the 19th century, they were widely imported to Europe and the United States. Florida farmers began to grow them in the late 1870s and they were shipped to Chicago via train. Mattie could get both fresh and canned pineapples for the Glessner table. They appear in many forms on the dinner menus. Let’s look this month at the ways Mattie could serve this delicacy.
Ambrosia Served in a Pineapple
Fruit Punch
Canned Pineapple
Pineapple Bavarian Cream
Pineapple Frappé
Pineapple Pie
Fresh Pineapple, with Pineapple-Eye Snip
Ambrosia or Pineapple Salad
Published in The Chicago Tribune, June 21, 1908, and attributed to Mrs. C. Vinton Henry.
1 large, fresh pineapple
6 oranges
1 cup of sugar
1 glass of sherry
Slice the pineapple lengthwise, keeping the green top attached. Hollow out the fruit leaving a solid inch of flesh inside. This will become your serving dish. Discard the core of the pineapple, peel the oranges and remove any white membrane. Slice the pineapple and oranges into sections of equal size. Spread one layer of fruit inside the pineapple shell, sprinkle with a third of the sugar. Repeat layers until all the fruit and sugar is used up. Pour a wine glass of sherry over top and let chill for at least 2 hours. Some like to add sliced bananas and maraschino cherries to this salad. This is a lovely dessert for a large party. Mrs. Glessner listed a “Pineapple Salad” many times in her Bills of Fare.
As a modern cook, I find it very interesting that what we consider “Ambrosia” today is so much closer to the “Bavarian Cream” than to the recipe published in 1908 for “Ambrosia.” I wonder how that happened?
Fruit Punch
2 quarts of brewed tea
1 pound of raw sugar
8 lemons
3 oranges
1 fresh pineapple, shredded, or a can of pineapple
1 pint strawberries, hulled
5 bananas, sliced
Brew your preferred tea, add sugar, and stir until dissolved, cool completely. Meanwhile, prepare the fruit. Grate the peel of the lemons and juice them; discard the lemon pulp. Peel and slice the oranges; discard the peel or set aside to candy later. Peel and shred the pineapple or use canned. Hull the strawberries and mash them into a pulp. Slice the bananas very thin. Add all the fruit to the cooled tea and let sit in a cold place overnight. Strain and serve in a punchbowl or decanter. This is best served very cold. Modern cooks might enjoy serving this diluted with seltzer water as it is very rich and sweet. And, for anyone thinking, “How about a nice Hawaiian Punch!?!” yes, this is where it came from.
Canned Pineapple, Chicago Style
Although Mattie canned many types of fruits and vegetables from The Rocks, the Glessner farm in New Hampshire, she would not have canned fresh pineapple. She could buy it either fresh or canned. The canned pineapple you see in the photograph is recreated from a Libby, McNeill & Libby label. This brand was chosen because all three partners were neighbors of the Glessners, residing in homes along Michigan Avenue. Certainly Mrs. Glessner would want Mattie to patronize her neighbors’ concern when purchasing canned pineapple. But, there is an even more interesting Chicago connection to pineapples during Mattie’s time.
It seems that Chicago’s former Mayor, George Bell Swift, had a bit of a pineapple controversy. Swift was appointed to fill in for the assassinated mayor, Carter Harrison, Sr., in 1893. He did not win the special election to finish out the rest of that term, but ran again in 1895 and won. Swift served until the spring of 1897 but lost the election to Carter Harrison, Jr. Never one to be deterred, Mr. Swift wasted no time expanding his influence. By June of 1897, The Chicago Chronicle published a scathing piece on his ownership of a pineapple plantation in Florida. Apparently, Swift was lobbying in Washington, D.C. asking for a one-cent tariff on imported pineapples. The paper opined that if foreign pineapples were inferior, as Swift claimed, then the American people could certainly ascertain that for themselves, and no tariff should be required. The pineapple wars went on for many years as American growers perfected growing and cultivation methods and experimented with different varieties.
As with nearly all fruits, pineapples come in many varieties. In Mattie’s time, special recipes would be published for Strawberry, Bird’s-Eye, Sugar-Loaf, Havana, Queen Anne, or Ripley pineapple varieties. Today, we usually find only one variety in our markets, which is the Smooth Cayenne. This was developed over time to be the hardiest and most easily transported thus squeezing out the other competing fruits. Most other varieties are only available in other countries or occasionally in specialty markets. Was Mr. Swift victorious?
Pineapple Bavarian Cream
2 Tablespoons granulated, unflavored gelatin (2 packets Knox)*
½ cup cold water
1 can grated pineapple, or one fresh processed pineapple, grated
½ cup sugar
1 Tablespoon lemon juice
3 cups of whipping cream, whipped
Soak the gelatin in cold water for 20 minutes. In a saucepan, heat the pineapple to boiling, reduce heat, add sugar, stir until dissolved. Add soaked gelatin, blend thoroughly. Set in a pan of ice or in a very cold place and allow to thicken. Prepare a mold by wetting it inside with cold water. When mixture is the consistency of thick jam, fold in the whipped cream and turn into the mold. Chill until firm. Unmold just before serving. If desired, you may garnish with fresh pineapple or insert several pineapple leaves for decoration. Maraschino cherries are also considered quite nice as garnish.
For the modern cook, Ellie would encourage the addition of finely diced mango, coconut, and perhaps macadamia nuts to the mixture. Mold or simply spoon into a hollowed-out pineapple for a party treat. This would be a spectacular Easter or Spring Celebration dessert.
*Fresh figs, kiwi fruit, papaya, pineapple, and prickly pears contain protease enzymes (enzymes which destroy protein). These enzymes have a softening effect on gelatin and prevent it from gelling properly. Boiling the peeled cut-up fruit for 5 minutes, however, will usually inactivate these enzymes, making all these fruits (except kiwi) usable in gelatin recipes.
Pineapple Frappé
2 cups water
1 cup raw sugar
Juice of 3 lemons
2 cups ice water
1 can grated pineapple or one fresh pineapple, shredded
Make a syrup by boiling 2 cups water and sugar for 15 minutes, add pineapple and lemon juice and simmer a few minutes until thoroughly blended. Cool, strain, add ice water and freeze into a mush. For the modern cook, you need not employ an ice cream freezer. Put the mixture into a plastic Ziploc bag or a container with a very secure lid. Then, put that container into a larger bag or container with equal parts rock salt and ice. Shake. This is a good job for the children. A frappé will be created in about 45 minutes of shaking. Discard the salty ice water. Serve in glasses.
Pineapple Pie
1 fresh pineapple, or one can
1 cup sugar
1 cup water
3 Tablespoons cornstarch
1 Tablespoon Mexican vanilla
2 Tablespoons apple sauce
Prepared pie crust, Mattie’s pie crust can be found in the November 3, 2020 column
Coarsely granulated or white sugar for sprinkling
First prepare a compote. Peel the pineapple and cut it into slices about a quarter of an inch thick. Remove the core. Make a simple syrup of 1 cup water and 1 cup sugar. Let this boil for about 5 minutes, then pour over the sliced pineapple and steep well, covered for 24 hours. The next day, drain the pineapple, saving the syrup. Boil the syrup down for another ten minutes. Skim any scum that rises. Pour syrup thus prepared over the pineapple again, add vanilla and stir. This compote can be served in many ways and can be canned as for jam if desired.
To make a pie, prepare a pie crust, spread just enough apple sauce inside the shell to glaze the crust. Mix 3 Tablespoons cornstarch with enough pineapple compote to fill the pie shell, about 3 cups. Add the vanilla. Fill the crust with the pineapple mixture and create a lattice top. Sprinkle the top with sugar. Bake in a hot oven (400˚) for 15 minutes then reduce heat to moderate (350˚) and continue to bake for about another 30 minutes. Watch the edges of the crust and protect it from burning. Cool thoroughly. This pie is best served cold.
Fresh Pineapple Processed with Pineapple-Eye Snip
John F. Pack, of Rochester, New York, patented the Pineapple-Eye Snip, designed to remove the eyes from the outer surfaces of pineapples, in 1901, US Patent No. 681, 339. You can see one of these in the Glessner House kitchen. The process was specifically used when pineapple was to be served fresh. The pineapple-eye snip was used to remove the fruit from the core, one eye at a time. The outside would be removed from the cone-shaped pieces of pineapple and the fibrous core discarded. I have tried using this device, and while it is superior to attempting to cut each eye out with a long knife, it is still extremely time-consuming, driving home the point even further that labor-intensive kitchen practices were to be expected in Mattie’s time.
We are more fortunate than Mattie was in some ways. Today’s pineapples are relatively less expensive; however, commercial processing has changed little. The same canned styles, sliced, chunked, and grated that Mattie used are still available. But, the fresh pineapples we can obtain have a far narrower spectrum; they are nearly always of just one variety. Regardless, pineapples are still a fantastic gift of nature and should be incorporated into menus, especially this time of year. Happy Spring Everyone!
. . . and at the back of the house . . . (posted February 28, 2023)
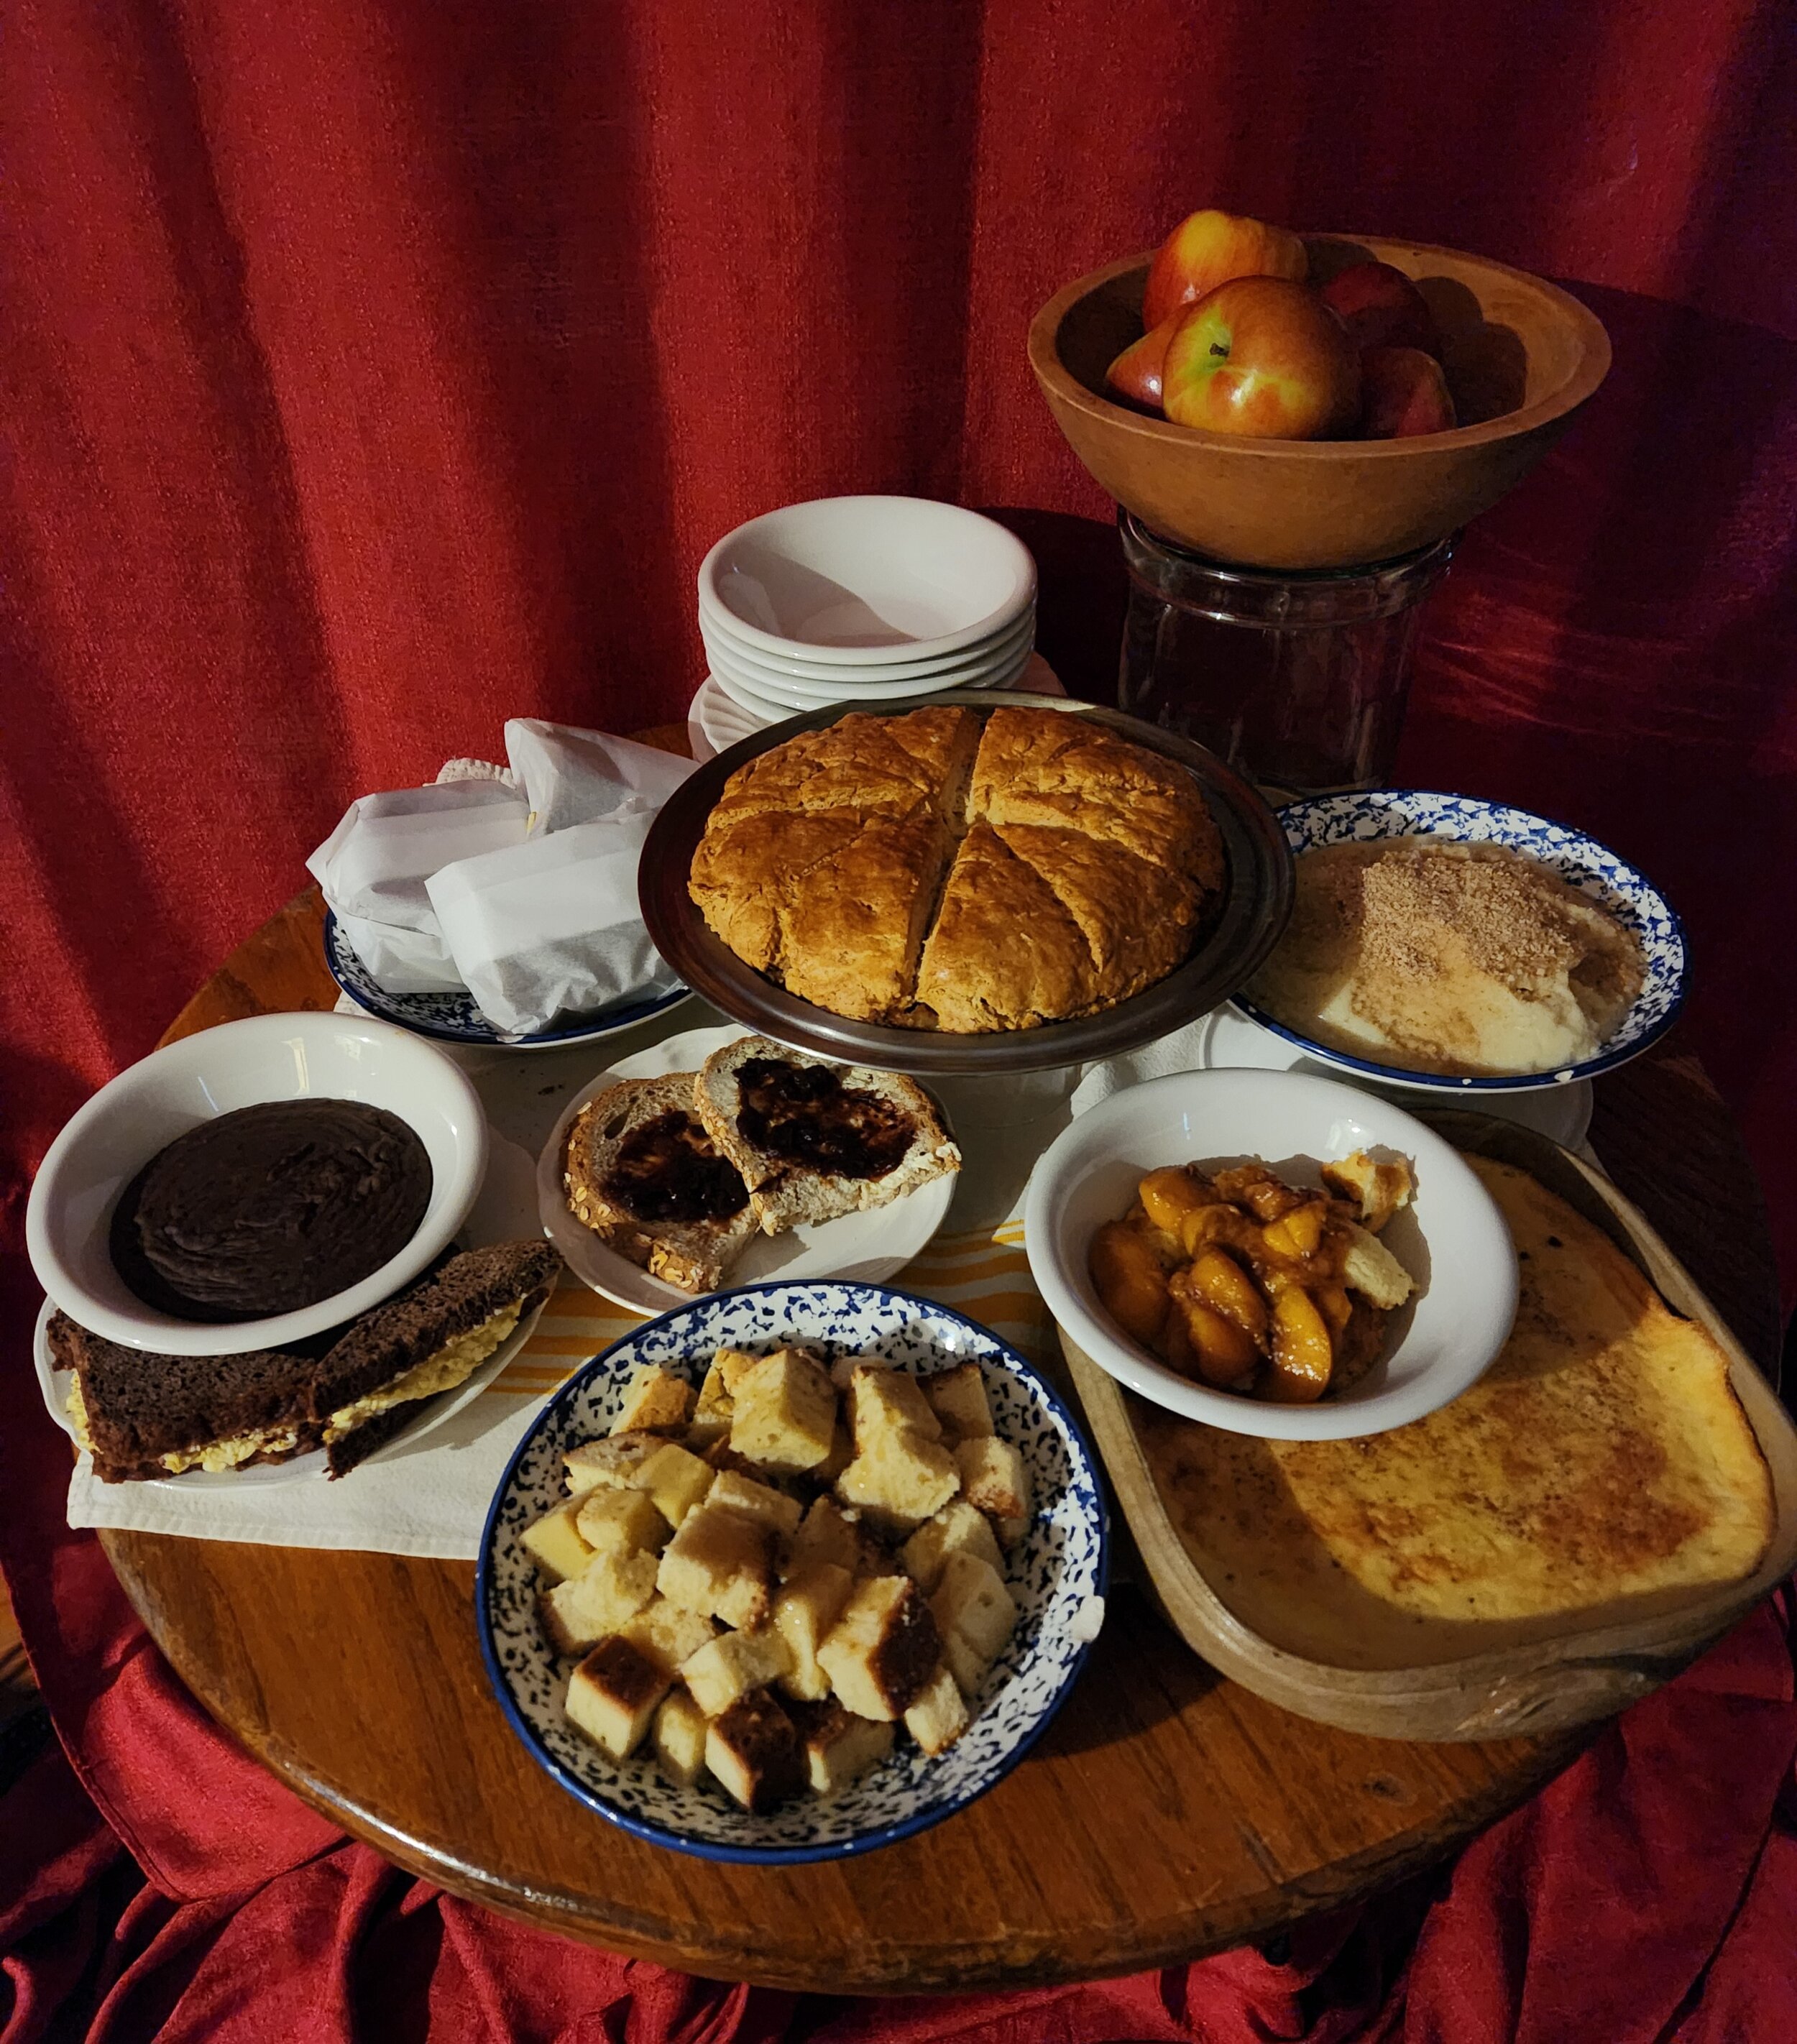
On March 10, 1892, Mrs. Glessner held a simple dinner party. Mattie was new, and she must have been pleased with such uncomplicated fare. You see, every single day, no matter what the Glessner family was planning for dinner, Mattie had to feed the seven or eight servants three meals in addition to the family needs. Some of the fancier dinner parties would take Mattie an entire week to prepare, cooking and baking different dishes every day and keeping them fresh until the night of the party. Rarely, unless it was just the family at home, would Mattie serve the same meal to both guests and servants. Social norms demanded a strict demarcation between the family’s and the servants’ food.
Traditionally, servants’ meals consisted of dishes made from leftovers* from the preparation of the family’s meals, as well as food in more basic forms. For instance, if Mattie had a bushel of apples in the cellar (from The Rocks, the Glessners’ summer home in New Hampshire), the servants might have a bowl on the table in the servants’ dining hall and eat them out of hand. For the Glessners, Mattie would make a compote or a pie. Occasionally, Mrs. Glessner might call for something like roasted duck or partridge on a salad. Mattie would use the breast meat for the guests and cut up the rest of the bird for the servants, making hand pies or a stew.
Here is the dinner party planned for March 10, 1892:
Black Bean Soup
Boiled Turkey—Oyster Sauce
Cauliflower
Cranberries
Potatoes
Plain Lettuce Salad
Sponge Pudding with Creamy Sauce
Cake
Fruit—Coffee
Let’s imagine what Mattie would have made for the servants’ table with the ingredients from this meal.
Black Bean Soup
This was a Glessner House favorite. We see it in many menus. (You can find the recipe in the March 2, 2021, Cooking with Mattie column.) It is a hearty, filling offering. Mattie would probably have made a large pot to serve both the guests and the servants. Hard-boiled eggs are the traditional garnish for black bean soup, but Mattie would probably have not garnished the soup for the servants. Instead, she might have chopped up any extra eggs and created an egg salad which could be made into sandwiches. She might have made them ahead, wrapped them in waxed paper, and stored them in the cold closet so they could be taken out for meals as needed. Honestly folks, make the black bean soup and have an egg salad sandwich on the side. It’s delicious!
Boiled Turkey with Oyster Sauce
For the servants, Mattie might have taken all the small pieces of turkey, those not conducive to lovely slices for the guests, and chopped them into a hash. The remaining oysters and sauce could be added, along with carrots and potatoes and put into a casserole with a biscuit or dumpling crust. Modern cooks could use the meat from a rotisserie chicken with the addition of some stewed carrots and potatoes to make a lovely pie. Place all the turkey or chicken with the vegetables into a pie or casserole dish.
Dumpling Crust
2 cups unbleached flour
½ teaspoon salt
2 teaspoons baking powder
½ cup butter, lard or other solid fat
1 cup milk
Mix all together, roll into a simple circle. Top the pie or casserole dish. Score for six or eight servings. Bake in a 350˚ oven until entirely brown on top, about 45 minutes.
Cauliflower
Mrs. Glessner does not give instructions as to how the cauliflower was to be served in this menu. Boiled or steamed with a sprinkling of cheese and breadcrumbs was most likely, but the cauliflower that was overcooked or not consumed by the dinner guests could easily be turned into mashed cauliflower. With the addition of some parmesan cheese and more breadcrumbs, the cauliflower could become a simple, frugal dish to serve the servants.
Cranberries
It is not specified here, but in other places, “Cranberry Relish” is mentioned. Mattie would make this in the fall and can it. There would be glass jars on the shelf in the pantry ready for use. A bit of fresh butter and a dollop of cranberry relish would make another sandwich for servants’ evening meal, or supper. The servants would have their most substantial meal in the middle of the day, just before or just after the family luncheon depending on the timing and how many guests there were. I imagine that Mattie herself did not always have time to sit down at table with the rest of the staff at regular meal times, and that she often ate standing up near the stove with one hand stirring something. I’ll bet you wonder how I know this.
Plain Lettuce Salad
In March, the expensive delicacy of hot house lettuce would not be wasted on the staff. Certainly, servants would eat lots of lettuce and other fresh-from-the-garden vegetables in the summer months at The Rocks, but it is doubtful that Mattie would have served such a fancy treat in the servants’ dining hall at this time of year. To provide a salad for the staff, Mattie would be more likely to serve canned peaches or another fruit.
Sponge Pudding with Creamy Sauce
Sponge pudding is simply a custard. For the guests, Mattie would have made individual ramekins of pudding for each guest and garnished them with the creamy sauce and perhaps a piece of candied orange peel to honor Mr. Glessner’s love of oranges. For staff, the same recipe would be made in a large casserole dish so it could be dished out one serving at a time. The servants might or might not have received creamy sauce.
¼ cup sugar
½ cup flour
2 cups milk, boiled
¼ cup butter
5 eggs, separated, yolks beaten, whites whipped
Large pan of hot water
Mix the sugar and flour, wet with a little cold milk, and stir into the boiling milk. Cook until it thickens and is smooth. Add the butter, stir until smooth. Stir in the well-beaten egg yolks, then add the stiffly-beaten whites. Pour into cups, or into a shallow dish. Set your cups or dish into a large pan of hot water about halfway up the sides of your container. Bake at 325˚for about an hour until knife inserted halfway between center and edge comes out clean. You may also wait until the top cracks for certain doneness, but this will not yield as jiggly a pudding.
For the Creamy Sauce
2 cups milk
2 eggs
3 ounces (⅓ cup plus 2 teaspoons) raw sugar
1 Tablespoon of brandy
1 teaspoon freshly grated nutmeg
Boil the milk, beat the eggs while the milk is coming to a boil and stir them in as soon as it does, then add the sugar. Stir thoroughly. Put the mixture into a double boiler (modern cooks can use a metal mixing bowl that fits inside one of your saucepans). Boil the water in the double boiler and continue to stir until the mixture thickens, remove from heat. Keep warm over hot water until ready to serve over pudding or cake. Do not permit to re-boil. When just ready to serve, stir in brandy, spoon over desired treat, and sprinkle with freshly-grated nutmeg.
Cakes
Cake was ubiquitous at Glessner House, almost as popular as oranges. A simple 1-2-3-4 cake (recipe in the April 22, 2020, Cooking with Mattie column) would probably be made on a nearly daily basis by Mattie. It was just there, like sunshine, daily milk deliveries, and oranges for Mr. Glessner. It is a simple pound cake that pleases every palate and is always available to be dressed up or down at a whim. Just the perfect cake for servants and family alike. A bit of Mrs. Glessner’s honey drizzled over the top doesn’t hurt a thing, or maybe some of those peaches?
Now, off you go, there are family meals to prepare. Always think, in the back of your mind, as Mattie certainly did: what am I going to do with the leftovers*?
* The word “leftover” referring to food not consumed but still edible for another meal, dates to the 1880s at least. So, Mattie knew that word, it wasn’t invented in the 1950s.
A Spectacular Season (posted February 1, 2023)

One hundred and twenty-five years ago this month, Glessner House was full of flowers, party favors, wedding gifts, and scores of callers and well-wishers. Miss Frances Glessner had her formal debut on November 24, 1897, then promptly announced her engagement to Blewett Lee. The wedding took place on Wednesday, February 9, 1898.
Mrs. Glessner describes the reception in her journal:
“Our tea table was set in the library. We put on a fine damask cloth and then our old Maltese lace cloth. We had two pyramids of cake, white and black, one on each end. On top of these were the little brides used on our wedding cakes. We had a splendid basket of pink and white roses and ferns on the table. Then there were cakes the shape of a heart—candies with little white bow knots on top of them. We had frozen egg nog in the hall—tea and coffee in the alcove… After the general company had gone, we had a dinner party of thirty-two.”
Sadly, we do not know what the “little brides” atop the cakes looked like. They have been lost to history. There are no images from the wedding other than the formal studio photographs of Frances and her bridal party. Mrs. Glessner was extremely busy.
Three and a half months of constant entertaining and festivities preceded the nuptials.
The whirlwind of activity between early November and the middle of February kept Mattie very busy. The service obligations included:
· Between two and eleven extra people for Sunday supper fourteen weeks in a row
· Four Reading Class luncheons for up to forty ladies each time
· Debut party for up to sixty guests
· Thanksgiving Dinner
· Five Ladies Luncheons averaging eighteen ladies each
· At least six formal dinner parties
· One dinner dance for forty-three, plus eleven orchestra members, with a midnight supper
· Christmas Eve announcement of George Glessner and Alice Hamlin’s engagement, with extra guests in attendance
· Christmas dinner
· Frances Glessner and Blewett Lee’s wedding with refreshments immediately after, and a formal dinner for thirty-two in the evening
· Ten for luncheon and fifteen for dinner the day after the wedding
· Nine for luncheon and ten for dinner two days after the wedding
· And please remember, Mrs. Glessner accepted callers every Tuesday; some weeks in the winter of 1897-1898 there were as many as thirty visitors.
Mattie made all the food for all those gatherings. Mrs. Glessner only refers twice to help for Mattie in her journal from this time. For the dinner dance held on December 16, 1897, Mrs. Glessner mentions that she had a “young woman from the Women’s Exchange come and help with the favors.” In February, she mentions that Mattie baked the wedding cakes, but they were sent to “Smiley” for icing. This refers to Charles H. Smiley who was a prominent and very successful caterer. Mr. Smiley was THE caterer in Chicago and the Glessners had a long history with him. Bill Tyre wrote an extensive blog article about Smiley which can be found here. Smiley was notable for his enterprising nature and stellar reputation when it came to entertaining in Chicago. When Booker T. Washington visited Chicago to meet with distinguished Black businessmen, Smiley was on the list of entrepreneurs with whom Washington met. As quoted in The Chicago Food Encyclopedia (University of Illinois Press, 2017), Washington referred to Smiley as having “character, good powers of observation, ambition and brains.” I’m certain Mattie was happy to turn the cake decoration over to his competent staff (I do so wish that I could!). That’s it. As far as we know, everything else was Mattie alone.
Clearly, this tsunami of entertaining took a toll on Mrs. Glessner. She became quite ill and took to her bed by February 21st and remained there for over four weeks. There is no mention of a collapse on Mattie’s part, so we can assume it did not occur. Her workload did lighten, however, after the three months of near constant entertaining.
We are so fortunate to have the actual menus from quite a few of these occasions, and perhaps we will attempt them in future columns. Several of the events featured more than one service of food, such as the Dinner Dance, held on December 16th, which had not only a dinner for forty-three, but a midnight supper as well. That party didn’t end until 2:00 am.
Just like the Dinner Dance, the wedding had essentially two services of food. Immediately after the ceremony, there was a refreshment table as described by Mrs. Glessner above and recreated in the photograph.
In Mattie’s time, a Wedding Cake was more often a dark fruit-laden cake. White cake for weddings was avant-garde in 1898. To have both must have been the height of entertaining. It was common practice at this time for guests who were not able to attend a wedding to be sent a piece of cake in a small cardboard box. We know this happened for Frances’s nuptials because Mrs. Glessner’s journal contains several thank-you notes for gifts of cake after the wedding. We don’t know if it was the Black Cake or the White Cake, but I’d like to think that she packaged the small heart-shaped ones for gifting.
The Wedding Reception
Pyramid of White Cake
Pyramid of Black Cake
Little Heart-Shaped Cakes
Bon Bons with White Bows
Black Cake
If you look up Wedding Cake in a nineteenth-century cookbook you will get a recipe for something that sounds more like a fruitcake than anything you’d find at a wedding today. This confection represents the transition from steamed puddings such as Figgie Pudding, to smoother cakes made with more flour and leavening and baked instead of steamed. This is, essentially, a baked Christmas (or Figgie) Pudding. For Mattie, a Black Cake would be this.
1 pound butter (2 cups)
1 pound sugar (2 scant cups)
12 eggs, separated
1 pound flour (4 cups)
2 teaspoons each cinnamon and mace
1 teaspoon each nutmeg and allspice
½ teaspoons cloves
4 ½ teaspoons baking powder
1 ½ teaspoons baking soda
1 ½ teaspoons salt
2 Tablespoons Mexican vanilla
2 pounds raisins
2 pounds currants
1 pound dried apricots
1 pound candied orange peel
1 pound chopped almonds
1 cup brandy or rum
1 lemon
Chop all the fruit into uniform sizes equal to raisins. Put fruit into a large bowl and cover with the brandy. Set aside for at least an hour; all day or overnight also works. Stir the fruit several times to encourage it to soak up the brandy. Mix the sugar with the spices. Mix ¼ cup of flour with the fruit, stir to coat. Sift the remaining flour with the baking powder, baking soda, and salt. Separate the eggs. Whip the egg whites, set aside. Cream the butter until very light. Add the sugar and spices, then the egg yolks. Grate the lemon peel, then juice the lemon. Add the grated lemon peel and juice to the batter, add the flour, then the fruit. Fold in the whipped egg whites.
Bake in several tins of graduated sizes in a 350˚oven for about 30 minutes until a knife inserted comes out clean. Cake can be glazed with a brandy glaze made of one part brandy and two parts apricot jam, heated until a smooth syrup is formed. Glaze the cake by pouring over or brushing with a pastry brush for a shiny finish.
White Cake
1 cup butter
4 cups flour
2 cups powdered sugar
2 teaspoons baking powder
1 cup milk
Whites of 12 eggs
1 teaspoon almond extract
Cream butter, add the flour beating until a smooth paste is formed. Beat the egg whites to a stiff froth and gradually add the sugar and almond extract. Combine two mixtures quickly and bake in tins of graduated sizes at 350˚ for about 30 minutes. Grated coconut is very nice on top of white frosting for a festive occasion.
Mrs. Glessner tells us, “After the general company had gone, we had a dinner party of 32.” These distinguished guests feasted on:
Oysters on Half Shell
Brown Bread & Butter
Olives—Celery
Chicken Cream Soup
Fish—Cucumbers—Potatoes
Fillet of Beef with Brown Sauce
Chestnuts—Creamed Mushrooms
Celery—Jelly
Salad—Sliced Ham
Hot Crackers
Ice Cream in Shape of Four-Leaf Clover
Cake
Fruit—Coffee
Bon Bons
Cigars
Champagne Throughout
It is astonishing to note that Mattie had ten extra guests for luncheon and fifteen guests for dinner on Thursday, the day after the wedding. Since so many out of town family and friends stayed at Glessner House or with nearby neighbors, the Keiths, Friday found nine extra for luncheon and an additional ten for dinner. Sadly, Mrs. Glessner does not include the menus for these services in her Bills of Fare. I wonder what Mattie served…
Mrs. Glessner took to her bed by February 21st, less than two weeks after the wedding and the debut season’s conclusion. She was ill for more than a month. The doctor even had to be called! No doubt Mattie made many invalid trays for her over those weeks. Let that be a lesson to you. Do not wear yourself out with parties! Stay calm and healthy during February. Perhaps a brief Valentines’ Day celebration, but that’s it. Relax.
For She’s a Jolly Good Fellow (posted January 3, 2023)
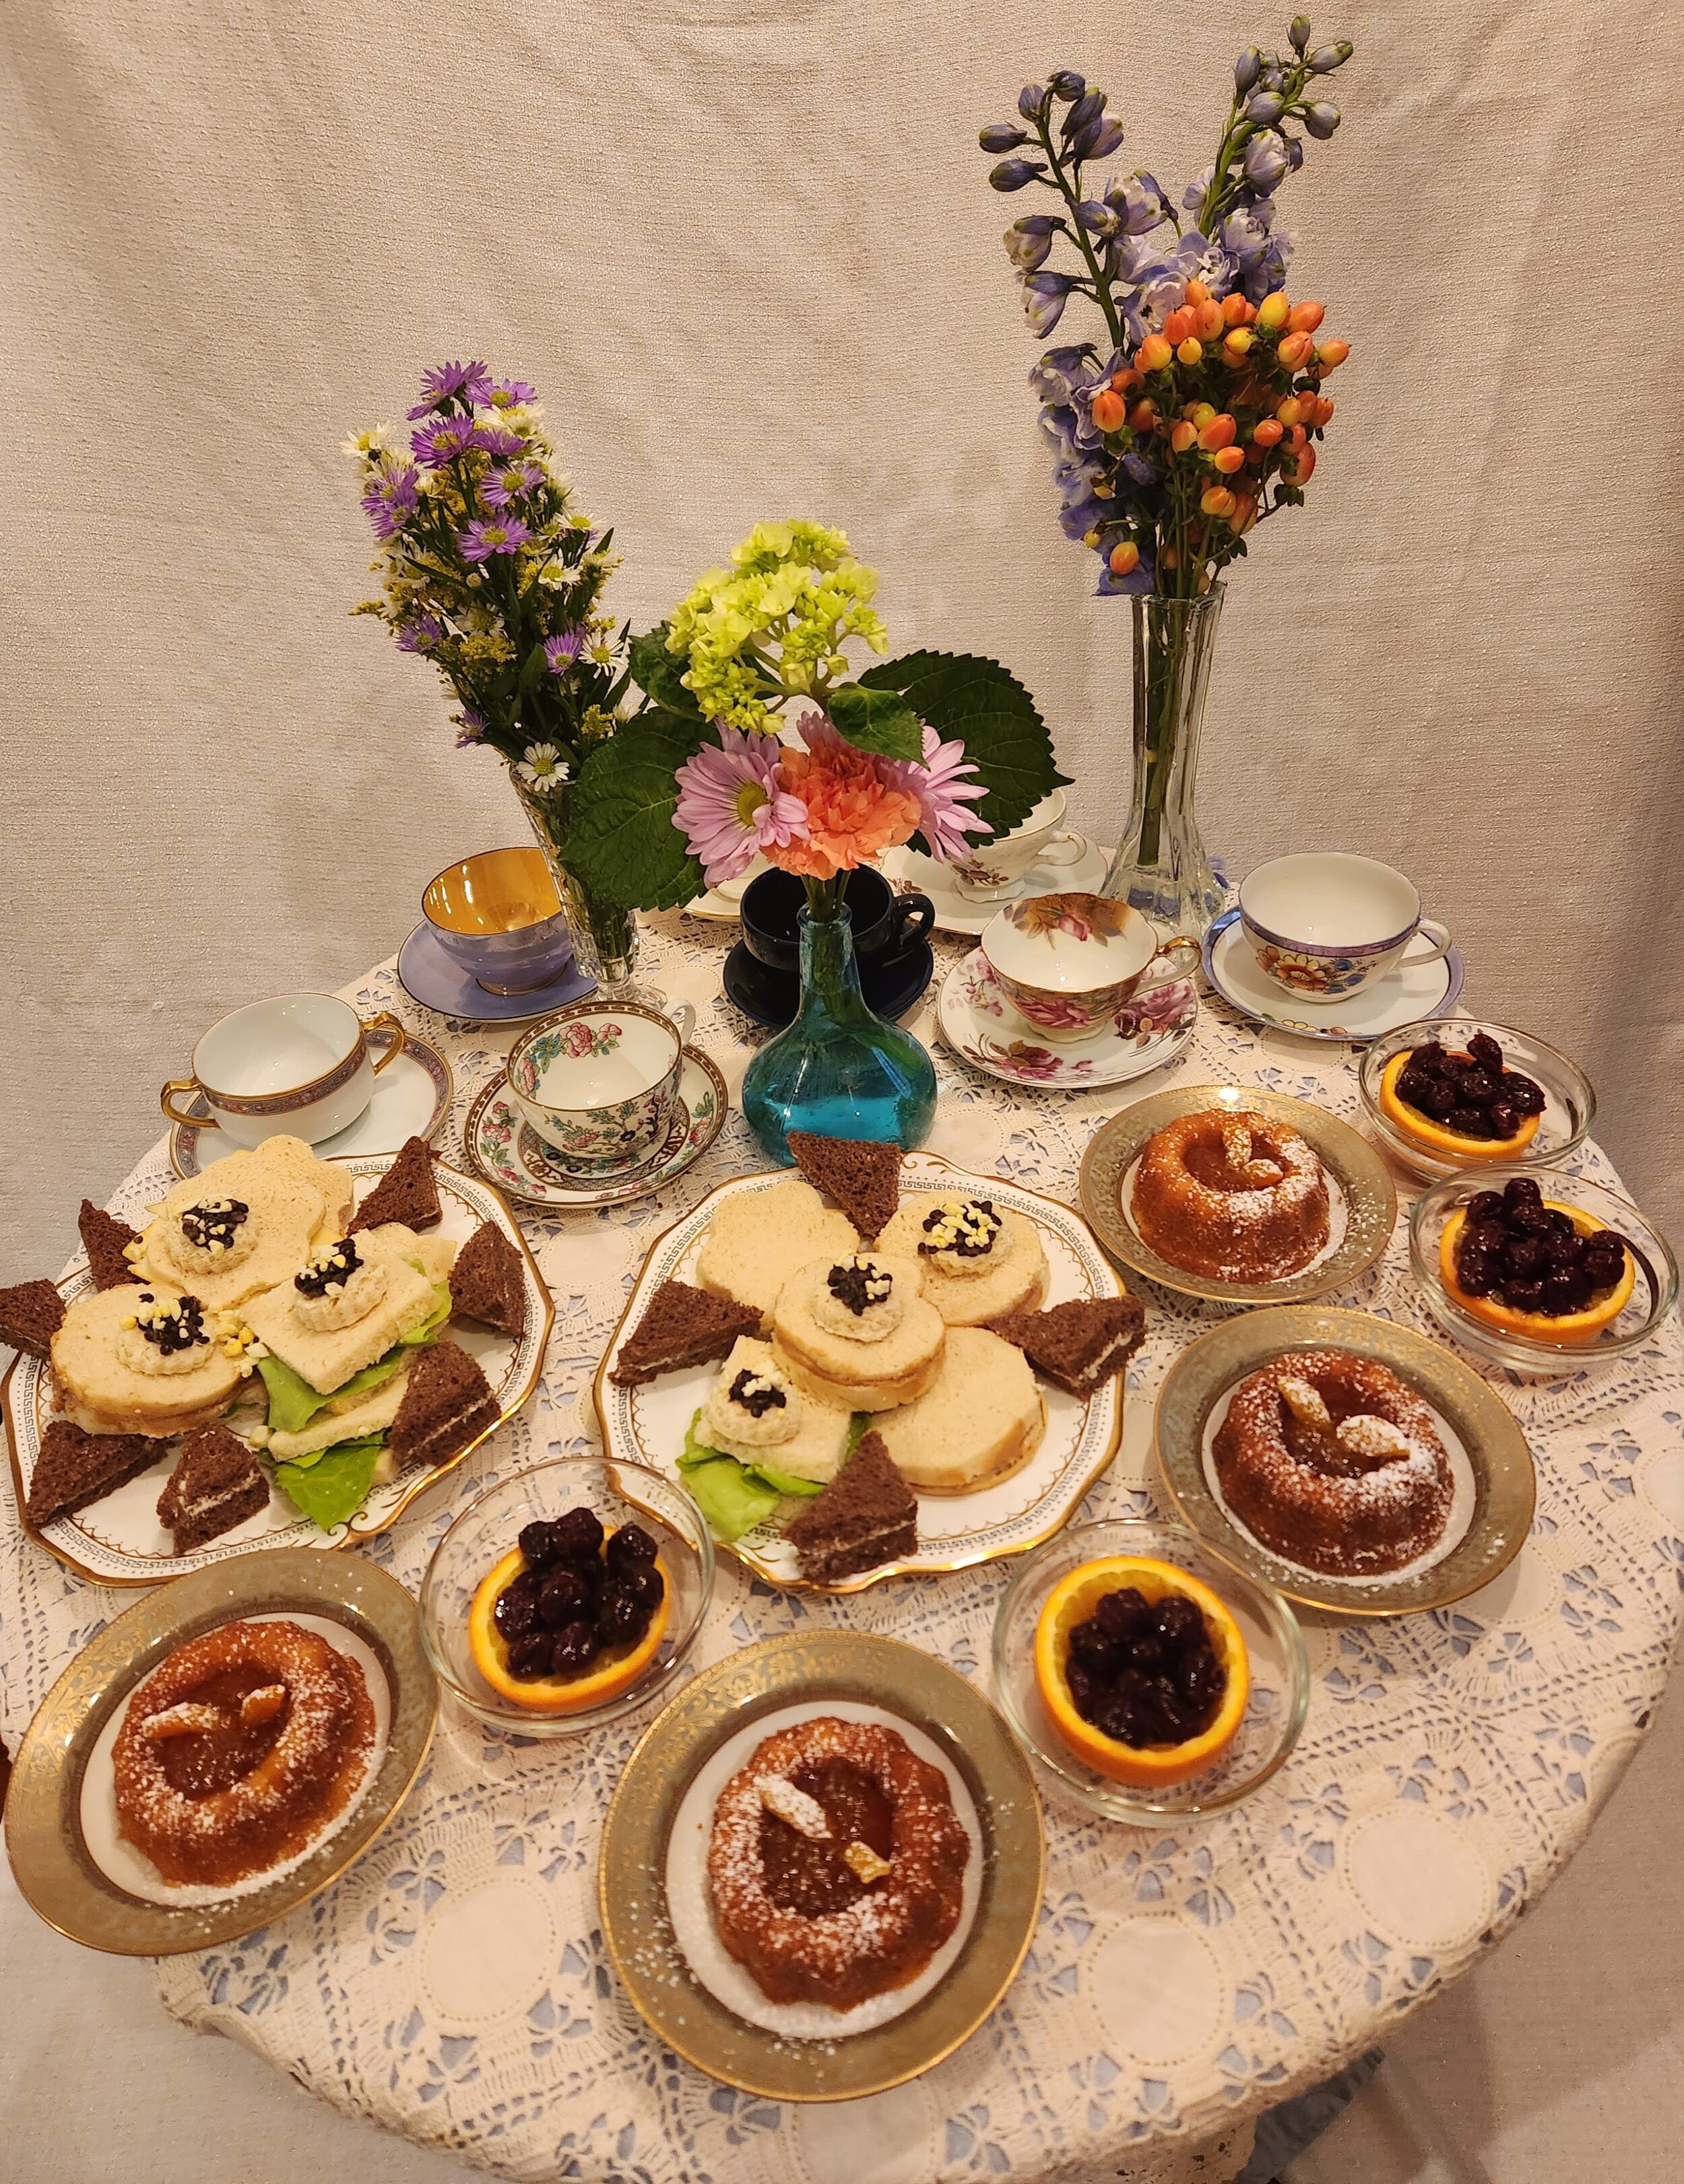
At Glessner House, the holidays may have gone on a little bit longer than for other families on Prairie Avenue. This is because Frances Glessner’s birthday was New Year’s Day. There are mentions of “birthday breakfasts” (where the birthday cake was served) in Mrs. Glessner’s journals. On January 2, 1898, she notes that the previous day she received a number of birthday greetings in the mail, as well as flowers from several people, and assorted teacups from female friends. In this month’s column, we are going to imagine that it is January 1, 1898, Mrs. Glessner’s 50th birthday. A small supper with a few close friends might be in order. Mattie could have made:
Oranges Filled with Brandied Cherries
Assorted Sandwiches of Cheese, Caviar, Lettuce,
Pâté de Foie Gras, etc.
Brown and White Bread and Butter
Individual Cakes with Apricots
Tea
Oranges Filled with Brandied Cherries
On December 29, 1897, just a few days before her birthday, Mrs. Glessner hosted a luncheon for 13 ladies. Perhaps these are some of the friends who brought her teacups? At that meal, “oranges cut in half with brandied cherries” are on the menu. This seems like an excellent choice for a festive occasion, and so Mrs. Glessner might have asked Mattie to serve them again for her birthday supper.
We’ve talked many times in the column about Mr. Glessner’s affinity for oranges. He insisted on an orange at every meal and is said to have peeled them with his penknife in one long coil as an amusing feat. By Mattie’s time with the Glessners, oranges were readily available, shipped in by rail, but they were still expensive, more than twice as much as apples. On January 1, 1898, The Chicago Daily Tribune reported, “A number of cars of oranges were shipped during the month of December, which were of good color and well matured…. oranges sold in this market from $3.00 to $3.25 per box (wholesale)…it is estimated that about 6,000 carloads were shipped out of southern California during 1897. The prospects for 1898 are that at least 8,000 carloads of oranges will be sent out from California.” For comparison, on January 6, 1898, The Inter Ocean has apples at $1.50 per box. This paper also quotes prices for oranges from Florida and Mexico at about the same prices as quoted for California oranges.
Brandied cherries were something Mattie would have made the previous fall and been feeding and tending for months. Please enjoy both the way Mattie would have done it, and a modern method.
Brandied Cherries
2 pounds, about 3 cups raw or frozen cherries, Mattie’s would come from The Rocks in New Hampshire
½ cup raw sugar, more if the cherries are quite sour
1 cup brandy
Mattie would have cooked the cherries and added sugar. She would have cooked until the liquid had reduced by half. Then she would transfer the cherries to glass jar with a tight-fitting lid. Mattie would have added about ½ cup of brandy, stirred, then set in a dark, cool place. About once a week, she would have opened the jar, added a bit more brandy, and stirred the cherries thoroughly. This can be repeated indefinitely until it is time to serve the cherries. Other fruits such as peaches, pineapples, etc. can be added as well. As long as enough liquor is introduced, the fruit will not spoil.
Today, one can cook the cherries over a very low heat, with the sugar, until the liquid has reduced by about half. Then, add 1 cup of brandy and continue to cook on very low heat for about another 2 hours. You want most of the alcohol to “cook off” otherwise, Mr. Glessner will not like it at all. Cool the cherries completely if filling sliced oranges with the cherries. Warm, the cherries thus prepared are excellent over ice cream.
Assorted Sandwiches
Mrs. Glessner tasked Mattie with sandwiches for both luncheons and suppers. Nearly always, they are listed as “sandwiches of cheese, caviar, lettuce, pâté de foie gras, etc.” She often lists “brown bread and butter” in addition to the sandwiches. This is quite common in Mattie’s day. Ladies’ luncheons, and light suppers were often very simple-carb heavy as we might term it today. Somehow, they believed that meat, especially red meat, was heavier and more masculine. You rarely find any animal protein other than chicken or perhaps seafood on a ladies’ luncheon menu. The bread, too, needed to be very light, and the fillings very delicate and thinly spread. Perhaps this is why Mrs. Glessner included “brown and white bread and butter,” to give a little more substance.
Sandwich-making is where you can really get creative, and I’m sure Mattie did, too. Margaret Powell, an author and a former household cook herself, tells us in her book, Below Stairs, that savories and sandwiches are the most fun for the cook. They let her personality come out and are fabulous ways to use up tasty bits of scraps too small to repurpose. Have fun with your sandwiches! Slice the bread very thinly, spread the spreads, or dollop them for open faces options. If you have never had a simple lettuce sandwich, you are missing out. Spread the bread with unsalted butter, top with a gorgeous leaf of hothouse lettuce such as Boston or Butter, top with another slice of buttered bread. This is probably the only 19th century sandwich where you cut the bread first; you want the lace of lettuce to be visible on the sides, it’s more elegant that way. All other sandwiches should be made first, then cut, unless you are using bread which was baked in a formed pan such as the heart and flower shape in the photograph.
Caviar was often on Mrs. Glessner’s menus, nearly always in the form of sandwiches. It was common, in Mattie’s day, to garnish caviar with a simple sprinkling of finely chopped hard-cooked eggs and serve open face so the caviar was visible. Pâté de foie gras was also a popular sandwich option. Mattie would have sourced it from a local shop ready to serve in a tin or pot. She would not have made it herself. If you choose to substitute peanut butter for pâté on your sandwich platter, no one will judge you.
Individual Cakes with Apricots
1 ½ cups unbleached flour
1 yeast cake or packet of yeast or 2 ¼ teaspoon granulated yeast
½ cup warm water (110˚)
⅔ cup butter, softened
4 eggs
½ cup raw sugar
1 teaspoon vanilla
Make a sponge of ½ cup of flour and the yeast dissolved in water. Set aside and cover until doubled in bulk. Meanwhile cream the butter and sugar, add two of the eggs, the vanilla, and the remaining flour. Beat thoroughly. Add the remaining eggs, one at a time, beating after each addition. Add the risen sponge and blend completely. Pour into greased small tins, gem pans, muffin tins, mini bundt cake tins, or other small containers. Bake in a moderate (350˚) oven for 20 minutes or until slightly brown on top. Once cool, remove from pans, fill indentation in the cake with apricot jam, or cut small hole into center of finished cake and add the jam. Garnish with sliced, dried apricots, and powdered sugar over them for a festive touch. Candles may be added if appropriate.
As we celebrate Mrs. Glessner’s 175th birthday, and imagine her 50th, Mattie and everyone else at Glessner House wishes you and yours a happy, healthy, and delicious New Year!
Note: For She’s a Jolly Good Fellow would have been the song sung at the birthday table, if one was sung at all. It was popular in the U.S. by the time of the Civil War. The Happy Birthday song we know today had its origins in the early 1890s but did not appear in published form until 1912.
We Wish You a Mattie Christmas (posted December 6, 2022)
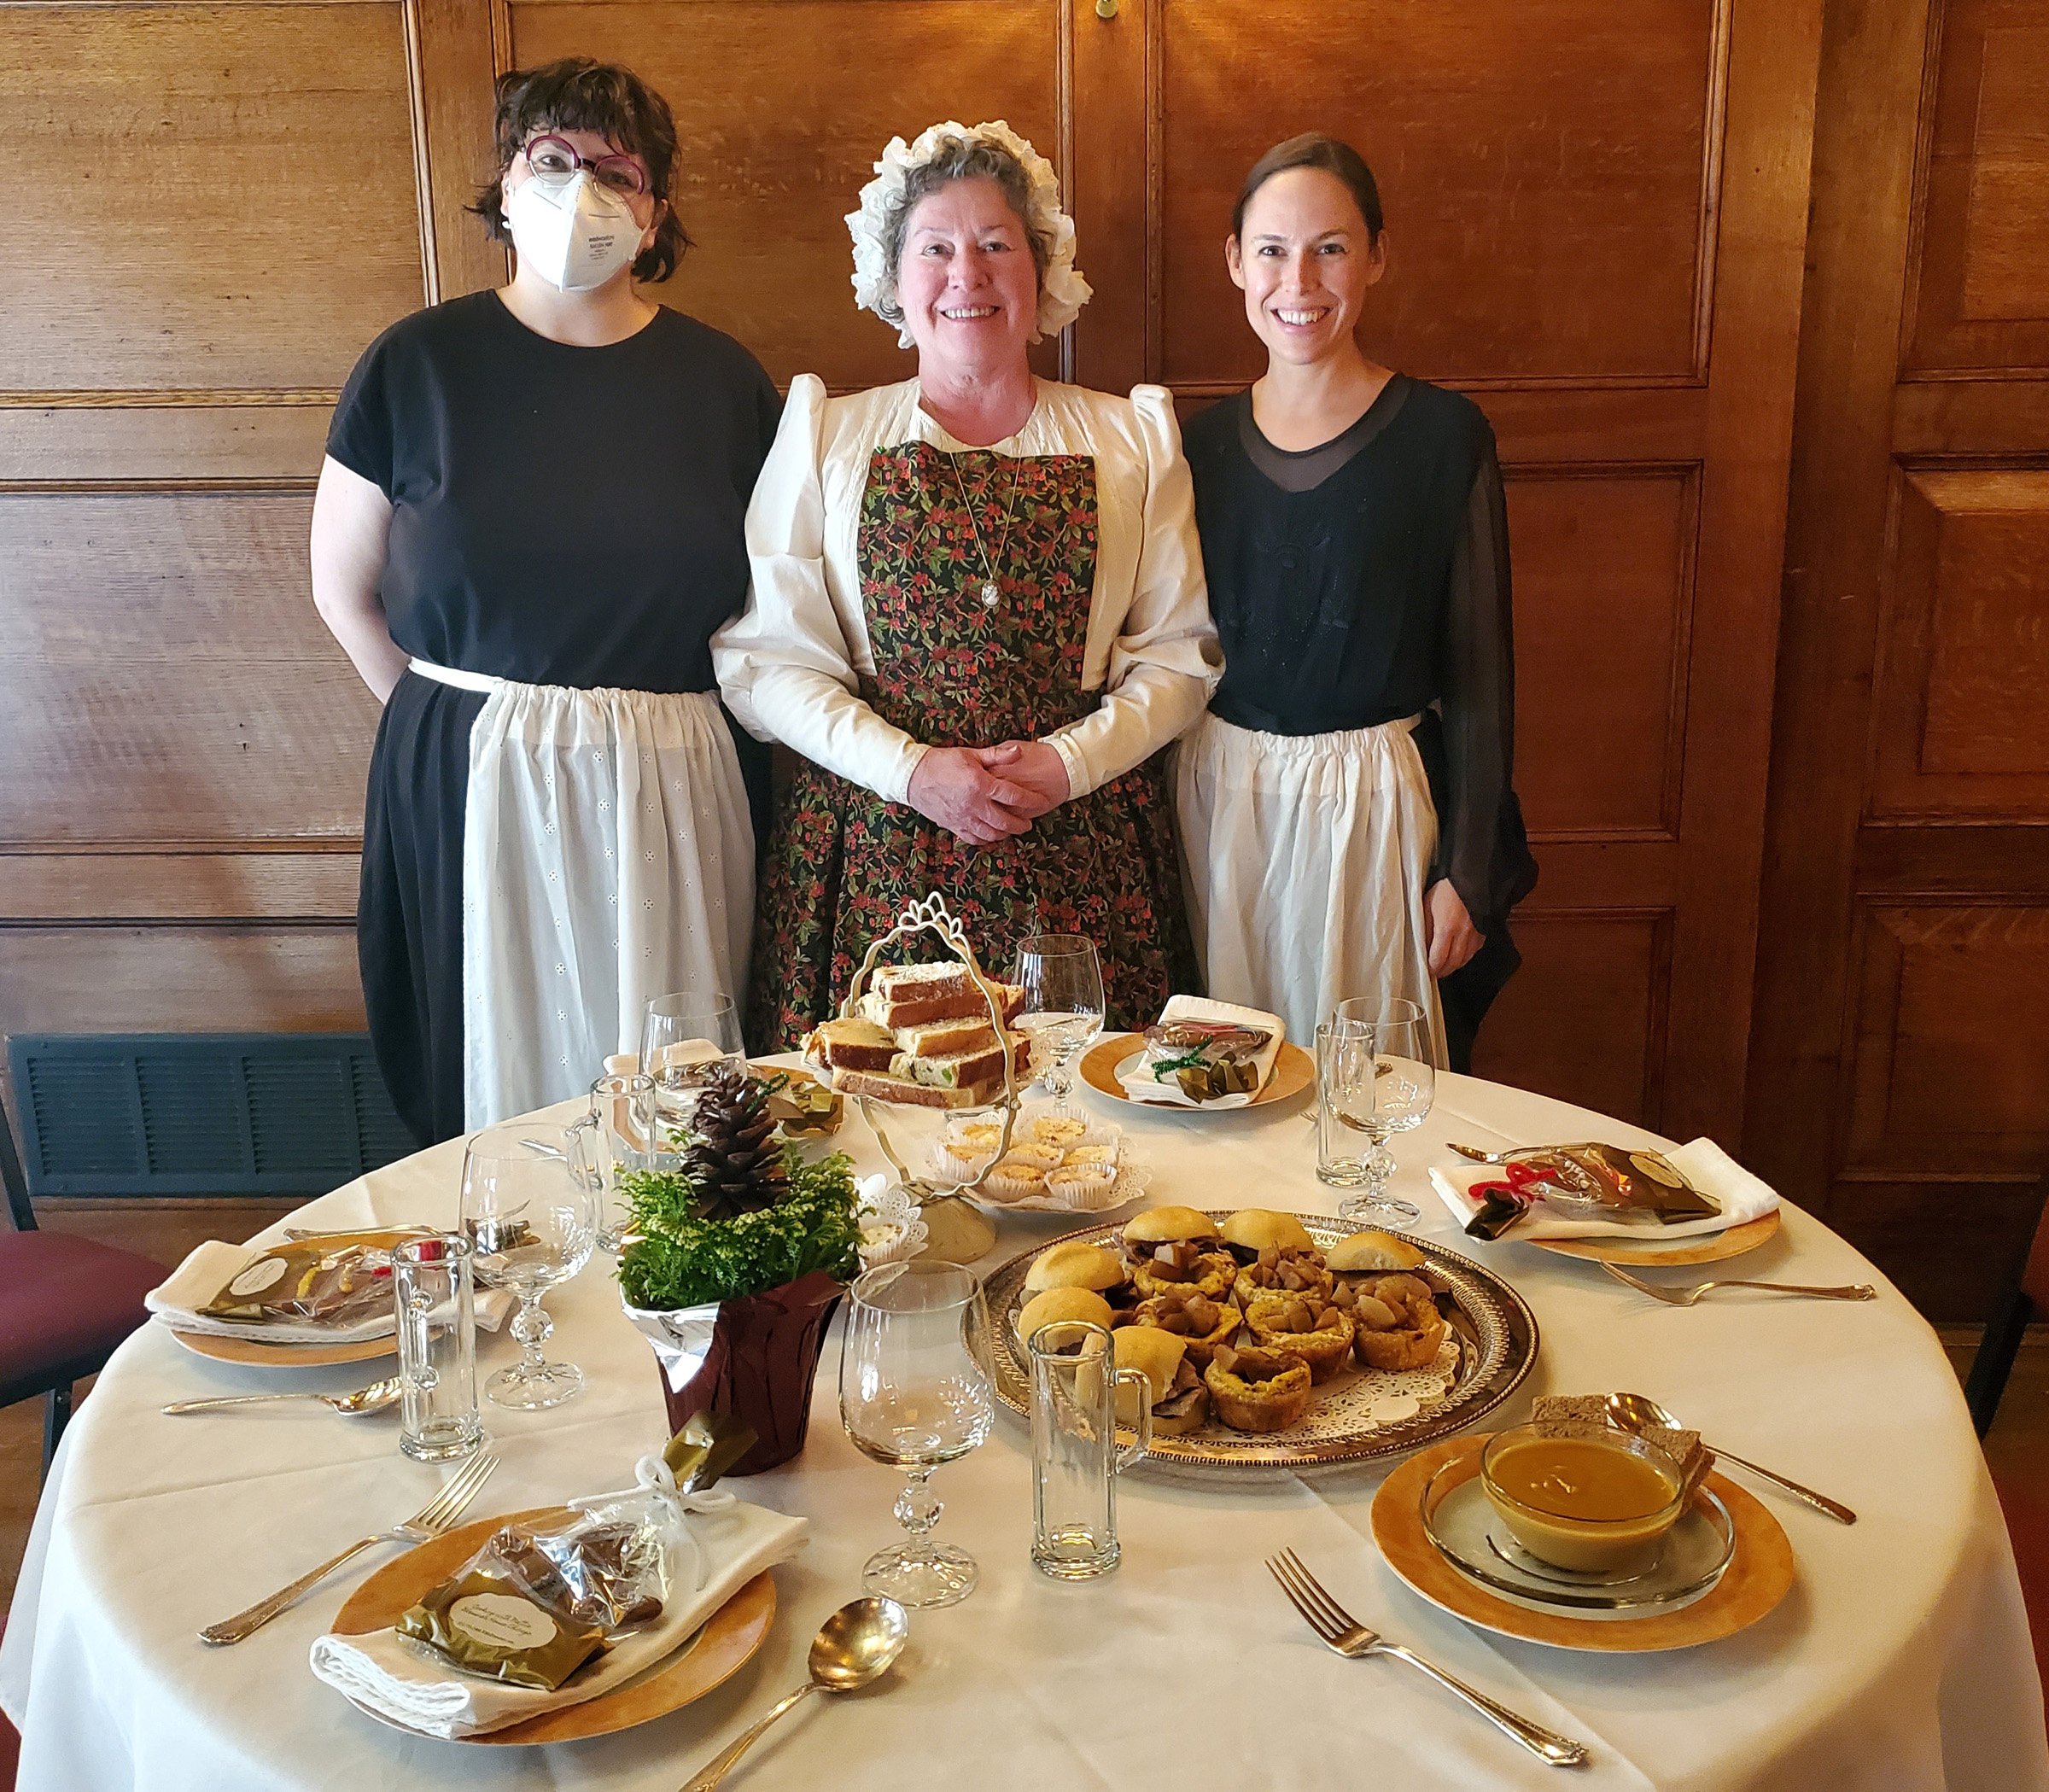
The Glessners loved a festive holiday party. Whether it be formal dinner on Christmas day, or a light luncheon or supper with a few close friends during the Advent season, Mattie would prepare very special dishes to celebrate the winter flavors. Today, the guests will enjoy:
Roasted Chestnut Soup
Mattie’s Brown Bread and Butter
Sliced Roasted Goose on Lightbread Rolls with Cranberry Relish
Spiced Pear and Custard Tartlettes
Christmas Bread
Eggnog Chiffon Pie
Gingerbread Folk
Spiced Cider
Mulled Wine
Roasted Chestnut Soup
3 cups roasted chestnuts
¼ cup butter
¾ cup celery, finely chopped
½ cup carrot, finely chopped
½ cup sweet onion, finely chopped
6 cups vegetable stock
2 whole cloves
1 teaspoon sea salt
1 teaspoon ground sage
1 teaspoon mace (you may substitute nutmeg)
1 bay leaf
¼ cup Amaretto
½ cup heavy cream
Salt and pepper to taste
Roast chestnuts: With a small, very sharp knife cut an x onto the flat surface of each chestnut. Roast in a 350° oven on an ungreased roasting pan until the skins open up where the x’s are. The hard outer shell will open up like a flower revealing the soft, tender flesh. This should take about 15 minutes. Remove from oven and cool just until you can stand to touch them. The dark brown outer hull will peel right off. They peel much easier when they are still hot so don’t let them cool if you can avoid it. Mattie would wrap in a warm towel and take out one at a time as she peeled them. Prepared chestnuts are available in wrapped packages from some of the finer shops (Ellie likes Caputo’s Fresh Market in Elmwood Park). If using these, please remove from package and roast lightly in a 375˚oven for about five minutes.
Meanwhile: Melt butter in a saucepan, add celery, carrots, and onion. Cover and sweat for 15 minutes or so. Pour stock over the vegetables, add salt, sage, mace, and bay leaf, bring to a boil then reduce and simmer 20 minutes. Add roasted chestnuts once they are prepared. Simmer another few minutes until chestnuts can be mashed with a fork against the side of the pan like potatoes. Puree using a stand or immersion blender in small batches and store for at least one day. Reheat, add cream and Amaretto, add salt and pepper if needed.
Mattie’s Brown Bread
This recipe can be found in the very first Cooking with Mattie column. Mattie won awards for her brown bread and Mrs. Glessner included it on nearly every menu. Slice the bread very thin. Using the freshest unsalted butter you can get (Mattie made her own, fresh, for special occasions), spread each slice with butter, cut off the crusts and fashion into pleasing shapes to serve with the soup.
Roast Goose
Geese are an excellent fowl for roasting. The Glessners were clearly fond of them as they show up on many menus. A Christmas goose was a Victorian delicacy popular both in England and America. Charles Dickens gets credit for popularizing the dish, but people were eating them ages before that. Geese are at their plumpest in December and are a large bird suitable for serving a gathering of about a dozen. Like ducks, geese are all dark meat. It is an extremely moist meat because geese have a natural layer of fat under the skin, unlike turkeys and most chickens we see today. Geese are easy to roast and serve with all the fixings. For a Christmastime luncheon or supper, Mattie has chosen to make sandwiches of sliced goose and cranberry relish on her lightbread rolls.
1 whole goose, 8-12 pounds is the usual size (special thanks to Wild Fork for their excellent geese this year)
Salt and pepper
3 cups of any of the following: roughly chopped apples, lemon peels, oranges or orange peels, sweet onions, pears; celery tops that cannot otherwise be used, etc.
3 bay leaves
Thaw the goose if not bought fresh. Remove giblets and neck if stored inside the cavity, set aside for another use. Salt and pepper the inside of the cavity then fill with roughly chopped fruit, celery, and onions and insert the bay leaves. Stitch the opening closed with cooking twine or pull the skin together and “pin” together using a toothpick. The method will depend on how much extra skin the butcher left you. Roast on a shallow rack in a 350˚oven for 15 minutes per pound, it will likely take about 2.5 hours give or take, but not as long as a turkey so watch it carefully. You do not want to overcook your goose! When the goose is done, let it rest for at least 20 minutes. Slice for service. Geese are smaller than turkeys and there won’t be as many neat slices, but every morsel should be used from this delicacy. Mattie would have made delicious hand pies for the servants from the extra goose, no doubt.
Cranberry Relish
Mattie would have made many jellies and relishes from the bounty at The Rocks. The recipe for Cranberry Relish was published in the November 3, 2020 Cooking with Mattie column. Cranberry relish is just the perfect treat alongside a goose hand pie, just saying.
Spiced Pear and Custard Tartlettes
A recipe of puff pastry (see below)
A bit of butter for greasing the tins
3 eggs, yolks only
1 Tablespoon prepared Dijon mustard
1 cup finely ground corn meal (Mattie would have called it Indian meal)
1 vanilla pod with the seeds scraped out (put the discarded pod in the vanilla sugar jar of course)
¾ cup whole milk
1 cup heavy whipping cream
1 Tablespoon fresh thyme leaves, or 1 teaspoon dried soaked in 1 Tablespoon white wine
Butter muffin tins and line with prepared puff pastry. Set aside. Put the egg yolks, mustard, and corn meal into a saucepan. Add the vanilla. Stir to blend. Put over a light heat and stir until warm. Slowly add the milk and cream, then the thyme. Remove from heat. Stir several times as the mixture is cooling. When lukewarm, spoon into pastry-lined tins. Bake at 350˚ for about 20 minutes or until a knife inserted comes out cleanly.
Puff Pastry
Mattie would tell you that a Professed Cook should always have mistressed a puff pastry. Once accomplished, this can secure your position in any household in which you should ever wish to work. It is simple, yet ambitious, as you should be. This is enough for 4 dozen tiny vol-au-vents, about one inch, or 2 dozen two-inch pressed into standard muffin tins.
1 cup butter with 1 Tablespoon reserved and chilled
1 ½ -1 ¾ cups flour
½ cup ice water or more as needed
A splash of lemon juice
First remove one Tablespoon of butter. Thoroughly soften the remaining butter until extremely pliable. Take a large sheet of waxed paper and spread the butter as thinly as possible on the waxed paper. You should have a rectangle at least 10 inches by 12 inches. Place the thin sheet of butter in a very cool place to harden. Next, mix the cold butter with the flour and water to form a dough, sprinkle the lemon juice over at the very end. No salt is needed. When the dough forms a good, solid ball, roll it out into as large a rectangle as you can, then remove the thin sheet of hardened butter from your cold place. Place the butter in the center of your dough and fold all the dough up and over and on top of it thoroughly encasing it like a pillowcase. With a floured rolling pin, roll the dough until smooth. Do not at any time allow the butter to “pop through” the dough.
When smooth, fold the dough over on itself as you would fold a letter, then over on itself again the other way and roll smooth once again. Depending on the temperature of your kitchen and the temperature of the board on which you are rolling you may need to put the entire dough sheet back into your cold place several times in the process, but you must roll and fold and roll and fold a total of nine times. Once complete, this dough will serve for puff pastry, vol-au-vents, tiny biscuits and many other uses. This is a good, basic recipe that should always be accomplished by the competent cook.
A note about Puff Pastry: Puff Pastry should have just five ingredients: flour, butter, water, lemon juice and elbow grease. It is easy but requires a great deal of work. Is that a contradiction? Many things in a kitchen are contradictions, so get used to it. The first several times you attempt this, you will probably not succeed. Do not waste the ingredients, simply rollout flat and use to line a pie dish or to make small crackers to be served with cheese or jam.
Spiced Pears
2 cups finely diced pears, use several types but be certain that they are perfectly ripe, what we like to call Beautiful, Beautiful Pears.
1 teaspoon each cinnamon, nutmeg, allspice, clove, cardamom
Mix together in a small saucepan. Simmer lightly for 10 minutes. Do not let the pears become soft. Remove from heat. Transfer into a glass bowl and chill. Use these to top the baked tartlettes.
Christmas Bread
Mrs. Glessner lists Christmas Bread on all of her holiday menus. It has been presented in the column before. Please see the November 30, 2021 Cooking with Mattie column, the recipe is there.
Eggnog Chiffon Pie
¼ cup raw sugar
1 envelope unflavored gelatin. Mattie would have bought it in a tin and used 1 ½ teaspoons.
1 ½ cups eggnog. Mattie would have used leftover eggnog from another holiday party. Modern cooks can use prepared eggnog from the shops. Ellie recommends Oberweis.
2 eggs, separated
¼ cup rum, or sherry for a lighter flavor
2 Tablespoons sugar to be added to egg whites
¾ cup heavy cream
1 nine-inch pie shell or 18 small shells
In a medium saucepan, combine sugar and gelatin, add eggnog and just the egg yolks. Cook over low heat, stirring constantly until mixture begins to thicken. Remove from heat and cool for 10 minutes. Stir in rum or sherry. Chill until the consistency of corn syrup.
Meanwhile, in a medium bowl, beat egg whites to soft peaks, gradually add 2 Tablespoons of sugar, beating until stiff and shiny. Fold egg whites into gelatin and eggnog mixture.
Beat heavy cream until soft peaks form. Fold into mixture. Chill until mixture mounds when dropped from a big spoon. Carefully spoon into pie shell or shells. Sprinkle with cinnamon and nutmeg and garnish with a holly leaf (not to be eaten). Mattie would often have garnished with flowers and greenery that was not meant to be eaten. Today, we steer away from garnishing with anything that is actually poisonous lest a guest accidently consume. The Glessners’ guests would have known not to eat holly in any form.
Gingerbread Folk
3 cups flour
½ teaspoon baking soda
1 teaspoon ginger
½ teaspoon each cinnamon, salt, cardamom
½ cup shortening, Ellie likes Butter Flavor Crisco
¼ cup dark brown cane sugar
1 egg, beaten
¾ cup molasses
¼ cup grated fresh ginger
1 teaspoon hot water
1 teaspoon vinegar
Sift the flour, measure and re-sift three times with other dry ingredients, set aside. Cream brown sugar and shortening until light, add egg, gradually add molasses then sprinkle grated ginger over and stir in thoroughly, add water and vinegar, use them to clean out the measuring cup that held the molasses. Mattie would positively have done this to make her clean up easier.
Divide the dough into four segments. Place on waxed or parchment paper. Press each segment into a square about 12” on a side, modern cooks could use a gallon Ziploc bag, one for each segment and press flat within the bag. Let the dough chill for half an hour. Take one segment out of cold area. Liberally flour a board or pastry cloth and roll the dough out until about ½ inch thick. Do not roll too thin, we want nicely plump gingerbread folk. Cut with desired cutter. You may decorate with currants or other dried fruit before baking or choose to decorate with icing after they are cooled.
Wishing each and every one of you the happiest, healthiest, and most delicious holiday season!
That’s a Jack-o’-Lantern?!? (posted October 31, 2022)

Discerning readers may notice that at the top left corner of the photograph, there is an odd creature who appears to be grinning at you from within his candlelit interior. He is a jack-o’-lantern.
“But he’s not a pumpkin?”
No, he is not. The original jack-o’-lanterns came from the British Isles, and a few other northern European countries. There is a fable about a man named Jack who made a deal with the devil that went wrong. Thus, he was saved from hell but banned from heaven, so he wanders the earth on Samhain (pronounced Saa-wn) with a lamp to light his path. Samhain, or later the Christianized All Hallows Eve, is celebrated on the last day of October, when the world passes from one of light to one of dark. The lamp is made from a turnip, or a rutabaga, or any large vegetable that can be carved out, with an ember or candle inside it.
These lanterns weren't for children's games and festivals. Instead, they served as a symbol for people in earlier times facing the dying light in their world every year as the days became shorter and shorter.
The Jack story is just that, a story. Immigrants from the British Isles brought the story with them when they came to North America. Pumpkins did not grow in the British Isles; they are one of the few foods that are truly native to North America. Pumpkins are so much easier to carve, so by the mid-1800s most folks in North America used pumpkins for their jack-o’-lanterns.
Mattie was born in Canada in 1862, but she was of Irish heritage. If she marked this time of year at all, it might have been with such a carved creature. But I’d like to believe that if Mattie encountered a turnip, her first instinct would be to cook it. And so, that’s what we’re doing this month.
Should you wish to explore more about how Samhain and Halloween were celebrated in Ireland before the turn of the last century, I’d strongly encourage you to do so. A great place to start is digital.ucd.ie. It’s a spooky path. Today, I am choosing to cook.
Turnip Jack-o’-Lantern
Ghosts, Pumpkins, and Fall Leaves Macédoine Salad
Curried Turnip Soup
Piedmont Turnips
Turnip Cake with Filberts
Mattie probably had a large supply of turnips brought back from The Rocks, the Glessners’ farm in New Hampshire. For a bit of luck, she might carve a small, rather funny-looking one into a jack-o’-lantern, but she fully intends to cook and serve the rest of them. Turnips are one of the foods of which Mr. Glessner approves, as outlined in Frances Glessner’s “Mr. Glessner likes” list from 1901, a handy reference tool for Mattie, and for me as well.
Besides use as a Halloween decoration, turnips are delicious, nutritious, and keep extremely well in the cellar to be available as a “fresh” vegetable during the winter months. Mattie would know many ways to prepare them. I certainly hope you will try some of these with your family.
Macédoine Salad
In cooking, Macédoine refers to, “a confused mixture or medley of things, usually vegetables.” Many references to Macédoine Salad are found in Mrs. Glessner’s Bills of Fare. Mattie must have made a great many of them. This is a simple dish consisting of various fresh or blanched vegetables of numerous colors, cut into pleasing shapes, and served with just a sprinkle of salt and pepper, or with a light mayonnaise dressing. We know that Mrs. Glessner had a whimsical side and enjoyed themes to her gatherings. I’d like to believe she’d be amused by creative cutting of the vegetables.
An assortment of fresh vegetables such as:
Turnips
Carrots
Beets
Broccoli
Cauliflower
Green peas or pea pods
Radishes
Salt and pepper to taste
Peel the vegetables that need to be peeled. To cut fun shapes, you will want to cut slices, about ½ an inch thick, making the slices as large in diameter as possible. For the harder, denser vegetables such as the carrots and turnips, blanch them by plunging the slices into boiling water for a minute or two, just until a knife can easily be inserted, but before fully cooked. Remove from boiling water and immediately plunge into an ice water bath. This will stop the cooking process and create a pleasing texture for your salad.
Using a sharp knife or small cookie cutters, cut shapes. For this Halloween-themed salad I used turnip ghosts, carrot pumpkins and fall leaves, beet leaves and acorns, and little trees of broccoli. To cut the eyes and mouth for the ghost, use a stainless-steel drinking straw. Alternately, one can simply cut all the vegetables into a medium dice. This is a bright, cheery salad even on the dreariest day, perhaps that’s why Mrs. Glessner liked it so much. It is a fresh salad that is readily available when lettuce salads are not.
Curried Turnip and Carrot Soup
“But Ellie (or Mattie)”, I hear you say, “did people even eat curry in late 19th century Chicago?” Oh yes, my friends, they absolutely did. Try this delicious fall delicacy soon. It is simple, nutritious, and completely vegan, unless you decide to garnish it with sour cream. This is the sort of soup Mattie might have ready for the servants on a busy fall day.
3 Tablespoons of sweet oil (olive, peanut, or my favorite, sunflower)
2 or 3 shallots, finely chopped
1 large bunch of cilantro, finely chopped, or 1 teaspoon coriander seeds
½ teaspoon mustard seeds
1 Tablespoon prepared curry powder
A piece of fresh ginger about the size of your thumb, peeled and grated
2 large carrots, peeled and chopped
2 large turnips, peeled and chopped
1½ teaspoons sea salt
½ teaspoon white pepper
5-6 cups water or vegetable broth
Juice of one half lemon, about 3 teaspoons
Black bread cut in the shape of a bat or cubes for garnish
A dollop of sour cream if desired. You might, if you’re very talented, manage to dollop the sour cream into a ghost shape
Heat the oil, add the shallots, and cook over medium heat until they begin to wilt and turn brown around the edges. Add all the spices, except the salt and pepper, and stir for a minute. Add the ginger, stir another minute. Add the vegetables, salt, and pepper, then the water or broth. Cover and simmer on low for 1-2 hours. It is safe to leave this on the back burner all day if you are busy. When all the vegetables are tender, either use a modern stand blender or an immersion blender to puree the soup. Mattie would have used a food mill. When the soup is completely smooth, check for salt and pepper and add the lemon juice.
To make a bat garnish, cut a bat shape from a slice of dark rye bread. Brush the top with butter or oil and lightly toast on the top rack of your oven or in a toaster oven until the top is shiny. Place in the center of each bowl of soup. You may also garnish with sour cream, yogurt, or vegan sour cream. Serve with a salad and more slices of brown bread.
Piedmont Turnips
This recipe, like several others we have used in this column in the past, comes from The Chicago Daily News Cookbook, published in 1896. It is attributed to Mrs. W.J. Meader of No. 200 Division Street, Elkhart, Indiana.
One large or two small turnips per person
Small pat of butter
About ¼ cup of milk
About a cup of breadcrumbs
Salt and pepper (either black or white) to taste
This is a version of scalloped potatoes made with turnips. Scrub the turnips and boil them whole until they are soft enough to be peeled and sliced. Remove from heat and cool in ice bath until you can hold them safely. The peel is easily removed. Slice very thin. Butter a casserole dish that will hold the number of servings you intend. Arrange the slices in a layer and top with a splash of milk, repeat until the dish is full. Sprinkle the top with breadcrumbs, salt, and pepper. Bake in a 350˚oven for about 30 minutes until the milk has been absorbed, the turnips are soft, and the crumbs have browned nicely. Serve as a side with any roasted meat dish or as an accompaniment to soup and salad.
Turnip Cake
Admittedly, this is a bit of a stretch, but Mattie was a very resourceful cook and if someone asked her to make a cake with turnips, she would figure it out, and so did I.
Mrs. Lincoln’s Boston Cook Book, published 1896 (in the Glessner House collection) has this to say on the subject, “[carrots and] turnips contain, instead of starch, a gelatinous gummy substance called pectin. They are useful in soups, giving them flavor…. Turnips contain but little nutriment…. They contain no salt, and therefor need more than other vegetables.” Today, we know that turnips contain glucosinolates and are rich in the antioxidant lutein. Sounds to me like a healthy, filling thing to add to a cake that won’t mess with the chemistry of the other ingredients. It works and is delicious. Please try this cake.
⅔ cups butter
¾ cup raw or brown sugar
3 eggs
1 Tablespoon Mexican vanilla
1 cup pureed turnip (cook turnip until it is very soft, this takes at least an hour, peel, and mash into a soft pulp)
1 ¼ cup flour sifted, measure and resift three times with the following:
½ teaspoon each baking powder, cinnamon, nutmeg, cloves, and salt
½ cup any nuts. Hazelnuts (filberts) are what Mattie used here.
Cream the butter and sugar. Add eggs one at a time, beating after each addition. Add vanilla, add flour mixture a little at a time and beat until smooth. Toast your nuts in a dry pan until they release their aroma, then chop half the nuts and add to the batter. Pour into a greased 8” cake pan and bake at 350˚until a knife or broom straw inserted in center comes out clean. Remove from oven, cool until cake can be handled then remove from pan. With a sharp knife or a piece of twine or wire, cut the cake in half crossways making two or more layers. Frost between the layers and the top with cream cheese frosting. Decorate the top with whole hazelnuts.
Frosting
2 Tablespoons butter
4 Tablespoons cream cheese
1 teaspoon Mexican vanilla
About half a pound of powdered sugar
Pinch of salt
Bring butter and cream cheese to room temperature, blend thoroughly. Add vanilla and then enough powdered sugar to form a spreadable consistency. Spread frosting between layers of cake and on the top. Decorate with nuts as desired. Mrs. Glessner would think this is the perfect cake to be served with ice cream. I suspect she viewed every cake that way. A caramel ice cream would be just the thing with this creation.
As we face the dying of the light this fall, may we all have a cellar full of turnips to tide us over. Enjoy the sun when it does shine and feed your loved ones.
Mattie and the Chocolate Factory (posted October 4, 2022)
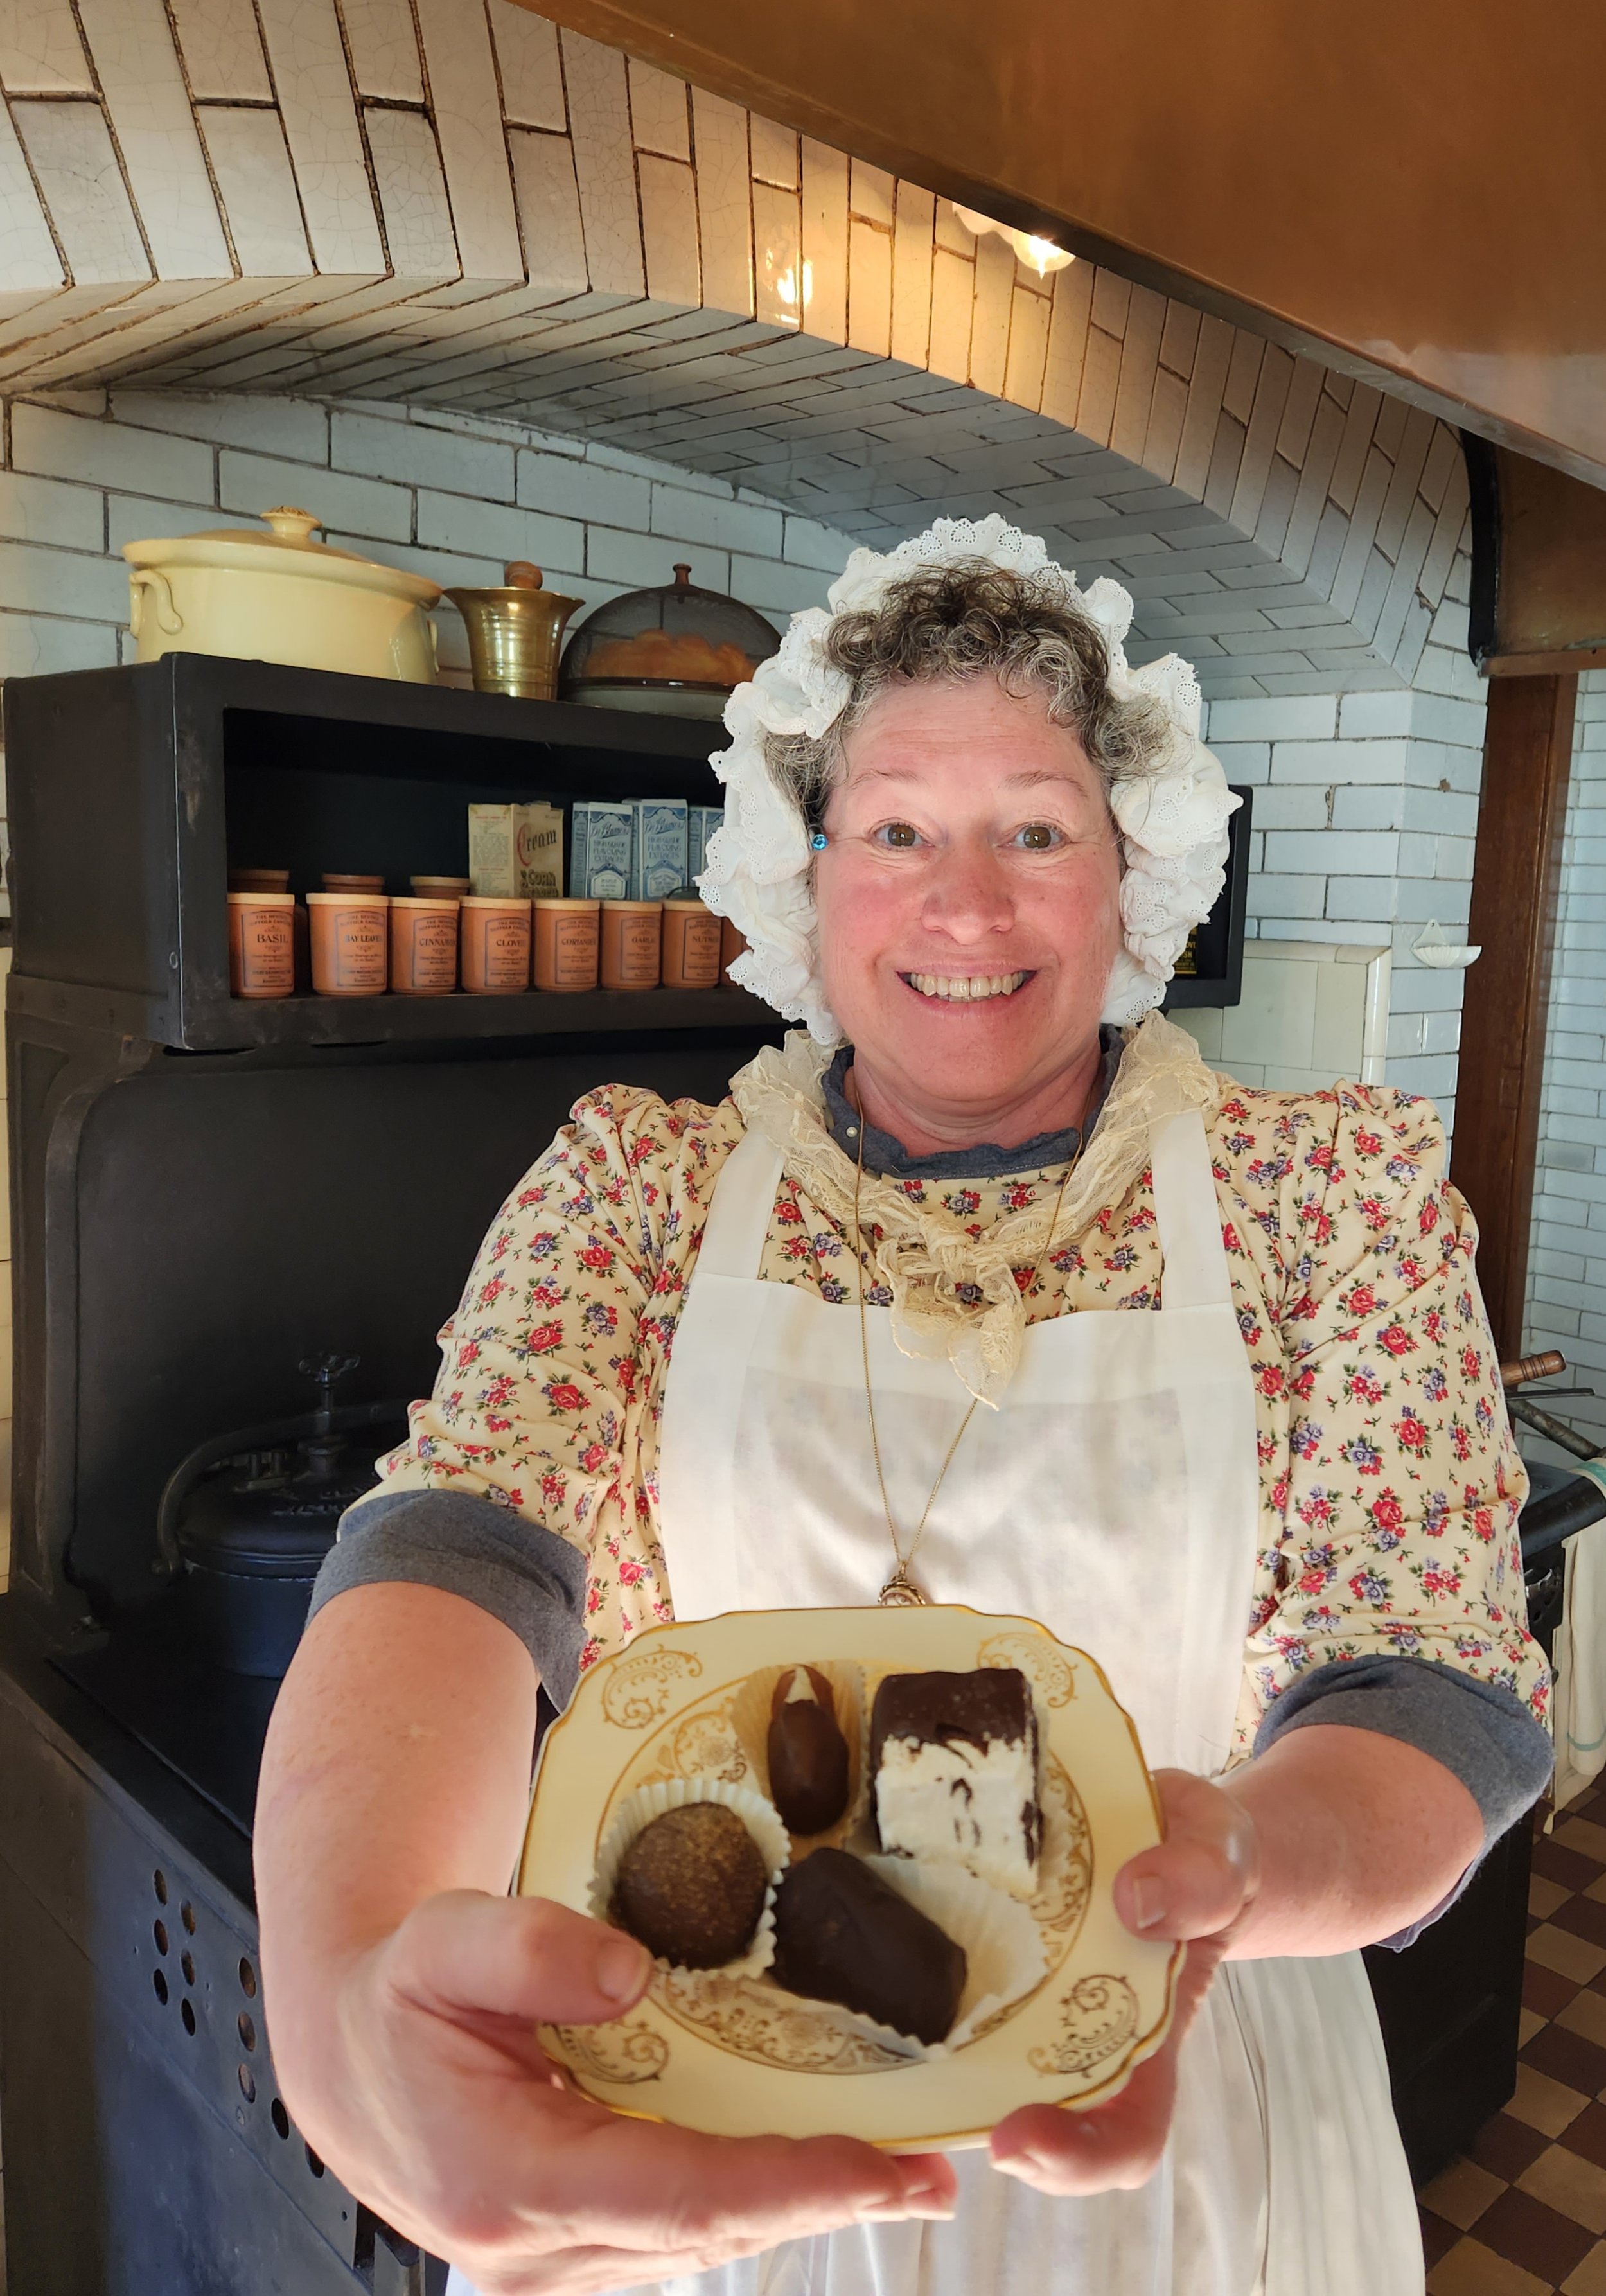
Last Sunday, Frances Glessner invited 30 of her very closest friends to a dessert event. It was quite festive.
Mattie produced chocolates from her kitchen and Sarah Hatfield was on hand with wonderful chocolate knowledge for all assembled. Their offerings were enhanced by those from Flesor’s Candy Kitchen in Tuscola, IL (est. 1901), and Anderson’s Candies in Richmond, IL (est. 1919). John Kranz Notz, Jr. of the Kranz’s Candies family in business (in an Adler & Sullivan designed store on State Street) in Chicago from 1868 until 1946, entertained the guests regarding his family’s candy history and brought with him some Anderson’s candies for all to share. You see folks, Kranz’s Candies, upon closing, sold their secret recipes to Anderson’s. True Chicago chocolate history.
Mattie would have felt very meager alongside the commercial candy makers that proliferated in Chicago in the late 19th and early 20th centuries. But home cooks can still have their place. Mattie was very pleased to try her hand at candy making and chocolate dipping, and so should you. All of these recipes are easily accomplished by the home cook.
In Mattie’s day, Chicago was a major candy capital due to its location in the middle of the country with easy access to all the rail and shipping lines.
Abundant milk, cream, and butter came from Wisconsin, corn syrup and cornstarch from Midwestern farms, and sugar from Michigan’s sugar beets. Everything else needed came aboard the increasing network of trains that made Chicago the country’s transportation hub. (Chicago Food Encyclopedia, 2017)
Mrs. Glessner mentions bonbons in so many menus, but she probably bought them from a commercial concern. Candy making is very time-consuming and meticulous. It requires precise temperatures and humidity levels and would probably take far too much of Mattie’s time away from six daily meals—three family, three servants—and her other duties preparing for large events.
However, let it never be said that Mattie could not make candy from scratch. And so, she has. We hope you will enjoy and try for yourself.
Marzipan Stuffed Dates
Mattie’s Marshmallows
Potato Fondant Maple Creams
Honeycomb Toffee
All dipped in chocolate, of course
Marzipan Stuffed Dates
We have made marzipan before, and I’d encourage you to visit the July 2020 column for more examples. Marzipan is just the foundation for this treat.
1 pound of dates, pitted
¾ cup ground almonds or almond flour
2 cups powdered sugar, or as much as is needed, sifted
1 egg white, for maximum safely, use pasteurized egg whites or powdered egg white or meringue powder, all can be found in most grocery stores
½ teaspoon almond extract
1 teaspoon Mexican vanilla
Dipping Chocolate, Mattie would have used Baker’s Semi-Sweet Chocolate but modern dipping chocolate will work just fine.
Marzipan
This is so easy and fun. In a modern mixer, or by hand as Mattie would have done, mix finely ground almonds or almond flour with egg white, almond and vanilla extracts. Gradually add as much powdered sugar as needed to make a fine paste (think Play-Doh). You’re done with this step now.
Stuffing the Dates
You will see a clear line along one side of each date where the pit has been removed. If you are pitting your own dates, use a fine kitchen scissor to slice a lengthwise line along the date. Gently open the date and remove the pit. Roll the marzipan into a log the same length as the date you are about to stuff and about the diameter of a pencil. This is best done individually, the assembly-line method with not work well, sorry Mr. Ford. Place the oblong piece of marzipan into the date to fill the cavity. There will be a bit sticking up along the open edge, which is most attractive, think how a hot dog looks sitting in a bun. Set aside. Continue to stuff as many dates as you have marzipan. If you run out of either, set the rest aside. It has a purpose.
When all your dates are stuffed, melt chocolate in a double boiler or simple metal bowl that fits inside one of your saucepans. Never attempt to melt chocolate directly in a pan on the stove. It burns too easily. There are many who would counsel you to melt chocolate in the modern microwave oven, but Mattie would not consider it.
Dip one end of each date in melted chocolate. Note: there will likely be one very pretty end to each stuffed date, dip the less attractive end. Place on waxed paper to cool. If desired, one can dip the other end once the first end has cooled thus completely enrobing the dates.
Mattie’s Marshmallows
Today, marshmallows come in a plastic bag from the store. They didn’t always. In Mattie’s day the commercially available marshmallows were just coming into being, and they came in tins. The Rochester Marshmallow Company was established in 1895 by Joseph B. Demerath, the first confectioner in America to commercially distribute marshmallows.
Mattie knew how to make marshmallows from scratch. I could spend another thousand words on the origin of marshmallows, and I truly wish I was able to here. Suffice it to say, there is a plant called a marshmallow. The root of said plant contains a pulp which when incorporated into sugar syrup and egg whites produces a puffy confection. This was how marshmallows were made until the middle of the 19th century when it was discovered that the same effect could be achieved by using gelatin. Mattie would have used gelatin. These are divine in the extreme and you should try them.
1¾ cup white sugar, raw sugar will make slightly browner marshmallows
¼ cup white corn syrup
2 egg whites (see note below)
½ cup water
½ cup water for the gelatin
7 teaspoons of gelatin (3 Knox packets)
Pinch of salt
1 Tablespoon Mexican vanilla
For Dusting Powder
1 cup powdered sugar
½ cup corn starch
Mix, sift three times and set aside.
Place the sugar, syrup, and water into a deep pan, stir until fully combined. Heat over medium heat until sugar comes to a boil, watch carefully. Cover tightly and continue to cook on medium heat for 2 minutes. When you remove the lid, check for sugar crystals adhering to the sides of the pan. If you see these, wet a pastry brush with cold water, and gently scrape the sides with the wet brush to remove the crystals. You do not really need a candy thermometer, although if you have one, you want to heat to 245˚. This is also known as the firm ball stage, meaning a drop of the sugar in a small bowl of cold water will form a firm ball immediately. This is how Mattie would have done it, but you go on with your thermometers…
While the sugar syrup is cooking, prepare the gelatin by placing in a deep mixing bowl, add the water and stir to form a slurry. If you are working with a modern mixer, put this into your mixer bowl.
Egg Whites
Also prepare two whipped egg whites, meringue consistency, and set those aside. Mattie would have whipped two raw egg whites. Modern cooks should use pasteurized egg whites from the refrigerator section, or dried egg whites from the baking aisle reconstituted to equal two egg whites.
When the sugar is ready at the correct temperature, slowly add it to the gelatin by pouring the hot sugar down the side of the bowl and whisking constantly. Add the vanilla as you are incorporating the sugar. As soon as all the sugar is incorporated, quickly add the egg whites and continue blending. At this stage, marshmallows can be piped into shapes with a piping tool and sprinkled with colored sugar. This is the origin of Peeps.
For traditional marshmallows, pour into a buttered 9x13 pan or any size you desire. If you want your marshmallows to be cubes, select a pan with a depth equal to one side of desired cube. Sprinkle dusting powder over marshmallows and cover lightly with waxed or parchment paper. Let sit for six hours, don’t even look at them. After six hours, dust a sheet of parchment paper the size of your pan, loosen the marshmallows from pan and invert onto the dusted sheet of parchment paper. Using a very sharp knife or fine scissors dipped in water, slice or cut the marshmallows into desired size. Place into a large mixing bowl or pan of dusting powder and dust all sides. They may then be stored in tin boxes or dipped in chocolate.
Potato Fondant Maple Creams
Fondant is a complicated chemical composition of sugar, water, and elbow grease. It is an art. Mattie is not an adept enough artist to attempt true fondant, so she uses an alternative, potato fondant. Trust me, it was a thing, and it is positively delicious.
½ cup boiled potatoes
1 egg white, beaten (see above for raw egg white substitutes)
1-2 cups powdered sugar
¼ cup maple syrup
1 teaspoon maple extract, Mattie would have used Watkins
Granulated maple sugar for dusting if desired, available in the finer shops.
Cook the potatoes as for mashed potatoes, strain. Press cooked potatoes through food mill on your finest setting or press through your finest sieve. You want to break down all the fibrous tissue of the potato. Once your potatoes are as smooth as possible, blend with egg white, maple syrup, and extract. Add as much powdered sugar as you need to form a firm paste, chill. Once chilled, roll paste into small balls about an inch in diameter, place on waxed paper and set aside in cold place. When all balls are completed, remove 6 or so at a time from the cold and dip them in chocolate, set aside on wax paper and complete the dipping. For an added touch, sprinkle maple sugar on the top of each dipped chocolate while they are still wet from dipping.
Honeycomb Toffee
1 ¾ cups raw sugar
½ cup honey from Mrs. Glessner’s bees or your local source
½ cup water
Dash of salt
1 Tablespoon each baking soda and Mexican vanilla
Have a buttered 8x8 or 9x12 pan ready. Heat the sugar, honey, and water until it reaches a boil. Now, start to watch. If using a candy thermometer, you want to get to 280˚-300˚ but don’t, whatever you do, go higher than that or it will burn. Mattie would have used the ball stage method. Fill a small bowl or custard cup with cold water, drop a bit of the sugar mixture into the bowl. If it forms a soft or firm ball, it is not ready yet. You are looking for hard crack. This means the mixture will form a piece of candy that will crack immediately like a peppermint stick. That is when it is ready. When this has occurred, remove from heat, quickly stir in vanilla and baking soda. It will expand greatly and bubble up. Stir vigorously and when entirely combined, pour into the prepared pan. Just as the mixture is beginning to cool, grease a sharp knife and score the candy along the lines for the piece sizes you want, roughly a grid 1x2 inches. These marks will seal over as the candy cools, but you should still be able to break up the lines. It doesn’t always work. Dip the prettiest ones in chocolate and eat the rest yourself with a nice cup of tea.
“And what, Mattie, should I do with all the leftover dipping chocolate?”
Oh, she is so glad you asked. There will always be leftover chocolate from dipping. Find all the filling scraps, the ugly pieces of toffee, extra dried fruit, nuts, extra marzipan, whatever is left. Make a mixture of all the extras and stir them into the melted chocolate after you are all finished with the pretty ones. Drop by spoonfuls onto waxed paper and feed them to all the goblins and small folk that visit this month.
Enjoy fall and all things candy everyone!
All Aboard! (posted September 6, 2022)
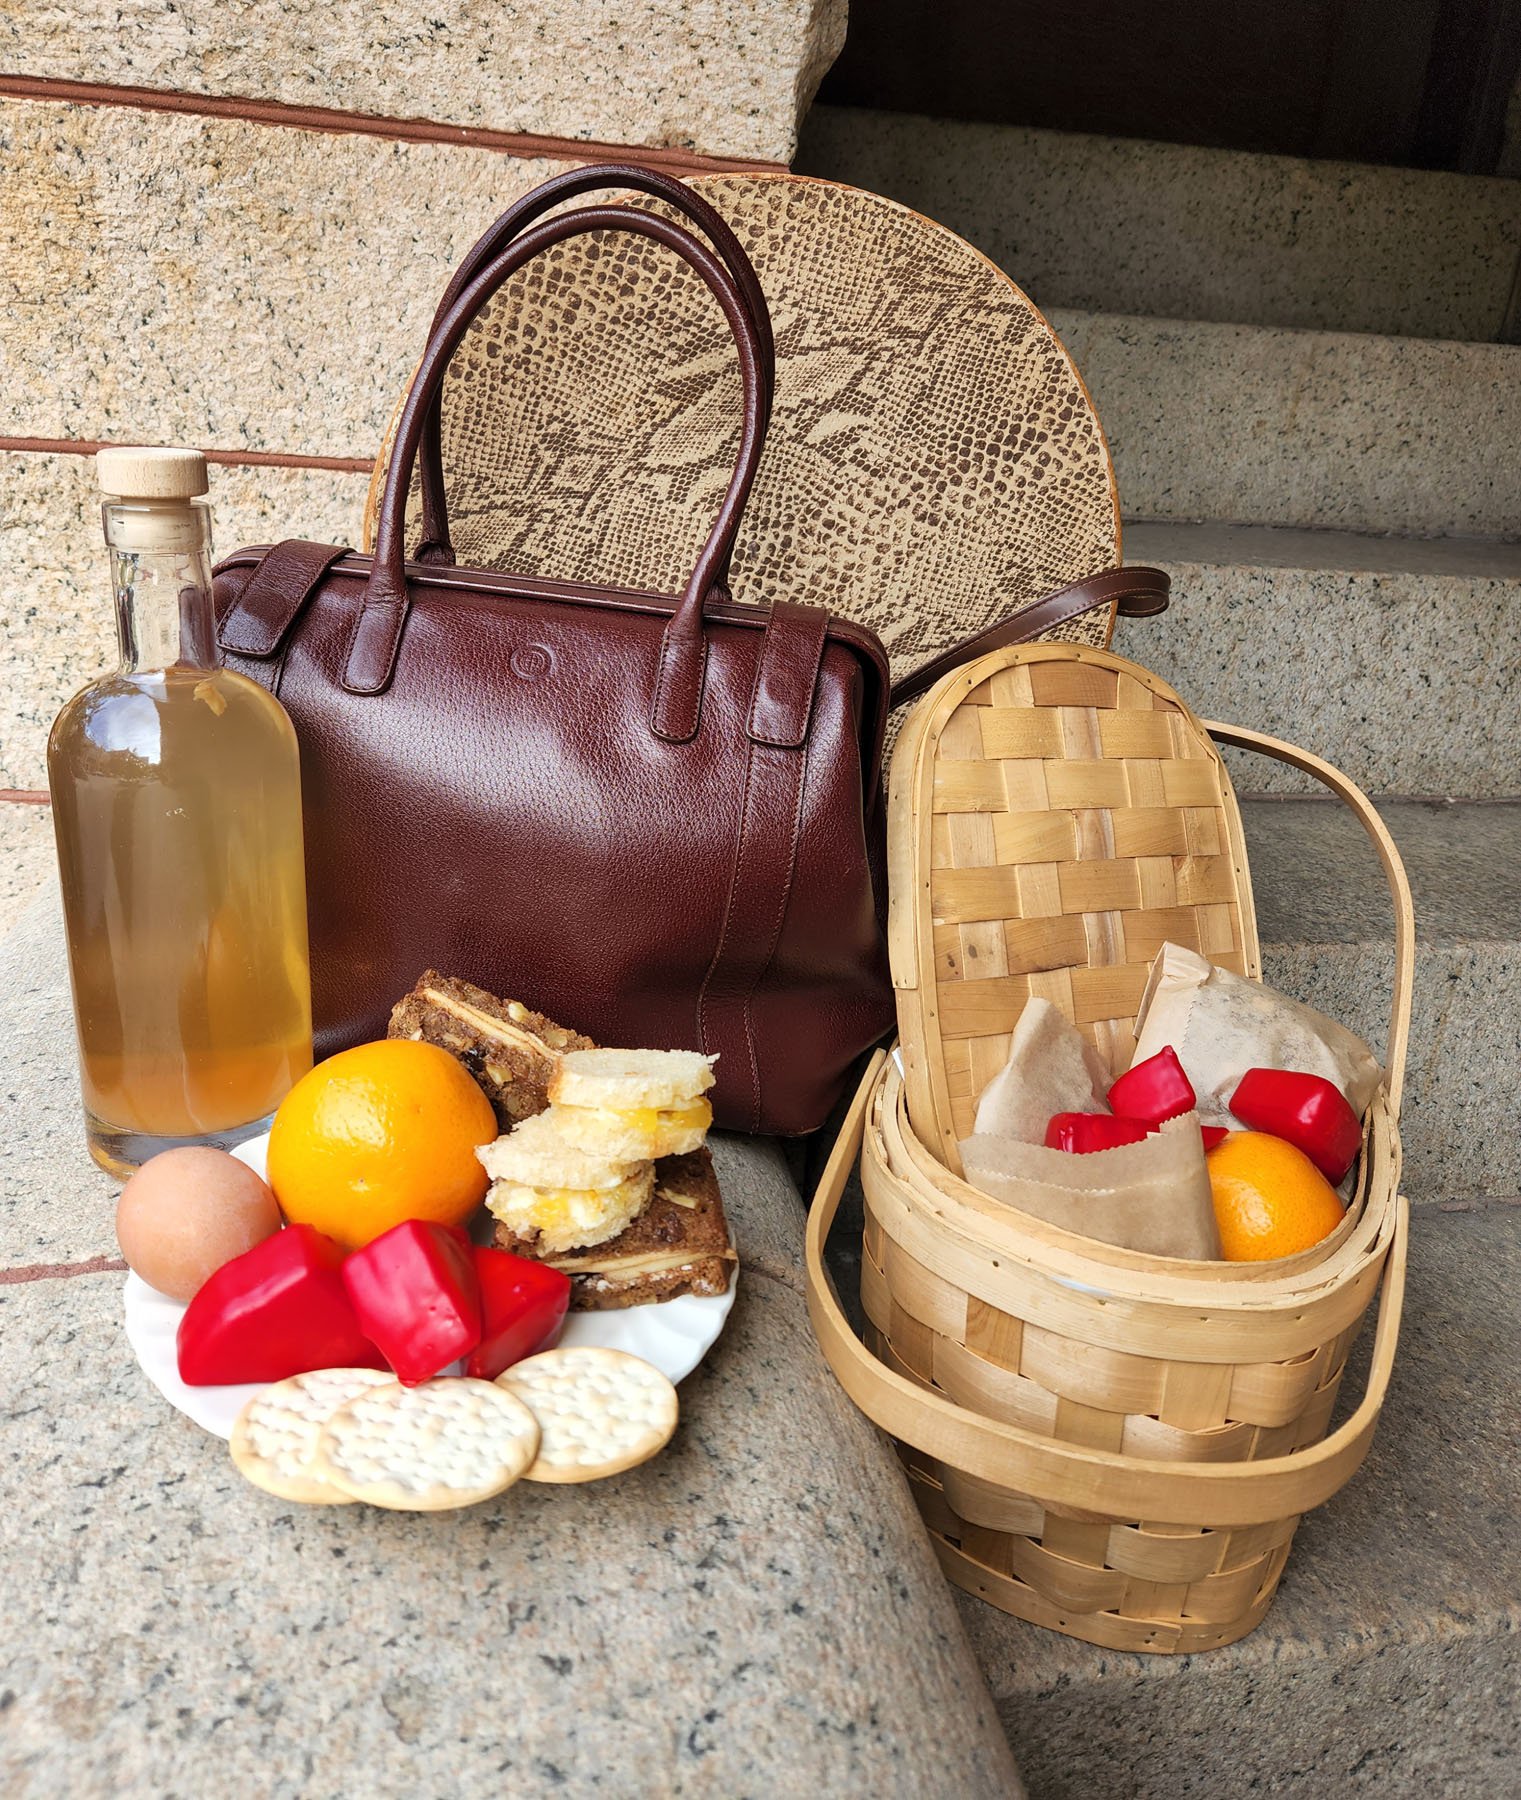
“Mattie packed us a lovely basket of tasty sandwiches, etc. to supplement the fare in the Dining Car as we once again take the train to our summer home, The Rocks, in New Hampshire,” wrote Frances Glessner never.
We know they went; we know they took the train, Mattie did as well, but we really don’t have any details. So, this month I will attempt to fill in the gaps with a bit of historical research, some recipe sleuthing, and a pinch of conjecture. Departing on Track #3, the Glessners take the train! All aboard!
The Glessner family left Chicago every summer to decamp to their lovely farm in New Hampshire called The Rocks. They rode the train from Chicago to Boston where they caught a second train to take them the rest of the way to Littleton, New Hampshire where a servant with a carriage, or after 1906, an automobile, would collect them.
Mrs. Glessner does not mention her sleeping car accommodations when documenting the many trips in her journals, but she does reference the Parlor Car. Train travel was radically different in the late 19th and early 20th centuries and would be unrecognizable to a modern Amtrak traveler. Multiple train lines left Chicago several times per day enroute to Boston.
The Pullman Palace Car Company provided various lines with elaborate and commodious accommodations for the 26- to 30-hour trip. The food in the dining cars rivaled that of the finer hotels and restaurants with Bills of Fare including broiled or fried halibut steaks with shoestring potatoes for 40 cents, or half a spring chicken with cream sauce for 50 cents, along with many other offerings. The Glessners would have their pick of excellent food during mealtimes.
But what about some snacks? What about when the train left Chicago at half-past ten and it would be some time until luncheon in the dining car? Mattie would have packed a small hamper for the Glessners, and perhaps even one for herself, if she were traveling with the family.
In Mattie’s time, food for travel on conveyances, trains, boats, and automobiles would be very specific. The foods were similar to that of picnics. They must be portable, able to be eaten at room temperature, not fussy or messy… in other words, they needed to be finger food that was ready to eat. For this trip, Mattie is packing a hamper full of:
Apple Sandwiches on Nut Bread
Hard Cooked Eggs in Shell
Marmalade Sandwiches on Light Bread
Individual Waxed Cheeses
Water Crackers
Ginger Switchel
Always an Orange
Nut Bread
2 cups unbleached flour
2 cups whole wheat flour
1 teaspoon salt
½ grated nutmeg (about one teaspoon but you should never use prepared nutmeg, always grate your own fresh, says Mattie)
½ cup molasses
2 cups milk
1 teaspoon baking soda dissolved in the milk
1 cup chopped nuts (walnuts, pecans, almonds, peanuts, etc.)
1 cup raisins, plumped
2 Tablespoons melted butter
Sift both flours and carefully measure, then sift together with the salt and nutmeg. Plump raisins by placing them in a small saucepan with enough water to cover. Some people like to plump their raisins with whiskey or rum, but Mattie would have used water. Simmer slowly for about 10 minutes until most of the liquid has been absorbed. Set aside in a ceramic dish to cool. Dissolve the baking soda in the milk then add to the flour mixture. Add the butter, then the nuts, and finally the cooled raisins.
Stir thoroughly and place into a greased loaf pan or several gem pans (modern cooks can use a muffin pan, this will make about 12). Let the mixture settle and raise a bit in the pan for 20 minutes then bake in a moderate (350˚) oven for about 35 minutes. It is done when a thin knife or broom straw inserted in the center comes out clean. Cool in pan 15 minutes, turn out. When thoroughly cool, wrap in waxed paper.
For Apple Sandwiches
1 crisp apple, peeled and thinly sliced
Juice of ½ lemon
¼ cup raw sugar
1 Tablespoon cinnamon
2 or 3 Tablespoons unsalted butter, softened
For apple sandwiches, slice the bread, spread each slice with butter on one side. Slice apples very thinly and place into a bath of lemon juice. Once thoroughly soaked, place apple slices into a dish with sugar and cinnamon, shake to coat. Arrange slices of apples on one slice of bread, cover with second slice. Wrap in wax paper for transportation.
Hard Cooked Eggs
I recently made some deviled eggs for a Mattie box at one of the Glessner House concerts and was asked how the eggs come out so perfectly. Don’t ever tell. This is the secret. Do not boil. Rather, steam your eggs. Place them in a colander that fits inside one of your saucepans with room for water below to boil. Sprinkle about a Tablespoon of baking soda over the water. Place on stove and bring to a boil so that the eggs are steaming. Watch carefully.
When the water begins to boil, set a timer for 12 minutes (this is for 6-12 eggs, if cooking more, do in batches). Steam exactly 12 minutes and then plunge the colander into ice water immediately. Gently stir the eggs to make certain that they have contact with the ice water. Complete the cooling process. There will be no green ring and the yolks will be perfect. Just as Mrs. Glessner liked them.
Marmalade Sandwiches
Several slices of white bread, any type
2 Tablespoons cream cheese
2 Tablespoons marmalade, jelly, or jam of your preference
Spread each slice with cream cheese. The cream cheese serves the same purpose as the butter in the Apple Sandwiches. Spreading a coat of butter or soft cheese on open slices of bread keeps the sandwiches from becoming soggy from whatever filling you desire. Then spread with marmalade or fruit preserve of your choice. Cut the bread into shapes. Always make the sandwiches first and then cut into shapes, or merely cut the crusts off. Guess who gets to eat the crusts?
Waxed Cheeses
Oh my gosh folks! I am so thrilled to learn how to do this. Cheeses in Mattie’s time would come in large wheels or wedges cut from still larger wheels. She would purchase from a local cheese monger such as James I. Kraft who moved to Chicago in 1903 and began producing cheese for distribution in the city and to ship nationwide from the Chicago hub. To pack cheese for a trip, Mattie would need to cut it into portion sizes and wax them so that they would be what we call “shelf stable” as the Glessners rode on the train.
Cheese wax differs from candle or canning wax in that it is a blend of paraffin and microcrystalline wax that remains pliable once cooled. It comes in 1 pound blocks and is still available today. This is very simple and also quite fun. Cut the cheese you desire into wedges or cubes; hard cheeses work best. Brush every surface of each cheese with vinegar. Turn to make certain you have coated all sides. Refrigerate.
Melt the wax in a small metal bowl or rinsed-out can (tomato sauce cans work well) placed inside a saucepan of water brought to a boil. Use a vessel that you can dedicate to wax as it is nearly impossible to clean out of whatever you put it in. 20 minutes before you are ready to dip, place the cheeses in the freezer to get them very cold.
Remove from freezer and quickly dip each piece of cheese into the melted wax halfway up the side. Place onto wax paper. When all the cheeses have been dipped once, dip the other side. Repeat the process so that every surface has two coats of wax. These will keep at room temperature for several days and if stored below 50˚F will keep for several years.
Water Crackers
The Glessners would be able to order Bent’s Water Crackers from the dining car for 10 cents. They were exclusively carried on most trains. The Bent Company has been operating in Milton, Massachusetts since 1801. Today, they are best known for their pies and cookies, but they are also a major supplier of hardtack to Civil War reenactors. They know about hardtack since they made it for actual Civil War soldiers as well. Mattie could certainly have made her own water crackers, but she probably purchased them from Bents or another local supplier. Mrs. Glessner listed crackers on many of her menus.
Switchel
1 piece of fresh ginger, 2-3 inches long
2 ¼ cups water
½ cup apple cider vinegar
½ cup honey or maple syrup
Sparkling or still water to finish
Switchel is the 19th century Gatorade. It contains many of the same electrolytes and would be extremely refreshing on a long train ride.
Use the side of a spoon to scrape the skin off the ginger. Cut the ginger into slices. Place the slices of ginger and water into a saucepan and bring to a boil. Remove from heat and let the ginger steep for 10-20 minutes.
Mix the vinegar and honey or syrup together. Strain the ginger water and mix both liquids together. Bottle for storage. When ready to serve, mix switchel half and half with either still or sparkling water. Serve over ice if available. I imagine that Mr. Glessner might enjoy his with a slice of orange.
Please remember to take all your belongings with you when exiting the train.
A Promenade of Punches (posted July 30, 2022)

Cooking as Mattie, I regard Glessner House as a living history site. I reenact a person who lived and worked there, so I see it as a time-machine experience for myself and the audiences. But Glessner House is also a museum. As such, historical discoveries are often made. One happened a couple of weeks ago when Executive Director and Curator Bill Tyre, and board member Deneen Bryce found several handwritten recipes in the archives. These recipes were in Mrs. Glessner’s handwriting and had been found inside various cookbooks in the collection but had been removed for preservation. We had never seen them before. Two of those recipes were for punch.
Frances Glessner instructed Mattie to serve punch at larger dinners and receptions, although it was not on the menu every night. The recipes for several punches are included in the Bills of Fare or Dinner Books to which I so often refer. The two recently discovered recipes are not listed there but, because they are in Frances Glessner’s own hand, we can be relatively certain that she either made them herself or had Mattie make them.
I could not possibly word this better, so I will give you this explanation of punch from Annie Gray, a leading British food historian.
Punch seems to have originated in the British West Indies, where it was a drink based on rum, and mixed with citrus (either lemon or lime), sugar and water. The first references are from the 17th century, and by the 18th century it was very popular at parties or as an after-dinner drink. It was associated with men and contemporary illustrations often show groups of very drunken men carousing around a punch bowl. Later recipes vary the spirit and sometimes include the very British tea. By the 19th century, punch had become a catch-all word for a mixed drink, predating the more formal cocktails by some time.
-Annie Gray, How to Cook the Victorian Way with Mrs Crocombe, English Heritage, 2002
Certainly Mr. Glessner would never be amongst the men carousing around a punch bowl as he was teetotal. However, Frances Glessner absolutely knew that her guests would enjoy punch at the end of an elegant evening. You will notice that some of these contain very little actual alcohol, relying instead on juices and ice.
Thinking that this was an excellent topic for a mid-summer column, I give you punches. The first two, clearly older, recipes are the recent discoveries, the other three are found in the dinner books. Please enjoy.
Roman Punch
Regents Punch
Mrs. Thomas’s Punch
Punch #1
Punch #2
Roman Punch
3 coffee cups of lemonade, strong and sweet
1 glass champagne
1 glass rum
2 oranges, juice only
2 eggs (whites well whipped)
½ lb. pulverized sugar beaten into the stiffened whites
Ice abundantly or freeze.
For the Modern Cook
3 cups of lemonade, strong and sweet. Sorry folks, you really do need to make if from scratch, Simply Lemonade would suffice but why?
4 ounces (1/2 cup) Champagne
8 ounces (I cup) rum
The juice of two oranges (approximately 1 cup)
2 egg whites, whipped. Mattie would have used raw, room temperature egg whites but we will use pasteurized egg whites or reconstitute the powdered ones.
1⅓ cups sugar
Whip the egg whites until soft peaks form. Continue whipping while gradually adding sugar until shiny and very stiff. You are making a meringue. Mix all the liquid ingredients and then mix in the meringue. Put into a container that can be frozen and put into the freezer for about an hour. It won’t freeze entirely because of the alcohol, but you don’t want it too frozen, just very chilled. Spoon into individual glasses or into a pitcher. The meringue will rise to the top and be the first taste when the guests take a sip. It’s like a cotton candy-topped drink. This could easily be made without alcohol and served at the next birthday party.
This will make an entire pitcher as seen in the photograph. The floating cotton candy effect is well worth the effort.
Regents Punch
1 lb. loaf sugar or rock candy
1 large cup of strong black tea
3 wine glasses of brandy
3 wine glasses of rum
1 bottle champagne
2 oranges (juice only)
3 lemons (juice only)
1 large lump of ice
For the Modern Cook
2 ⅔ cups sugar
1 cup strong black tea
2 ¼ cups (18 ounces) brandy
2 ¼ cups (18 ounces) rum
1 bottle Champagne
The juice of two oranges
The juice of three lemons
Ice for individual servings or large block for punch bowl
Mix all ingredients thoroughly and serve thoroughly chilled or over ice with a sprig of mint as garnish. If you are serving in a punch bowl, put a large block of ice in the bowl to keep this punch very cold. In the photograph, this is the punch in the carafe with the silver handle and spout. It is about half full of ice. This is a stronger punch but would be very welcome at a long afternoon party as a last beverage for departing guests. Be certain that every group has a designated driver home.
Mrs. Thomas’s Punch
1 part Burgundy
1 part Moselle
2 parts Cooks champagne
Rose Fay Thomas and her husband Theodore Thomas were dear friends of the Glessners. Theodore Thomas was director of the Chicago Orchestra from its founding in 1891 until his death in 1905. The Glessners entertained the Thomases many times in both their Chicago and New Hampshire homes. Clearly Frances Glessner valued Rose’s friendship and counsel and this extended to punch recipes. “Mrs. Thomas’s Punch,” is referenced in many Glessner House menus.
Punch #1 (listed in Mrs. Glessner’s menus)
2 parts Cooks Champagne
1 part Burgundy
1 part Rhine wine
Mix all ingredients and chill thoroughly. Serve very cold in punch bowl or small glasses.
Punch #2 (listed in Mrs. Glessner’s menus)
1 part Moselle
1 part Burgundy
1 part orange juice (orange juice added for Mr. Glessner, he’d take his plain)
2 parts Cooks Champagne
Mix all parts thoroughly, save the Champagne for last so you get the bubbles at the top of the glass. Serve very cold with an orange garnish.
However you serve it, fruit, bubbles, and liquor will enliven a party. It is hot, it is the mid-summer, and all of us need a little bit of a break. I want you to enjoy Mattie’s recipes this month in good health and with abundant good cheer.
The Incredible, Edible Tomato (posted July 5, 2022)

There is a very complicated myth about people once believing tomatoes were poisonous. For a full treatment, please read The Tomato in America: Early History, Culture, and Cookery by Andrew F. Smith. The controversy stems, ahem, from two essential roots. First, pewter plates, once widely used for food service, contained a great deal of lead. Acidic foods such as tomatoes would leech the lead and therefore sicken the consumers of tomatoes, and presumably other acidic foods as well, but tomatoes got the rap. Secondly, several publications in the 1500s classified the tomato in the nightshade family and also as a mandrake. Nightshade is poisonous and mandrake is an aphrodisiac; either way you slice it, the tomato was in trouble. In Europe, the fear of the tomato continued for several hundred years. European immigrants brought their anti-tomato conspiracy theories with them to North America.
However, the tomato was eaten in many warmer climates all over the world. It originated in central and south America. Foodways move, as we know, and eating of tomatoes was widely accepted by the North American population by the middle of the 19th century. When the need for canned foods for the troops arose during the Civil War, tomatoes were discovered to be very conducive to canning. The armies canned and served tomatoes to the troops, thus further popularizing and encouraging tomato eating nationwide. Since Mattie was born in 1862, she would never have known a kitchen that did not serve tomatoes. Mrs. Glessner lists tomatoes on too many menus to count, served in myriad ways. Here are a few examples for using this glorious product of nature. Fruit? Vegetable? I like this quote from E. Lockhart,
“A tomato may be a fruit, but it is a singular fruit. A savory fruit. A fruit that has
ambitions far beyond the ambitions of other fruits.”
Please enjoy these recipes with your family.
Tomato Fritters
Halibut Creole Style with Tomatoes
Tomato Jelly Salad
Green Tomato Pie
Tomato Catsup
Tomato Fritters
4-5 fresh tomatoes
1-2 ears corn on cob
1 teaspoon each sugar, nutmeg, salt, pepper
2 eggs
½ cup milk
Flour to make a batter, 1½-2 cups
Scrape corn from cob, saving the liquid it releases. Skin tomatoes in boiling water. Mix tomatoes with the corn and its liquid, breaking up tomatoes as needed. Season with sugar, nutmeg, salt, and pepper. Add 2 beaten eggs, the milk, and flour enough to hold together. Fry in boiling lard or other desirable oil and drain onto newspaper. When fresh corn is not in, dried corn which has been soaked overnight may be substituted. Indian meal (corn meal) may be substituted for half the flour, if needed. This will make a dozen or more fritters. These are really good with homemade tomato catsup.
Halibut Creole Style with Tomatoes
This recipe is from The Daily News Cookbook, published in Chicago in 1896 and attributed to Mrs. Robert Schueler of No. 684 South California Avenue, Chicago. For four servings.
4 4-ounce portions of fish
Salt and pepper
1 clove of garlic per fish portion, finely chopped
1-3 Tablespoons of canned tomatoes per serving. Fire roasted tomatoes in a can will work well for this. Mattie would have some canned from last year’s crop at The Rocks.
Take a thick, square piece of halibut or other firm fish. Wash it and lay it on a baking dish. Season with salt and pepper. Finely chop a clove of garlic about the size of a large bean and strew over the fish, then put on a cup of canned or fresh tomatoes. Bake until the flakes separate (this is not in the original recipe, but 350˚ for about 20 minutes will work.)
Tomato Jelly Salad
1 can of stewed tomatoes
1 teaspoon each of salt and powdered sugar
1 teaspoon red pepper flakes*
2 packages of unflavored gelatin
½ cup room-temperature water
Soak the gelatin in the water until thoroughly dissolved. Add the seasonings to the tomatoes and blend in a modern blender until smooth. Mattie would have put the tomatoes through a food mill or sieve. Mix seasoned tomatoes with the gelatin and place into greased muffin tins, small bowls, or any other round mold. Chill thoroughly, overnight is best. Unmold and carve the jelly if necessary to have a more tomato-like shape. Place on a lettuce-lined plate and garnish with a fresh basil or mint leaf. Mattie would have served this with a dollop of mayonnaise, but modern palates might prefer some sour cream.
*This recipe can be enhanced any way you like, add Worcestershire sauce, your favorite salsa, cumin, celery salt, garlic, anything you like. It can be kind of like a Bloody Mary jello shot with no booze, pretty wonderful.
Green Tomato Pie
This is a modern recipe adapted from HealingTomato.com. But there is nothing in the ingredients or techniques that Mattie would not have understood or accepted. And I really wanted a dessert for this menu! This is an amazing recipe, and I cannot imagine the Glessners not enjoying it as I hope you will as well. It is in the tradition of Mock Apple Pie; if you throw enough brown sugar, cinnamon, and nutmeg at a thing, it’s going to taste like apple pie. Plus, this is so pretty.
1 piecrust (see Mattie’s pastry recipe posted November 3, 2020)
4 green tomatoes
1 cup brown sugar
1 cup flour
1 teaspoon baking powder
1 teaspoon cinnamon
1 teaspoon nutmeg
1 teaspoon vanilla
½ cup unsalted butter
Line a pie plate with crust and flute the edges as you prefer. Slice the tomatoes as thinly as possible and place in the pie plate in careful layers. Pack as neatly as you can with few gaps between slices. Put the pie, with just the tomatoes, in a 400˚ oven for ten minutes. Meanwhile, mix the spices with the flour, then cut in the butter and mix until thoroughly blended. Remove pie from oven, rearrange tomatoes to fill in any gaps then sprinkle the crumbs over the top of the pie, covering tomatoes completely. Place back in oven and bake an additional 25-30 minutes, until tomatoes are bubbling, and crust is brown on top. Serve with whipped cream. Mrs. Glessner would certainly have wanted ice cream in the form of a tomato on the side.
Tomato Catsup*
In Mattie’s day, and earlier, there were many, many kinds of catsup: mushroom catsup, anchovy catsup, walnut catsup, and yes, tomato catsup. Mattie would have made tomato catsup from the tomatoes at The Rocks, the Glessners’ summer home. She may very well have made many of the other types as well. Making your own tomato catsup is really fun. It takes all day, but it’s not difficult and you will be thrilled with the outcome, I promise. This recipe has been reduced from one found in Mrs. Lincoln’s Boston Cook Book (1896), which called for a bushel of tomatoes. If you wish to make an entire bushel of tomatoes into catsup, multiply all the ingredients by 14.
3 28-ounce cans of stewed tomatoes; for extra flavor, use fire roasted
3 ½ teaspoons salt
½-1 cup brown sugar (to taste)
1 teaspoon cayenne pepper
1 ½ teaspoons each allspice, mace, celery seed, cinnamon
4 cups cider vinegar
Mix the spices together with the sugar; start with ½ cup of sugar and then add more later to your taste. Put the tomatoes into a very deep pot. You want the maximum head space because this is going to bubble a lot. If the tomatoes are whole, break them up with a potato masher. Add the spices and sugar, stir. Add the vinegar. Stir and set on the lowest burner setting, do not cover. This is truly an all-day project. Stir whenever you pass by the stove. About every 20-30 minutes is fine as long as the bottom is not getting burned. The kitchen will smell like vinegar as it reduces. You will notice that as it thickens and reduces it gets darker. It will not stay bright red like modern ketchup. That is made differently.
After about 6-8 hours, the mixture should have reduced by about half. At this point, Mattie would have put it through a food mill to remove any fibers. Modern cooks may choose to use a stand or immersion blender. One may certainly leave the catsup rough for a more artisanal treatment. This will make about 4 pint jars. Waterbath can anything you are not planning to use right away. A sealed jar should keep in the refrigerator for some time, like it’s going to last! Ketchup has many uses.
*Aka Ketchup. There are endless debates as to the correct spelling of the word. This is a spelling issue; it’s the same stuff. It has been called by both names, all over the world, for centuries. Most of Mrs. Glessner’s cookbooks call it Catsup, and so do I. Just please don’t put it on a hotdog or throw it on a wall.
The Inside Scoop from Mattie (posted May 31, 2022)

Frances Glessner’s “Dinner Book” of menus reveals that she served ice cream at nearly every luncheon, supper, and dinner. Often, she references the mold it should be made in. We know that the Glessners owned at least these molds: calla lilies, four-leaf clovers, books, and candles, as those are mentioned in the menus. I have often wondered how Mattie accomplished this. Molding ice cream is no mean feat and I mean that sincerely! One must first pack the molds, then freeze them solid—contemporary cookbooks had instructions for packing the filled molds in ice and salt to freeze solid—unmold them, plate them, and then not let them melt before service. Folks, this is nearly impossible. I honestly do not know how she did it. Additionally, she would have needed, at the very least, six molds of each shape. Otherwise, it would be impossible, considering molding time, to make enough molded ice cream for a dinner of 18 people. And yet, we know she did.
I did my best folks, I really did, and boy did I learn a lot. First of all, making your own ice cream is tricky. You need either a traditional ice cream freezer or the attachment for a KitchenAid. I’m not certain if other companies make ice cream attachments. I am a KitchenAid girl. There are numerous YouTube videos purporting to teach you to make ice cream using two concentric plastic bags and some ice and salt. Tried that, did not get good results.
Therefore, I believe that Mattie certainly knew how to make ice cream, but she likely availed herself of commercially available ice cream from one of the many Chicago concerns which sold it, such as John T. Cunningham, Manufacturer of Fine Ice Creams, on West Van Buren Street, or Gertie’s on South Kedzie Avenue, still open today in several locations. Once the ice cream was delivered to the back door of Glessner House, Mattie could either mold it using one of the many molds she had, or scoop it into special ice cream dishes as seen in the picture. I find no evidence that ice cream was sold already molded. Just imagine a hot kitchen full of roast beef, potatoes, two vegetables, freshly baked rolls, and then you have to cope with ice cream! I stand in awe, I truly do.
What about toppings? Well, the banana split was supposedly invented in Ohio in 1907 so I doubt Mattie would have known about it quite yet. Additionally, remember Mr. Glessner was not fond of sweets, so something so opulent in the sweets department would probably not be requested by Mrs. Glessner. The hot fudge sundae is only slightly older and again, I doubt Mattie would have served them. There are almost no references to chocolate of any kind in the Dinner Books except for bon bons being occasionally served at large parties. Mrs. Glessner seems certainly to have preferred molded ice cream with cake or a cookie. Regular readers may notice there is a small bee-shaped cookie in the dished vanilla ice cream. The ice cream has been covered with a layer of honey as I imagine Mattie might have done to showcase Mrs. Glessner’s excellent honey crop. In the picture, you will see, both molded and dished:
Strawberry Ice
Vanilla Ice Cream
Tutti Frutti Ice Cream
Mint Ice Cream
Strawberry Ice
2 cups water
½-1 cup sugar as needed, depending on sweetness of berries (can omit if watching sugar intake)
1 quart washed and de-stemmed strawberries
To make a simple sugar syrup with sugar and water, mix water and sugar in a saucepan. Cook over medium heat until the sugar dissolves completely and the mixture is clear; cool completely. If avoiding sugar, you may omit this step, but still use the water in the recipe. Slice the strawberries into small pieces and mash with a potato masher or large heavy spoon until thoroughly crushed. Mattie would have put hers through a food mill to remove as much of the roughage and seeds as possible, which is what I did.
Mix the berries with the cooled sugar water and pour into an ice cream freezer. You can also just freeze the slurry you have made but it will be denser and will not have as good a consistency. Using an ice cream freezer with a dasher blends the mixture as it freezes and makes for a smoother product more like commercial ices.
Vanilla Ice Cream
3 quarts sweet cream
4 cups powdered sugar
1 pint milk
2 Tablespoons Mexican vanilla
Mix the sugar with the milk in a small saucepan, cook until all sugar is dissolved. Cool. Mix sweet milk with cream, add vanilla, and put into an ice cream freezer. Turn until done. This recipe is from Mrs. Mary C. Harrison of Wyoming. She was one of the Lady Managers of the 1893 Columbian Exposition in Chicago. When they published a cookbook, entitled Favorite Dishes, this recipe was featured. If you want to make all these recipes, divide your finished vanilla ice cream into thirds.
Tutti Frutti Ice Cream
⅓ recipe vanilla ice cream
1 pint canned peaches (Mattie would have canned peaches from The Rocks from the previous fall)
1 cup maraschino cherries
1 pint canned crushed pineapple (pineapple was available canned in metal in Mattie’s time and was considered a delicacy)
We have talked about Tutti Frutti before, in the column published August 2, 2021. Tutti Frutti is a combination of peach, pineapple, and maraschino cherry or strawberry. Once you have made your vanilla ice cream, you can add the fruit. Freeze until firm. In the picture, the Tutti Frutti is featured in the rose mold and in a dish with a cherry on top. This would be a very special dessert!
Mint Ice Cream
⅓ recipe vanilla ice cream
2 Tablespoons mint jelly
Fresh mint leaves for garnish
Once the vanilla ice cream is solid, mix in the jelly until the whole is colored green. Freeze in molds. The four-leaf clover mold in the picture is mint ice cream. We know that the Glessners had four-leaf clover molds because that was how the ice cream was molded for Fanny’s wedding in 1898.
My hat is all the way off to Mattie once again. How she molded the ice cream and kept it cold enough for service boggles my mind. The woman never slept, clearly. If you want to make your own ice cream, it is really fun, and your family will be thrilled, but a short walk to the local ice cream parlor might be a better use of your energy, just sayin’. Please enjoy.
Birthday Cake for Breakfast (posted May 2, 2022)
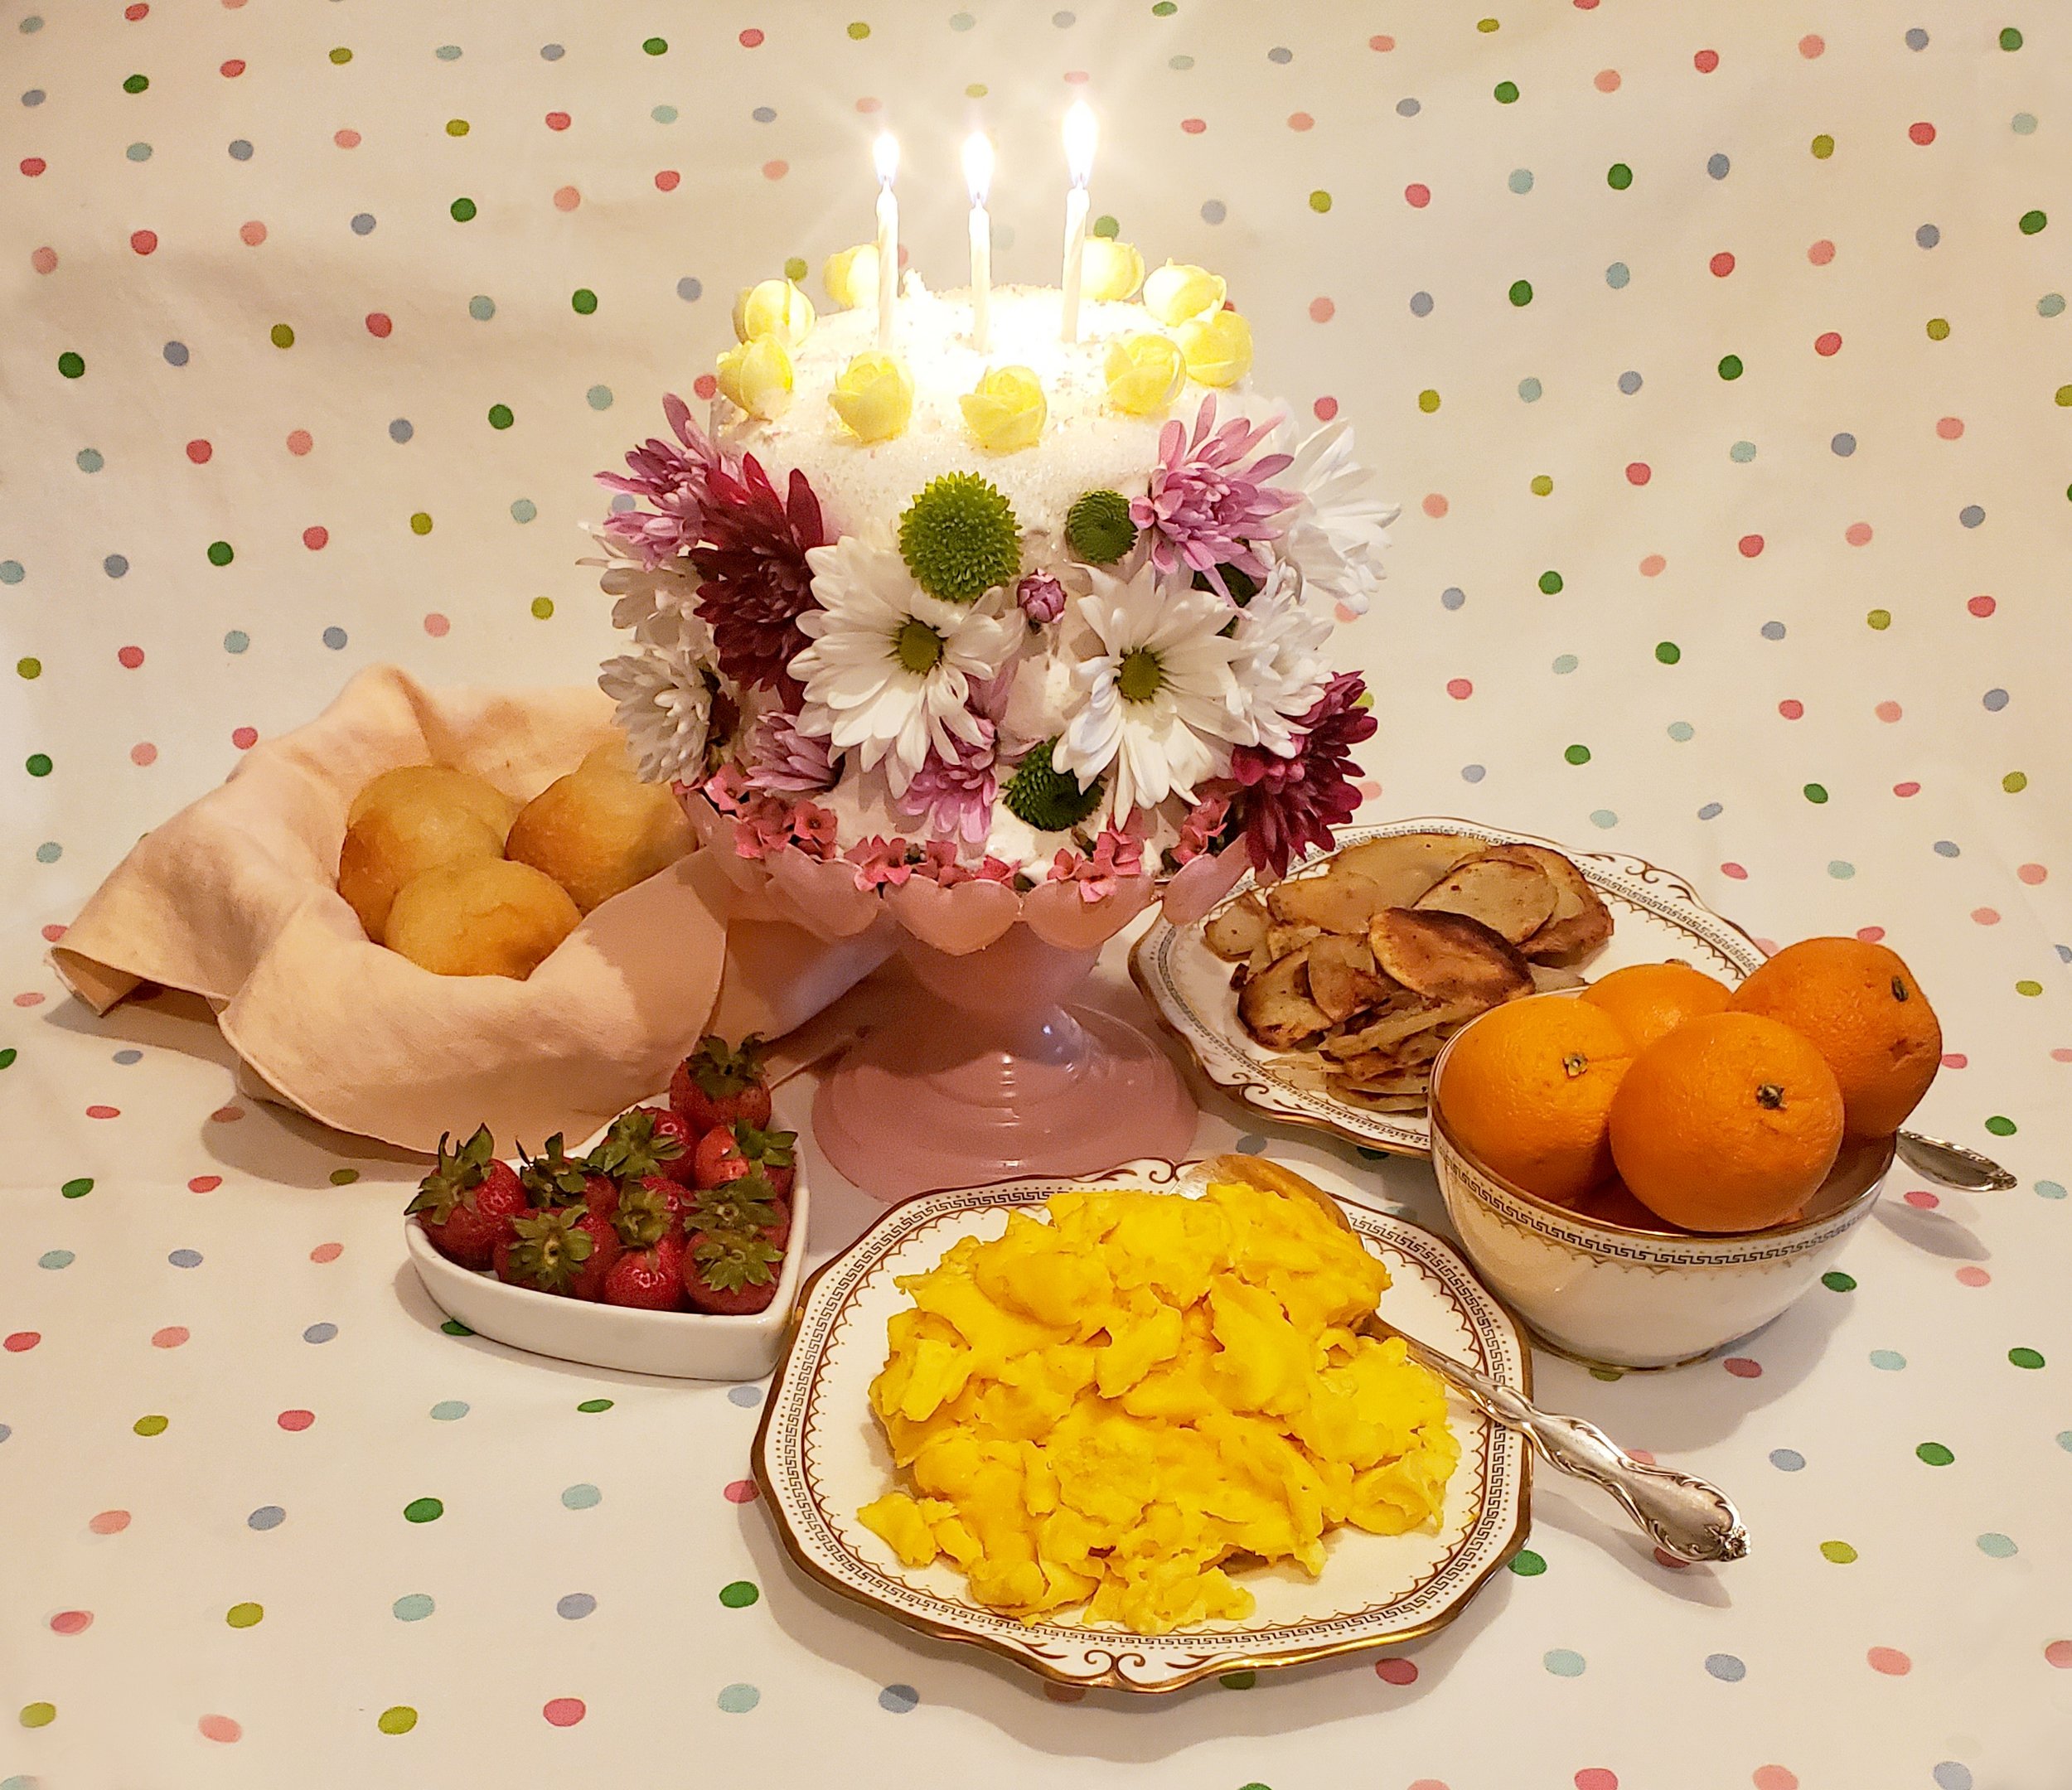
Did you know that the Glessners celebrated birthdays at breakfast? This month we are going to do that, too. On March 25, 1896, Mrs. Glessner wrote, “Wednesday Frances was eighteen years old. We had eighteen carnations, eighteen lilies of the valley, eighteen candles and a fine cake on the breakfast table. We gave her a lovely watch and chatelaine.”
On May 3, 1904, their granddaughter Emily was born and presumably they would have had a birthday breakfast for her every year complete with flower-decorated cake and candles. We could imagine this as Emily’s cake, or perhaps even Mattie’s…
Decorating cakes with real and candy flowers was a common treatment in Mattie’s time. In the cake pictured, she has used both fresh flowers and candied roses for ornamentation. The cake inside the frosting is an adaptation of Orange Cake which was submitted by Mrs. Frances Welles Shepard, one of the Lady Managers for the Columbian Exposition, and published in Favorite Dishes: A Columbian Autograph Souvenir Cookery Book, published in 1893.
Orange Cake
1 cup sugar
½ cup butter
4 egg yolks
½ cup milk
2 cups unbleached flour
2 teaspoons baking powder
4 egg whites, beaten separately
1 teaspoon Mexican vanilla
1 8-ounce jar orange marmalade
Thoroughly cream butter and sugar, add egg yolks. Whip the egg whites into a firm froth and set aside. Sift the flour, measure, and resift three times with the baking powder (you’ve been reading these columns for awhile if you know why). Mix the flour into the butter mixture alternately with the milk, add the vanilla. Stir in the orange marmalade. Fold in the egg whites. Bake in greased and floured pans, two 8-inch or three 6-inch, at 350˚ for 30-35 minutes. Cake is done when broom straw or fine knife comes out clean. Frost with boiled frosting.
Boiled Frosting
1 cup white cane sugar
¼ teaspoon cream of tartar
Dash of salt
1/3 cup water
1 egg white
½ cup powdered sugar, or as much as is needed
½ teaspoon of Mexican vanilla
In a large saucepan bring the sugar, cream of tartar, salt, and water the point where sugar is clear but mixture is not boiling; remove from heat. With a hand mixer beat in the egg white and flavoring. Mattie would have used a Dover beater--a hand-crank eggbeater. Continue to beat until mixture is cool and has achieved the consistency of spreadable frosting. If necessary, add up to ½ cup of powdered sugar if mixture is too liquid. This is tricky. Sometimes it all comes together perfectly, sometimes, it needs a little help. Mattie would have been prepared for every eventuality.
Once your cake has cooled and your frosting is ready, it is time to assemble your cake. Stack your layers with either frosting or jelly in between. More orange marmalade in the center is very nice. Frost the top and sides of the cake and prepare to decorate.
As Mrs. Glessner states in her account, you should match the number of flowers to the age of the person. You can certainly use both edible and real flowers, and yes, some flowers are edible and can be purchased at the finer shops.
For breakfast, Mr. Glessner was not fond of either bacon or sausage, but you should feel free to serve whatever breakfast your family prefers. Mattie has prepared scrambled eggs, rolls, potatoes, and, of course, oranges for this birthday breakfast.
There are three candles on the cake, one for the past, one for the present, and one for the future.
Mattie’s birthday was May 18, 1862. She would have been 160 years old this month. Happy Birthday to everyone born in May!
An Easter Tea Party for the Little Children (posted April 5, 2022)
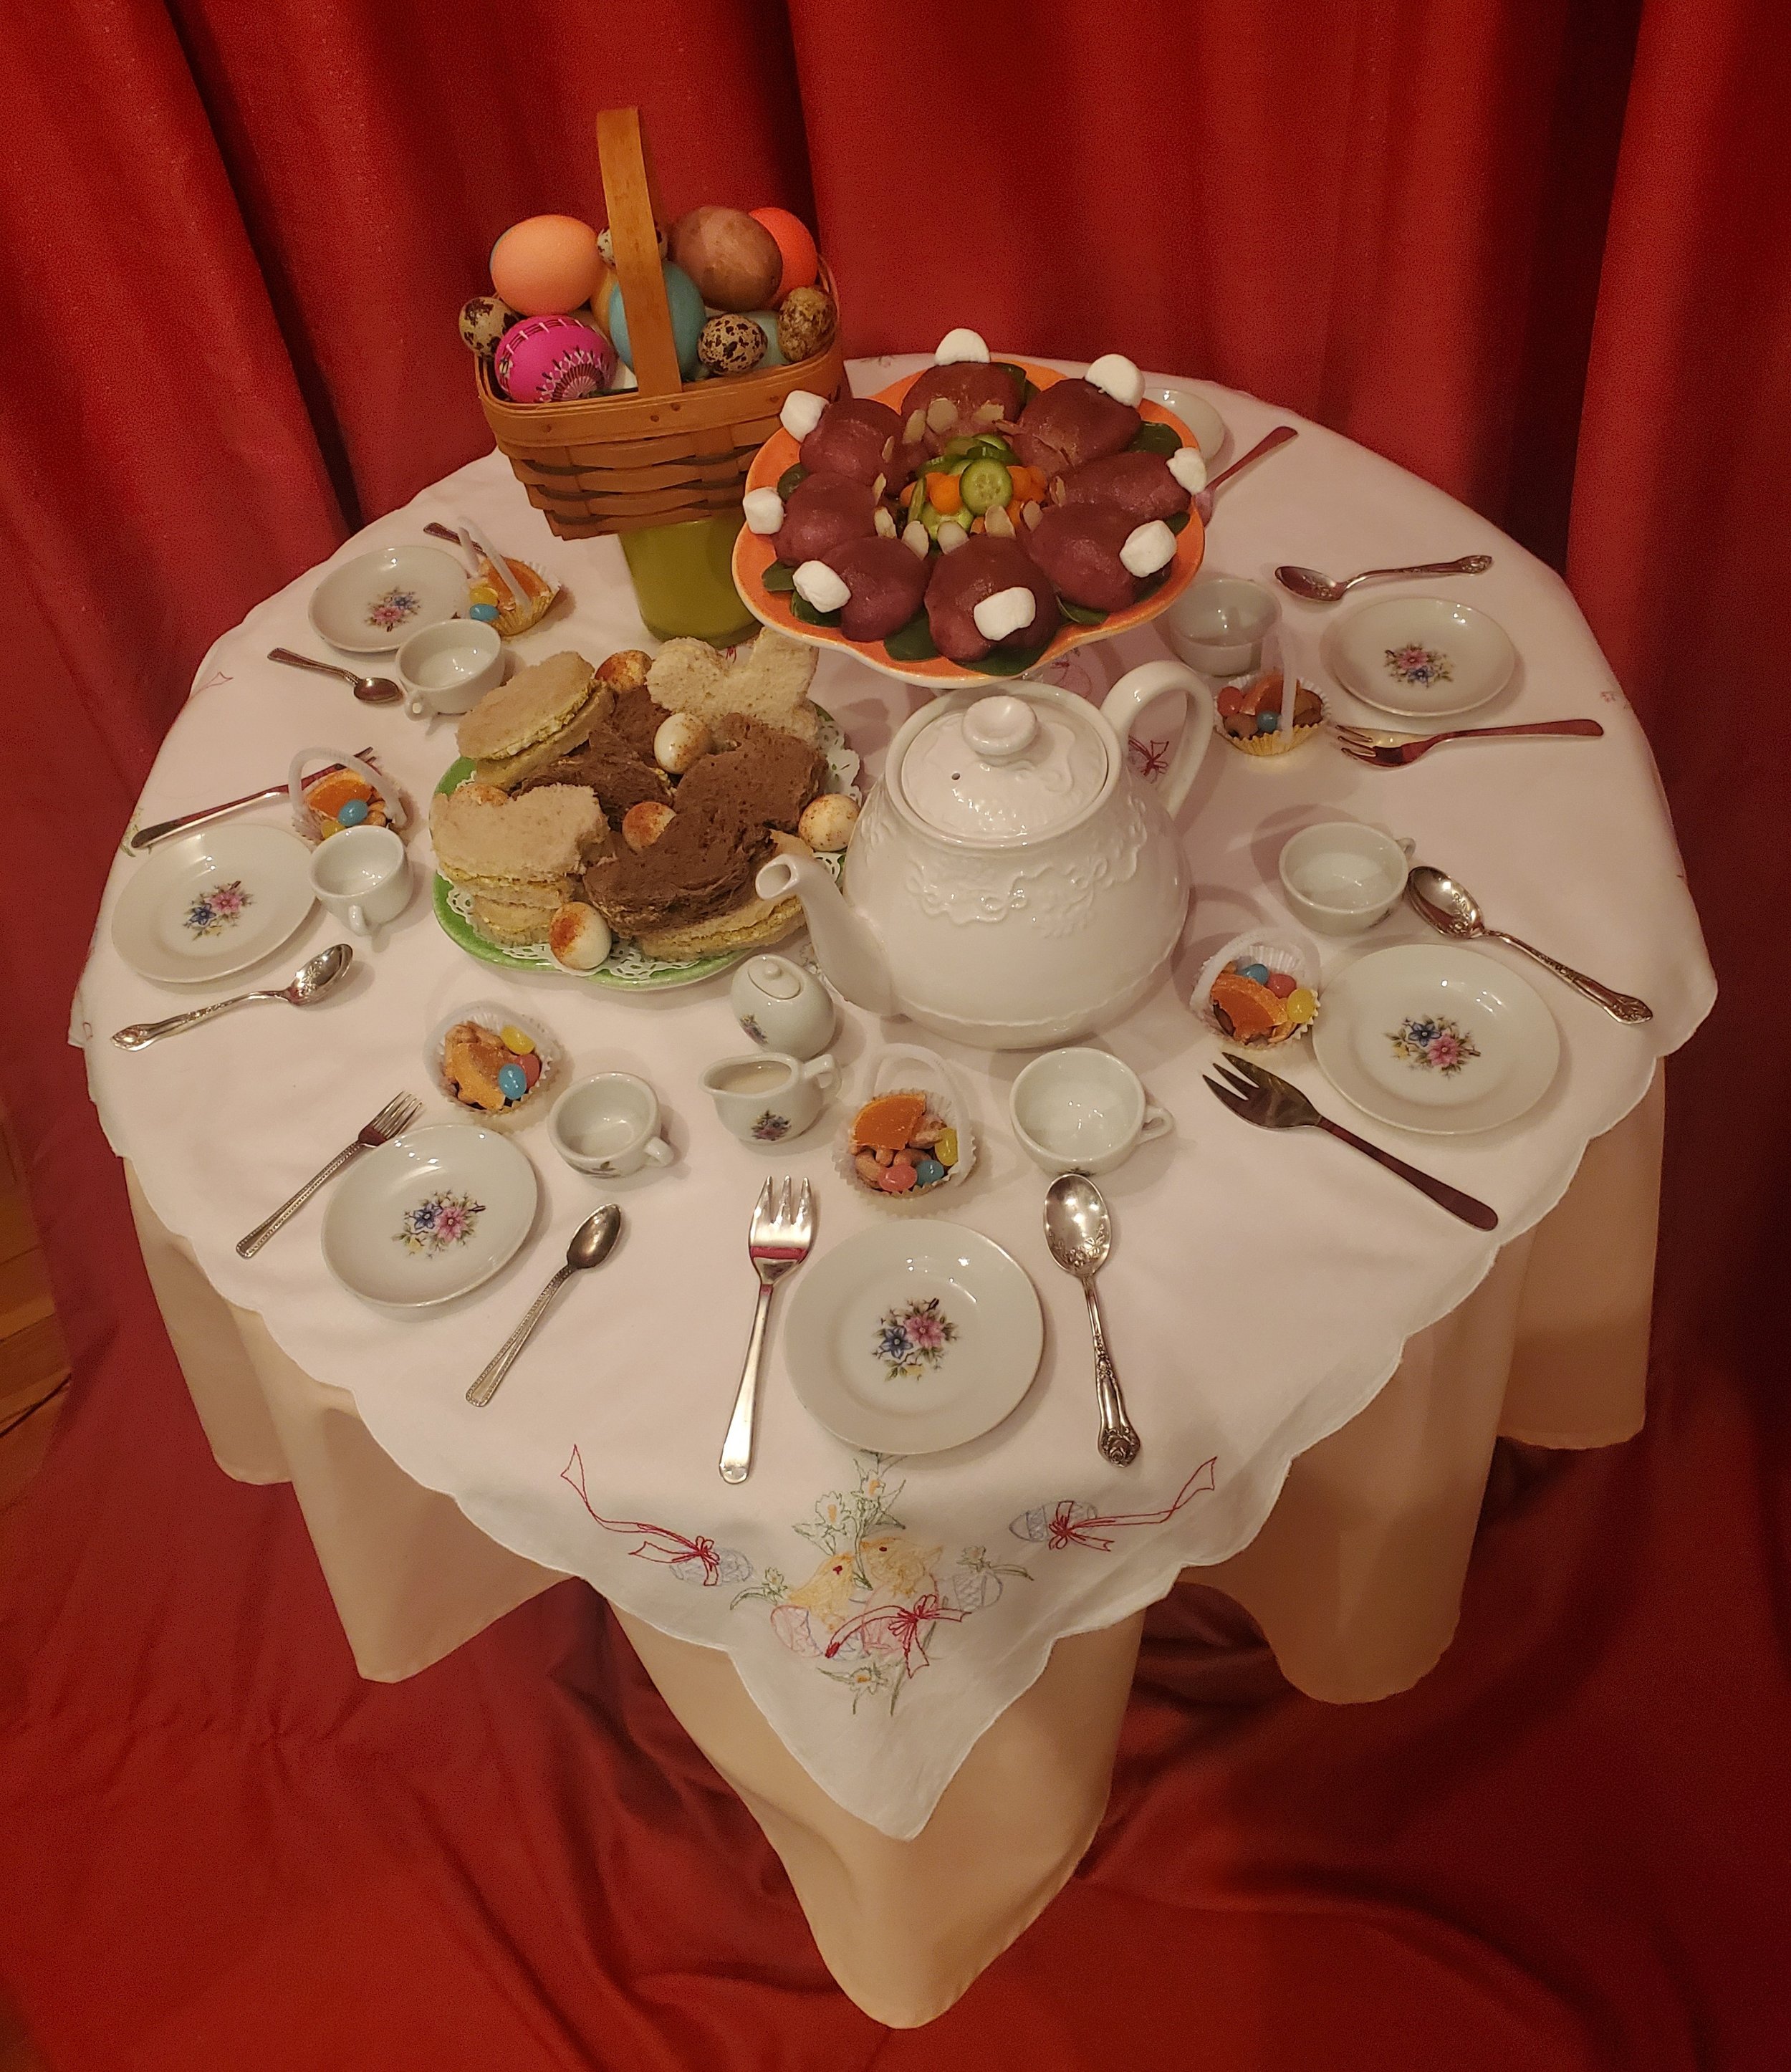
On April 19, 1908, Frances Glessner recorded in her diary, “Today I have colored Easter eggs for the little children.” This would refer to her seven grandchildren. George Glessner and his wife Alice (neé Hamlin) had four children: Elizabeth (1899), Frances (1900), John (1902), and Emily (1904). Frances Glessner Lee had three children with her husband Blewett: John (1898), Frances (1903), and Martha (1906), who would be the youngest at our party.
Coloring eggs for Easter was a relatively new concept in the United States in Mattie’s day, having caught on in America from the German tradition only about a generation earlier. Packets of egg dye, as well as dissolvable sheets, were readily available in Chicago. Mattie might have purchased egg coloring supplies from Druggists Peter van Schaack & Sons on Lake Street downtown, or perhaps from Fuller & Fuller. But I’d like to think she patronized The Englewood Fair at 63rd & Eggleston. Although Mrs. Glessner colored the eggs herself, Mattie would have been in charge of preparing a lovely little tea complete with tiny plates and silverware and treats to tempt the grandchildren. We are imagining that she made:
Egg Salad Sandwiches in Pleasing Spring Shapes
Tiny Hard-Cooked Quails’ Eggs Dusted with Paprika
Poached Pear Bunny Rabbits
Nut Cups with Jelly Bird Eggs and Candied Oranges for Mr. Glessner
Egg Salad Sandwiches
The recipe for Curried Egg Salad can be found in the column posted on May 19, 2020. Egg salad would be the easiest way for Mattie to use up all the hard cooked eggs that Mrs. Glessner colored. Spread whatever bread you like with a thin coat of softened butter to keep the bread from getting soggy, then spread with egg salad. Make the sandwiches first and then cut into shapes with a sharp knife or use a cookie cutter. Mattie has made butterflies, baby ducks, bunnies, and eggs. She adds a special touch by obtaining some tiny quails’ eggs (which you can find today in any local Asian market) and hard cooking them. Once peeled, dust them with paprika or any other dark, powdered seasoning. They are a special treat for small children and yes, they do actually taste different, try them!
Poached Pear Bunny Rabbits
One pear for every two servings
Dark red or purple juice such as currant, grape, or pomegranate
A few marshmallows
Toothpicks broken in half for affixing the marshmallow tails
A few currants, raisins, or cherries
Sliced almonds for ears
Small carrots and cucumbers, sliced for garnish
Slice the pears in half, remove the stems and ends with a sharp knife and use a melon baller to hollow out the core neatly. Peel the pears and place in a shallow saucepan or skillet in one layer, flat side down. Pour juice over the pears to cover. Simmer on low heat until pears are soft but not falling apart. This will only take 5 minutes or so. Remove from heat and allow to cool.
When ready to serve, place pear “bunnies” on a bed of lettuce or spinach with the small end facing towards the center. To make the tails, cut a marshmallow into four pieces with kitchen scissors. Mattie would not have been able to procure miniature marshmallows as they were not available in her day. They will be much easier for the modern cook if you prefer not to mess with cutting marshmallows. Break a toothpick in half. Put one end in the marshmallow tail and pin the tail on the bunny. Take two almond slices and stick into the head of each bunny for ears. Place a currant, raisin, or cherry (either dried, fresh, or maraschino) on the small end of the pear to make a nose for each bunny. Put small slices of carrot and cucumber in the center of the plate for the bunnies to snack upon before your guests snack on them.
Nut & Candy Cups
Small muffin liners
Pipe cleaners, cut in half
Assorted nuts
Jelly beans (called Jelly Bird Eggs in Mattie’s time)
Candied orange slices as a nod to Mr. Glessner, “always an orange”
Instead of a formal dessert for this children’s tea, Mattie might have made nut cups. Mrs. Glessner nearly always served nuts and candies at the end of her meals. For the grandchildren, Mattie could make tiny baskets using paper muffin cups and pipe cleaners. To make them like Mattie could have, cut a pipe cleaner in half, bend each end in about half an inch and poke the sharp end through the muffin cup from outside to inside. Fold the small end up and pinch tightly. Bend the handle into a curved shape and poke through the muffin cup on the opposite side. Adjust the curve of the handle and fill with nuts and candy as desired.
Now, brew a pot of good tea, have lots of milk and sugar available for the little children, and enjoy a pleasant tea party with the small (or big) people of your choice. Happy Spring, Everyone!
Mattie Has Been Noodling . . . (posted March 1, 2022)

We live in interesting times. There is so much discomfort and concern right now that I thought something comforting might be in order. What could be more comforting than noodles? Mattie would have called it macaroni if it was purchased, noodles if she made it herself. Many of us today call it pasta. Regardless of the moniker, flour, liquid, a little oil of some sort, sometimes eggs, and a pinch of salt have formed comfort food for cultures all over the world, throughout time.
Why is it called macaroni and what did Yankee Doodle have to do with it? It’s complicated. In an egregious simplification, I will tell you that in the late 1700s, when Thomas Jefferson was a world traveler and esthete, there was an aesthetic movement in Europe for extravagant dress and manners. These men were at first considered to be the height of fashion and elegance. They were called Maccaronis. They were so very sophisticated and fancy that they even ate exotic things like specially-shaped noodles from Italy! Imagine that! Gradually, over just a few years, these men, their manners, and customs began to be ridiculed. Thus, “stuck a feather in his cap and called it macaroni,” was intended as a supreme insult to the Yankee Doodle Dandies. And by the way, doodle is a rhyming slang for noodle which means dummy or dullard if applied to a person. I told you this is complicated!
The combination of starch, water, sometimes egg, and oil is ancient. You may have heard that it came to Europe and thence to America from China with Marco Polo. Perhaps. More likely, this product was a simultaneous invention as people began to make food from the ingredients they had at hand and those that were introduced by travelers/invaders. Now, let’s get back to the 1700s please because I will be out of words very soon. The extruded noodle or paste food came to be called macaroni. The Maccaronis themselves faded into the background of history. Back to Jefferson. He introduced extruded noodles to America. He referred to this dish as macaroni and procured a “mold for making maccaroni” in 1789 which was shipped back to America for him from Paris in 1790. Yes, it was served baked with cheese.
Jefferson, and others in early America, could purchase ready-made macaroni imported from Naples. It was very expensive and considered an extreme luxury. Extruded noodles or macaroni are distinguished from noodles made at home. This would have been called “paste” in Jefferson’s time.
Mattie would have called them noodles. Noodles and macaroni start with the same dough. To make things more confusing, this dough is often called paste, even in Mattie’s time. We know that Mrs. Glessner meant pastry when she said “paste” from several entries in the dinner books. But you will still see it called paste in cookbooks well into the 20th century. For noodles, the cook rolls the prepared dough as thin as possible, cuts with a blade or a fluted edge roller (think a pizza cutter with a wavy edge) and cooks in boiling water. These are often added to soups and could be used in a variety of ways including as a base for a simple dessert.
Macaroni, in Mattie’s day, would have referred to any noodle product that was commercially made using a press, or extruder. The dough is forced through small holes in a press to form various shapes. The term was used for all forms of extruded noodles regardless of shape. So, for Mattie, spaghetti is also macaroni. The shape of the hole through which the dough is pressed and the length to which the product is cut create types, such as elbow macaroni (which has a hole in the center because the mold has a hole in the center), spaghetti, shapes like stars and alphabets, etc. The best reference for modern audiences is a Play-Doh machine.
Mattie would not have owned her own macaroni extruder or press. She would have purchased various shapes of macaroni ready made from a grocer (The Grocers Encyclopedia, 1911). Frances Glessner lists “macaroni with tomato sauce” in several of her menus. The most popular way to serve macaroni in Mattie’s time was with cheese. We don’t find any references to Mrs. Glessner serving macaroni with cheese to her guests, but we can imagine that Mattie might have made a dish of it for the servants as a quick supper on a busy day, just like we do today. In Mattie’s time, parmesan cheese was most often used for a baked macaroni dish.
Noodles were made from scratch in Mattie’s time and would be used in soups and for a sweet custard eaten as a breakfast food or simple dessert. I’m including a recipe here partly to encourage you how to make your own noodles, and partly because this is truly a delicious, warming, very comforting food. If you have a Jewish grandmother or good friend, you will recognize this as a kugel (Thanks Rochelle).
Let us try our hands at some early twentieth century comfort food.
Macaroni with Tomato Sauce
Baked Macaroni with Cheese
Sweet Macaroni Pudding
Macaroni with Tomato Sauce
1 cup any style macaroni, cooked* (approximately two ounces dry)
1 Tablespoon butter
1 ¾ cups fresh stewed tomatoes, or canned (Mattie would have canned tomatoes from The Rocks, the Glessner farm in New Hampshire, and would have them for ready use)
1 sliced onion
3 Tablespoons butter
2 ½ Tablespoons flour
¼ tsp salt
Pinch of pepper
Cook macaroni in salted boiling water until tender. Drain, rinse with tepid water and place into ceramic or glass bowl with 1 Tablespoon butter, stir to coat, set aside. Heat 3 Tablespoons butter in saucepan, add onion and cook until clear, add tomatoes. Cook fifteen minutes. Rub through sieve or use food mill (Mattie would have used a food mill, you may use an immersion blender or stand blender, but remember, a more refined sauce will be achieved if you strain and press rather than incorporate the roughage). Set aside to cool. Add flour, salt, and pepper to strained tomato mixture. Stir until thoroughly blended. Return to heat, stirring constantly. Spoon sauce over macaroni into individual serving dishes. Mattie made this as a side dish to Chicken Boudin for Glessner house guests (we’ll get to that in a future column).
*There are numerous instructions in cookbooks from Mattie’s time which tell cooks how to cook spaghetti so that it stays whole, in strands. They were told to boil salted water, then hold the bunch of dried spaghetti with one hand and slowly lower it into the pot and wait until the wet ends get soft, then gradually lower the spaghetti into the hot water so as to maintain the length of the spaghetti. Many recipes instructed the cook to break the macaroni in pieces to avoid this time-consuming step.
Baked Macaroni with Cheese
1 cup cooked macaroni (approximately two ounces dry)
2 Tablespoons butter, plus 1 Tablespoon for the macaroni once cooked
2 Tablespoons flour
1 cup milk
¼ teaspoon salt
Pinch of pepper, white pepper is preferred, cayenne if you want to take it up a notch. Mattie did use cayenne pepper.
¼-½ cup parmesan cheese, grated
¼ cup breadcrumbs, buttered (Place crumbs in a dry skillet add a teaspoon of butter, stir briskly to coat, and remove from heat just as crumbs start to brown. This can easily be made ahead and stored.)
Cook the macaroni in salted boiling water until tender. Drain, dot with 1 Tablespoon butter while still warm, stir to coat, set aside. Melt 2 Tablespoons butter in saucepan, add flour and stir to form slurry. Add milk gradually and stir constantly to make a simple white sauce. Salt as desired. This is a white sauce, not a roux. You do not want to overcook the flour with the butter in the first step, just make sure it is all thoroughly incorporated before you add the milk. Put a layer of boiled macaroni in buttered baking dish, sprinkle with grated cheese; repeat until dish is full. Pour the white sauce over all, cover with buttered crumbs and bake at 350 ˚until crumbs are brown, about 15 minutes. Make in individual dishes for a formal presentation or in one casserole dish for more informal service.
Sweet Noodle Pudding (with thanks to Mrs. Beeton’s Book of Household Management, 1869)
Noodles
2 cups unbleached flour (Whole wheat flour adds a nutty goodness. Mattie would have used white flour for noodles, but you don’t have to.)
1 egg
½ teaspoon salt
1 Tablespoon melted butter or sweet oil*
Enough water to form a stiff dough, roughly ⅓ cup
In a large bowl, stir the flour with the salt. Make a well in the center and drop in one egg and the butter or oil. Stir with large wooden spoon or hands until thoroughly mixed. If using a modern stand mixer, use the dough blade. Mattie would have kneaded the dough herself on a floured board. Knead whichever way you choose for at least ten minutes. Roll as thin as possible or use a pasta roller if you have one. Mattie would have rolled with a wooden rolling pin on a pastry cloth or marble board. Roll until nearly translucent. Use a sharp blade or cutter with fluted edge to cut the noodles into long, thin strips. Let dry in place if possible. Be certain they are not sticking as they dry. Dry the noodles for at least 6 hours or overnight. Add to dishes as per the recipe instructions.
Pudding
1 cup dry noodles which you have already prepared, approximately 2 ounces, you may certainly use commercially made noodles
2 pints milk (4 cups)
Rind of ½ lemon, just the outer, yellow part of the peel
3 eggs
¼ cup sugar
2 Tablespoons brandy
½ teaspoon grated nutmeg
Put the noodles, with a pint of milk into a saucepan. Add the lemon rind and let simmer until the noodles are tender. Remove the lemon rind. Put the mixture into a pie dish or individual dishes for the size of the party. Mix the other pint of milk with the eggs, stir well whilst adding the brandy and sugar. Pour over the noodles and milk in the dish or dishes. Grate a little nutmeg over the top and bake in a moderate oven (350˚) for ½ hour.
*Sweet oil, in Mattie’s time, referred to any oil that did not come from an animal, such as olive oil, walnut seed oil, apricot seed oil, rapeseed (now called Canola) oil, etc. Olive oil has too strong a flavor for a sweet recipe, so please use butter or a milder oil for a sweet dish.
Let us all be comforted by noodles today, and always.
“But Mattie! We don’t eat that anymore. Offal is awful!”
(posted February 1, 2022)
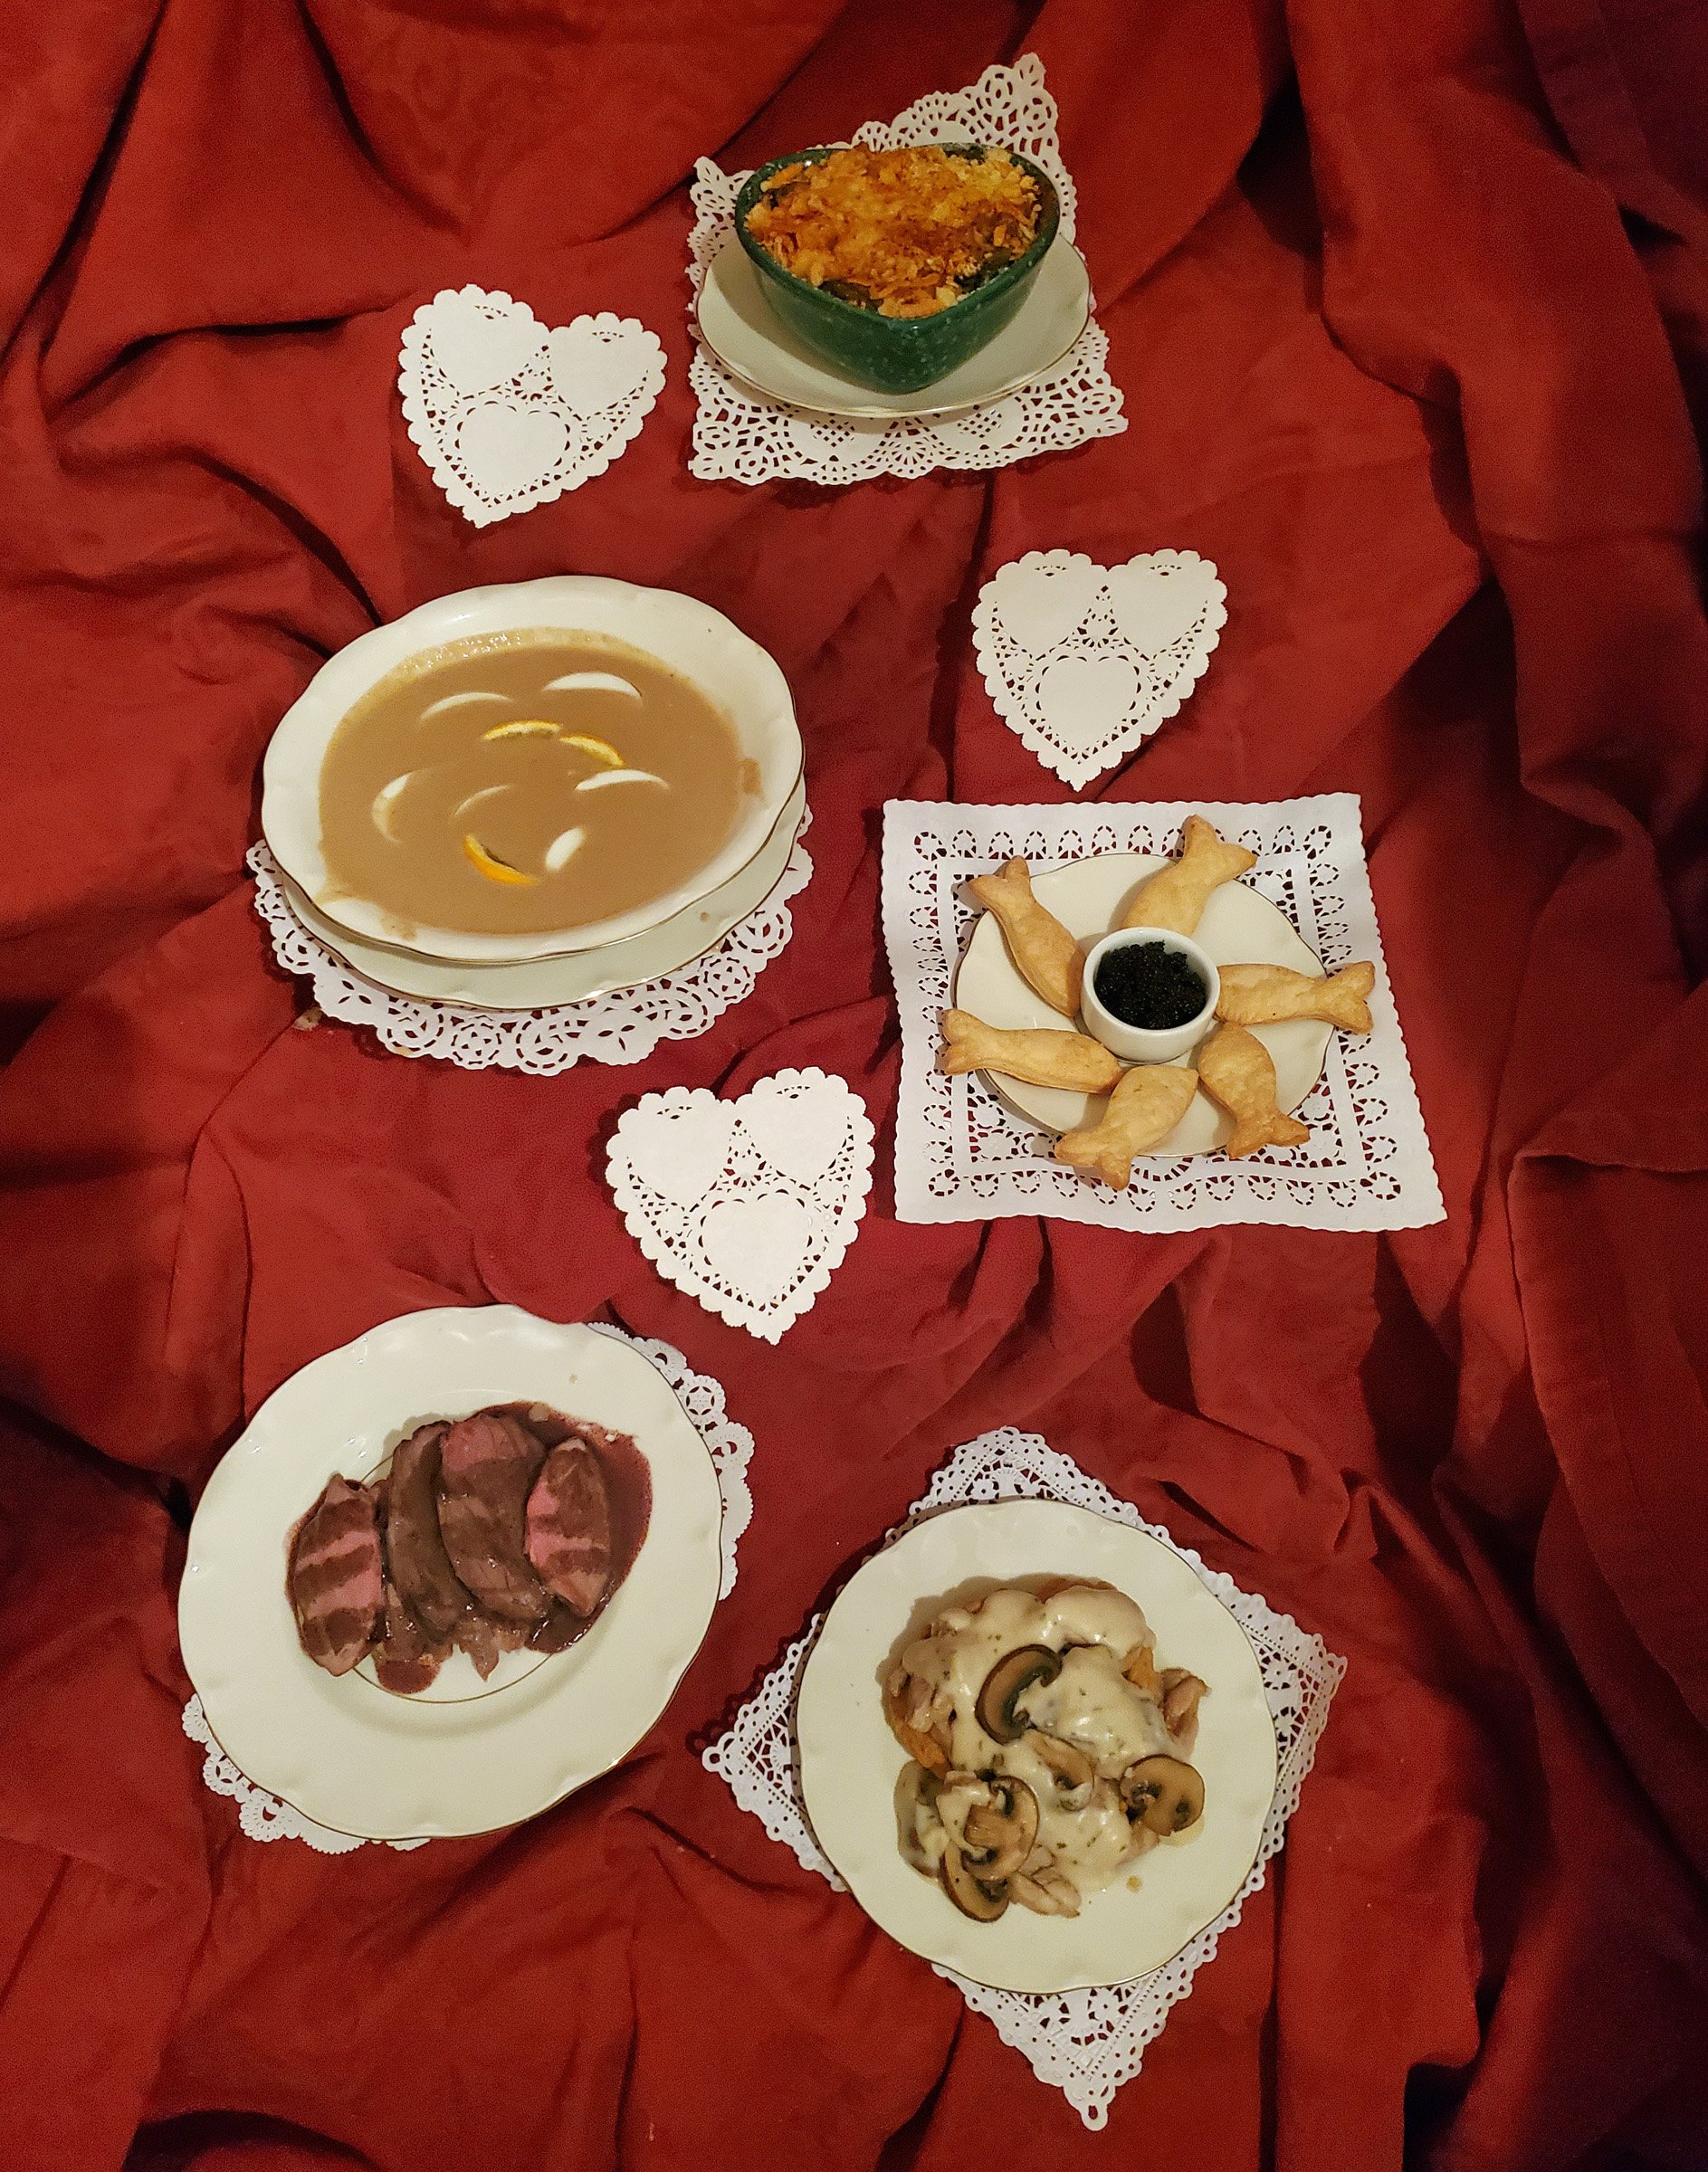
I have spent the past two years pouring over Mrs. Glessner’s dinner books so many times that I should have them memorized by now. I am responsible for presenting an accurate picture of what Mattie cooked and served to the Glessners and their guests and this is part of how I do it. Honestly, dear readers, I have been holding out on you, leaving a few things off because I really did not want to cook them. In Mattie’s day, many animals, and parts of animals that are no longer consumed were served frequently. This month, here is me, putting on my grown-up pantalettes to bring an even truer representation. Off-putting as it may seem, this is what the past tasted and smelled like, and that is my job.
Frances Glessner’s Bills of Fare (later called Dinner Books) begin in 1892, the year Mattie was engaged as cook. They list all the menu items for 86 dinners, suppers, luncheons, and parties between January of 1892 and the point at which I stop in 1912 when Mattie left her post. Certain items appear over and over and were clearly favorites. Many of these things are foods most of us no longer consume. Sweetbreads, for instance appear 17 times. Saddle of mutton (not lamb) appears 13 times. For February, I present some popular dishes that Mattie cooked for the Glessners which most guests today would not want to eat.
Scalloped Oysters
Mock Turtle Soup
Caviar with Puff Pastry
Saddle of Mutton with Wine Gravy
Sweetbreads with Mushroom Cream Sauce
Scalloped Oysters
1 eight-ounce can of oysters (Aldi has really good ones), drained
Half a sleeve of crackers, about 15 saltines or Ritz
1-2 Tablespoons butter, cut into small pieces
¼ teaspoon paprika
Salt and pepper to taste
Squeeze of lemon
The Glessners enjoyed raw oysters on the half shell frequently, but scalloped oysters appear many times in the dinner book as well. This is an exceedingly simple dish. In a small casserole dish, place a layer of oysters, then crackers, then butter and repeat until the dish is full. Sprinkle salt, pepper, and paprika on top, then squeeze half a lemon over all. Bake in a medium, 350˚ oven for 20 minutes or until top browns nicely and liquid is bubbling. This should serve two persons.
Mock Turtle Soup
1 Calf’s head from which you have singed off the hair (modern cooks may choose to use 1 pound ground beef or turkey)
3 cups beef or chicken stock
1 teaspoon each ground cloves, ginger, allspice
3 Tablespoons flour (you may substitute 6-8 crushed ginger snap cookies for the spices and flour)
3 hard cooked egg yolks, slice the whites and save for garnish
3 Tablespoons whole milk or cream
1-2 cups sherry or madeira
Sliced lemon and sliced egg white for garnish
Turtle soup was originally made from green sea turtles and was enjoyed so much in Europe in the 18th century that by the middle of the 19th they were in such short supply that mock turtle soup was developed. The tender meat of a calf’s head mimicked the flavor and texture of turtle meat. In Alice’s Adventures in Wonderland (first published in 1865) C.S. Lewis created a character called the “Mock Turtle” having the body of a turtle but the head and hind feet of a calf.
In America, diamond back terrapins were used to near extinction on dining tables just as their sea cousins had been. Hence, the emergence of mock turtle soup in the U.S. Fun fact, all terrapins are turtles but not all turtles are terrapins. Terrapins are turtles that live in both water and brackish swamps, while those that live exclusively in the sea are just turtles.
Today, some American restaurants still make soup from snapping turtles but for the most part any turtle soup served in America is mock. There are countless recipes. The flavor profile usually contains what we consider gingerbread seasonings: cloves, ginger, allspice. Some recipes even call for using ginger snap cookies as seasoning and thickening. This works, I tried it. They nearly always have hard cooked egg as a thickening agent, the addition of sherry or other sweet wine, and are garnished with egg and lemon.
To make your own version of mock turtle soup, put ground beef or turkey into a saucepan, sprinkle the seasonings and flour (or cookies if going that route) over it, pour two cups broth over and let sit for fifteen minutes. Put the pan on the stove and heat until meat is thoroughly cooked. Add more broth as needed to keep a liquid, soup-like consistency. Meanwhile mash the egg yolks until very smooth and add the milk or cream, blend thoroughly. Add this to the soup gradually and stir to blend. Mattie would have put the soup through a food mill to create a smooth texture. A modern stand or immersion blender may be used at this stage. It is perfectly fine to skip this step yielding a soup with more texture.
Just prior to serving, add the sherry and simmer just a few more minutes. When heated through, serve with small wedges of lemon, and thinly sliced cooked egg white as garnish.
Caviar with Puff Pastry
Frances Glessner served caviar frequently, usually in the form of sandwiches. Here we have a very simple service of caviar in a small pot surrounded with puff pastry in the shape of fish. Puff pastry can be purchased ready made in the frozen food aisle, but please don’t. Try just once making it yourself, and you’ll never buy the box again. Unlike the label on the stuff from the grocery store, which reads like a chemical analysis of the Chicago River, real puff pastry has only five ingredients: flour, butter, lemon juice, water, and elbow grease.
1 ½ cups flour plus more for dusting
1 cup butter, room temperature
½ cup ice water or more as needed
Splash of lemon juice
Remove one Tablespoon of butter and mix it thoroughly into the flour. Gradually add the ice water to form a stiff dough. Sprinkle finished dough with lemon juice. Spread the rest of the butter onto a sheet of waxed paper to form a square about 10” on a side. Chill the thin sheet of butter thoroughly.
Meanwhile, roll the dough into as large and thin a square as you can. Peel the butter away from the wax paper and place in center of dough square. Fold the dough over the butter to cover completely, roll until smooth. Fold the left and right sides of the dough into the center, then fold the top and bottom into the center, roll until smooth. If the butter is popping through the dough, that means it is too warm. You don’t want to fully incorporate the butter; you want to layer it within the dough. Put back outside or in the fridge to cool.
Repeat this folding and rolling process, chilling when needed, nine or ten times. Sometimes I like to take it up to eleven. Use this for turnovers, crackers, or shells to be filled with all manner of things. For crackers to serve with the caviar, roll and cut with desired cutter, bake at 400˚ for 5-7 minutes. Mattie would have come to Mrs. Glessner with a good puff pastry technique at the ready. Everything tastes great on it!
Saddle of Mutton with Wine Gravy
Today, if we eat sheep at all, it is generally lamb, but in Mattie’s time, older sheep, or mutton, was routinely consumed. When properly seasoned and cooked, it can be a tender and delicious main dish, but it has a strong, somewhat gamey flavor not favored by most modern palates. Mutton can be procured at many small meat markets in Chicago and lamb is available in most supermarkets.
As with all roasts, bring to room temperature, thoroughly salt and pepper and roast at 350˚ until desired doneness, about 20 minutes per pound. Remove from pan and add flour to the pan drippings equal to the volume of the drippings. It will probably be 1-2 Tablespoons depending on the size of your roast. Make a simple roux with the flour and drippings but instead of water or broth, add 1-2 cups red wine. Stir and simmer until a gravy is formed, salt and pepper to taste. Serve over sliced meat.
Sweetbreads with Mushroom Cream Sauce
Ah the famous sweetbreads! What are sweetbreads, anyway? Trust me, you really don’t want to know…ok, you dragged it out of me. Sweetbreads are the thymus gland of a young cow or sheep. They also refer to the pancreas of an older animal. They can be procured from a specialty or traditional butcher shop. They are not expensive and have an extremely mild flavor and texture which most resembles mushrooms, in my opinion. This might explain why so many recipes call for serving them with mushrooms. Mattie often did.
To make this dish, take one pound of sweetbreads and soak them in salt water for at least an hour, drain, discard water. Simmer sweetbreads in a saucepan with a little water until firm and no longer pink. Remove from water and pull off any fibrous membranes or veins; this is precisely as much fun as it sounds. Chop finely. Slice half a pound of mushrooms and sauté in 2 Tablespoons butter; add 2 Tablespoons flour and make a simple roux. Add a cup of milk and a splash of sherry. When the cream sauce is finished, add the sweetbreads. Serve over toast points or puff pastry.
Now for the time that always comes when I tell you which of these recipes you should make right away to impress your family… Puff pastry. See you in March!
Gold Found Where the Rainbow Rested (posted January 2, 2022)
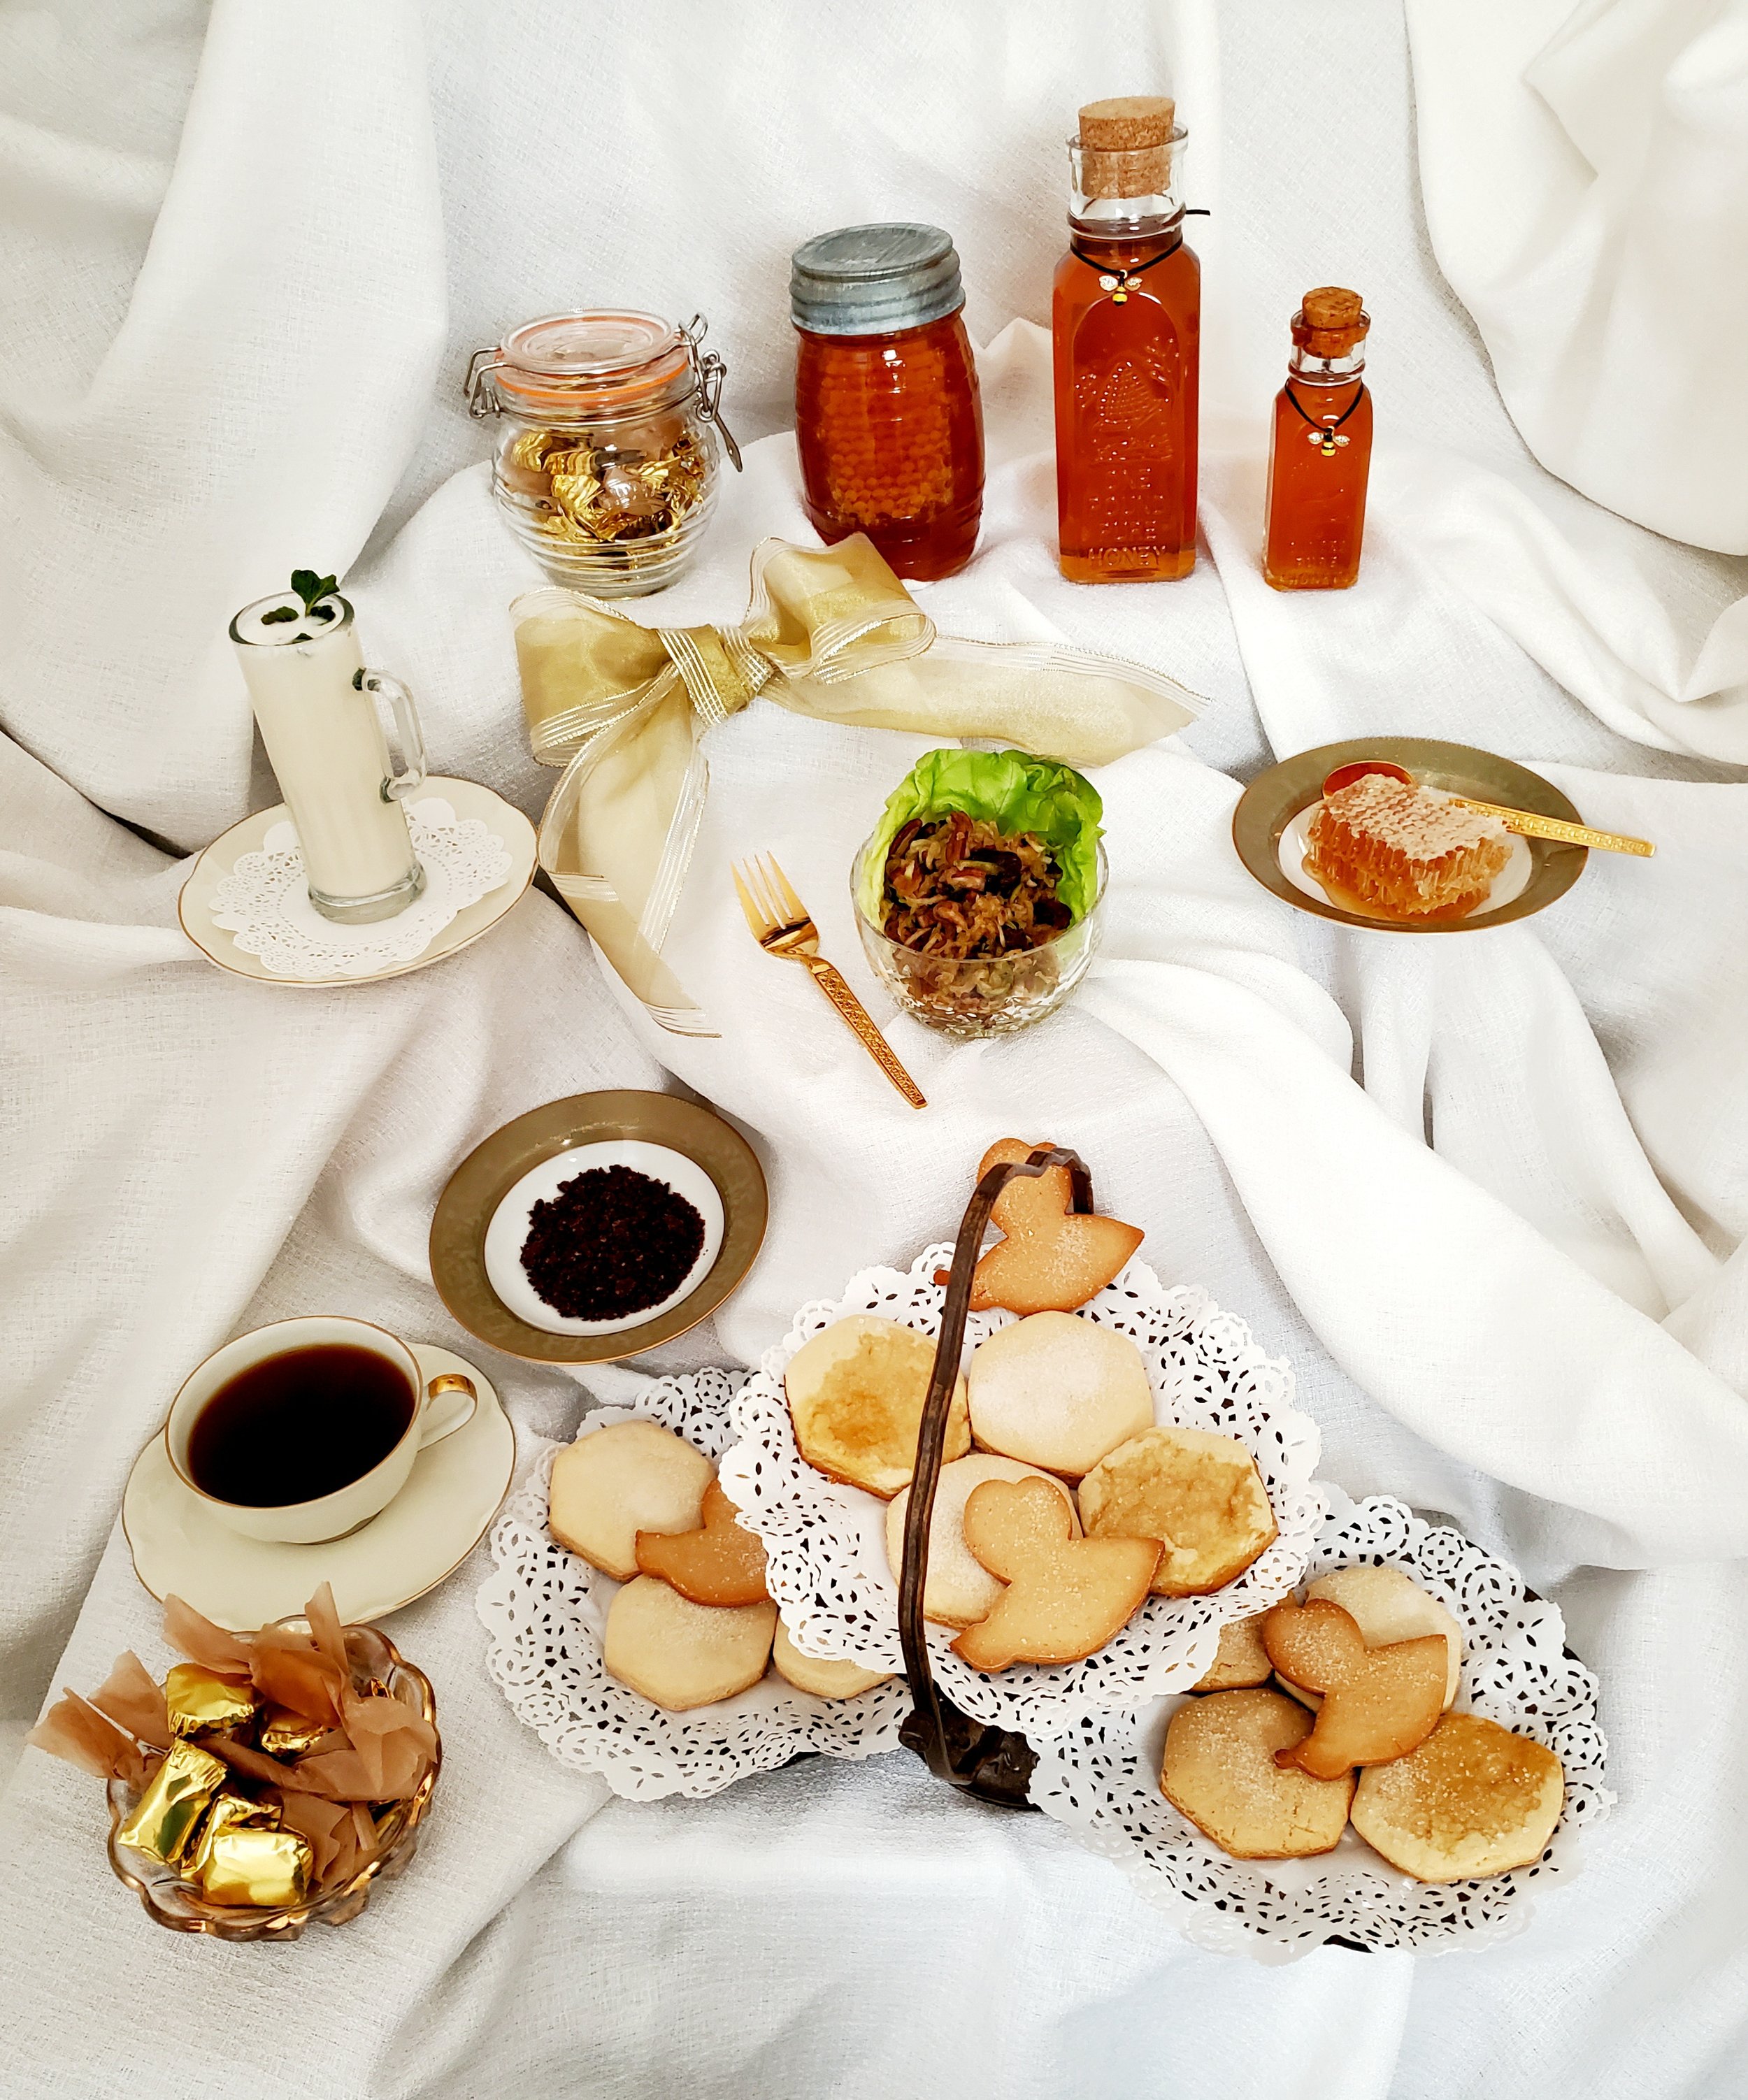
It is January, the holiday season is nearly over. We are taking down decorations and putting all our lovely gifts to use. If you were in the Glessners’ circle at the turn of the 20th century, you might receive a pound or so of Frances Glessner’s own honey. She was an apiarist and had at least two dozen colonies of bees at The Rocks, their summer home in New Hampshire. In deciding where to best place her bees, she wrote,
“One day in June when the sky didn’t know whether to laugh or cry and so did both at once, a rainbow with all the primitive colors showing bright rested one end of its glowing arch on a corner of the pasture, marking the spot for us to search for the pots of gold and hidden treasure.”
(“With Birds, and Bees, and Blossoms,” unpublished essay by Frances Glessner given as a talk to The Fortnightly of Chicago, 1903)
Just as Mattie turned the fruit yield from The Rocks into jams and jellies, the honey was packaged for gift-giving and family use. Mrs. Glessner was once asked by Bradford Torrey, noted ornithologist, if she had any commercial return from her honey and she told him that she gave it away to her friends, to which he replied, “Oh, then you have!”
Oh, the glories of honey! The American Bee Journal, to which Frances Glessner subscribed, boldly announced the benefits of honey, and exhorted its subscriber apiarists to tell everyone that,
“honey is good for the lungs and liver; that they will not cough so much nor be so bilious; that it is a blood purifier, a mild laxative, in fine a thorough and harmless renovator of the whole system; that they will live longer, feel better, be more at peace with themselves, their Maker, and with mankind; die happier, and leave a great legacy to their children if they will but consume honey in lieu of other sweets.” (American Bee Journal, XXIII, no. 7, 1887)
Now, I ask you, who could argue with a testimonial like that?!?
Keeping bees was a noble pastime often practiced by landowners of the Glessners’ economic class. Mrs. Glessner’s apiary yielded up to 1,500 pounds of honey a year. For Mattie, the challenge would be how to use the yield that was not distributed as gifts.
Comb Honey
Lime Honey Fruit Compote
Honey Tea Biscuits
Honey Taffy
Honey Beverage
Honey-Lemon Milk
Nineteenth-century home apiarists put up honey in tin pails, glass jars and ceramic honey pots. Sadly, we do not know exactly how Mrs. Glessner packaged the honey she gave as gifts. Mr. Glessner referenced in his tribute to her (see Object of Month for January 2022) that she sold some of her honey as well. He proudly states that it fetched the highest prices. This would be up to 18 cents a pound! In the picture you will see a jar of wrapped honey taffy, a pound of comb honey, a pound of extracted honey, and a 4-ounce bottle of extracted honey. Perhaps someday we will discover how she packaged it.
Comb Honey
The honeycomb is edible, and many people tout its dietary and health benefits. Mrs. Glessner often gifted her honey with the comb intact, considered more desirable in her time than “extracted honey,” which is how it is most often sold today. Prior to passage of the Pure Food and Drug Act in 1906, people were very skeptical about product purity. Extracted honey – that which did not contain a comb – was easy to adulterate with sugar-water and molasses, masquerading as honey. The inclusion of the comb was a guarantee of authenticity that would have been known to all in Mattie’s time. The comb itself is edible. Try spreading some on a biscuit or slice of toast. It is especially popular with kids and is the origin of candy wax lips once enjoyed at Halloween.
Lime Honey Fruit Compote
½ teaspoon grated green lime rind
¼ cup lime juice, about 2 green limes
4 medium green apples
¼ cup honey
¼ cup seedless raisins
1 dozen moist medium-sized prunes, finely chopped
1 dozen pitted dates, sliced into thin slices
¼ cup pecans or walnuts
Grate lime rind just before needed (it can also be purchased ready made in jars, if desired). Juice the limes and measure out ¼ cup. Place into a large ceramic bowl. Wash apples, core but do not peel. Grate apples and place into the bowl with the lime juice. Add honey, and all the dried fruit. Let sit overnight or a full day. When ready to serve, ladle into individual delicate bowls lined with a lettuce leaf.
Honey Tea Biscuits
1 cup of strong honey
½ cup of whipping cream
2 eggs
½ cup butter, melted
3-4 cups flour
½ teaspoon of soda
1 teaspoon cream of tartar
Mix all the liquids together. Sift 3 cups of the flour with the soda and cream of tartar. Add dry ingredients to wet and stir until a stiff dough is formed. Add as much of the last cup of flour as needed. Roll about an inch thick on a floured board or pastry cloth. Cut with cookie cutter. This time Mattie used one that is shaped like a bee and another shaped like a chamber of honeycomb. She made this herself from a donut cutter and a pair of plyers. Place cut cookies on cookie sheet. Bake at 350° for about ten minutes until just done. You may sprinkle with vanilla sugar or spread with fresh honey before baking which gives a nice shine. These are excellent spread with honey or jam.
Honey Taffy
2 ⅓ cups sugar
2 ⅓ cups honey
1 ⅔ cups water
¼ teaspoon salt
2 teaspoons Mexican vanilla
Combine sugar, honey, water, and salt and cook rapidly to medium crack stage (if using a candy thermometer, this is 280°). Remove from heat. Stir in vanilla very quickly and pour onto a buttered marble slab or into a buttered pan until just cool enough to be handled. Pull the taffy until light. With the last few pulls, draw out into a rope about ½ inch in diameter. While still pliable, quickly cut into ½ inch lengths using kitchen scissors with blades rubbed with softened butter. Wrap each piece in heavy waxed paper. This will make 2- 2 ½ pounds of candy for gift giving or family use.
Honey Beverage as a Coffee or Tea Substitute
The American Bee Journal (XXIII, no. 40, 1887), has a recipe for a hot beverage made from honey and grain.
“Take three quarts of good, clean wheat bran and bake in the oven til it becomes quite brown. Then add one quart of liquid buckwheat honey and stir thoroughly; put it back into the oven to bake still more, stirring it frequently until it gets dry, granulated, and very brown—a little scorching will not hurt it. Draw it the same as coffee, and use with milk and honey, or milk and sugar, to suit the taste. This makes a perfectly wholesome and palatable drink, and the sooner it takes the place of tea in every family, the sooner the public health will improve.”
Some of my older readers might recall a product called Postum which was a coffee/tea substitute made from roasted wheat bran and molasses. It was first introduced in 1895. Perhaps C.W. Post was reading The American Beekeeper, too. Postum was discontinued in 2007 but revived in 2012 and is once again available for purchase. Or, you could come to Glessner House and have Mattie make you some from Mrs. Glessner’s honey.
Honestly readers, you can trust me. You know how in every column I tell you there is one recipe you really must try? Believe it or not, this is it! I am a decided tea drinker, as I imagine Mattie was as well. This beverage is delicious, truly. I drank the whole cup after I took the picture and thoroughly enjoyed it. If you are trying to avoid caffeine but enjoy a really robust, dark, warm beverage, this might do it for you. No one is more astonished than I!
Lemon-Honey Milk
1 quart chilled milk
½ cup honey
dash of salt
¼ cup strained lemon juice
Combine milk, salt and honey and beat until thoroughly mixed. Mattie would have used a Dover beater. Modern cooks can use a blender to good effect. Add lemon juice very slowly, beating all the while (if using blender, pour through the hole in the blender lid). Serve at once, very cold, in frosted glasses. A sprig of mint is a nice garnish. You should try this too. It’s like if an orange Dreamsicle was lemon instead. Delicious!
Mrs. Glessner was pleased when Mattie served The Rocks’ honey at the Glessner House table as she described in her Fortnightly Club talk,
“Tell me when you taste your tea biscuit, spread with nectar stored by my New Hampshire pets, and which has in it a touch of wild rose, flowering grape, red raspberry, a dash mignonette, and all the rest gathered from luscious heads of white clover, did not these patient little workers find for you and me the pots of gold which were hidden where the rainbow rested on the hillside one smiling and tearful day in June, twenty years ago.”
Let all of us appreciate the bees’ gold at present while we pack away our decorations and enjoy our gifts.
We Wish You a Mattie Christmas! (posted November 30, 2021)

Frances Glessner loved to have holiday parties, as evidenced by the many tea, supper, and dinner menus she left for us in her bills of fare and dinner books. This is a recreation of an event that she might have held for a few dear friends at Christmas. Mattie would have prepared:
Tomato Cream Soup with Egg Dumpling
Roasted Salmon & Leek Cream Cheese on Lightbread Roll
Mattie's Brown Bread with Horseradish Cheddar Spread
Cranberry Relish
Pear, Fig, & Stilton Tartlettes
Christmas Bread
Squash Pie
Mince Pie
Spiced Cider
Mulled Wine
Tomato Cream Soup with Egg Dumpling
In Frances Glessner’s menus, there are many instances of egg balls being served in soups. Popular vernacular has changed in 110 years, and I was not comfortable with that moniker, so we are calling them dumplings. I was not familiar with the concept and was pleased to be introduced to them. They are found in many 19th century cookbooks and were used as an addition to simple cream and clear soups to make them a little more filling and more visually interesting. Makers of matzo balls will recognize the basic idea but with the addition of hard cooked egg yolk, these take on a creamy texture. I enjoyed trying to make them look like little speckled quail’s eggs.
Tomato Cream Soup (4-6 servings)
White part of a leek, finely chopped, approximately ½-1 cup
¼ cup olive or other sweet oil
2 cloves garlic
2 Tablespoons grated fresh ginger (ginger paste is available in a tube from most markets and will work here. Mattie would have grated her own ginger for this soup)
15 ounce can whole tomatoes (Mattie would use a jar of tomatoes that she had canned from The Rocks’ previous summer’s bounty)
Splash of white wine
1 cup vegetable stock
15 ounce can tomato puree
1 teaspoon salt
¼ teaspoon cayenne pepper
¼ teaspoon white pepper
½ cup heavy cream
Sauté the leeks in oil until thoroughly wilted, add garlic and grated ginger, and cook until garlic just begins to brown. Add tomatoes, wine, and stock and simmer for about half an hour. If you have an immersion blender, use it now. Mattie would have put the mixture through a fine sieve or food mill, and returned to the pan, discarding any fibrous tissue.
This is one of the true differences between modern and Edwardian era cooking. Today we tend to blend in, chop up, and reincorporate all fibrous tissues, whereas Mattie would have pushed through a sieve and used only the remaining liquid. This does actually alter both the flavor and the texture of the dish. Our modern method is more artisanal and probably healthier because everything is ground up and used, but Mattie’s more refined method would have been considered correct in her time.
Once either blended or sieved, return the mixture to the pot and add 1 can of tomato puree and check for seasoning. You may want to add more salt, or perhaps more ginger at this point. Right before service, add the heavy cream and stir to blend. Spoon into bowls and add 4-6 egg dumplings depending on the size of your servings.
Egg Dumplings (4-6 servings)
3 hard cooked egg yolks (reserve the whites for other purposes)
1 raw egg
¼ cup finely grated breadcrumbs
¼ teaspoon salt
¼ teaspoon white pepper
1-2 Tablespoons fresh parsley, finely chopped
A few Tablespoons whole milk
Cook and peel the eggs and remove the yolks. Mash the yolks thoroughly then blend in breadcrumbs. Add salt, pepper, parsley, and one whole egg and blend into a smooth paste. The mixture should be slightly sticky. If it is too dry, add some milk a little at a time. Set a pot of salted water to boil.
Meanwhile, let the mixture sit for at least 15 minutes as the breadcrumbs absorb the moisture. If it dries out too much, add a little more milk. Mixture should be easily moldable and hold its shape well. Form into little balls and roll them sideways on your palm so that an ovoid shape is formed. Drop the finished dumplings into boiling water and boil for 3 minutes. If the first one does not hold its shape, add more moisture and press the mixture together even tighter. This is simple to learn and you should only have one or two mistakes. This recipe will make approximately 24 dumplings about the size of a quail’s egg.
Remove finished dumplings from water with a slotted spoon and place in a ceramic bowl with a drizzle of butter or oil so they do not stick together. Keep them in a cold place until ready to use. Place them into the hot soup just before service. If they are going to be served immediately and not rest in the soup at all, pop into boiling water to heat through for one minute first. The dumplings will absorb the heat from the soup in a few minutes if they rest in the soup. They will hold their shape for quite a long time and can remain in the soup and be served later as leftovers if they are not all gobbled up at once.
Roasted Salmon and Leek Cream Cheese (4-6 servings)
A loaf of good bread or a dozen lightbread rolls, sliced
1 Tablespoon olive oil
1 leek, rinsed and finely chopped
1 parsnip, peeled, cut to ½ inch lengths and sliced in thin strips
½ pound roasted salmon (may also use smoked)
½ teaspoon each celery seeds, paprika, dried mustard, cayenne pepper
½ cup finely chopped raw celery
1 Tablespoon lemon juice
8 ounces softened cream cheese
Heat the olive oil over medium heat. Add the leek and parsnip and sauté 5 minutes. Add the salmon to the pan with the celery seeds and seasonings. Stir to break up salmon and combine, sauté another 3 minutes. Remove from heat, let cool. Fold in the cream cheese, celery, and lemon juice. Spread the mixture onto slices of bread or rolls and cover to make a sandwich. Garnish if desired with a leaf of flat parsley, watercress, or other bright green fresh herb.
Mattie’s Brown Bread with Horseradish Cheddar Spread
Mattie’s award-winning bread recipe was published in the very first Mattie column on April 15, 2020. We know that Mrs. Glessner was fond of it because brown bread with butter or sandwiches on brown bread show up in many, many menus.
Horseradish Cheddar Spread
8 ounces cream cheese
8 ounces sharp yellow cheddar cheese, finely grated
¼ cup strong prepared horseradish
½ teaspoon smoked paprika
½ teaspoon white pepper
½ teaspoon sea salt
Mix all ingredients together. Spread onto thinly sliced brown bread and cut into desired shapes. For a special presentation, once the sandwiches are cut, spread some of the extra filling along the edges and dip into finely grated cheese. Place on doily-covered trays for service.
Cranberry Relish
Mattie would have canned or “put up” many jars of fruit and vegetables from the summer bounty at The Rocks. These concoctions would have emerged from glass jars at holiday time to grace the table. The recipe for Cranberry Relish can be found in the column posted November 3, 2020.
Pear, Fig, and Stilton Tartlettes
Prepare crusts in small tartlette pan using puff pastry or pie crust or any crust you prefer for a tartlette. Filo dough circles in small muffin cups work very well. Mattie would have used her pastry recipe cut into small circles in her smallest muffin or gem pans. Mattie’s pastry recipe can be found in the column posted on November 3, 2020. Prepare your tartlette crusts and have them baked and ready to fill.
1 Tablespoon warm water
1 Tablespoon raw or brown sugar
12 dried figs, stems removed
¼ cup unsalted butter
2 pears, peeled, cored, and finely chopped
½ cup port wine, brandy or sherry will also work if port is not available
1-2 Tablespoons honey
Dash of salt
6 ounces White Stilton or Feta cheese, crumbled
Walnut halves, toasted
Create a simple syrup with the sugar and water and cook over very low heat. Cut the figs in half. Add the figs cut side down and cook until they begin to release their juice. Add the butter, stir, and cook for five minutes. Add the finely chopped pears and simmer until pears are soft, about 20 minutes. Remove from heat and add the port. Let marinate at least 15 minutes or up to several hours.
Remove the fruit, return the sauce to the stove and reduce until a thick syrup. Taste and add honey and salt as needed. Add the fruit back in and stir to coat. When ready to make the tartlettes, place a teaspoon or so of fig mixture into each baked tartlette crust, add the cheese crumbles and place in a hot oven or under a broiler just until cheese is melted. Garnish each tartlette with half of a walnut. These may be served at any temperature.
Christmas Bread
Mrs. Glessner specifies “Christmas Bread” in many of her menus. She does not call it Stollen, but that is most likely what it was. Stollen is a German baking tradition dating back to at least the 14th century. Several other European cultures have a very similar winter bread. You don’t really want me to go back to the 14th century, do you? I could…
….I didn’t think so. For Mattie, a Christmas bread would be something she made every year, even as a girl. It is a yeast bread with dried fruit and nuts mixed in before baking and should be topped with a white icing or powdered sugar. Think fruitcake and brioche getting married. This is a lovely thing to make at the holidays and is certainly the one recipe from this column that you should make this year for your family.
3 ¼ cups unbleached flour
1 package or 2 ¼ teaspoon yeast
1 cup warm water 100-110° (Mattie would have used her pinkie finger to test the temperature and never missed. You may want to use a thermometer.)
⅓ cup raw sugar
1 teaspoon salt
½ teaspoon mace (you may substitute nutmeg)
¼ teaspoon cardamom
¼ cup melted butter
1 egg
¼ cup whole milk
1 teaspoon grated lemon peel
2 cups finely chopped dried fruit and nuts, all kinds. Try to find as many different colors as you can by combining dried apricots, pineapples, cherries, apples, candied lemon and orange peel, and several kinds of nuts such as pecans, hazelnuts, and pistachios. The more the merrier Christmas (sorry, could not help myself).
In a large bowl, sift and measure two cups flour with the salt and spices. Add the sugar and yeast to the warm water and let sit until it bubbles. Add the yeast mixture to the flour and stir briskly. Stir in melted butter, egg and milk. Add as much more flour as needed to form a stiff dough. Turn onto a floured board and knead for ten minutes or until a stiff ball is formed in which a fingerprint will bounce back smooth. Set ball of dough in a warm place, covered until double in bulk, about 2 hours.
When the dough is doubled, punch down and roll with a rolling pin to about two inches thick. Sprinkle the lemon peel and dried fruit and nuts over the top of the dough. Fold the dough over on itself in thirds and roll back to two inches thick. Fold the dough over on itself in thirds the other way and repeat until all the fruit is incorporated. Divide dough into thirds, make ropes and braid the three ropes, or form into a long thin loaf. Let rise half an hour.
Bake in a hot oven (375°) for 20-30 minutes depending on the size of the loaf you created. When cool, either sprinkle liberally with powdered sugar or create a glaze with equal parts lemon juice and powdered sugar. This is to make the loaf look like a wrapped baby Jesus, but you told me you didn’t want to go back to the 14th century, so we won’t.
The Pies
Each of Mrs. Glessner’s holiday menus included the same two pies, squash and mincemeat. Mattie must have made hundreds of these in the 20 years that she cooked for the Glessners. We published the recipe for squash pie in the column with Mattie’s pastry recipe, November 3, 2020. Mrs. Glessner honored this recipe by saving it in her own, personal cookbook. It was probably given to Mattie’s replacement. The mince pie can be found in the column posted on December 1, 2020. Please see those columns for the recipes.
If you have been reading these since the beginning, thank you. You may see that we are building a foundation of Mattie’s cooking and the Glessners’ service. As I have poured over the dozens of menus, I have seen patterns emerge. There were certain things that Mattie obviously did very, very well. The Glessner’s enjoyed them so much that they appear time and again in the menus. Clearly, Mattie was very good at both squash and mincemeat pie. Made as small tarts, they would make a lovely tray with some sliced Christmas bread.
Mattie and I wish you a Very Merry Christmas and a Happy New Year! Be Safe, Love People, Make Wonderful Food, and Share It!
Thanksgiving, Mattie Style (posted November 2, 2021)
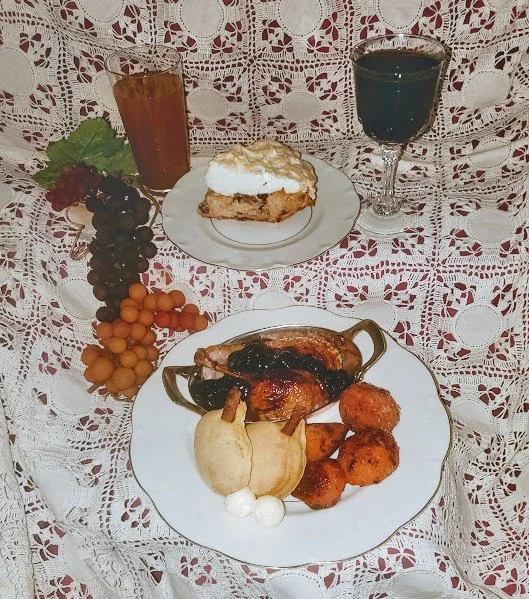
“A day of Home Coming, a day of kindness and broad charity, a day of reconciliation and mutual forgiveness. Let us gather in home and church, remembering the peace and one’s usefulness that we owe to one another. In true spirit to man and gratitude to God—let us all on Thanksgiving Day unite and give thanks for his goodness.”
This was printed in the Chicago Inter-Ocean newspaper on November 25, 1912. It is credited to R.A. Schoenfeld Co., a dry goods store at 63rd and Halsted, and forms the masthead of their Thanksgiving sales ad.
The El Dorado Daily Republican from El Dorado, Kansas, published November 25, 1897, expressed the following sentiment:
“It is a good day to lay aside and forget all differences and to keep in one’s heart only the tenderness and sunshine out of which the lips and eyes will make such loving smiles and glances.”
Mattie’s idea of Thanksgiving would have been influenced by messages like these, as well as her family’s traditions of Thanksgiving in Canada, which falls in October. In the 19th century, Americans focused on the story of the pilgrims and their survival of the first year in their new home. As a child of Scots-Irish immigrants, Mattie would have had very different Thanksgiving traditions. In Canada, Thanksgiving was, and still is, the celebration of a successful harvest, more in keeping with the fall festivals of Europe. Americans, then as now, also emphasized traveling home to be with family. Mattie could relate to that. Frances Glessner’s journals contain several references to Mattie being away in early October. Perhaps this is a coincidence, but perhaps she was going to visit family for Thanksgiving. How convenient to have a cook with a different family tradition for this important holiday so she could be in Chicago to cook for the Glessners on American Thanksgiving.
So, what would she be cooking? There are many Thanksgiving dinners listed in Frances Glessner’s menus and honestly folks, they are all pretty much the same. We talked about them last year (please see column published on November 3, 2020). For other households however, and certainly for many hotel dining rooms and fine restaurants, Thanksgiving dinner was an opportunity to whip up not only your very best and fanciest dishes, but also to try what they believed to be what the pilgrims really ate that first Thanksgiving. What did they think they knew in Mattie’s time?
Turkey with all the trimmings was the phrase then, as now. We also see, in published menus, nearly every other type of bird including quail, duck, grouse, pheasant, and even the humble chicken. Additionally, sweet potatoes in some form nearly always appear, as do cranberries, pumpkin, and apples. So, let’s have some fun and make something truly special for the Glessners this year.
Duck with Dark Cherry Sauce
Glazed Sweet Potatoes
Pumpkin Biscuits with Honey Butter
Apple Cranberry Custard Pie
served with Claret and Sweet Cider
I’m going to select duck because I like duck, and I happened to have one in my chest freezer. Not gonna lie folks, necessity is the mother of all sorts of things, isn’t it?
Duck with Dark Cherry Sauce
1 3-5 lb. duck (longtime readers know, always look at Aldi) other shops have them too, especially at the holidays
1-2 carrots, roughly cut
1 apple, roughly cut
A few sprigs of thyme
Salt and Pepper
For the Sauce
2 cups dark, sweet cherries, fresh or frozen, pitted
2 cups red wine
2 Tablespoons butter
Drippings from duck
Small cheesecloth bag containing: 1 cinnamon stick, 6 cloves, 1 bay leaf, and 6 whole allspice. Yes, you may cheat and use powdered spices, but Mattie would not have used them in this instance.
I like to brine all my birds. They are just better that way. Mattie would have done this in a large, glazed ceramic crock or mixing bowl with a cover. Today, we can use a large Ziploc bag. Put the bird in the bag. Mix 1 quart water with ⅓ cup kosher salt and 2 Tablespoons raw sugar. Stir until dissolved. Pour over bird in bag and then add as much additional water as you can and still close the bag. If using a bowl or crock, just make certain the bird is submerged. Set in refrigerator overnight. The next day, remove bird from brine, discard brine, cover bird and let it come to room temperature.
Preheat oven to 350°. Stuff the cavity with chopped carrots and apples. Set the duck on a small wire rack inside a roasting pan. Put bird in oven and let cook for about 20 minutes until you have some drippings in the bottom of the pan. Baste about every ten minutes to ensure that the skin crisps up nicely. The bird will be done in about 20 minutes per pound, internal temperature should reach 165°. Remove from oven and set on back of stove or another warm place. Do not cover if you wish the skin to remain crispy.
Skim as much fat as possible or use a gravy separator. Put the roasting pan on the stove on a low heat. Add the wine gradually to the drippings and stir to deglaze the pan, taste for salt, add the cheesecloth bag and simmer for at least 20 minutes with the lid off. Reduce the liquid by at least a third. Add the cherries and stir but try to keep the cherries as whole as possible for a nicer presentation.
You may create a crispier skin by putting the bird back in the oven for 10 minutes or so just before serving. Slice the breast pieces thinly and spoon the sauce over. Duck is very rich. Two or three slices of breast or one leg and thigh should suffice for most diners. All duck meat is dark meat.
Glazed Sweet Potatoes
1 large sweet potato per person, longer, thinner ones work best for this
¼ cup butter
1-2 egg whites, beaten slightly
¼ cup raw sugar
1 Tablespoon cinnamon
1 teaspoon each nutmeg and ginger
1 teaspoon salt
½ cup plain bread crumbs
2 Tablespoons maple syrup or honey
¼-½ cup apple cider or white wine
First, scrub the potatoes thoroughly. Boil in lightly salted water until a thin knife can be inserted to the center. This will take about thirty minutes for four large potatoes. Remove the potatoes from the water and run cold water over them until cool enough to handle. Carefully scrape off the skin with the backside of a knife or the edge of a spoon.
With your finest, sharpest knife, carve each potato into three or four smaller potato shapes, about the size of an egg. Set aside into a bowl which contains the egg whites. When carving is complete, toss the potatoes in the egg white to thoroughly coat.
Mix the sugar and spices with the bread crumbs. Melt butter in a large skillet (Mattie would use her largest cast iron skillet for this). Roll each potato in sugar and spice mixture then fry in the butter until nicely browned. Remove to a wire rack.
Pumpkin Biscuits
1 cup fresh pumpkin, roasted
1 cup buttermilk
4 cups unbleached flour
5 teaspoons baking powder
2 Tablespoons raw or brown sugar or honey
1 teaspoon salt
½ cup butter, cold, cut in dice
½ cup shortening, Ellie likes butter flavor Crisco
Preheat oven to 400°. Mix pumpkin and buttermilk together, add honey to this mixture, if you are using honey. Measure the flour, sift, measure again. Sift all dry ingredients together three times. Combine the wet and dry mixtures. Mix by hand or with a stand mixer until blended. Then, turn onto a floured board and knead 8-10 times. Roll a generous 1 inch thick, cut with pumpkin shaped cutters. To create the stems, break pieces of cinnamon stick and insert at the top. Bake on a parchment covered baking sheet for 12-15 minutes, until golden on top with a few darker brown spots. Serve with honey butter.
Apple Cranberry Custard Pie
This recipe is adapted from one in the Favorite Dishes cookbook which was published by the Women’s Board of the Columbian Exposition in 1893. It was sent in by Alternate Lady Manager, Mrs. Annie L.Y. Orff of Missouri. Mrs. Glessner would have known several of these ladies. We do not know if she knew Mrs. Orff.
1 cup milk
Yolks of 2 eggs (save whites for the topping)
3 apples, peeled, cored and grated fine
1 cup dried cranberries, plumped for five minutes in ¼ cup apple cider or brandy
½ cup sugar
1 teaspoon nutmeg
pinch of salt
1 plain pastry crust (use Mattie’s, see column posted November 3, 2020)
To plump the cranberries, put them into a small saucepan with cider or brandy. Simmer on a low heat for about 5-10 minutes. Cool. Mix all ingredients together and place in a pie shell lined with pastry crust. Bake at 350° for an hour and a half to two hours, until a knife inserted in the center comes out clean and the filling no longer jiggles. Cool pie.
Make a stiff meringue with the remaining egg whites, add 2 Tablespoons raw sugar or honey. Frost the top of the pie and put back into the hot oven for about 10 minutes until lightly brown on top. Watch carefully. Let cool before serving. Pie will set up well once cooled and should slice easily.
Some of these recipes are a lot of trouble. And frankly, that’s kind of the point. One of the most important things I want the readers to learn about the way Mattie cooked, was how incredibly labor-intensive it was. Why just bake a sweet potato when you can parboil it, carve it into a still-smaller sweet potato shape, roll it in sugar and spice and fry it? Heavens! And the pie, lots of steps, two layers, much more trouble than an ordinary apple pie. Thanksgiving for Mattie was a time to show off her skills and ingenuity, and a time for the Glessners to show off how talented their cook was.
I wish for you a Thanksgiving this year filled with all your favorite things to eat, and an opportunity for you to show off your cooking talent. And, if you can go home, and not bicker with any of your family members, all the better!
Mattie Did Not Make Pumpkin Spice Lattes (posted October 5, 2021)

However, she did enjoy cooking fall menus for the Glessners. This is a simple supper to be eaten in the evening after a big luncheon, or late at night after the symphony or opera. Mattie is using up her fresh ingredients and reveling in the fall bounty of pumpkins, squashes of all types, and of course, apples. She is also enjoying the cooler temperatures which enable her to do a great deal of baking. No more worries about overheating the house, although her gas range heats the room far less than the coal or wood stoves on which she learned to cook.
Since the Glessners had a 1,500-acre farm in New Hampshire, much of the produce would have been brought in from their own land. Frances Glessner really did bring back comb honey from her own bees to be used in the Chicago house. Most of the fruits and vegetables grown at The Rocks were put up by Mattie and transported to Chicago already in jars. However, any fresh produce not canned would be brought back for Mattie to cook with in the fall. Here she has set out:
Mattie’s Brown Bread
Pumpkin Soup
Cucumber & Orange Salad with Cherry Tomatoes
Apple Tart with Whipped Cream
Mattie’s Brown Bread
Mattie won awards for her bread and rolls. Mrs. Glessner mentions this in her journals. In the very first Cooking with Mattie we published Mattie’s own recipe for brown bread. Please scroll down to the first column at the very bottom of this page for the recipe. When the bread is baked and cooled, slice thickly and place around the edge of the soup bowl. The Glessners might also have enjoyed some butter or apple butter on their bread, and you should, too.
Pumpkin Soup
The making of soups and stews inside a large squash is an ancient method found all over the world. What makes this dish so perfect for Glessner House is that it ties right in with Mrs. Glessner’s sense of whimsey. She liked to theme her parties and loved a clever joke. To have soup baked and served in its own shell would appeal to her, at least I really think that it would. This is a fabulous recipe. I have been making a version of this for years. It is the very best dinner on a crisp fall night. For a smaller number of servings, just use a smaller pumpkin, and adjust ingredients accordingly. If you scrape all the contents out of the pumpkin, they will keep well in a glass bowl with a lid and will warm up well.
One 6-8 pound pumpkin
1 quart of half & half, or 2 cups whole milk and 2 cups heavy cream. The non-dairy milk-equivalent beverage of your choice will also work.
Six slices of hard bread such as whole wheat, sourdough, or pumpernickel
8 ounces of grated Gruyere, Emmenthaler, Swiss, or any cheese in the Swiss family
1 Tablespoon sweet oil (olive, sunflower, etc.)
1 teaspoon each curry powder, white pepper, salt, nutmeg
Mix the liquid with all the seasonings. Set aside. Cut the top off the pumpkin as you would for carving a jack-o-lantern. Take off the top and scrape out the seeds and fibrous tissues. Save the seeds if you like to make roasted pumpkin seeds. More about that next month. Meanwhile toast the bread or put in a warm oven for ten minutes or so. Cut the bread into approximately 1-inch squares. Grate the cheese. Now, we are going to sort of make lasagna inside a pumpkin. Stay with me. Starting with a handful of bread cubes, put them inside the pumpkin, follow with a handful of cheese. Repeat until the pumpkin is full within about 2 inches of the top interior edge. Pour the liquid and spices mixture in and put the top on. The pumpkin should be about ¾ full. Be careful to leave at least two inches of space at the top because it will expand as it cooks.
Place the pumpkin in a pie plate or round casserole dish. Adjust your oven racks so the pumpkin fits with as much room around it as possible. You may need to remove some racks. Bake in a 350° oven for about 2 hours. Depending on the size and density of your pumpkin, it may be done in an hour and a half, or it may take 3 hours. The 8-pound pumpkin in the photo took 3 hours. It is done when the outside is slightly brown, you can make an impression in the outer flesh with your finger or a wooden spoon, and the inside is bubbling. Check at the one-hour mark, but you needn’t monitor it overmuch. The hardest thing about this recipe is taking the oven racks out so the pumpkin fits.
When you remove from oven, thoroughly stir the mixture and scrape the inside of the pumpkin to incorporate the chunks of cooked pumpkin into your soup. This will serve 6-8 people for a hearty meal with bread and a salad. And Boy, does it make the house smell good!
Cucumber Tomato Salad with Cherry Tomatoes
We do not know if Mattie had a kitchen garden in window boxes. We do know that she did not have an actual kitchen garden in the courtyard. Therefore, most of the fresh goods this time of year that did not come from The Rocks came from neighbors who had gardens, or from the produce men with whom she placed orders. If any of you readers have gardens, you know that at this time of year, the last little tomatoes are about all we have left. Mattie is using them in the salad.
One orange, peeled and sliced
One cucumber, peeled and sliced
One lettuce leaf
A handful of cherry tomatoes
Mrs. Glessner frequently listed Tomato Salad in her menus, and we know that Mr. Glessner insisted on oranges at every meal. This is the perfect solution when it’s just the two of them. For the salad pictured, place a leaf or two of lettuce on a salad plate, layer the slices of oranges and cucumbers in a circle. Place cherry tomatoes in a pleasing pattern on top. If you desire a dressing, a simple mixture of mayonnaise, Dijon mustard, and a little tomato paste will be perfect.
Apple Tart
2 apples, peeled and sliced
2 Tablespoons honey
1 teaspoon each cinnamon & nutmeg
½ teaspoon salt
¼ teaspoon each ginger and cloves
Recipe of either piecrust or sugar cookie dough, depending on your taste
Approximately 2 Tablespoons raw sugar for sprinkling
Line a baking sheet with parchment paper. Sprinkle sugar on the parchment paper. Make a recipe of either pie crust or sugar cookies. If you want a very rich dessert, use cookie dough. For a lighter, more savory version, use pie crust. Roll chosen dough into about a ten-inch circle. Place on the baking sheet on top of the sugar-sprinkled paper. Mix the apples with the honey and spices, stir to thoroughly coat. Spoon the apple mixture into the center of the crust. Leave at least 3 inches open around the edge of the circle. Fold the edges in towards the center to create the tart. Sprinkle the top with sugar and bake at 400° for about 25 minutes. Serve in slices topped with whipped cream or ice cream.
Mattie on Baking
There has been a great deal written about the gas range at Glessner House. Recently, it has come to light that the house always had a gas range. This was the final straw for several cooks before Mrs. Glessner found and trained Mattie. In Mattie’s day, most ranges would burn coal, either soft bituminous coal, or hard anthracite coal. Older cooks, born earlier in the 19th century, would be accustomed to wood burning ranges. Mattie would have known how to operate all of these, and clearly, she was willing to learn to cook on a gas range.
There is an interesting feature that all these instruments have in common. None of them had a thermostat. Recipes at this time would refer to baking temperatures, when they mentioned them at all, as slow, moderate, quick, or very quick. Mattie would have known how to gauge correct temperatures for certain foods, and probably didn’t even remember how she knew. For the cook just starting out, there were several methods. Catherine Beecher wrote in Miss Beecher’s Domestic Receipt Book (1846),
“An experienced cook will know without rules. For a novice, the following rules are of some use in determining….If you sprinkle flour on the bottom, and it burns quickly, it is too hot.
If you cannot hold your hand in longer than to count to twenty moderately, it is hot enough.
“If you can count thirty moderately, it is not hot enough for bread. These last are not very accurate tests, as the power to bear heat is so diverse in different persons; but they are as good rules as can be given, where there has been no experience.”
By the 1880s, things had changed so much. This was the world Frances Glessner was shopping in at the time she purchased her gas range in November 1886. As written in The Easiest Way to Housekeeping and Cooking by Helen Campbell (1880),
“The modern stove has brought simplicity of working, and yet the highest point of convenience, nearly to perfection. With faith that the fuel of the future will be gas….with the best gas stoves, a large part of the disagreeable in cooking is done away. No flying ashes, no cinders, no uneven heat, affected by every change of wind, but a steady flame, regulated to any desired point, and, when used, requiring only a turn of the hand to end the operation.”
But still, no thermostat, Helen Campbell suggests,
“In baking, a moderate oven is one in which a teaspoonful of flour will brown while you count to thirty, a quick one, where but twelve can be counted.”
Mattie retired from cooking at Glessner House several years before oven thermostats were in regular use. She might have looked upon them like some of us today view self-driving cars. She’d view our world of the internet, private trips to space, and pumpkin spice lattes with bemusement as she rested after serving supper to the Glessners. Mattie would put her feet up and enjoy a cup of apple cider. Happy Fall Everyone!
To learn more about the gas range at Glessner House, watch our YouTube video, Secrets of Glessner House Part 22: The Range.
Mattie’s Cool Drink Offerings (posted August 2, 2021)

A cooling drink on a hot day is one of life’s great pleasures. Water was not drunk straight out of the tap or well in Mattie’s time, and she could scarcely have imagined everyone walking about with bottles of water wherever they go, as so many do today. Tea, and coffee of course, were served at Glessner House, but cooling drinks in the hottest part of summer would be very important for both servants and family alike. In fact, Mrs. Glessner firmly stated in her directions to servants that a bottle of filtered water should be kept in Mr. Glessner’s dressing room.
In several of her menus, Frances Glessner refers to Apollinaris Water as one of the beverages served at her parties. Apollinaris Water is natural spring water from Germany, named for St. Apollinaris of Ravenna, a patron saint of wine. By 1913 the company was producing 40 million bottles a year, 90% of which were exported worldwide. It is still available today.
In Mattie’s time, there was a similar spring water source closer to Chicago, bottled in Waukesha, Wisconsin. This natural spring, said to have once provided water to the Potawatomi people, was tapped beginning in 1871. Ironically, the same year Chicago burned, a small town in Wisconsin started bottling water. Mattie could procure this White Rock mineral water in both still and effervescent forms. Fun fact, Coca-Cola claims to be the first to use the image of Santa Claus to promote its product, but White Rock mineral water did it first, in the 1920s. It became extremely popular during Prohibition when no self-respecting hostess would serve alcohol to her guests. White Rock is still sold today.
Although Mrs. Glessner always served wine and champagne, and very occasionally harder spirits and punch, soft drinks would have been an important part of daily life for the family and staff, and certainly for Mr. Glessner, who never partook of intoxicating beverages.
There is a lovely quote about temperance in The Easiest Way to Housekeeping and Cooking by Helen Campbell (Rand, Avery & Co., Boston, 1880):
“Temperance is personal cleanliness; is modesty; is quietness; is reverence for one’s elders and betters; is deference to one’s mother and sisters; is gentleness; is courage; is the withholding for all which leads to excess in daily living; is the eating and drinking only of that which will insure the best body which the best soul is to inhabit: nay, temperance is all these, and more.”
I would like to believe that the Glessners heartily subscribed to this motto.
Let’s imagine that Mattie is trying some beverage recipes and Mrs. Glessner will have a taste test to see which ones she’d like to serve at the next event or have on hand for herself and Mr. Glessner. The cookbook collection in the Glessner House library is replete with books featuring entire chapters on various homemade beverages. Many soft drinks, such as the waters mentioned above, and some soda pops were available to Mattie for ready purchase. However, she may have also utilized the tried-and-true recipes from the cookbook collection to make her own. We will try:
Iced Chocolate
Almond Milk
Raspberry Shrub
Cooling Cinnamon Water
Appleade
Tutti Frutti
Iced Chocolate
4 ounces sweet chocolate, grated
½ cup sugar
½ pint water
1 quart cream
1 teaspoon vanilla
Put chocolate, water, and sugar in a saucepan to melt. Stir until smooth. Heat cream in double boiler. When hot, add gradually to the chocolate mixture, beat until well mixed. When cold, add vanilla, strain, and freeze.
This is fantastically delicious! I am not kidding. It is ice cream without the ice cream freezer. It tastes like frozen chocolate pie and would be a hit with nearly any crowd I can imagine. Please try this one, folks!
Almond Milk
36 fresh almonds
½ cup boiling water
1 quart cold water
½ cup sugar
Almond milk is a delicious beverage, but it does not keep long and should be made a short time before it is needed. Take three dozen fresh almonds, blanch by pouring boiling water over them and removing the skins; then pound to a paste; add ½ cup of boiling water, strain, and then add one quart of cold water and ½ cup sugar. Keep very cold until ready for use.
How many of us regularly purchase almond milk for use on cereal, in coffee or tea, and for recipes? Did you have any idea how easy it was to make it at home? I didn’t, now I do. Mattie would be astonished that folks pay so much for something so simple to make at home. Plus, it’s really fun to blanch the almonds, try it!
Raspberry Shrub
12 ounces red raspberries (any berry or juicy fruit will suffice)
1 cup cider vinegar
½ cup white sugar
Ice, crushed
Put raspberries and vinegar together. Let stand four days, then strain. Discard the fruit pulp, add the sugar. Boil 20 minutes, bottle and keep in a dry, cool place. To serve, fill as much as desired in a glass, add crushed ice and water. Very refreshing and wholesome in hot weather.
Shrubs were quite popular much earlier and into the 19th century, but they were still around in Mattie’s time. The nicest thing about a shrub, in my opinion, is that it is a concentrate. The mixture takes on a syrup-like consistency. Mixing it about 4:1 with water, either still or effervescent, makes an excellent summer drink easily concocted when the syrup is bottled and ready to go.
Cooling Cinnamon Water
2-3 cloves
4 3-inch cinnamon sticks
A bit of sugar may be added but is not required
Ice
Bring a quart of water to boil. Add the cinnamon and cloves. Remove from heat and cover. Allow to cool. It will resemble a weak tea. Serve over ice.
What is interesting to me about this beverage, and those of its ilk, is that it is simply water flavored with spices. It takes a few tries to get the ratio right, but once one has done that, it is really delicious, not at all caloric, and very different from anything one tastes today. This one is truly a flavor from the past.
Appleade
6 medium apples
½-¾ cup sugar
Large lemon if available
Ice
This is an excellent drink when lemons are scarce. Bring 2 quarts of water to a boil. Slice whole apples and put into a deep ceramic or graniteware pot or mixing bowl (do not use a cast iron or any other non-coated metal pot). Pour boiling water over the apples, cover, let sit several hours. When completely cool place in refrigerator or other cool place overnight. The next day, strain the apples through a sieve. Be careful not to squeeze any of the pulp through the sieve. You want the liquid to be perfectly clear. Juice the lemon, strain and add to the apples. Make a simple syrup with ½ cup each sugar and water. Heat until the sugar dissolves and the mixture turns from cloudy to clear. Cool. Add to apple liquid to taste. Serve very cold over ice.
Appleade will turn a slightly pink color if you use red apples. It is bright and refreshing with just a hint of tartness provided by the lemon. This is far from cider and will not ferment as apple cider will when not pasteurized. It would have been considered a very appropriate drink for servants, tradesmen that might be working in the house, and as a delicate beverage for a ladies’ luncheon on a particularly hot day.
Tutti Frutti
3 mashed strawberries
1 peach, cut fine
1 ring of pineapple, cut fine
The juice of ½ a lemon
1 Tablespoon sugar
Ice, crushed
Mix all ingredients well, mash thoroughly, and strain through cheesecloth or a VERY fine strainer. Mix with pounded ice and serve in a short glass.
Did you know that Tutti Frutti was a drink before it was an ice cream and candy flavor? I didn’t. What makes it really distinctive is the combination of peach, pineapple, and strawberry. Be honest. If someone were to ask you what flavors go into Tutti Frutti, would you know the answer? I wouldn’t have either until I made this. Try it. It’s really good and, if you freeze it in popsicle forms, I’ll bet it tastes just like the Tutti Frutti ice cream creations you might remember.
Dear Readers, I often tell you which things are really good to try from Cooking with Mattie, and which things are more suited to a 19th century palate. Honestly, every single one of these is positively delicious. Try them all if you like, or select one that has the flavors you crave on a hot day. You will not be disappointed, as I trust Mrs. Glessner was not when Mattie presented her with the tasting tray.
Healing at Home (posted July 6, 2021)

Firstly, I want to thank our dedicated volunteer Steve Scott for suggesting this topic. Steve cares for the vast library collection including Mrs. Glessner’s cookbooks often referenced in this column. He noticed many of those books had chapters on “sickroom cookery” and wondered how Mattie would have handled that. So, let’s find out. Thanks Steve!
Food and drink during a time of illness played a far larger role in Mattie’s time than it does today. In chapters on sickroom cookery, or “cooking for invalids,” the advice of the “medical man” is prominent if not pre-eminent. The role of physician-as-nutritionist has changed dramatically in the years since Mattie might be nursing Frances Glessner through a “hard headache” or tending to “summer complaint” in one of the children. Today’s physicians are given little instruction about food and nutrition. You would be amazed how important it was a century ago. The famous English nurse, Florence Nightingale, frequently wrote and lectured on the subject. “Remember, that sick cookery should half do the work of your poor patient’s weak digestion.” (Notes on Nursing, first published in 1859.)
Cookbooks gave copious instructions. “As the fever subsides, the gastric and intestinal juices are sufficiently secreted to digest farinaceous foods and the medical man can decide in each case what articles are most suitable…The object is to convey fuel foods (carbohydrates) to the system, and only enough albuminoids (flesh formers) for repairing the tissues.” (Twentieth Century Cookbook and Practical Housekeeping, by James Bethuel Smiley, Henneberry Co., Chicago, 1900, p. 575.)
The type and severity of illness being treated influenced the bill of fare for the patient. Herbal and homeopathic remedies were employed as was the feeding of certain foods which acted on specific parts of the system or addressed a particular complaint. For instance, cinnamon was known to help with digestion and assist in increasing appetite. Lemons and other citrus fruits were considered stimulating and very palatable to even the most seriously ill. Lemonade and other fruit drinks were a way to get simple sugars into the system. Whey was known to be more digestible than milk or cream, and buttermilk was given for gastric distress. “When much fever is present very little gastric juice is secreted…. All nourishment given in high fever should be in fluid form, and it is very doubtful if starch can then be converted into sugar.” (Twentieth Century Cookbook.) Remember, “feed a cold, starve a fever.”
Instructions are very clear that a simple, elegant tray setting was of extreme importance. Paramount was the serving of tiny quantities of a variety of approved foods so that if the patient were to reject one proffered item, another could easily be substituted without returning to the kitchen. The goal was to encourage but not force eating. The mental condition of the patient – his or her mood, cravings, and/or distaste for certain items – was always to be considered by the caregiver. Pages were written outlining how to dress the tray, how to cover all beverages with a doily, not serving too large an amount, always serving meals on time, never announcing the menu ahead of time lest the patient develop either a craving or a distaste for expected items, using various spoons to find the one most comfortable, etc. There was an entire ballet with full orchestra around the feeding of an invalid. For our tray, we have:
Milk Toast
Panada
Barley Water
Rice Jelly
Tapioca Jelly
Restorative Jelly
Lavender Shrub
Milk Toast
Toast a slice of bread, uniformly brown. Break any hard pieces of crust or remove them entirely. Add sufficient hot milk or cream to thoroughly soak it. Sweeten with powdered sugar.
Panada
Panada or Bread Jelly is an ancient sickroom recipe dating at least as far back as the early 1700s. It is essentially sliced bread, boiled in water until it forms a loose soup-like pulp. It is flavored with either onion and pepper, or sugar and cinnamon and was standard invalid fare for centuries. By Mattie’s day, the name Panada remained, but the recipe was far simpler. Were Mattie to have made Panada for someone with upset insides, she would have done it thusly.
Split two graham crackers, put them into a bowl, sprinkle with sugar and salt and cover with boiling water. Set the bowl in a double boiler for half an hour or until the crackers are dissolved. Slide them out into a hot saucer and serve very hot with sugar and cream.
Barley Water*
Lauded in song and story, Barley Water was commonly given to invalids, especially children. It was believed to be nutritious and refreshing. It was said to be an excellent drink in febrile affections. With the addition of 8-10 figs, cut into pieces, it becomes a mild laxative drink.
1 cup toasted barley with the husks on (not pearled barley)
1 quart of water
1 Tablespoon sugar
8-10 figs if laxative effect is required
Wash the barley, add one quart of water (add figs if desired) and simmer until ¼ of the water has boiled away. Strain, add a Tablespoon of sugar dissolved. Feed in a feeding cup/invalid feeder or by the spoonful to the patient.
*For the photograph, the Barley Water was not put into the feeding cup (see the Object of the Month for March 2020) as it is a Glessner House artifact and it would be inappropriate to fill it. Barley Water is one of the liquids for which this vessel might have been used. The Barley Water is seen in the small glass in front of the feeding cup.
Did you ever wonder why we serve Jell-O to sick children and patients in hospitals? Well, here is the origin.
Rice Jelly
2 ounces rice flour
3 ounces white sugar
1 quart water
2 Tablespoons rose, orange, or cinnamon water
In a double boiler, make a thin paste of flour, sugar, and a little bit of cool water. Add one quart of water and cook over boiling water for about two hours, stirring frequently. When liquid is reduced by at least a third and mixture begins to thicken, remove from heat, add desired flavoring and place in small molds. Chill until firm.
Tapioca Jelly
¼ cup pearl tapioca (not quick-cooking)
2 cups water
⅔ cup raw sugar
3 cinnamon sticks
Dash of salt
Juice and grated peel of one large lemon or two small ones
Wash the tapioca. Set in a crockery bowl with the water and leave overnight to soak. After soaking, pour tapioca and water into saucepan and cook until completely dissolved and clear. Then add the sugar, salt, lemon juice, lemon peel, and cinnamon and continue to cook for another 20 minutes stirring all the while. Remove from heat, remove the cinnamon sticks, and pour mixture into small molds.
Restorative Jelly
One box of unflavored gelatin
1 cup of port wine
1 Tablespoon powdered Gum Arabic*
Juice of ½ lemon (about 2 Tablespoons)
3 Tablespoons white sugar
2-3 cloves or a thumb-sized piece of ginger (2 or three small pieces of candied ginger may be used)
Put all ingredients into a glass jar with a cover. Place jar on a trivet in a pan of cold water. Heat it slowly. When the mixture is dissolved, stir well and strain. Pour into small molds or into a shallow dish. When cool, that in the shallow dish can be cut into small cubes. The addition of ginger makes this especially good for sick headaches, woman’s complaint, or the early stages of a lady’s confinement.
*Gum Arabic is the sap of the Acacia tree. Artists may recognize using it as a binder. Please don’t use art supplies in your kitchen folks. There is both artists’ and food-grade Gum Arabic. It is the “gum” in Gummie Bears. Isn’t that a fun fact?
Lavender Shrub
A shrub is a beverage made with vinegar, sugar, and fruit. Seltzer and a flavoring or essence can be added. It is often made into a cocktail with the addition of strong spirits but without that, it is an extremely healthful drink. Since Mrs. Glessner suffered from what she termed “hard headaches”, now called migraines, lavender would be very soothing. It is known to settle the stomach and calm the mind. Any fruit on hand can be used. Shrubs give the patient a pleasing way to consume vinegar, which is excellent for digestion.
Several sprigs of fresh, food-grade lavender or ¼ cup dried lavender flowers
A handful of fresh mint leaves, crushed (optional)
2 cups mashed fruit: plums, peaches, berries, watermelon, etc.
1 ½ cups vanilla sugar (see Cooking with Mattie posted June 1, 2021)
1 ½ cups apple cider vinegar
Mash the fruit with the sugar. Place in a covered bowl and refrigerate at least 8 hours. Remove from refrigerator, strain through an exceptionally fine mesh colander or place in cheesecloth and squeeze all the juice out. Discard the flesh of the fruit. Mix the juice with the vinegar. Add the lavender and mint. Bring the mixture to boil, skim to remove any scum that rises. Reduce heat and simmer at least five minutes. Strain again. Mattie would have clarified her shrub by beating two egg whites until frothy. Add the egg whites to the hot shrub and continue cooking until the egg cooks and comes all together. The egg will pick up and hold onto any fibres or sediment left in the liquid. Pour the clarified mixture into a glass vessel with a lid. This can be kept in the refrigerator for months and improves with age. To make one drink, take ¼ cup of the mixture, add one cup of water or seltzer. Mattie would have used Apollinaris water. Serve chilled.
Dear readers, of all the recipes in this column, this last is the one I hope you really do make. I know sickroom cookery may not be the most palatable group of recipes I have ever presented to you, but this Lavender Shrub? This is really good, whether you have a “hard headache”, or not. Try this. Might not help, couldn’t hurt.
The next time you have the complaints listed in this column, you perhaps could think about these old recipes. They will not ever replace modern medicine, but they have value. We have all watched, and some of us have participated in, diet regimens such as paleo, no-carb, gluten-free, etc. Many modern influencers would be surprised to learn that Victorian and Edwardian era cooks knew a great deal of this stuff a century ago.
“Men dig their graves with their teeth; not only by drinking whiskey and using tobacco, but by eating food loaded down with inflammatory materials.” (The Boston Cookbook, by Mrs. D. A. Lincoln, Roberts Brothers, Boston, 1896, p.433.)
We might have some things to learn from Mattie and those others who cooked for both dinner parties, and deathbeds.
The Glessners Attend an Outdoor Concert (posted June 1, 2021)
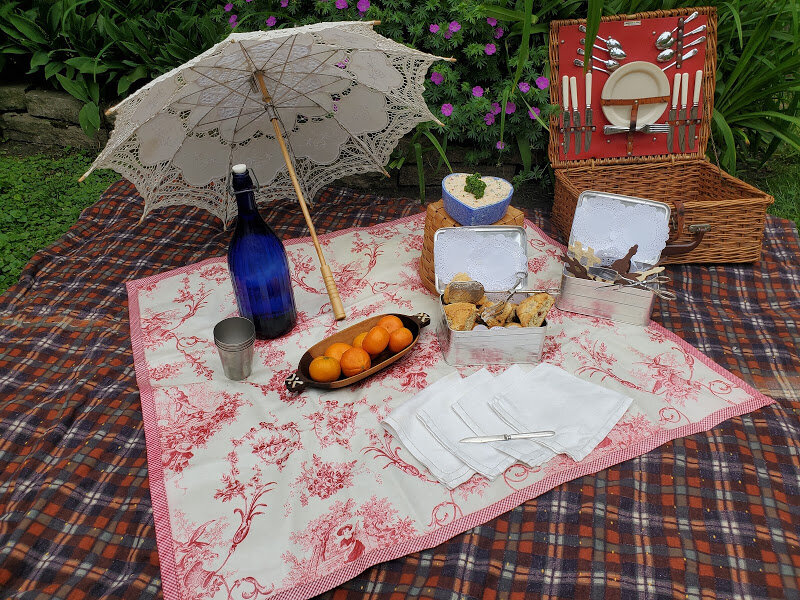
John and Frances Glessner have been invited to join their friends at an outdoor concert by the Illinois State Band in Douglas Park (today Douglass Park). In 1894, the West Chicago Park Commissioners organized a series of concerts at Garfield Park, Humboldt Park, and Douglas Park. The Chicago Tribune reported in its June 24 issue that year that if these weekly concerts prove popular, more will be added to each park and additional parks will be featured.
Mattie is tasked with preparing a lovely repast suitable for lounging on a blanket in the grass. The Glessners and their friends will enjoy delicacies as they listen to the musicians raising gifts to the sky on a beautiful summer evening. All picnic foods should be transportable in a basket and be the proper serving temperature, whatever that temperature happens to be. The basket will include:
Sharp Cheddar Cheese Spread
Dark and Light Water Crackers
Always an Orange
Summer Rhubarb Scones
Lemonade
Sharp Cheddar Cheese Spread
1 8-ounce brick cream cheese, softened
8 ounces of sharp cheddar cheese, shredded
1 to 4 Tablespoons prepared horseradish
1 tart apple, diced finely
1 Tablespoon chopped fresh chives (or use dried chives soaked in white wine until plump to total
1 Tablespoon)
A handful of fresh parsley, finely chopped, and a few sprigs for garnish
Thoroughly blend all ingredients, except horseradish. Blend in 1 Tablespoon of horseradish and then taste. Desire for the sharpness of horseradish varies greatly amongst people. Adjust to suit the taste of those for whom you are cooking, add more as desired. This should not need any salt but a dash or two of salt generally improves most things. Depending on the sweetness of your apple, you may want to add just a pinch of sugar to cut the sharpness of the cheese and horseradish. Serve in a crockery dish with a knife for spreading onto crackers or slices of thickly sliced bread.
Some readers might notice that there are small flecks of orange cheddar cheese in the mixture. This might lead you to ask, did Mattie use orange cheddar cheese, or was the cheese she used white or off-white in color? If you did not ask yourself that, you might want to skip this next bit and go right on to the recipe for crackers. Cheese is naturally a shade of white but when cows are pastured in areas with grasses rich in beta-carotene, the milk, and subsequently the cheese, takes on a golden, almost orange hue.
Consumers of cheese realized this as early as the 1700s. The cheese that was more orange in color was more desirable because it indicated that the cows were pastured on fresh grass, not given only dry hay. Clever cheese mongers learned to dye their milk with carrot juice, saffron or a seed called annatto which does not change the taste but makes the cheese orange. Farmers in the United States in the early 1800s copied this European method, especially in Wisconsin where Mattie was probably getting the cheese that was sold in Chicago. However, in the summer, when the Glessners and Mattie were at The Rocks in New Hampshire, the cheese in that region was generally not dyed and therefore she would have used a white cheddar. I personally think this makes up nicer in appearance with orange cheese.
Water Crackers
(Recipe for about ten dozen depending on the size)
2 cups unbleached flour
¼ cup sweet oil (olive, soybean, sunflower, almond, etc)
1 teaspoon salt
½ cup water, more or less, very cold
These crackers are very light and will take on the flavor of whatever oil you use. A nut oil such as almond or walnut will impart a very nutty flavor. Sunflower oil is also quite nice in them. Measure flour and sift three times with the salt. Place into a large bowl. Add the oil gradually and mix with your hands until all the oil is incorporated. Gradually add the water until the mixture sticks together and can form a ball. Roll out the dough as thinly as possible or put it through a pastry press until extremely thin. The thinner you can get your dough, the crispier and lighter your crackers will be.
Cut them with a biscuit cutter or into other pleasing shapes and bake in a 400° oven for about eight minutes. Cool completely before storing. These pair well with many cheeses and spreads and should be a basic staple item for any well-run kitchen. For this event, Mattie has cut the crackers into musical shapes such as eighth notes, sharps, flats, and cellos. To make dark crackers, substitute 1 cup dark rye flour, ¾ cups unbleached white flour, and ¼ cup dark unsweetened powdered cocoa.
Rhubarb Scones
Many people say that they do not care for scones because they tend to be dry. This is a very moist scone recipe and is just the perfect snack for a summer evening. Additionally, rhubarb is coming in at this time of year and Mattie would have wanted to take advantage of baking with the freshest ingredients, as she always did. One could substitute apple, pear, pineapple, or any fairly-dense fruit for rhubarb in this recipe. If using a sweeter fruit, reduce the sugar by half.
3 stalks of rhubarb
1 ½ cup unbleached flour
1 Tablespoon baking powder
½ teaspoon salt
8 Tablespoons unsalted butter, cold
½ cup vanilla sugar*, divided
2/3 to 3/4 cups heavy cream
1 well-beaten egg
*Note regarding Vanilla Sugar
Vanilla sugar can be purchased at The Spice House and at several specialty markets. Mattie would have gotten hers from a traveling spice merchant or made her own. It is easy to make yourself. To do this you will need 2 cups of raw sugar and about 6 inches of vanilla bean. Slit the bean down the center and peel it open. With the back side of a knife, scrape the inner pulp from the outside husk of the vanilla bean and add to the sugar. Using a modern blender, whir all together until you see the tiny bits of vanilla become smaller and blend into the sugar. Mattie would have shaken it in a sealed jar and then forced it through a fine sieve several times. Store in an airtight container with the outside husk of the vanilla bean immersed into the sugar.
Wash the rhubarb and remove the leaves and the top and bottom edges where it may be dry or dirty. Slice into ¼ inch slices. Toss the slices with ¼ cup of vanilla sugar and set aside. Do this first as the fruit will release its juice as it sits with the sugar. Sift the flour, measure, and resift three times with the baking powder and salt. Cut the butter into a fine dice. If using a modern stick of butter, take a sharp knife and slice the stick into four long, thin rectangles, then slice each of those into 8 pieces. Drop the butter one little piece at a time into the flour mixture and blend with a pastry blender, two knives, or using a modern mixer. Add the rhubarb being certain to scrape all the rich sugar syrup out of the bowl into your mixture. Stir by hand. Add ¼ cup of sugar and mix thoroughly. In a measuring cup, beat one egg until light in color and add enough heavy cream to make ⅔ cup. Add this gradually to the mixture until a soft dough is formed. Add additional cream if needed to make a dough that can be handled.
On a floured board or pastry cloth, divide the dough into two balls and flatten them out into disks about 8 inches in diameter and about 2 inches thick. Transfer each disk to a parchment paper lined baking sheet. With a sharp knife, cut each disk into 6 or 8 triangles. Carefully separate the triangles so they no longer touch each other and bake for about 25 minutes at 425°. Scones should be a golden brown. Do not overbake. Store in a sealed container until ready to eat.
Lemonade would be the perfect accompaniment to this picnic as would iced tea.
If you are interested in sampling any of these items, they will be in Mattie’s Snack Boxes at the next Glessner House Courtyard Concert on June 9 when we will be treated to the music of John Sharp & Friends. Please click here for tickets.
Mattie Goes Shopping (posted May 3, 2021)

For this month, we are showing Mattie’s view of things. You will see the ingredients, and also the backstage, kitchen side of service, rather than finished dishes as the diner saw them. Special note, Mattie would have plated things in the order served. This means that everything would not be done all at the same time. But to make things easier for the viewer, all dishes appear together in the second photo.
Frances Glessner planned a Supper Menu on May 7, 1893. Suppers are lovely. They are more casual, contain fewer dishes, and engender a more relaxed atmosphere. To be historically fair, you should know that I have made some changes. Mrs. Glessner requested peas and I have substituted Brussels sprouts. I have combined the Rice Croquettes with the Chicken Timbales to create Rice and Chicken Croquettes. We have already covered Timbales in a previous Cooking with Mattie column, and not yet Croquettes so, here we go. The menu:
Broiled Salmon with Sauce Tartar
Creamed Potatoes
Baked Tomato
Chicken & Rice Croquettes
Brussels Sprouts with Pearl Onions
Apple & Celery Salad
Molded Ice Cream
Angel Cake with Strawberries
Broiled Salmon
One 2-3 pound salmon filet cut into one inch slices
Salt and white pepper
Juice of one lemon
Mattie would have purchased her salmon from one of the many fishmongers in Chicago and it would probably have been delivered to her, wrapped in white paper, and fileted with the heads removed. The fish should be cooked with the skin off for this presentation.
An easy way to remove the skin before cooking is to heat a skillet, preferably cast iron, that is large enough to accommodate your entire filet. When the skillet is sizzling hot, plop the salmon filet skin side down onto the hot skillet. Let sit for the count of twenty then test an edge to see if the skin sticks to the pan and the flesh peels off in one piece. DO NOT walk away, this happens very quickly, and you do not want to begin cooking your fish. When the skin will separate easily, simply use a large spatula or butter knife to pull up the flesh leaving the skin in the pan. Set your skinned fish on a cold platter to stop any cooking. Slice each filet into one-inch strips and proceed with the recipe. Now, go wash your pan!
Mattie would have broiled her fish in a gridiron which is a two-sided cage. You can do this in your oven broiler, on your grill outside or on a baking sheet onto which you have placed a wire rack. Get your oven very hot, at least 425°, or use the broiler feature if you have one. Salt and pepper each portion of fish and place onto your rack, broiler pan, or gridiron. Pour lemon juice over the top of each portion. Grill on each side about 3-5 minutes depending on the thickness of the fish. Serve very hot with Sauce Tartar. A sprinkle of fresh green herbs, such as chives or parsley, is a nice touch for service. Mattie would have added a squeeze of lemon, which you will see in the preparation photograph, wrapped in cheesecloth to omit seeds when squeezed over the top.
Sauce Tartar
What we in 2021 consider tartar sauce would be unknowable to Mattie. She probably wouldn’t like it very much either and it would not go with a beautifully broiled portion of salmon at all. Worcestershire sauce would be the most prominent ingredient in Mattie’s sauce and she could purchase it in bottles from her grocer or a traveling spice merchant. Mattie’s Sauce Tartar would be served hot.
1 Tablespoon vinegar
1 teaspoon lemon juice
½ teaspoon salt
1 Tablespoon Worcestershire sauce
1/3 cup butter
Mix all ingredients except the butter and warm in a small bowl over hot water. Melt the butter and add gradually to the other ingredients whisking briskly. Keep warm and serve over hot, broiled fish. A cold version may be made by adding mustard, pepper, powdered sugar, salt, onion juice, chopped olives, capers, and pickles to prepared mayonnaise but this is to be served with fried fish.
Creamed Potatoes
2 or 3 small new potatoes per person
Boiling water, salted
Recipe of white sauce made with cream rather than milk
Pinch of cayenne pepper
Potatoes are one of the things that survive well in storage. Mattie would have stores of potatoes in the basement in May but new potatoes would just be coming in from southern climes so she would have served small, fresh potatoes for this dish. Scrub the potatoes and boil in salted water until the skins can be removed, about 10-15 minutes. Remove from heat. Take off skins as soon as potatoes are cool enough to handle and slice very thin.
Place in baking dish that has a lid and cover with white sauce (see below). Stir to make certain each potato slice is coated with sauce and there is plenty of extra sauce in the dish. Bake in a slow oven (300°-325°) for one hour, checking occasionally to make certain the potatoes are still covered in sauce and not drying out. To plate, sprinkle a few grains of cayenne pepper over the top.
Chicken & Rice Croquettes
This is a dish made from kitchen scraps but we don’t talk about that, really. A small roasted chicken would be made nearly every day by Mattie. She would use it for servant’s meals, slice the breast for sandwiches for the family, and chop everything else for dishes like croquettes. Rice was not just an “oriental” import for Mattie. Rice production in South Carolina and Louisiana was in full force in the late 19th century. Rice, sold in cloth bags and transferred by the cook into glass or ceramic jars, was a staple item in any proper kitchen. Rice is an important component of croquettes.
Mrs. Glessner loved croquettes. They are listed on multiple menus and are made with so many ingredients that I sense Mattie must have been very good at making them. Croquettes are not often served today, and I am not certain why. Essentially, they are a mixture of a protein, a starch, a white sauce, eggs, and some seasonings mixed together and cooled until they can be formed into shapes, rolled in cracker crumbs and deep fried. Sounds wonderful, doesn’t it? We should make these again.
1 cup chopped chicken meat, white, dark, or both
1 cup rice, cooked (barley, macaroni, quinoa or any grain you enjoy may be used to good effect here)
1 teaspoon celery salt
1 teaspoon salt
¼ teaspoon each white and cayenne pepper
1 Tablespoon finely chopped and caramelized onion or 1 teaspoon onion juice
1 teaspoon chopped parsley
1 teaspoon lemon juice
1 cup or more bread crumbs or finely crushed cracker crumbs, saltines are fine for this, Ritz-style crackers also work very well
2 beaten eggs
Mix the chicken, cooked grain, spices, and lemon juice together. Let cool if any ingredients were warm when you started. Add one beaten egg. Form into rolls. You are looking for something about the size of a shotgun shell or a roll of Life Savers candy. Coat the finished rolls in cracker or breadcrumbs, then dip in the other beaten egg, then in crumbs again and deep fry in hot oil until brown. Set onto brown paper or clean newspapers to drain until all have been fried. Serve with a thin white sauce. Yes, folks, it is a show about white sauce this month.
Baked Tomatoes
One medium-sized tomato per person plus one extra in case of breakage
1 cup cracker crumbs, more or less depending on the number of tomatoes
1 Tablespoon finely chopped onion or 1 teaspoon of onion juice
1 Tablespoon unsalted butter per tomato
Tomatoes in May would come via train from California or Florida, or perhaps Mexico. Hothouse tomatoes would also be available to Mattie. We have this sense that Victorian and Edwardian era folk could not obtain fresh goods not grown in their region, but that is a fallacy. Just like today, if you are willing to pay for it, it is obtainable. Refrigeration in the late 19th century enabled many fresh goods to be transported thousands of miles. Tomatoes were one of these things, as were strawberries, which you will see later in this menu. Mattie would have inquired of her grocer what the price of tomatoes would be, then decided whether or not it was in-budget to serve them, but rest assured, she could obtain them.
First, you must skin the tomatoes. Place them in a large bowl. Boil a kettle of water and pour over the tomatoes. Remove the tomatoes one at a time using a slotted spoon and slip the skins off. You must work quickly so as not to leave the tomatoes in the hot water too long, as they will begin to cook. They must remain in the hot water so the skins stay loose until you remove them. This must all be done quite quickly. Once skinned, cut out a circle at the stem end of each tomato and remove this “lid.” Scoop out the inside pulp being careful to maintain the integrity of the shell. A grapefruit spoon or teaspoon measuring spoon with a sharp edge work well for this. Make certain your spoon is smaller in width than the diameter of the hole you cut. I tried this both ways, to save you doing it. I found that scooping out the centers first and then removing the skins worked best. So, for this treatment, I would counsel that you scoop first, then slip skins. For any other tomato treatment, slip skins first.
However you accomplish your skinning, save the insides and run under cold water, remove the seeds but save the pulp. Mix the pulp with breadcrumbs, salt, and pepper to which you have added a small amount of butter. Stuff each tomato with this mixture and place in a baking pan just large enough to hold all of them standing on solid end and close together so they do not fall over during cooking. Sprinkle the open end with more breadcrumbs and dot with a small pat of butter. Bake at 375° for about ten minutes. Serve very hot.
Brussels Sprouts with Pearl Onions
Five or six Brussels sprouts per person
Five or six pearl onions per person
Salt
Pinch of white pepper
Recipe of White Sauce if desired
Brussels sprouts would come into Chicago still on the stalks and be cut off and put in baskets by the grocer. Mattie might be accustomed to working with them on the stalk at The Rocks, but in Chicago, they would most probably be cut off and delivered to her that way. Cut the Brussels sprouts off of the stalk if purchased that way, or cut off the rough ends of each sprout with a sharp knife. For best results, core out the stem end by removing a cone-shaped piece. This will result in a sweeter smelling sprout with less sulfur odor. Many folks claim not to enjoy Brussels sprouts and cabbage because of the sulfur smell. This method will alleviate that issue.
Soak the cleaned sprouts in cold water for 15 minutes. Boil in salted water for 10-15 minutes or until tender (the modern cook might prefer to steam the sprouts which will help to retain their bright green color, Mattie would have boiled them). Meanwhile, remove the outer skins and each end of the onions, boil the onions in the same water as the sprouts. For a prettier dish that takes just a bit more work, lightly pan sauté the onions whole in butter or sweet oil until they begin to turn a little brown. A slightly caramelized pearl onion will lend a sweetness to the dish and have a lovely color in your finished presentation. When both vegetables are cooked either butter them lightly or cover with a thin white sauce.
White Sauce
2 Tablespoons unsalted butter, melted
1 ½ Tablespoons unbleached white flour
1 cup scalded milk
Dash each salt and white pepper
This is just a simple, basic sauce. Make a light roux by blending the flour and melted butter. Add the seasonings. Gradually add the hot milk and whisk or stir briskly so no lumps are formed. Pour hot over the vegetables and stir to coat.
Apple & Celery Salad (also known as Waldorf Salad)
1 apple per person plus one in case of breakage
1 stalk of celery per person, very finely chopped plus one more for garnish
Freshly made mayonnaise, approximately 1 Tablespoon per apple
¼ cup finely chopped nuts, walnuts or pecans are best choices
1 Tablespoon honey or maple syrup
Dash each of cinnamon and nutmeg
This salad can be made all mixed together and served on a lettuce leaf, but Mattie might have tried the presentation recommended by the Boston Cooking-School Cook Book, where it is referred to as Waldorf salad, although Mrs. Glessner always called it apple and celery salad. For this method, select firm apples either red or green. Cut the tops off as you did for the tomatoes. Core the center to remove the seeds but do not cut all the way through to the bottom, leave about ½ inch intact at the bottom end. Hollow out the center leaving enough flesh adhering to the skin, so the fruit maintains its shape. Mattie would have used a melon baller with a sharp or serrated edge. If you have this tool, it is ideal for hollowing out an apple. Take a small cloth drenched in lemon juice or the cut side of a piece of lemon and coat the inside of the hollowed-out apple to keep it from browning.
Chop the apple flesh very fine and mix with the finely chopped celery and nuts. Add the spices and sweetener to the mayonnaise and stir briskly; a few drops of apple brandy does not hurt at this stage. Mix the mayonnaise mixture with the apples, nuts, and celery and stuff into the cavity of each apple. Cover the top with the stem end “lid” and garnish with curled celery. Serve on a leaf of lettuce or a bed of curled celery.
To Curl Celery
With a very sharp knife or a peeler tool remove long, thin strips from an entire stalk of celery. They will begin to curl as you cut them off. Place in a metal bowl full of ice water and they will curl further. This is a fun job for kids if they have safe knife skills.
Molded Ice Cream
Oh Gracious! Dear readers can I tell you a few things about molded ice cream? First of all, I fail to understand how Mattie accomplished this with the means at her disposal. Ice cream molds must be lightly oiled on the inside. I used a small, copper, cake-shaped one this time. Slightly softened ice cream must be packed inside tightly. It must be then frozen as hard as possible, unmolded onto a plate, and served almost immediately else it begins to melt around the edges.
I’ve tried this several times, with several different kinds of ice cream and I can attest that Scooter’s Frozen Custard (at Belmont and Paulina) works the best. Modern commercial ice cream is emulsified so that it is scoopable right out of the freezer. If you want to mold ice cream as Mattie did, you need to make it yourself or buy from a place that does not aerate and emulsify so that you can hard freeze in the molds.
Angel Cake
It is called Angel Cake, not Angel Food Cake, in the Boston Cooking-School Cook Book, and many others. I always call it Angel Cake and am often corrected. To be clear, it was Angel Cake in some books and Angel Food Cake in others and there seems to be a shift after 1906 when Devil’s Food Cake came into being, thereby setting the two apart from each other. Call it what you will. It is a cake made very carefully from a small amount of ingredients coming together in seamless harmony. If you mistress or master this cake, you can do anything!
1 cup flour
1 cup white sugar
1 teaspoon Mexican vanilla or almond extract
1 teaspoon cream of tartar
11-13 egg whites depending on the size of your eggs. Mattie’s egg size would require 13. Today, our eggs are so much larger and 11 will suffice.
Sift your flour three times and re-measure. If you have a blender, further granulate sugar to the finest consistency. Mattie would have been able to purchase sugar at varying consistencies that we cannot obtain except at specialty stores. Do not use confectioners, or powdered sugar because it has additives such as cornstarch and other stabilizers which are not necessary to this recipe, and please don’t get me started on powdered sugar. Full stop.
Separate the eggs and save the yolks for Hollandaise Sauce or another use such as adding to omelets. Whisk or beat the eggs with the cream of tartar until stiff peaks form. Gradually add in the sugar and vanilla or almond extract, whisking or beating constantly. The mixture should appear gorgeous and shiny! Gradually fold the flour in by hand using a large spatula. Gently pour into a tube pan. DO NOT grease the pan! Bake at 350° for about 45 minutes. Resist the urge to check the progress in the oven. Opening the oven door reduces the temperature by just enough to cause this delicate cake to fall. It should be done at 45 minutes. You are allowed to check at 45 minutes. Bake some additional time if the top is not nicely browned.
Now, this next part, I know, is one of those but-what-possible-difference-could-it-make? It does, please trust me. Invert the cake by placing it on top of a soda pop or wine bottle. Cooling the cake upside down makes a huge difference. When cool, remove from pan by running a thin, sharp knife around the edges and the center peg of the pan. Plate. Slice with a serrated blade.
Berries for Cake
This works for strawberries only. Raspberries, blueberries, and blackberries are too delicate. For strawberries to sauce a cake, slice thinly, place in bowl that has a lid and dust with sugar (raw or white, powdered works too, but why would you, see previous). Put the lid on. Shake vigorously. This bruises the berries just enough to create a lovely sauce. Chill until ready for service. For fresh berries, slice the cake, carefully place berries over the cake, dust with fine sugar (see previous) at least ½ hour before service so the sugar can soak in. Enjoy.
Mattie did her shopping via the telephone and regular orders with grocers who delivered. When necessary, she could visit the Water Street Market. Vendors with spices, oils, tinctures, and other imported delicacies such as vanilla and specialty nuts might come around to the female servants’ door at Glessner House. Frances Glessner would keep a keen eye on the total budget, but it would have been up to Mattie to obtain the best price for goods she needed to create the menus that Mrs. Glessner requested. You, my dear readers, get to do it all yourselves. Enjoy!
Spring Tea (posted April 6, 2021)

It is spring! Time to have friends over for tea. Frances Glessner was pleased to host her dear friends Mr. and Mrs. F. Hopkinson Smith. Mr. Smith was a fascinating character. He was an artist, an author, and an engineer and was known for constructing the base for the Statue of Liberty, among many other projects. His books were widely read and enjoyed. Thanks to Bill Tyre for some further information on him. He was a close friend of the Glessners and would stay with them whenever he visited Chicago. In letters to them, he often noted that he felt one of the places he most enjoyed was the sofa in front of the fireplace in their library where he experienced their warm hospitality.
In his novel, Colonel Carter’s Christmas, he retold the story of the Glessners carrying the fire from the library of their old house to their Prairie Avenue house in December 1887, thus transferring the memories and hospitality of the old home to the new. Colonel Carter performs a similar “ceremony” in the novel. Glessner House has many autographed copies of Smith’s books in the library. We should all have friends who put us in books. The tea menu on April 17, 1894 was as follows:
Sandwiches
Cake
Cakes
Bon Bons
Chocolate
Tea
Egg Nog
Claret Cup
Sandwiches
Although Mrs. Glessner did not describe what kinds of sandwiches or cakes she wanted, Mattie would have known. There are several other examples within Mrs. Glessner’s menus wherein she lists the desired sandwiches. They were always: cheese, caviar, lettuce, pate, chicken salad, anchovy. Methinks Mrs. Glessner had a guide. The Boston Cooking School Cook Book by Fannie Farmer mentions every single one of these sandwiches in its sandwiches section, except caviar.
The trick with tea sandwiches is to use different breads, shapes, and garnishes so that the guests feel they are really being treated. In the photo above, I have taken a few modern liberties with the ingredients but attempted to provide the requisite variety.
It is really very easy, and Mattie would have known all these tricks. I shall attempt to share them with you. First, get several different kinds of bread: dark rye, whole wheat, white. Then, prepare your fillings and garnishes and decide what will pair best with what. We have:
Cheese on Heart-Shaped White Bread
Egg Salad on Flower-Shaped Wheat Bread
Lettuce and Butter on White Bread
Braunschweiger on Dark Rye Bread
Chicken Salad on Nut-crusted Wheat Bread
Sardine on White Bread Fishes with Anchovy Eyes
To make a 19th century cheese sandwich one cannot just slice cheese and put it on bread. One must first make a roux, then melt the cheese in the roux, then cool it, then spread it on the bread. I am not making this up. I garnished mine with tiny leaves of spinach for color.
Egg salad can be easily made using hardboiled eggs (see column posted on May 19, 2020) mayonnaise, Dijon mustard, curry powder, and white pepper. Make it very smooth and pipe onto your bread open face, then garnish with chopped chives.
Lettuce sandwiches are so lovely and delicate. Simply spread unsalted butter onto the bread, place a leaf of lettuce and top with another slice of buttered bread. Remember, with all tea sandwiches, always make the sandwich first, then cut the crusts off. There are no crusts on the bread in a proper tea.
Mrs. Glessner often specified paté de foie gras sandwiches. If this is in your budget, by all means use it. In the photograph you will see simple Braunschweiger with a light coat of dark mustard on both sides of the bread. Ellie hint: when making any type of sandwich that you need to set aside before serving, always spread butter on your bread before making the sandwich. This keeps the ingredients from penetrating the bread and becoming soggy before serving.
Chicken salad was an easy sandwich filling for Mattie because she could use leftover chicken scraps. Chop the chicken very fine, add mayonnaise and finely chopped celery then spread on bread. To dress this sandwich up a notch, spread softened cream cheese on the edges of each sandwich after cutting and then dip them in finely ground nuts.
Sardine sandwiches are mentioned in almost every 19th century cookbook. Sardines are a forgotten ingredient, and I would love to see them revived. These tiny fishes pack a wallop of nutrition and very few calories if canned in water rather than oil. I smashed the sardines into a fine paste then mixed with cream cheese. After making the sandwiches on white bread, I used a fish-shaped cookie cutter to cut them out then gave them “eyes” with a dollop of anchovy paste. Mattie might have made the entire sandwich with anchovies, but they are awfully salty for the modern palate; a small drop is plenty for our taste today.
Cakes
Mrs. Glessner honestly lists both “cake” and “cakes” in her menu. This might seem like an error or oversight, but I don’t think so. Cake, singular, would refer to one cake, such as pistachio or in this case, strawberry, sliced for service. Cakes, plural, would refer to small, bite-sized pieces of cake which are cut and decorated and served with the candy. This is another really fun thing to do with the kids if you have them. First start with a very simple basic cake such as the 1234 cake from a previous Cooking with Mattie column posted April 22, 2020. A store-bought pound cake will suffice if you are saving time.
Cut the cake in slices about an inch and a half wide, remove the crust and cut each slice into four equal squares. Now, decorate! I used pink frosting for some, drizzled chocolate for others and some I cut in half, spread a bit of chocolate frosting on them and topped with a sliced strawberry. This is fun and you are only limited by your own imagination. Having many different cake treatments was a hallmark of the truly festive tea table. Mattie would have had access to a variety of chocolatiers in Chicago in 1894 and we know that the Glessners did enjoy candy as it is on every menu. There is a very simple way to make your own bonbons however and that is what I have done here.
Bon Bons
4 ounces cream cheese, softened to room temperature
2 Tablespoons unsalted butter
1 teaspoon Mexican vanilla
3-4 cups sifted powdered sugar
Optional add-ins such as peanut butter, Ovaltine, cocoanut
Ground nuts and melted chocolate for dipping
This is so easy and fun. Mattie would have blended by hand, but you can use an electric mixer, I won’t tell. Blend the cream cheese and butter together until very smooth, add the vanilla then the powdered sugar until you have a stiff dough. Once the basic dough is made, you can add peanut butter to part of it, Ovaltine to some, etc. This will give you several different flavors of bon bons. Set in the refrigerator for about an hour to harden up. Take generous Tablespoon-sized scoops of chilled dough and roll into a ball. If using nuts, roll the ball in the ground nuts. Freeze the balls on parchment or waxed paper until very solid. For chocolate dipping, take the frozen balls out of the freezer and dip quickly into melted chocolate. You can use dipping chocolate found in the produce aisle near the strawberries but in a pinch, chocolate chips work almost as well. Put the dipped bon bons onto parchment or waxed paper to cool.
Beverages
There is an abundance of beverages on this tea menu, and I eliminated one for the photograph because the table was getting crowded. In the original menu, Mrs. Glessner instructed that “chocolate” (meaning hot cocoa), tea, eggnog and claret cup were all served. You will not see hot cocoa on the table in the photograph, but the others are there. In the interest of symmetry, there are four of everything on the pictured table, but observant readers will know that Mr. Glessner would not be having any eggnog or claret cup as he was a teetotaler. I was very pleased to see that there are recipes for both eggnog and claret cup in Favorite Dishes: A Columbian Autograph Souvenir Cookery Book compiled by the lady managers of the Chicago World’s Columbian Exposition in 1893. Mrs. Glessner would have known many of the contributors to this book, including her neighbor, Evaline Kimball.
Eggnog
From Mrs. W. W. Kimball, of Chicago, Lady Manager
For four persons
Four eggs, separated
¼ cup raw sugar
1 cup brandy
1 cup cream
Grated nutmeg optional as garnish
Beat the egg yolks until very light, continue beating while adding the sugar. Add the brandy to the yolks and sugar. Whip the egg whites until just frothy, add half of the frothy egg white to the yolk and brandy mixture. Add the cream. Continue to beat the egg whites until stiff peaks form. Pour the mixture into glasses and top with a dollop of egg white, sprinkle with nutmeg. Modern readers - Do Not do any of this!!! Raw eggs should not be consumed, ever. 125 years ago, no one knew this yet, so they did. Commercial eggnog which you can purchase today has been pasteurized and does not contain raw food products. It is interesting to note that today we think of eggnog as a Christmas or winter beverage. I find it listed in Mrs. Glessner’s menus at all times of year. I wonder when it became relegated to holiday fare?
Claret Cup
From Mrs. Frona Eunice Wait, of California, Alternate Lady Manager
Take half a gallon of good claret and a pint of old whisky and mix them thoroughly; sweeten to taste by mixing the sugar with a little water to dissolve it before it comes into contact with the alcohol. Take a can of pineapple, or one fresh one, and chop fine, put juice and all into the punch; set the whole mixture on ice and let it stand at least three hours before using; serve some portion of the pineapple with each glass.
Modern readers: try this recipe only if staying at home for the night. It is very strong! The concept of mixing red wine with whisky is perhaps Scottish in origin, at least it was for Queen Victoria. Her servant and dear friend, John Brown, helped the Queen recover her grief over the loss of her beloved husband with liberal doses of claret mixed with whiskey. I’m guessing the pineapple is just to make it seem less like a mixed drink and more like a punch. And speaking of punch, this recipe can be a punch if it is served in a punch bowl. It is a cup if it is served directly from a pitcher into the glasses. That’s the difference between punch and cup and now you can all go home, you learned something. Just don’t drive after drinking even one cup of this.
And that, ladies and gentlemen, is how you have an adult tea party at Glessner House with Mr. and Mrs. F. Hopkinson Smith. Enjoy your friends and invite them to tea very soon.
St. Patrick’s Day (posted March 2, 2021)

It is March, so Mattie would be making corned beef and cabbage, right? Actually, no, sorry. First of all, in the early 20th century, St. Patrick’s Day was not a universal holiday the way it is today. Everyone was not Irish on St. Patrick’s Day in Chicago...yet. Generally, just the Irish Catholics celebrated. We find no evidence of the holiday being recognized at Glessner House. Mattie was of Irish extraction, but she was born in Canada to parents from Northern Ireland and therefore, her ancestral celebration comes on July the 12th not on March the 17th… but that is a long story for another day.
And furthermore, dear readers, corned beef isn’t, and wasn’t, eaten in Ireland, even in the North. The Irish in Ireland would have feasted on bacon with their cabbage. Many Irish immigrants to this country lived in the same general areas as the Jewish immigrants, and their local markets didn’t carry pork. The shops stocked beef brisket. This cheap cut of meat was often corned, meaning preserved with large corn-sized salt crystals and spices to break down the tough meat. This is also where pastrami comes from. For the Irish immigrants to Chicago, New York, and Boston, pickled, or corned beef, became the cheapest meat dish to celebrate St. Patrick. From those 19th century celebrations, it took on a life of its own and today corned beef is an expensive treat for a special day. It has come a long way from its humble beginnings. I could go on about this all day, it is a fascinating study, but we are here to prepare a lovely early spring meal for the Glessners, and perhaps your families as well. So here is what Mattie might be serving.
Buckwheat Soda Bread
with Herbed Butter or Honey Butter
Black Bean Soup
Roasted Turkey
Brussels Sprouts
Duchess Potatoes
Salad of Golden Beets, Sliced Apple & Celery
with a Horseradish Mayonnaise
Cabinet Pudding
Buckwheat Soda Bread
Nothing can be more truly Irish than soda bread. This, unlike corned beef, really is Irish. Certainly Mattie, with her award-winning bread skills, would be adept at soda bread, too. In the region of Canada where Mattie came from, a great deal of buckwheat is grown, so she would have been familiar with its use long before she came to cook for the Glessners. Buckwheat, despite its name, is not related to wheat at all and thus is gluten-free. If you are trying to cook gluten-free, you could adapt this recipe as noted below.
Mr. Glessner was known to be fond of brown bread and it was served on many menus. We made Mattie’s own brown bread recipe in the very first Cooking with Mattie column. This recipe will yield a similar loaf but does not require yeast, raising, or kneading and thus gives the cook more time for other dishes.
1 ¼ cups unbleached flour. For gluten-free baking, substitute masa (finely ground corn flour), rice flour or prepared gluten-free flour, 6 ounces by weight
3 ⅛ cups buckwheat or whole wheat flour, 12 ounces by weight
1 teaspoon salt
1 teaspoon baking soda
2 teaspoons brown sugar or honey
2 cups buttermilk*
2 Tablespoons butter
But I can’t bake bread! Oh, yes you absolutely can. Sift flours separately and carefully measure them. Then, sift both the flours together with the salt, soda, and sugar. As regular readers and all good bakers know, you should sift three times. If using honey, add it with the milk later. Measure 2 cups of buttermilk (or substitute buttermilk*), make a well in the center of the dry ingredients and pour in the buttermilk all at once. Stir until just blended.
Turn onto a floured surface and roll around a few times. There is no need for kneading this bread. Shape into a large lump and gently place into a greased loaf pan, cake pan, or mixing bowl. Traditionally, soda breads are round. Sprinkle the top with a little wheat or buckwheat flour and bake at 350° for about 45 minutes. For a perfect top crust, in the last ten minutes of baking, take a large pat of butter and smooth it over the top. Continue baking until done. The butter will melt instantly on the hot bread surface and create a lovely crust on the finished bread.
*For substitute buttermilk, take a scant 2 cups whole milk and add 2 Tablespoons of lemon juice and 2 Tablespoons of vinegar. Stir them all together and let sit for a few minutes. The milk will thicken as it curdles and will resemble and behave like buttermilk. This is what I generally use. I have experimented a lot over the years and find that adding both lemon juice and vinegar to the milk gives it the right consistency.
Flavored Butters
Many types of flavored butters can be made to accompany almost anything. For this dinner, you will see four-leaf clover shaped pats of honey butter and herbed butter. Mrs. Glessner was known to use a four-leaf clover ice cream mold. Four-leaf clovers are different from Irish shamrocks but that is another long story.
Soften butter to a spreadable consistency and mix in honey, about a Tablespoon for half a stick (¼ cup) of butter. For herbed butter, take a combination of herbs such as tarragon, chives, and parsley to make one Tablespoon. Mattie would have used dried herbs which she would soak in a little white wine or lemon juice. Mix 1 Tablespoon of either fresh or reconstituted dried herbs into half a stick of butter (¼ cup). Spread the finished butter about ½ inch thick on a piece of waxed or parchment paper and chill until firm. Cut with small cookie cutters or a small juice glass to make single serving pats.
Black Bean Soup
1 can of black beans*
At least three cups water
2 Tablespoons butter
½ cup sweet onion, finely chopped (1 small)
2 stalks celery, finely chopped
1 teaspoon salt**
Pinch black pepper
½ teaspoon dried mustard
½ teaspoon cayenne pepper
2 hardboiled eggs, carefully sliced
Thin slices fresh lemon
Melt the butter in a large saucepan, add onion and celery and cook until soft and very fragrant, about half an hour. Add all the seasonings except the salt and stir a few minutes to lightly toast the spices. Add the entire can of beans with their liquid and enough water to cover. Leave covered on the lowest heat for at least an hour. Check to make certain the water is not boiling away. Add more water as needed so that all the beans and vegetables are still covered. Keep on the stove for at least another hour, checking every fifteen minutes or so. This is a very forgiving soup, as long as you don’t let it boil dry. Mattie would have kept this on the back burner all day.
After about three hours total, the beans should be thoroughly mushy. At this point, Mattie would have forced the entire mixture through a sieve or a food mill. This is preferable because the outer coverings of the beans and the fibrous tissue of the onion and celery will be removed. If you use a modern blender or immersion blender, everything will be puréed and your soup will not be as refined. Once the soup is very smooth, add the salt and enough additional water to make the proper service consistency.
Serve hot, garnished with sliced hard-boiled eggs and a thin slice of lemon. This was the prescribed garnish for black bean soup in every historic recipe I found, and I do not know why. Someday I shall dive down the rabbit hole of black bean soup research, but not today. This soup is really, really good! Far better than I expected it to be. I will make this again and you should, too. An added bonus, if you use olive oil instead of butter and eliminate the egg garnish, this soup is vegan.
*If you wish to use dried beans, soak 1 cup of beans overnight in water. Drain and rinse. Cook in 3 cups of unsalted water for about an hour, then proceed with the recipe as written using about ½ cup of the water in which the beans were cooked initially, and use that water for the rest of the recipe when water needs to be added.
**Always add salt to a bean dish at the very end. Salt during cooking toughens the beans.
Roasted Turkey, Brussels Sprouts
We are not going to go over the instructions for these courses except to say, roast your turkey as you like and slice. Serve with lightly steamed Brussels sprouts with a bit of salt and butter. Mattie always served Brussels sprouts with chestnuts but we have already discussed how the use of chestnuts has diminished in our time (see the December 2020 column).
Duchess Potatoes
For duchess potatoes, start with mashed potatoes however you already make them. While still very hot, stir in one raw egg for every 4 potatoes and whip until very smooth. Put into a piping bag or simply a plastic bag with one corner cut out, and pipe small mounds about the size of a golf ball onto a parchment paper covered baking sheet. Bake at 400° for about 10 minutes until nicely golden on top.
Salad
Mrs. Glessner always mentions a salad in her dinner menus, and they are clearly paired with the other items. I would like to believe that Mattie helped to curate these menus with her skills and ideas. I selected golden beets this month for the same reason Mattie might have. At this time of year, root vegetables that had wintered over were just coming out of the ground. To preserve a portion of the crop, many farmers leave a few plants of beet, carrot, turnip, parsnip, etc. in the ground all winter. When the ground begins to thaw, these jewels are still fresh when everything else is either used up or withered after the long winter. Wintered-over vegetables tend to be sweeter, denser, and more concentrated in flavor than their counterparts which were dug up in fall and kept in the root cellar. I found gorgeous golden beets at Caputo’s Fresh Market this week. Mattie would have had these early spring delicacies delivered by the grocer.
1 beet per person
1 large apple sliced crossways in thin slices
2 stalks celery finely chopped
¼ cup mayonnaise (homemade preferred)
1 Tablespoon prepared horseradish
1 Tablespoon honey
1 Tablespoon lemon juice
To make the dressing, mix mayonnaise, horseradish, honey, and lemon juice, add the finely chopped celery, and set aside in a cool place. Line a salad plate with a few leaves of lettuce, spinach, or something leafy and green. Slice your apple crossways to reveal the star inside, remove the seeds from whichever slice they end up in. If you wish to slice the apples ahead of service, squeeze a bit of lemon juice over each slice, put the apple back together and wrap tightly in a damp cloth, put in a cold place.
When ready to serve, place sliced apple in the center of the plate and top with celery and dressing mixture. Please see the February 2021 column to cook your beets. Slice them crossways to reveal the pretty spirals inside. Ring the plate with the sliced beets. These flavors blend gorgeously, and the presentation brightens up a dreary day.
Cabinet Pudding
Cabinet Pudding is sometimes called Chancellor’s Pudding. It is a steamed pudding made from stale cake or cookies, dried fruits, and custard. Today’s diners would recognize it as Bread Pudding. In Mattie’s time there would be both a cold and warm version. The cold version is constructed more like a parfait or trifle, with a prepared custard to which some gelatin has been added. We are trying the warm version here.
Tall, deep metal mold or mixing bowl
Deep pan which can accommodate your mold with the lid on
One recipe of sponge cake, angel cake, or other light cake (leftover cake is fine); lady fingers may also be used
2 ⅓ cups whole milk
1 egg plus 7 egg yolks (Mattie would have used the whites for the cake)
⅓ cup raw sugar
1 teaspoon Mexican vanilla
1 Tablespoon orange flower water or rose water (optional)
Assortment of sliced, dried fruit such as dates, cherries, raisins, candied citrus; whatever is at hand.
Cut the cake into uniform chunks about 2 inches square. Set out on a baking sheet to dry while you are making the custard. Mix all the custard ingredients together until very well blended and frothy. At this point you have two choices. You can have a decorated finished product, or one that is all mixed together. Mattie would probably have done the more refined version, which I tried. The whole pudding and one slice are in the photograph to show you what both the inside and outside look like. This is hard to do and takes lots of practice. Clearly, I could use some more.
If you want to attempt it, start by filling your large pan with water about half full and put in a 325° oven. Mattie would have steamed this pudding on the back burner, but the oven works better if you haven’t done this before. Butter the mold and place a few artfully-sliced pieces of dried fruit along the bottom edge. Stick them to the buttered sides and hold in place with pieces of cake. Work about three inches at a time. If your mold has indentations, try to center and fix the dried fruit pieces in those indentations. Pour the custard up to your cake level and stop. Put the mold in a cold place until it is just set enough for the next layer.
If you have ever made a layered Jell-O salad, it is the same principle. Repeat this process until you are out of ingredients. Mine ended up with four layers. For the mixed version, layer fruit, custard, cake, repeat until mold is full. If you try the refined version, and fail, what you end up with is the mixed version, which is fine, too.
When the mold is full, put into your pan full of hot water. Add more hot water so that the water comes ¾ of the way up the side of the mold. Cover with a tight lid and steam in your oven at 325° for about 2 hours. Depending on the deepness of your pan, it may take a little less or a little more time. Remove from the oven when a long thin knife or skewer inserted comes out clean. Take out of the oven and leave in the pan of hot water until cooled. Unmold, slice and serve alone, with whipped cream or a hard sauce which is simply softened butter, sugar and brandy whipped to a fine consistency. Ungarnished Cabinet Pudding is also acceptable.
Mrs. Glessner may well have had some Irish friends who invited her to a St. Patrick’s Day tea, or perhaps she might have attended a concert of Irish music. But, at Glessner House, the menu would be as ever with an emphasis on what was freshest at that time of year and enhanced with Mattie’s special touches. Happy Spring, Everyone!
Valentine’s Day (posted February 2, 2021)

We do not know what holiday was Mattie Williamson’s favorite. If I had to guess I would say the servants’ picnic in September. But Valentine’s Day is my favorite holiday and creating this menu has been a true labor of love for me this month. I tried to imagine not only what Frances Glessner would request for a small dinner party, but also what my modern readers would enjoy making for those they love, and can actually see, this year. Let’s see how I did.
Oysters á la St. Valentine
Lovers’ Potion
Lamb Chops on a Bed of Red Lentils
Heart Beets
Poached Pears
Valentine Ice
Pink Champagne
As regular readers know, I always start crafting a menu with recipes from Mrs. Glessner’s vast cookbook collection. There are several books which list specific menus for Valentine’s Day. Victorian folk loved to theme just like we do. They gave dishes names that went with the holiday, tinted food to be the colors of that special day, and arranged food in iconographic shapes. These dishes were all found on those menus with the exception of Heart Beets, I apologize for the bad pun, I came up with that one myself because it just seemed so obvious.
Oysters á la St. Valentine
Two oysters per person, fresh, shucked, or good quality canned
Shells or small dishes for plating
½ cup of breadcrumbs
1 Tablespoon butter
1 Tablespoon olive or other sweet oil
½ teaspoon ground nutmeg or mace
If the oysters are fresh, poach them in a little white wine or vegetable stock until the edges curl. If canned (excellent quality canned oysters can be procured at Aldi) simply drain the liquor and pat dry because they have already been cooked. Chop the cooked oysters and dust them with nutmeg or mace*. Place them in the clean shells or in small ramekins. Melt the butter in a flat skillet (cast iron works best for this), add the oil, then lightly toast the breadcrumbs until they are a nice golden brown. Take care not to burn. Sprinkle the breadcrumbs over the oysters and broil for just a minute or two. This should be done right before service so they come to the table hot.
Oysters are found on nearly every one of Mrs. Glessner’s menus and were usually served on the half shell. Chicago’s love of oysters dates from the mid-1800s when fresh oysters were packed in oatmeal and shipped by rail from the East Coast. George Rector, well-known author and restauranteur, opened Rector’s Café Marine at the World’s Columbian Exposition in 1893, thus introducing to attendees from far and wide the delicacy Chicago had been enjoying for years. Mattie would have probably had her oysters delivered to the back door on a regular basis as they were served so often at Glessner House. We included oysters in Mattie’s first formal dinner last March and I am certain we will again when I am able to cook as Mattie for all of you once more.
*Mace and nutmeg come from the same plant, Myristica fragrans. Nutmeg is the hard seed in the center of the “fruit” of this tree and mace is the soft covering around the seed. Mace used as a spice is first dried and ground. You will sometimes see a historic recipe call for a “blade of mace.” This is one section of that outer hull and is often dropped into soups or sauces to flavor them. Mace has a sharper, more pepper-like flavor than does nutmeg and is more often used in savory dishes, whereas you will find nutmeg called for in sweeter recipes. When one cannot get mace, it is fine to substitute nutmeg, but true mace imparts a better flavor for this dish.
Lovers’ Potion
Beef consommé, canned or homemade
Macaroni in the shape of hearts or homemade noodles cut with a small heart-shaped cookie cutter
This recipe has the distinction of being either the simplest or most complicated in the menu depending on whether or not you do everything from scratch. I tend to think that Mattie certainly knew how to make her own consommé and noodles but would probably have used store-bought. Consommé is broth that has been clarified using an egg white dropped through while at a high boil. The egg captures the sediment in the broth and one is left with a transparent liquid. Mrs. Glessner often specified clear soups for her dinners.
To turn basic consommé into Lovers’ Potion, bring the liquid to a boil and drop in about a dozen heart-shaped noodles per person. Cook them in the consommé until just tender. Do not overcook as the shaped pasta will fall apart easily. Heart-shaped pasta is sold at this time of year in many groceries, and it is not at all a modern invention. On the illustration page of The Grocer’s Encyclopedia, which Mrs. Glessner had in her collection, we clearly see heart-shaped pasta. Mattie would have been able to buy a small bag of it for this dish. I really like the use of it in this clear soup because one gets to see the hearts set off by the reddish-brown liquid.
Lamb Chops
Lamb is a traditional spring food and perfect for Valentine’s Day. If they have been frenched, meaning the extra fat has been removed from the end of the bone, and they are plated facing each other, they form a heart shape which is quite lovely. I’m certain Mattie would have served them like that. Lamb chops are very easy to prepare. If you can broil a good steak, you can make lamb chops.
Allow two chops per person for the heart-shaped presentation but broil more and have them ready in case seconds are desired at your house. Salt the chops and leave them covered until they have come to room temperature. Grill them as you would a steak on both sides. They will take about 5 minutes to cook to medium rare.
Red Lentils
In Mattie’s time, lentils would be used mostly in soups and not served often as a side dish but their color and delicate size make them perfect as an accompaniment to the lamb. Writing in 1859, Isabella Beeton, author of the widely read cookbook, Mrs. Beeton’s Book of Household Management, tells us that in England lentils are not often eaten, but points out that they are an ancient grain that was mentioned in the Bible and by many early Greek philosophers. “A wise man acts always with reason, and prepares his own lentils,” according to the Stoics. Pliny wrote that the consumption of lentils produces mildness and moderation of temper. That sounds to me like an excellent recommendation, especially for a holiday dedicated to love. Mrs. Beeton, however, goes on to tell us that because the origin of the word lentil comes from lentus which means slow; they are suspected of making men indolent. What do you want to bet that was a comment by a “superior empire” about the food and habits of conquered peoples? Hmmmmm….
For six servings
½ pound of red lentils, washed and sorted
3 cups of water
1 teaspoon salt
1 Tablespoon olive oil
3 shallots, sliced
Here is an Ellie hint. If you cook your beets and lentils together, the beets will color the lentils an even darker red. Bring water to boil, add the lentils and salt, reduce heat and simmer about 20 minutes. Be very careful not to overcook. Lentils may be calming but are not very forgiving. If cooked too long, they will break apart and turn to a mush which is fine for some dishes but not as a bed for your beautiful lamb chops.
Heart Beets
One beet, about the size of a baseball, per person
Salted water or cook them with the lentils
Many people say they do not like beets, and I maintain this is because they have only ever eaten pickled beets. When not soaked in a spiced brine, beets have a very delicate, almost buttery flavor. Although I do make pickled beets, and I’m certain Mattie did too, plain boiled beets with just a little salt and butter are delicious! You should by all means give them a try if you believe you do not like them. You may be quite pleasantly surprised.
Scrub the beets thoroughly! With a very sharp knife remove the hard, crusty top and slice off just the very bottom. Do not peel. Plop them whole into the water with the lentils if you like, or cook alone. Bring the water to boil and then reduce and simmer. To test if the beets are done, insert a very sharp thin knife or cake tester. You want them tender enough to pierce all the way through. Remove the beets from the water and let cool until they can be handled safely. Depending on the age of the beets you can either scrub off the skin with a stiff brush or gently scrape it off with the back side of a paring knife. Carefully slice each beet into five or six slices about ⅜ inch thick. Then, with a sharp cookie cutter cut each slice into a heart. Save the outer edges for another dish.
To plate the lentils, lamb and beets, you may want to lay a large leaf of Swiss chard, butter lettuce, kale or several leaves of fresh spinach. I used a large leaf of swiss chard with bright red veins and stems because it looked perfect for Valentine’s Day. Spoon the lentils over the leaf, arrange the chops in a heart shape and decorate the plate with the heart beets.
Poached Pears
Mrs. Glessner often used fruit as a salad course during her meals and that is where we have placed the pears for this meal. If those for whom you cook are not amenable to a sweet item at this point in the meal, I suggest you serve them instead for dessert with vanilla ice cream. It will be lovely to look at and delicious. Pears are so delicious poached lightly and if one chooses very fat pears, when sliced in two they are rather heart-shaped as well.
4 pears, about 5-6 ounces each
2 cups dry red wine or unsweetened currant or cherry juice
¼ cup raw sugar (may be omitted and the modern palate would not miss is)
1 cinnamon stick about 4 inches long
½ teaspoon each peppercorns and whole allspice
Zest of one lemon
1 cup of fresh or frozen cranberries
In a pan large enough to accommodate 8 pear halves lying flat, heat the wine or juice, sugar, and spices until they come to a soft boil, reduce heat and add the cranberries and cook another ten minutes. Meanwhile, core the pears from the bottom leaving the stem in place. Carefully peel the pears and slice in two. If your pears are not heart-shaped enough for your taste, you can “carve” them into a better shape. Gently place halved, peeled pears into the hot liquid and simmer on very low heat for another ten minutes. Strain the liquid, removing the spices and spoon over the pears for service. As a salad, serve cold on a lettuce covered plate. For dessert, I would suggest serving them warm with a side of vanilla ice cream.
Valentine Ice
Mrs. Glessner nearly always served ice cream and she preferred it molded. She goes to the trouble to indicate which shape she wants for various special dinners: book shapes for the Reading Class, four-leaf clovers for Fannie’s wedding, candles at Christmas, etc. The heavy metal molds that Mattie used are precious artifacts today. We have one four-leaf clover mold at Glessner House! Today, it is so much easier to mold ice cream. Most craft stores will sell you a tray made of silicone with heart shaped indentations. They are designed for muffins, candy and even soap making but they are just perfect for ice cream too. Let your ice cream come to a slightly softened state so that you can spoon and press it into the mold. Cover with plastic wrap and put in your freezer overnight. Unmold onto a dish and ring with sliced strawberries, which are also, say it with me, heart-shaped!
I wish all of you the happiest Valentine’s Day with whomever you are able to see. Cooking is such a wonderful way to show your love for someone and for a holiday devoted to love, a home-made Valentine’s dinner seems the perfect plan. Please enjoy!
New Year’s Celebrations (posted January 5, 2021)
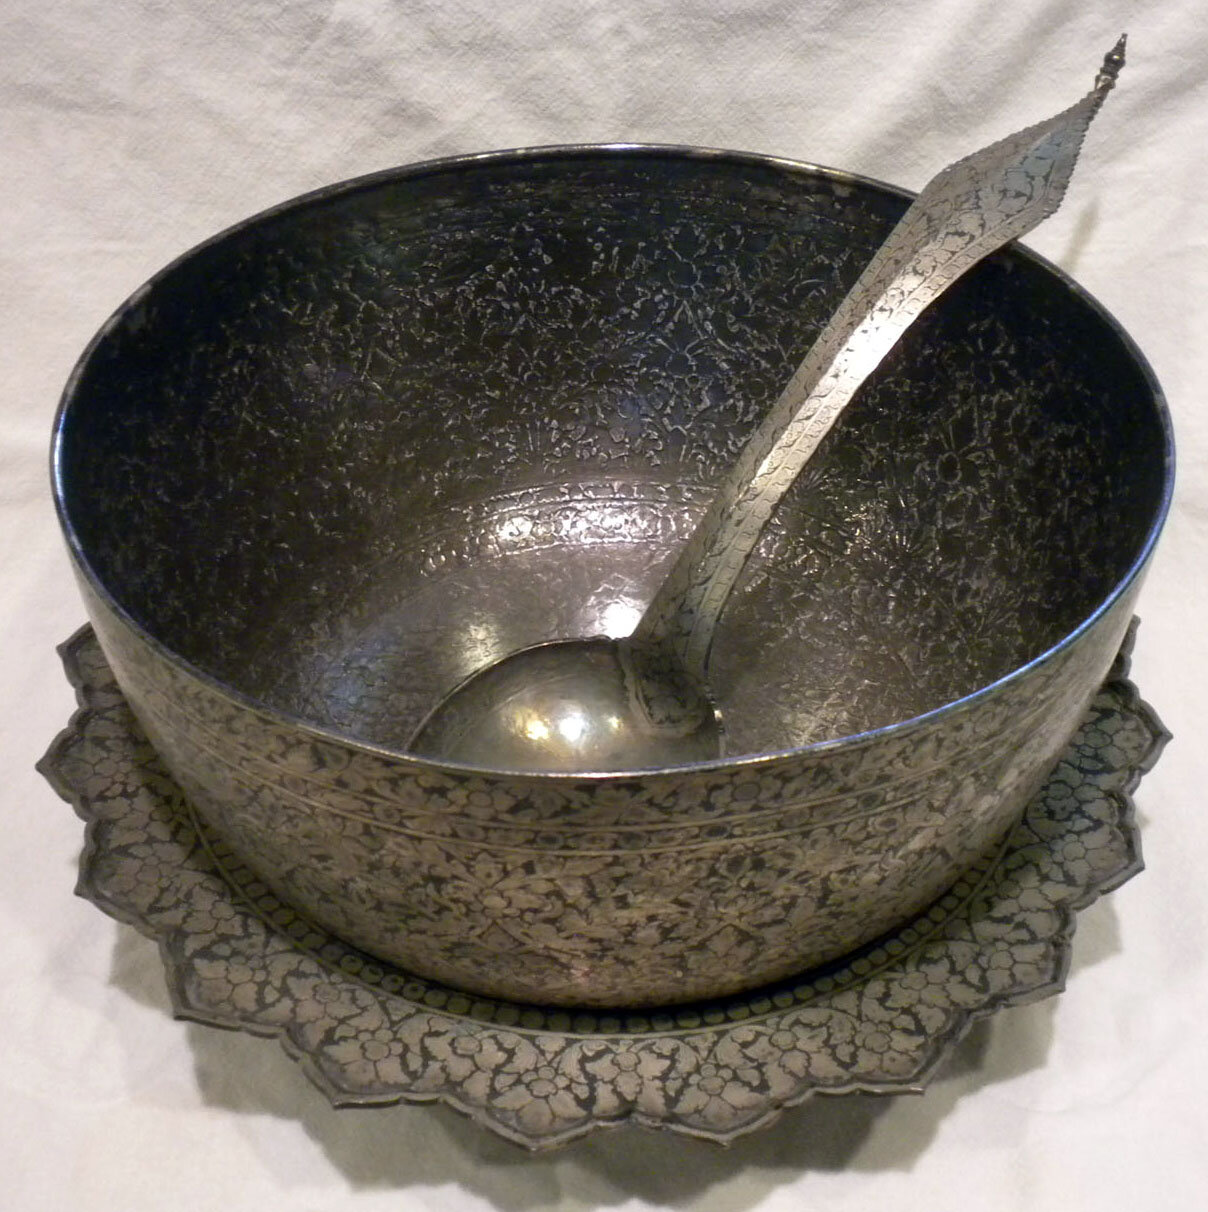
This Siamese silver niello rice bowl, purchased at the close of the World’s Columbian Exposition, was used by the Glessners as their punch bowl.
Frances Glessner was never one to put herself forward. However, on New Year’s Day we might forgive her as it was her birthday. After the flurry of activities surrounding Christmas with its concerts, fairs, and parties, we can understand why Glessner House might relish a quiet, unassuming New Year’s celebration. Perhaps it could have just a bit of birthday merriment thrown in for good measure.
In searching through the menus and journals, we find little mention of entertaining for either Mrs. Glessner’s birthday or New Year’s Day. We shall have to imagine how the festivities might have gone. They would be quiet, certainly, with some punch containing no spirits as Mr. Glessner would prefer. Mrs. Glessner should certainly have some sweets as it is “her day.” Mattie may have been given the day off on her own so she might have prepared something simple like a meat pie or perhaps even a cold supper such as the one listed here.
Supper after Concert April 10 1893
Roast Beef
Boiled Ham
Cold Salmon
Cheese
Rolls
Ice Cream---Strawberries---Cake
But since it is the New Year and Mrs. Glessner’s birthday, there should be a festive beverage and sweets so here are some ideas for you to try with your family at home.
Mrs. Thomas’s Punch
¼ Burgundy
¼ Moselle
½ Champagne
The name refers to the wife of Theodore Thomas, conductor of the Chicago Orchestra (now the CSO). Her name was Rose Emily Fay and she was quite a significant person in her own regard. This punch, attributed to her in a note written in 1902, has only this simple recipe. It appears several times in Mrs. Glessner’s menus, so we know it was a favorite. Designed as it was for any number of guests, it is in the form of a ratio. Today we might say 1 part Burgundy, 1 part Moselle, 2 parts Champagne. This would make quite a strong punch as it had no fruit or ice in it at all. Certainly Mr. Glessner would not partake. We find another punch recipe in 1905 and again this one is listed as being part of a Supper for Orchestra. It lends itself much better to a temperate version so you might try this one as well for your party.
Punch After Musical Program
1 Bunch Royal Velvet (also known as English Lavender*)
1 Bottle Cook’s Champagne**-substitute sparking white grape juice
1 Bottle Burgundy-substitute still red grape juice
1 Bunch of Mint
1 Sliced Pine Apple (it was two words in the 19th century)
2 Cups Fresh Strawberries
2 Sliced Oranges
2 Sliced Lemons
The Glessners probably grew lavender at The Rocks in New Hampshire and Mattie would have had dried bunches hanging in her kitchen. She might also have jars of the flowers stored away or perhaps could substitute a few teaspoons of lavender water or a few drops of lavender oil available from a spice merchant. Today in Chicago we can buy lavender flowers from The Spice House on Wells Street or perhaps from the bulk food section in some of the finer markets. If you have never cooked (or mixed) with lavender, now is the time to start. It imparts a lovely fragrance and flavor to this punch which should not be missed.
Blend all the liquids together and add the lavender and mint. You then have a choice. You can either float the fruit in the punch bowl and see to it that each guest has fruit in their serving, or you can use a modern blender. Mattie would have used a sieve or a chinois to crush all the fruit and blend it into the punch. Some crushed ice might be added to make a frothy concoction more like a frozen daquiri or a fruit smoothie in consistency. Any way you make it, this punch should be an incredibly special New Year’s treat.
* Royal Velvet is a varietal of Lavendula angustifolia, most commonly referred to as “English Lavender.”
**Cook’s Champagne has been made in the US since 1859. Mrs. Glessner specifies Cook’s Champagne in her menus.
The Sweets
And now for a sweet treat for this festive day. Mrs. Glessner refers many times in her menus to the items served after the meal. We know that she occasionally made her own candy in Taffy Pulling Parties at The Rocks and we know that she served bon bons which she probably sourced commercially in Chicago. One item that shows up frequently is “preserved currants.” No doubt currants were grown at the family farm and certainly many jams and jellies would have been made by Mattie, but “preserved currants” probably refers to dried currants with more like a raisin or dried cherry consistency. There is a reference in 1893 to “ice cream—preserved currants served with it.” These would also go well with salted nuts, crystallized oranges, candies, and prunes which are so often listed as the finale on many menus.
For a very special occasion, the ultimate 19th century candy might be served, marron glacé, a candied chestnut. Mrs. Glessner refers to “marron” being served with the desserts in December of 1898. These were Queen Victoria’s most favorite treat and they enjoyed celebrity for at least 300 years beginning in the 1600s. Chestnut trees grow on most continents in the Northern Hemisphere. They are an excellent source of carbohydrates and fat and in many early cultures took the place of other starch products that were hard to grow. Some of the finest chestnuts are said to grow in France where the word for them is marron. Yes, that’s where we get the name for the color. They also grow in Italy, Greece, China, Japan, and they once grew in the US as well. American chestnut trees (Castanea dentata) suffered a horrible blight at the beginning of the 20th century and have still not grown back to pre-1911 levels. This explains why so many of Mrs. Glessner’s menus include dishes made with chestnuts and yet we so rarely see them today.
Marron glacé, like many items from this period of culinary history, require a great deal of time. Today, persons wishing to serve this delicacy purchase them ready made by a confectioner, or cheat, as well-known chef Bruno Albouze does on his YouTube Channel. The reason that even famous chefs cheat is two-fold. First, it is very difficult to get the larger fresh maroni (Castanea sativa) chestnuts today. Second, the process takes five to seven days to complete. But take heart, it is not complicated and if you want to try it yourself, you can have the mixture on your back burner for a week as Mattie might have and end up with a special treat you won’t believe you made yourself.
Marron Glacé
1 pound (about 30) of the largest chestnuts you can find (Caputo’s Fresh Markets have them as do most groceries this time of year)
3 cups raw sugar
3 cups water
1 vanilla bean, split
¼ cup powdered sugar
First peel your chestnuts. There are more tricks for peeling chestnuts than you can imagine but Mattie and I prefer the steaming method. With a very sharp knife, make a small X on the flat side of each chestnut. Place in a steamer basket over water and steam until the skin peels away from the meat. Turn off heat. Keep the chestnuts very hot by only removing a few at a time once they begin to open. You will burn your hands, just part of the process, move on. Peel both the inner and outer shell away from the meat and carefully set aside until all are done. You will lose several as they are delicate. Save the broken ones to use in soups, stews, and breads later.
In a large saucepan make a simple syrup with the sugar and water and stir until dissolved thoroughly. Gently place the chestnuts into the sugar syrup and bring to a boil for one minute. Cover, remove from heat and set aside for 24 hours. Stir, bring to a boil again and add the cut vanilla bean, stir, remove from heat and cover for another 24 hours. Do this a total of five to seven times, removing the vanilla bean after the second day of boiling and sitting. On the last day you will have a dark syrup which you should save for baking. Carefully remove each chestnut and place on a wire rack to drain. Remember, save that precious syrup!
Now, for the final step, place the wire rack on a parchment paper lined baking sheet. Mix ¼ cup of powdered sugar with enough of the syrup to make a thin icing. Pour the icing onto the chestnuts as you would ice a petit-four or a Stöllen. You may also brush it on but take care not to injure any intact nuts. Place in a 200° oven for about ten minutes then leave the oven door open until entirely cool. Place into small paper baking cups to serve. So, now you see why Mattie might have tried to find a confectioner and so should you, but it is really great to know how to do it yourself, isn’t it?
Happy New Year, one and all! And the very happiest 173rd birthday to Frances Glessner!
Christmas (posted December 1, 2020)

Is it Christmas already?!? Oh, you might be thinking that, but Mattie would not have been. She prepared for months. Frances Glessner set a very nice table, always. The very nicest of tables should be set for Christmas. Traditions must be maintained, and preparations would be ongoing. Mrs. Glessner’s reputation as a fine hostess was due, in no small part, to the skill of her cook and their excellent lines of communication.
We are so very fortunate at Glessner House to have Mrs. Glessner’s menus, in her handwriting, so we can know exactly what she served for a particular gathering. This year, 2020 at Glessner House, we were to reenact the Christmas of 1895. We are unable to do many of the things we had planned, but we can tell you what food was served, and a little bit about how Mattie would have made it so you can do so for your family. Perhaps you can make some new traditions, starting now.
Christmas Dinner 1895, 9 Persons—7 o’clock, the menu was:
Oysters on half shell
Brown Bread & butter etc.
Clear Soup served with Sherry
Mold of Fish served with Champagne
Potatoes-Cucumbers served with Cider
Entrée of Chicken Timbale
Turkey
Sweet Potatoes-Chestnuts
Celery Jelly Cranberries Pickles
Salad
Plum Pudding Mince Pie
Fruit—Nuts—Raisins—Figs—Cake—Coffee
Should you desire to recreate the above menu exactly for your guests, I would counsel you that the portions should be very small for each dish. In fact, tasting portions of today would look quite adequate for Mattie to send out to the dining room. There are no fewer than two dozen items on this menu. Any three would probably make a meal for most of us these days, with the size portion to which we have grown accustomed. I have chosen these three: Chicken Timbale, Florentine Salad and Mince Pie.
Chicken Timbale
To make 4-6
You will need 4-6 custard cups, ramekins, or muffin cups
1 large baking sheet with sides or a sheet cake pan
6 ounces of pasta, Mattie would have used Zitoni Rigati, if she could get it. It is a spaghetti-length tube of pasta; as if gigantic elbow macaroni were in one long extrusion. It is pictured in The Grocers’ Encyclopedia by Artemas Ward in Mrs. Glessner’s cookbook library, on the illustration page entitled Macaroni and Similar Pastas. You can still buy it today at Caputo’s Market. 12 pieces are about 6 ounces.
1-2 cups toasted bread crumbs
1-2 eggs
3-5 mushrooms
1 cup whole milk
½ of one roasted or boiled chicken breast
¼ cup flour
¼ cup butter
½ nutmeg, grated
pinch of salt
Boil the pasta in a deep pot until just cooked but not yet breaking apart. Carefully remove to a buttered cookie sheet and roll around until coated with butter. Cover and set aside. The pasta must remain pliable in order to make the timbale.
Meanwhile, chop the mushrooms finely and sauté in butter until very soft. Add the flour to the melted butter and mushrooms and stir until blended. Gradually add the milk to make a gravy. Simmer. Take the chicken and grate it with a cheese grater. This sounds very odd to the modern cook, but I can explain. You are making what was called a forcemeat. Think of it as a pâté with breadcrumbs. If you chop the chicken, you are merely cutting fibrous tissue in the meat into smaller pieces. If you grate it, or better still, force it through a food mill or a sieve as Mattie would have, you are sifting the fibrous tissue from the meat thus making it smoother. Next, in a separate bowl, mix the bread crumbs with the beaten eggs and enough water to make a sticky paste. This is the cement for the structure you are about to create.
You must have your mis en place in place (longtime readers know how much I love saying that).
-buttered pasta on a baking sheet
-gravy with mushrooms and chicken
-bread crumb paste
-molds
Butter the inside of each item you will be using for a mold. Take a cherry-sized lump of breadcrumb paste and press into the bottom of one mold. Then, take one tube of pasta and beginning at the center, wind it around the inside of the mold. If it tries to move to the center, simply stick it to the side with more breadcrumb paste. Repeat with a second tube of pasta. Two should be enough for most individual molds. (this will work with spaghetti or linguine but is messier and takes much longer.) When the mold is lined with pasta, immediately fill the cavity with the gravy mixture and pat down with your hand to remove any air pockets. Repeat process for all molds. Set oven to 325°. Take a sheet cake pan or a deep cookie sheet and place in open oven. Fill pan with water. Gently place the molds into the water and cover top with parchment paper or loose aluminum foil. Close oven and bake for 30-45 minutes until a knife inserted in the center comes out clean. Serve with a light white sauce or gravy and perhaps a side of cranberries of your choice. (The cranberry marmalade featuring in my Thanksgiving column below, would be lovely).
Salad Florentine
This recipe was found as a clipping in the front of Mrs. Glessner’s manuscript cookbook located in the fall of 2019 when the Mattie research was just beginning. What is curious to me is that it is labeled Florentine yet does not call for spinach. Today, we are accustomed to something identified as Florentine as containing spinach. There are so many French food phrases that Mrs. Glessner and Mattie would have known and used in their own menus. Aux pommes meant with apples, Beignet meant fritter or other fried dough, and au Riz always indicated service with rice. However, Florentine did not yet mean with spinach, it merely served to call attention to the other flavors and preparation styles of the Tuscan region. I would not recommend adding spinach to this salad. Many will certainly recognize it as very similar to a Waldorf salad which made its printed debut in 1896 in The Cook Book by "Oscar of the Waldorf,” a book also in Mrs. Glessner’s collection.
½ lb of chestnuts*
¼ cup celery root, may substitute fennel root
1 bay leaf
1 small blade of mace or ¼ tsp grated mace or nutmeg**
¼ cup prepared mayonnaise
¼ cup whipped cream
*Peel chestnuts and boil until tender with a piece of celery root, a bay leaf and a small blade of mace. This is Ellie talking--You may also purchase prepared chestnuts in many markets. They come in a glass jar or a sealed package and have already been divested of their pesky shells and cooked. If using chestnuts thusly prepared, you may omit this step.
**mace is the outer hull of the nutmeg and was a very common seasoning in Mattie’s time. It is less pungent than nutmeg and lends itself better to savory dishes rather than sweet.
When chestnuts are done, drained and cooled, cut into slices. Add to the chestnuts half as much shredded or diced celery and the same amount of very thinly sliced apple. Mix with mayonnaise in which a little whipped cream has been folded. Arrange on lettuce-heart leaves and garnish with thin slices of red apples with the skin left on.
Mince Pie
If the question is mince pie? The answer today might be, why? A hundred or more years ago, mince pie, or mince-meat pie was on every winter menu. You have heard the term acquired taste? I might say that mince pie is an antique taste. There is little like it eaten today. It gets even less attention than fruitcake and I’m certain that’s because there are no stories about it. Let’s find some!
Roasted leg of lamb tastes like Easter, turkey and dressing tastes like Thanksgiving, and as I discovered for the first time this month, mince meat pie tastes like Christmas.
-Lauren Fink
Mince meat has its origins during the Crusades when Englishmen returned from the Middle East with new spices and cooking techniques. The spices created even more ways to preserve meat and fruit. Throughout the middle ages and into the modern age, dried fruit mixed with finely chopped cheap cuts of meat and strong spices was a prized filling for pastry crusts. It is a highly seasoned pie with very bold flavors. It would never have been served at a ladies luncheon or tea but was considered just the thing for a big dinner where men with their rougher palates would enjoy the hearty aroma and taste.
There are more stories about the shapes and traditional seasonings for mince pies than there is possibly room for here. Suffice it to say I, personally do not believe that cinnamon, cloves and nutmeg are stand-ins for gold, frankincense and myrrh but there are those that will tell you so. What I know, and can say for certain, is that Mrs. Glessner REALLY liked mince pies. Meat was not included in many of her recipes, so we are omitting it here. I have found no fewer than four recipes for mince pies in her own handwriting and countless others in her vast cookbook collection. The recipe here is a combination of the best bits from all the recipes, just as a good mince should be the best of all your ingredients and imagination.
Mince Pie
For two 7-8 inch double crust pies
Mattie’s pastry recipe (see her Thanksgiving column below)
3 apples, cored but not peeled, chopped
1 lemon
1 orange
½ cup raw sugar mixed with ½ cup water
5 cups total of dried fruit: cherries, cranberries, apricots, raisins, dates, figs, currants etc. chopped very fine
1 cup dark brown sugar
½ cup molasses
1 ½ cups apple cider
1 tsp to 1 Tbsp each cinnamon, clove, nutmeg, ginger, allspice, salt
½ cup brandy or sherry
1-2 cups bread or cracker crumbs
½ cup butter, divided
1 egg mixed with ¼ cup of water
Core and chop apples, put into large saucepan or Dutch oven, set aside. Using a vegetable peeler, peel just the outside of the lemon and orange leaving all the white pith on the fruit. Chop the peel finely and put in a small saucepan with the sugar and water mixture. Cook over low heat until the sugar bubbles and the peel is translucent. Peel all the white pith off the fruit and discard it. Remove any seeds and break the lemon and orange into segments and add to the apples. Chop all the dried fruit and add to the raw fruit in the large saucepan or Dutch oven. Add all the spices to the citrus peel and sugar in the small saucepan and stir until dissolved then add to the fruit. Add cider and stir over low heat for at least an hour until all the raw fruit is thoroughly cooked. Add enough bread crumbs to make a thick, porridge-like consistency then add ¼ cup of the butter and stir until melted.
Roll the pastry dough and line two pie plates. Fill with mince mixture and dot the top with remaining ¼ cup of butter cut in small pieces. Top with upper crust. Brush top of pie with egg and water mixture and sprinkle with cinnamon and sugar. Bake at 375° for 20 minutes then lower heat to 350° and continue to bake until top crust is brown and filling is beginning to bubble (listen, you can hear it), about 30 minutes more. Cool and serve with ice cream or whipped cream.
I do not find many Dickensian references in Mrs. Glessner’s cookbooks, but we know how she valued literary traditions. Charles Dickens influenced how everyone in her time felt about Christmas. He continues to do so in our time as well. So, from Mattie, in the tradition of the Cratchits, please enjoy these recipes. Make and serve them in good health and God Bless Us, Everyone!
Thanksgiving (posted November 3, 2020)

Frances Glessner had some definite plans for Thanksgiving. Most years, for which we have journal entries, tell of visits to the symphony or various theatrical performances with her children or friends. This was followed by “a delightful dinner here.” I marvel at how much Mattie must have been doing whilst her employer was off at the theatre or orchestra. The menu was set. We know this because we have many years of Mrs. Glessner’s menus for this special day and they are all the same. Mattie made, and the guests were served:
Oyster Soup
Fish with Sauce
Small Potatoes, Cucumbers, Celery, Olives, Pickles
Quail Pie
Sweet Potatoes
Roast Turkey
Cranberries
Boiled Chestnuts
One Vegetable
Tomato Salad-Toast
Mince Pie
Squash Pie
Sweet Cider
Sweets, Nuts, Raisins etc. Coffee
You all know how to cook a turkey. Mattie’s turkey would be small, approximately 10-12 pounds at the largest, fairly stringy, and certainly not the highlight of the meal. However, there would be places that her cooking could shine, and these are the things we have chosen to highlight here. If you would like to add early 20th century delicacies to your holiday menu, these are here for you to try: Quail Pie, Cranberry Marmalade, and Squash Pie.
Quail Pie
2 quails or Cornish hens
1 small apple
1-3 Tablespoons sweet oil (olive, sunflower, almond, canola, etc.)
2 cups finely diced root vegetables: onions, celery, carrots, sweet potatoes, rutabagas, parsnips, potatoes, etc. Choose the ones you like and have access to.
Salt and pepper to taste
2 Tablespoons sherry wine (if desired)
1-3 Tablespoons butter
3 Tablespoons flour
Quails are available from our wonderful friends at Chicago Game and Gourmet. Tell them Ellie sent you. A simple substitute is a Cornish hen, available at Aldi or most groceries. Thaw the birds if frozen. Brine overnight in a large plastic bag with 4 cups water, ¼ cup salt and 2 Tablespoons of sugar. Remove the birds from brining, cut up apple and stuff into the cavity then bake in a 350° oven for about 35 minutes, until done. Save the broth and grease from the birds. If you want the Mattie presentation, remove the legs and save to decorate your pie. Take all the meat off the bones, set aside. Chop all your vegetables very fine. Heat 1 Tablespoon of oil and add vegetables in this order: onions, celery, carrots, turnips, rutabagas, parsnips, potatoes. Cook each for 10 minutes before adding the next. When the last vegetable is added, cook an additional 10 minutes. For the gravy take the broth and grease from the birds, mix in enough butter to make 3 Tablespoons. Add 3 Tablespoons of flour and stir thoroughly. When combined, add enough milk or water to make a gravy. Add the sherry, if you like. Take the meat from the birds, except for the legs which you have saved, mix with the cooked vegetables and the gravy you have just made.
The Pastry
In doing research for Mattie, we found a small cookbook in Mrs. Glessner’s handwriting. In it was a recipe for “Pastry-Mattie Williamson”. This, no doubt would be what was used to make the crust for the Quail Pie.
1 ½ cups flour
¼ cup shortening (Ellie is a big fan of butter flavor Crisco)
¼ cup butter
¼ teaspoon salt
pinch of baking soda
enough ice water to make a dough
Sift the flour, measure, resift. Add salt and soda and sift again (you have been reading these columns, right? Sifting is the true key to fabulous baked goods! Trust me, I’m Mattie). Cut the shortening and butter in gradually with a pastry blender, two knives or in a food processor. Add enough ice water to form a ball of dough. Roll on a floured board or pastry cloth and line a pie dish or several small bowls.
To Make the Pies
Fill each pie with the vegetable and cooked meat mixture. Make a top crust and place over the pie. Turn edges under and crimp. Bake at 350° for about 30 minutes depending on the size of your pies. Remove from oven and garnish with reserved legs, if desired.
Cranberry Marmalade
This is so simple, and your guests will be thrilled!
1 12-ounce package of cranberries
3 oranges
3 green apples
3 cups raw sugar
2 sticks of cinnamon, several nutmeg pieces, 8 allspices
1 6” square of cheesecloth or a small spice bag
½ cup maple syrup
Using a vegetable peeler remove just the skin from the oranges. Then peel the oranges and discard all the white pith. Core the apples but do not peel. Take the orange peels and using kitchen scissors (regular scissors work just fine, do not stress) cut the peel into tiny slices about 1/8” wide and 1 inch long. Put the peel into a large saucepan. Add the sections of orange, 1 cup of the sugar and 1 ½ cups water. Bring to a boil, reduce heat and simmer 30 minutes. Add the cranberries. Simmer another 30 minutes. Add the apples. Simmer another 30 minutes. Place the cinnamon sticks, nutmeg pieces (I mean the schnivels of nutmeg that are left when you grate nutmeg, you save those, right? If not, just grate some nutmeg into the mixture.) and about 8 allspices into some cheesecloth and tie to close. If using a bag, put all into a bag and draw string to close. Place spices into the mixture with the fruit for 30 minutes. Simmer slowly. Remove bag from mixture, add maple syrup (honey will work too!). Serve immediately or place into glass jars to seal or water bath can. This is wonderful with all Thanksgiving meats.
Squash Pie
1 acorn squash the size of a Chicago softball
½ cup brown sugar
1 teaspoon cinnamon
½ teaspoon ginger
1 teaspoon vanilla (Mexican vanilla is best)
1 teaspoon grated lemon rind
2 eggs, lightly beaten
½ cup cream or evaporated milk
1 pie shell (Use Mattie’s recipe for pastry and make extra for this pie)
Cut your squash in two but don’t remove the seeds, just leave them where they are, they are not hurting anyone. Place a pat of butter in the cavity with the seeds and turn cut-side down on a baking sheet. Bake at 350° for at least an hour. You want it to be entirely cooked. The outside shell will begin to brown and turn hard. When cool, remove the seeds, discard, scoop all the meat out. Once your squash is removed from the shells, put it in a blender or through a food mill (Mattie would have used a sieve) until completely smooth. Mix with sugar and spices, add eggs and milk. Pour into a prepared pie shell. Bake at 325° for 30-40 minutes. Pie is done when a knife inserted near the center comes out clean. Serve with whipped cream, and drizzle with maple syrup, dust with cinnamon.
Thanksgiving is a joyous holiday filled with good smells, good friends and good spices. Enjoy yours this year!
Halloween (posted October 6, 2020)
Who has more fun? The party goers, or the person who gets to plan and set up for the party? The answer is, “Yes!” Whereas we have no direct evidence that Frances Glessner staged Halloween parties, perhaps that was someone else’s holiday in her circle. We do know that she loved to theme and decorate and plan enticing menus to please her guests. This year, Mattie would like to help you put on a Halloween Party for your family that will be both fun and delicious.
On the table you will see: Glasses of Warm Apple Cider with a cinnamon stick Witches Broom, plates full of goodies including Pumpkin Biscuits, Sandwitches, Punkin Cheese Ball with Fall Leaf and Black Cat Crackers, party favors in the form of Fortune Nuts, and baskets of Dragon’s Teeth and Always an Orange with a Jack-o-lantern face. You will also see small pipe-cleaner skeletons dancing on the handles of the cider mugs.
Halloween parties in the late nineteenth and early twentieth centuries would be familiar to any modern time traveler. There were decorated pumpkins, skeletons, Boogie men, and games that involved apples and treasure hunts. Mrs. Glessner’s cookbook collection includes The Party Book, published in 1912 which tells us, “The very name conjures up troops of spooks and goblins, witches and their “familiars,” the hoot of owls, the faint rustle of ghostly garments, and strange faces fearfully glimpsed in mirrors…” Halloween themes and decorations of Mattie’s time might even be a might too ghoulish for modern tastes, so we toned it down a bit. Special thanks to long-time Glessner House supporter Bryan Ogg for the lovely homemade punkin. It just made the table and is exactly what Mattie would have wanted. Many of the instructions in contemporary literature c. 1910 encourage tiny witches to be made of pipe cleaners, cotton balls, crepe paper and small bits of fabric. But, there are other members of the family that are far better at making tiny people and so we have opted for skeletons only here.
Pumpkin Biscuits
1 ½ cups pumpkin, Mattie would have made her own but one 12 ounce can will do
1 cup buttermilk
3 ½ cups flour, divided
5 t baking powder
4 t sugar, molasses or honey
¾ t salt
1 cup butter, cut into small pieces
Mix all dry ingredients together, sift three times (we’ve been over this, longtime readers!) cut butter into fine dice and add ¼ cup at a time, cut in with pastry blender or two knives until the mixture resembles small peas. Mix the pumpkin and buttermilk together and add to the flour mixture until a soft dough is formed. Thoroughly flour a pastry cloth or board and turn the dough onto it, liberally sprinkle with flour and roll gently until about ¾ of an inch thick. Cut with pumpkin shaped cutter if you have one. If not, cut with a round cutter or a large glass and then pinch the top to form a stem and push the bottom in a bit to make more oval. This dough is very soft and forgiving. Bake in a 425° oven for about 12 minutes until just brown around edges.
Sandwitches
Take slices of dark rye bread and cut into a witch hat shape. Fill with any desired sandwich filling: ham, turkey, cheese, or even peanut butter.
Punkin Cheese Ball
For six servings, mix 8 ounces of cream cheese with 1 Tablespoon of orange juice. You may add chopped nuts if desired. With wet hands roll the cheese into six balls. Grate one carrot and roll the cheese ball in freshly grated carrot. This can be spread onto crackers.
Halloween Crackers
This is an easily adapted recipe that will make many kinds and colors of crackers, and it is lots of fun. Get the whole family involved. For any type of cracker, follow the recipe with your desired ingredients. Roll to ¼ inch and cut with cookie cutters into desired shapes.
¼ cup grated cheese, any type, parmesan, cheddar, gouda, etc. depending on color desired
1 T butter or olive oil
1 t any sort of herb or zest such as parsley, poppyseeds, lemon or orange zest, etc.
¼ t spice such as black pepper, curry powder, turmeric, paprika, etc.
¼ cup flour, white, whole wheat, rye, almond, whatever is desired. Have extra for rolling out the dough.
1 T juice, apple, orange, tomato pineapple, etc.
Enough water to form a dough
You can double or quadruple this recipe if you want all your crackers to be of one type. If you make four batches in four different flavors, you will achieve the plate pictured. For really dark black cats use rye flour and 1 T dark cocoa. Bake at 400° for 8-10 minutes.
Fortune Nuts
This is a lovely party favor and was found at many Victorian era parties. It is not as easy as it looks, and this really is one to get the kids involved if you have them. Crack whole walnuts as cleanly as you can. You will be putting them back together so take care to keep the two halves set aside together so that you do not have a three-dimensional jigsaw puzzle on your hands later. (I’ll bet you wonder how I know that!) Pick out the nut meat and add to your cream cheese or save for another dish later. Write tiny fortunes or riddles or just notes on small pieces of paper and fold them up inside the nut shells. Affix shells back together with a small bit of glue and leave a piece of string or ribbon to assist in the opening.
Dragons’ Teeth and Jack-o-Lanterns
Pistachio nuts were a great delicacy in Mattie’s day. They do not grow in the Midwest, so they were expensive and precious. Their natural green color was prized by Victorian cooks. Whole, just out of their shells they were said to look like dragons’ teeth. Serve them in a small basket or bowl to each guest. And since this is the Glessner House, we must have Always an Orange for Mr. Glessner. Paint jack-o-lantern faces onto small oranges with black paint or a modern Sharpee. Don’t worry about the ink or paint, it will only penetrate the peel making the orange still completely safe and delightful. I’ll bet Mr. Glessner could have peeled one of these leaving the face intact!
Happy Halloween Everyone!!!
The Servants’ Picnic (posted September 1, 2020)

Glessner servants’ picnic in the late 1920s
“It’s just the servants’ picnic.” That’s what Mattie might have said. Every year, at The Rocks, the Glessners’ summer home, Frances Glessner gave all the servants one full day off.
One fabulous day! They took the Glessner vehicle. In 1885, even before Mattie officially worked for them, Mrs. Glessner stated in her journal, “…a holiday I gave them. The day was lovely and they carried their luncheon going in the same four horse wagon we had when we went to the Sunset Hills house.” In 1893 she wrote, “ Tuesday the day was very fine so I sent the servants off for their usual picnic at the Flume. They took the democrat wagon and the carryall…all five of our people and a friend of Mattie’s…they had a fine day.”
What was a fine day, as considered by the servants, in the late 1800s? Well, it starts with, no work. Oh Wait! The Cook must make sure the family has everything they need for the day that the servants will be gone in addition to packing a picnic. Mrs. Glessner talks of fried chicken and beans and other dishes that she and her daughter could “warm up.” Sadly, she doesn’t tell us what the servants took on their outing, we can never know.
However, let’s deconstruct this a bit. It is summer, it is hot and you have a day off but you want to enjoy spending time, not working, with your work friends. What do you pack? Ellie, cooking as Mattie, is imagining this…
Sausages-dried, cured, easily sliced onsite by the men with their ready knives.
Bread. The family would have needed bread all week, you know the picnic is happening so you make just a little extra in rolls or short loaves, so you have them ready.
Fruit. Whatever is ripe in New Hampshire in September. Apples, pears, perhaps peaches and plums, the berries are gone but you might have some jam that you can bring along.
Chicken? This would probably still be at home for the family. In fact, Mrs. Glessner mentions that, in 1897, “Mary had left two apple pies and a pan of chickens all cooked. We heated them and made cream gravy.” Chances are the servants had their picnic sans chicken.
Meat pies. This would be just the thing for a picnic. They are made from leftover ingredients and would be transportable for the servants’ outing, easily.
Beverages. There would be beer, of course, and since many people, especially women, eschewed strong drink, there would be lemonade or another punch available, probably also some iced tea.
Let’s make meat pies, berry jam, and simple rolls. You should check the previous columns for a wonderful recipe for ginger punch.
Meat Pie
For 24 hand pies or six individual pies
For the Crust:
2 cups flour
4 teaspoons baking powder
½ teaspoon salt
A pinch or 2 each of dried sage, thyme & white pepper or just use ½ teaspoon prepared poultry seasoning
⅔ cups shortening
⅔ cups milk
Sift the flour, baking powder and seasonings together. Cut in the shortening in three of four additions and mix thoroughly so that all the fat particles are incorporated. Add the milk gradually until a stiff dough is formed. Let the dough sit in a cool place until ready to use.
For the Filling:
The meat from one roasted duck or chicken, or from a roast beef, 4-6 cups hand-pulled or chopped
Every root vegetable you have such as: potatoes, parsnips, carrots, rutabagas, turnips, sweet potatoes, all peeled and chopped finely. The amount should roughly equal the amount of meat.
One large sweet onion, finely chopped
One bunch of celery, finely chopped
¼ cup butter
Drippings from the roasted duck, chicken or roast
A few Tablespoons of milk
A few Tablespoons of dry white wine
Fresh thyme, tarragon or rosemary if desired
Salt & pepper to taste
Egg wash
Roast the duck, chicken or meat, save all the drippings. Cool and remove the meat from carcass. Put the skin and bones in a pot and cover with water to make broth for later. Chop all the meat finely. Chop the onion and celery and sauté in the drippings until transparent. Chop all the vegetables in pieces the same size as your pieces of meat. Mix all the ingredients together, adding the herbs and salt last. Add a bit of wine and milk to make a nice filling that will hold together.
To Make the Pies:
Roll the dough out as for a pie and cut circles about 6 inches in diameter. Place a few Tablespoons of filling in the center of the circle and brush a bit of milk or water around the edges. Fold the edges towards each other and pinch them together to make a half moon shape. Brush with the egg wash. Bake in a quick oven (400 degrees) for about half an hour. For small pies, roll the dough out and cut the appropriate size circle to fill your individual pie dishes. Fill with filling and mound up, cover with top crust, crimp, cut two or three slits in the top, brush with egg wash and bake in a quick oven for 45 minutes to an hour until crust is fully browned and filling is bubbly.
Berry Jam
A quantity of berries, blueberries, raspberries, blackberries, etc and an equal amount of sugar.
Mash the berries, measure, and add the equal amount of sugar. Cook over a low heat for about half an hour until fully blended and most of the water has evaporated. Place into hot glass jars and either water bath can or seal with paraffin.
White Bread for Everyday and for Rolls
For 2 or 3 loaves or about four dozen rolls
¼ cup warm milk
1¾ cups warm water
1 cake of yeast or 2 ¼ t teaspoons granulated
3 Tablespoons sugar
5-6 cups good hard flour
2 teaspoons salt
3 Tablespoons butter, melted
Mix the warm water with milk, add the yeast and sugar and set until the sponge is formed, this means the mixture is frothy. Place two cups of flour into a large mixing bowl, add the salt. Make a well in the center and add the liquid. Beat thoroughly for at least three minutes with a large wooden spoon. Add the melted butter (you may also use melted shortening or sweet oil here) and stir vigorously. Then, stir in the rest of the flour in small portions until a stiff dough is formed. Knead dough on a floured board or pastry cloth for at least 10 minutes. Set to rise in a greased bowl, covered, for at least an hour (or perhaps two) until doubled in size. Punch dough down, form into three or four loaves depending on the size of your pans or into several dozen rolls. Let these rise again until nicely domed. Bake in a moderate oven until brown on top. Turnout of pans immediately and cool your loaves on a wire rack.
Enjoy your picnic outing as I know Mattie and the other servants would have enjoyed theirs - because it is right back to work tomorrow!
The Glessners’ Picnic (posted August 4, 2020)

There are numerous instructions for the proper picnic in Frances Glessner’s cookbooks. The summer picnic was an enjoyment for all, with the possible exception of the cook who had to make and pack all the food and drink. Still, I think Mattie would have enjoyed the different sorts of cooking, “it makes a change,” she might say, and so do I.
In Twentieth Century Cookbook and Practical Housekeeping, published in 1900, one finds this lovely set of instructions:
As for the provisions, the articles suitable are very numerous. And do not forget the accompaniments to the different dishes; thus if you have pie remember the cheese, and so on. …No cold lunch is complete without sweet pickles…Sandwiches you will want of course….For meats, game is always agreeable, and boiled ham, cold tongue, sausages, veal loaf, pressed veal or chicken are all suitable. Eggs, hard boiled, stuffed or deviled are always relished and so are salads. There should be an abundance of fruit and cake and pies as may be desired.
Our board of fair today includes: Ginger Punch, Potatoes to Cook in the Fire, Always Oranges, Deviled Eggs, Cold Grilled Chicken, Boston Brown Bread and Date Nut Sandwiches. Macedoine Salad, Blueberry Hand Pies, with Sweet Pickles, Pickled Radishes and Plum Butter; those last three seen in the photos in jars but recipes not included here.
Ginger Punch
Years before bottled soda pop, people made their own. Sometimes it fermented a little, whoops! But this won’t, unless you leave it sit too long, and it’s really delicious.
½ pound fresh ginger, peeled and sliced into dice
1 quart water
1 cup raw sugar, white is alright but please use only cane sugar, not beet
½ cup orange juice, juice of one large orange should suffice
½ cup lemon juice, juice of two lemons should suffice
Put the ginger, sugar and water into a saucepan and heat to boiling. Boil fifteen minutes. Add the juices. Cool, strain and place into sealable glass bottle. Mix with crushed ice for service. (Ellie Hint! I think this is excellent mixed in equal parts with any sort of fizzy water, seltzer or club soda.)
Potatoes
Here is where the Culinary Historian meets the Modern Cook and one of us says, “No! That’s insane!” Before the advent of tin foil in the late nineteenth century and aluminum foil in 1913, people still wanted to cook potatoes for a picnic. You can clearly see red skin potatoes in the photo of the Glessner picnic. The prescribed way was to wrap the raw potatoes in several layers of soaking wet brown paper and stick them in the ashes at the edge of the fire. Fahrenheit 451 anyone? I found it in several cookbooks but I don’t believe it. They say the “sand” at the edge of the fire will be no more than 300° but I’m highly skeptical. I’d use aluminum foil were I you.
Fresh Oranges
Regular readers of this column will know that Mr. Glessner never sat down at table, inside or out, without a fresh orange. So, these are there just for him!
Deviled Eggs
If you look closely at the photo, you will see that the deviled eggs are “leveled off” this makes it easy to put something flat on top of them when packing the basket. Took me simply YEARS to figure this out! My gift to you. Hard cook eggs, (Ellie Hint! Steam your eggs for 12 minutes in a colander over boiling water. They peel easier and there is no green ring for over cooking).
For six eggs
¼ cup mayonnaise
1 Tablespoon Dijon mustard
1 teaspoon curry powder
1 teaspoon honey
dash of salt
dash of white pepper
Cook the eggs, cool the eggs, remove yolks, and mix with mayonnaise, Dijon mustard and spices. Instead of piping into the hollows of the white, try just a small spoonful and level off your eggs. This makes them far easier to pack. When setting out your picnic, dust the tops with paprika.
Cold Grilled Chicken
You will wonder how you lived without this recipe! It is the easiest and best way to make chicken on the grill and is just as delicious hot as cold. Mattie would have used legs and thighs because they are the richest parts of the chicken.
For 12 pieces of chicken, adjust to suit your picnic crowd
1 cup each olive oil, honey, tomato paste
1 Tablespoon crushed garlic
1 Tablespoon dried tarragon or a large handful fresh from your herb garden
1 Tablespoon red pepper flakes
Remove the skin from the chicken pieces. Mix the marinade ingredients and put the chicken and the marinade into a large ceramic bowl or Ziploc bag if you are cooking in the 21st century. Marinate overnight in the refrigerator. Remove from refrigerator and put the entire mess into a casserole dish and pop in the oven at 325° for half an hour. You can finish on the grill if it is hot for about another ten minutes or drain the juice off and finish in a 400° oven for ten minutes. This is really good hot or cold!
Boston Brown Bread Sandwiches
Mrs. Glessner mentions Boston Brown Bread many times in her menus so we know it was a favorite. It is actually a pudding not a bread as it is steamed, not baked, but it can be the palette for many yummie sandwich spreads.
The Bread
This recipe is from the Boston Cooking School Cookbook, which is in Mrs. Glessner’s collection, so we know it is the very best!
1 cup rye meal (flour)
1 cup corn meal
1 cup graham flour (substitute whole wheat if you cannot find graham flour)
3 teaspoons baking soda
1 teaspoon salt
2 cups sour milk (use buttermilk or 2 teaspoons vinegar into 2 cups milk to sour)
¾ cup molasses, dark brown sugar or maple syrup
½ cup raisins, dates or other dried fruit if desired
Sift the dry ingredients together three times (you have been reading these columns right along, haven’t you?). Add the milk and sweetener and dried fruit if desired. The great thing about this is that you can really make it without an oven. If you are camping, you can make this on a campfire even! Find several tin cans from soup or fruit. Wash the cans thoroughly and rub the inside with oil or butter. Try to find cans that do not have the white plastic lining, I’m not sure what would happen with those, I haven’t researched it yet but just don’t. This recipe should fill five or six normal sized soup cans. The cans should be about ¾ full. Let the dough rise for 15 minutes while you boil al large kettle of water. Put the cans into the water making sure the water only comes up about halfway to the top of the cans. Put on a lid and boil for 2-3 hours. Check to make sure the water doesn’t boil away, refill with hot water as often as you need to. Remove from heat, cool, turn them over and using a can opener, remove the other end of the can. Push the bread out from either end and slice for your sandwiches.
Filling
For six sandwiches
4 ounces cream cheese
¼ cup plain yogurt or sour cream (Mattie would have used sour cream)
¼ cup toasted nuts, any kind, toasting just makes them yummier, it is not required
½ cup chopped dates, raisins, dried cherries, dried apricots, anything you like
A dribble of balsamic vinegar or lemon juice if you have it
Mix all together and spread between two slices of Boston Brown Bread, enjoy!
Macedoine Salad
Mrs. Glessner’s menus are full of references to a Macedoine Salad. It sounds way fancier than it is. The trick appears to be using vegetables that can be cut in tiny, same-sized pieces, and served lightly steamed and very fresh.
For six persons, adjust according to the size of your party.
½ head of cauliflower
An equal amount of broccoli
1 cup fresh peas
1 cup fresh carrots, sliced
1 cup fresh zucchini, sliced into pleasing shape, if desired
Steam all the vegetables until they are bright and immediately plunge into cold water. Mix all with a light dressing of olive oil and vinegar and serve. A mayonnaise dressing may also be used. Occasionally, for a very nice party, the vegetables might be arranged on the plate individually to form an artistic display. For a picnic, a nice, bright colored mix is fine.
Blueberry Hand Pie
For the Filling:
1 pint fresh blueberries
¼ cup raw sugar
¼ cup corn starch
For the crust:
1 cup flour
¼ cup raw sugar
2 teaspoons baking powder
1 teaspoon nutmeg if desired
¼ teaspoon salt
⅓ cup shortening or butter (Ellie Hint! Butter Flavor Crisco works best for this)
⅓ cup milk
flour for dusting and rolling
Small dish of water for wetting the edges
Mix the berries with the sugar and cornstarch. Set aside. Sift dry ingredients three times then add shortening or butter one Tablespoon at a time and blend thoroughly. Add the milk. Stir to form a thick dough. Turn out onto floured board or pastry cloth and roll to ½ in thickness. Cut in rounds or squares, whatever is desired. Take one round or square, wet the edges and put 1-2 Tablespoons of berries in the center. Fold over and seal. Repeat. Bake at 375° for about 25 minutes. Serve hot or cold.

Glessner picnic at The Rocks, 1894; Frederick Law Olmsted at center.
Mr. Glessner’s Breakfast (posted July 21, 2020)

(NOTE: With the reopening of Glessner House, Cooking with Mattie will shift to a monthly column. Look for the next installment on Tuesday August 4th).
Frances Glessner, the children, and most of the servants moved to The Rocks in New Hampshire in early- to mid-May. John Glessner often stayed behind for several weeks to tend to business before joining the family in mid-summer. Mrs. Glessner left detailed instructions for the remaining servants regarding care of the house in her absence. This included very specific directives as to how to feed Mr. Glessner. Apparently, he was quite the discerning diner. Drawing from these suggested menus, today we serve you Mr. Glessner’s breakfast tray.
On the plate you will see—clockwise from one o’clock—shirred egg, potatoes with cream sauce, baked apple, and corn bread with a small ball of butter. Also on the tray is a tiny dish of peach butter (we made this last week, check out the recipe in the “Moving House” column below), “always an orange,” and water with ice. Mrs. Glessner clearly states in ALL the suggested menus for her husband (breakfast, lunch, and dinner) that there should be, “always an orange.” There is no coffee, tea, or chocolate (what we would call cocoa or hot chocolate today). Mr. Glessner drank only cold water that had been boiled and filtered.
Shirred Egg*
*for one, multiply by the number of servings desired
1 egg
1 Tablespoon heavy cream or evaporated milk
1 teaspoon butter
1-2 Tablespoons breadcrumbs
1 Tablespoon grated cheese, if desired
Fresh herbs to garnish, chives, tarragon, parsley, whatever you like
This is an offering one finds in many 19th and early 20th century breakfast menus and we don’t make them much anymore. We should. They are delicious and easy. Shirred actually refers to the special dishes that were originally used for this style of egg. A shirred egg dish looked a great deal like an au gratin dish. It was a low, flat-bottomed ceramic dish. They could be oval or round and might be wide enough to hold two eggs or just the right size for one. Today, you can use a small ramekin as I did while cooking as Mattie. Don’t have breadcrumbs in your kitchen? Yes, you do. (Ellie Hint: make a small piece of toast. Cool thoroughly. Put cold toast into a Ziploc bag and crush it up with your hands. Great job for kids, et voila, breadcrumbs!)
Preheat oven to 325°. Butter the entire inside of the dish with softened butter (Ellie Hint: use the paper wrapper that your butter comes in. You save those don’t you? They are perfect for buttering dishes and pans before cooking). Pour a tablespoon of heavy cream or condensed milk into the dish. Break one egg into each dish or two if you have the larger dishes. Cover the egg with breadcrumbs and a small pat of butter. Place in the oven for about 15 minutes. Check at 10 minutes and jiggle the dish to check doneness. You want the white to be set but the yolk still a bit runny. At the end of cooking, the egg will puff up, that is a good way to tell it is done. You may sprinkle a small bit of grated cheese on top at the very end of cooking if so desired. Garnish with fresh herbs or just a dash of salt and pepper and serve immediately.
Potatoes with Cream Sauce*
*for one, multiply by the number of servings desired
1 potato
1 Tablespoon butter
1 Tablespoon flour
½ cup heavy cream or evaporated milk
Black pepper, salt, parsley to garnish
Once you perfect this dish you might find yourself adding it to your dinner side dishes. It is very good. Peel the potato and slice into disks about ¼ inch thick. Place into pan of cold water and set aside. Boil a small saucepan of water and add a teaspoon of salt. Strain the sliced potatoes and place carefully into the boiling water and cook for about five minutes. Meanwhile, melt the butter, stir in the flour to make a roux. As soon as the butter and flour are thoroughly blended, add the cream or evaporated milk and stir. The mixture should be quite thick. Add a bit of milk to thin out the sauce if needed. The potatoes will be done in about the time it takes to make the sauce. Strain the cooked potatoes being careful to retain their shape. Place potatoes directly on plate and cover with the sauce. Garnish with fresh parsley.
Baked Apple*
* for one, multiply by the number of servings desired
1 apple
1 Tablespoon butter
1 Tablespoon sugar, raw, white, or brown
½ teaspoon freshly ground nutmeg
1 teaspoon cinnamon
Preheat oven to 400°. From a stick of butter, slice one tablespoon, then slice longways into 2 rods, form into one long rod which will be about ½ inch by 2 ½ inches. Place this/these in freezer to harden. Core apple, do not peel (Ellie Hint: this is a bit of a trick but will work. When you core your apple from the stem end, stop before going all the way through. Carefully hollow out with a long, narrow knife leaving about ¼ inch of apple at the bottom end. This will keep the butter and spices from leaking out. If you do not have an apple corer but do have a grapefruit spoon, this is ideal to hollow out an apple leaving some flesh intact at the bottom). Mix spices and sugar together and use a tiny spoon or narrow knife to insert into the apple cavity. Put the frozen rod of butter inside.
Put each apple into a small glass or ceramic bowl or put several apples into a shallow dish. Add one tablespoon of water per apple to dishes/dish. Bake at 400° for 15-30 minutes depending on the number of apples. When done, the skin will begin to split slightly. Mattie would have inserted a darning needle to test for doneness. The needle should go in easily. Truth to tell, Mattie probably wouldn’t have. She would know instinctively by experience and smell but testing for doneness is something we all need to learn. Remove from oven and transfer to plate with egg, potatoes, and cornbread. Should you so choose, you might make extra apples to be eaten later for dessert with a scoop of ice cream or with some fresh whipped cream on top. Baked apples done this way would have been the last stage of cooking apples saved in cold storage from the previous year. The new apples would come in late summer. You are tasting history.
Corn Bread*
*this will make 6-8 servings depending on how you choose to bake it and how much your family loves corn bread. No one will judge you if you consider this one serving.
1 cup milk
1 egg
1 cup corn meal
1 cup flour, for the best cornbread use whole wheat flour, unbleached all-purpose is fine too, if gluten free is desired, gluten-free flour will work but not rise as much
1 Tablespoon baking powder
1 teaspoon salt
½ teaspoon freshly grated nutmeg
1 Tablespoon sugar, honey or maple syrup
¼ cup cooking oil or melted butter
Pre-heat oven to 400°. If you have an 8” or 9” cast iron skillet, this is the perfect cooking vessel. You might also use muffin cups or, as I did, cooking as Mattie for Mr. Glessner, a molded pan that makes rectangles. If using a cast iron pan or mold, pour ¼ cup of oil into the pan (divide equally between sections if using a mold with multiple compartments) and place in the hot oven while you mix other ingredients. Measure 1 cup milk into a 4-cup Pyrex measuring cup or mixing bowl, add the egg and blend thoroughly. Sift the corn meal, flour, salt, baking powder, sugar, and nutmeg together three times. Blend into the milk and egg. If using honey or syrup, add that at the end.
Carefully remove the vessel you are using from the oven and pour the hot oil into the batter and stir briskly. Immediately pour batter back into the pan or mold. You will hear a sizzle. This is the batter cooking quickly and forming a lovely crust on the bottom of your cornbread. This is a great trick. If using muffin tins with paper liners do not try this, but if you have sturdy muffin tins you can do this without paper liners, heating the oil just as for a cast iron pan. Bake for 15-30 minutes depending on the size of your vessel. Obviously, smaller containers will bake faster. Batter should rise with a nice dome and be slightly brown on top. A sharp knife or broomstraw inserted should come out clean. Remove from oven. Let sit five minutes then remove from pan and serve hot with lots of butter, honey, or your desired preserves or jam. Mr. Glessner would be having Mattie’s peach butter.
Moving House (posted July 14, 2020)

You are moving house. Not your house exactly, your employers’ house, but you go, too, along with several other servants and the family. This would have been Mattie’s world in 1895. Mattie Williamson worked for the Glessners, and the Glessners moved to their summer home in New Hampshire every year in May. For Mattie this would probably have been a very happy time since her favorite brother and sister-in-law were the caretakers of The Rocks, the Glessner summer home. Mattie had worked for them there, too, when she was younger. The trip was not a vacation, but it was a huge change of scene and a different sort of cooking.
Farms in the summer explode with produce. The Rocks was no exception. There were fruit trees, honeybees, and a garden. Everything would be “just coming in” when Mattie and the rest of the Chicago Glessner contingent arrived.
Freezers existed but “frozen food” was still a glimmer in someone’s eye. The summer yield must be preserved in other ways: canning, pickling, curing, and candying. Mattie and the other women at The Rocks would have had many long days in the mid-summer not only cooking for the family but also saving nature’s bounty for the winter months. The family would be excited to eat all the garden-grown food so Mattie would have been tasked with presenting everything fresh at the same time that she was preserving for winter.
This week we are going to both preserve and present fresh food for your family as Mattie would have done for the Glessners. Let’s do things with peaches, beets, cabbage and eggs.
Peach Cobbler
3 cups sliced peaches, plums, apricots, pears, pretty much any fine orchard fruit
½ cup butter
1 cup raw, white (cane only please) or brown sugar
2 eggs
1 teaspoon baking powder
1 teaspoon almond extract if you have it, if you don’t and you happen to have Amaretto in your liquor cabinet, it will work just fine
1 Tablespoon vanilla
1 cup flour
1 cup boiling water
Peaches come in in late July and August. They don’t last long, so eating them now and preserving them somehow for the winter months are both a concern.
Mix the butter and sugar until well blended, add the eggs. Sift the flour with the baking powder (three times, you’ve been reading these columns, haven’t you?) and gradually add this flour mixture to the butter, sugar and egg. Then add the almond extract and vanilla. Spread all of this into a baking dish or into individual ramekins. This should fill 6 ramekins or one 9” by 12” baking dish, or one 8” by 8” dish. Layer your fresh fruit over the batter.
Right before placing in oven pour 1 cup of boiling water over all and bake at 350° for about 45 minutes until broom straw or fine knife inserted comes out clean. Serve with ice cream or whipped cream. In the photo it is garnished with a sprig of chocolate mint, showcasing more summer bounty for you.
Peach Butter
Lots of peaches, many many peaches. Adjust accordingly. Let’s pretend you have six peaches this time
½ cup brown sugar
2 Tablespoons honey
1 full Tablespoon of whole cloves in a cheesecloth bag or 1 teaspoon ground cloves
1 teaspoon almond extract
1 Tablespoon vanilla extract or one inch of vanilla bean
Wash the peaches and remove the pits. Cling peaches and free-stone peaches will be different. If you are working with free-stone peaches, they will just pop off the pit when you slice them. Cling peaches will, obviously, cling. Just throw them all into the pot, it won’t hurt a thing. Once they are cooked and sloppy, it will be easy to remove the pits. Do not stress about the pits. Cook in a large saucepan for at least three hours on the lowest flame/heat possible with your stove. A lovely slurry will be formed. Remove the pits if they are there.
Mattie would have used a food mill to break up the peach pulp and remove the skins. If you have one, use it, but most of us today will use a blender or food processor to chop up everything and make a nice smooth pulp. Once you have done this, however you do, put back in a saucepan and continue to cook for at least two more hours on a low flame. You can also opt to put in oven at the lowest setting, 175° or as close to that as you can get and cook for about 5 or 6 hours. If you have vanilla bean, put it in at this point.
After that, put back in blender or use your food mill again to smooth the butter as much as possible. Return to saucepan and add a cheesecloth bag full of cloves or ground cloves and the honey. Cook 30 minutes. Add the almond extract, and the vanilla if using vanilla extract. Place into canning jars and water bath can in boiling water for 15 minutes. It is very difficult to judge amounts when making butter or preserves but six peaches should yield about three 8-ounce jars of finished peach butter.
Beets
6-8 beets
Boiling water
¾ cup water in which the beets were cooked
¾ cup apple cider vinegar
8 cloves
1 cinnamon stick
¼ teaspoon red pepper flakes or cayenne pepper
½ cup raw, white or brown sugar, honey or maple syrup also just fine
Beets will come in gangbusters all through the summer months. They are a root vegetable and are delicious fresh and canned. Many people prefer a pickled beet. They are not generally eaten raw so they must be cooked. Make certain that you are not planning any activities in the next two days that require people looking at your hands. They will turn purple (I’ll bet you wonder how I know this!). Remove the beet stems and scrub thoroughly. Place into boiling water and boil until a sharp knife can be inserted all the way through. Remove from water, save the water from cooking the beets, run cold water over the beets and set aside.
Meanwhile put ¾ cup of the beet water, vinegar, cloves, cinnamon, sugar and pepper into saucepan and bring to a boil. Strain through a fine mesh strainer or cheesecloth to remove the spices. When the beets are cool enough to handle, use the backside of a knife to scrape the top layer of skin off the beets and remove the hard stem area. If you are planning to serve right away, then pop the beets into the vinegar mixture and cook for ten minutes. Remove from heat, cool, slice and use in salads. If you are planning to can, slice the beets directly into prepared (meaning clean and boiled) canning jars. Pour the vinegar mixture over them and waterbath can for 15 minutes in boiling water.
Eggs
8 eggs, hardboiled
Extra beet pickling mixture OR
1 cup cider vinegar
1 cup water
1 Tablespoon salt
When the hens are laying there will be an abundance of eggs. Sometimes the hens are not laying, like in the winter, and eggs need to be preserved for future use. One of the ways to do this is to pickle the eggs. In the photograph you will see two sorts of pickled eggs, one in a brine and one in pickled beet juice so that the eggs turn purple. These are especially fun for children.
First, hard cook the eggs (Ellie Hint: with a colander inserted into a larger pan or a “spaghetti cooker” if you have one, steam the eggs over boiling water for exactly 12 minutes.) Immediately plunge into ice water, when cool, peel and place into canning jars. Heat the beet pickling mixture or the vinegar/water/salt mixture to boiling and pour over the peeled eggs in the jars. Seal and water bath can for 15 minutes in boiling water. Serve on salads, in hot dishes and just by themselves in February when fresh eggs are scarce.
Cabbage
½ head of fresh cabbage
3 Tablespoons mayonnaise (homemade if you have it)
1 teaspoon lemon juice
½ teaspoon sugar, raw, white or brown
½ teaspoon poppy seeds if you have them
dash of salt and pepper
Chop the cabbage fine. Mix all the dressing ingredients until very smooth. Toss the cabbage with the dressing. Place on salad plate. Decorate the plate with matchstick sliced pickled beets and pickled eggs. Serve as salad course. This should yield enough salad for three or four people. Adjust amounts according to the size of the group for whom you are cooking.
No entrees this time folks but you know what to do. Make a lovely omelet or roast chicken, serve the fresh beet, cabbage and pickled egg salad and present the peach cobbler with ice cream for dessert. You’ll have to wait until winter for the peach butter, pickled eggs and beets. And boy will you appreciate them then!
Mattie’s Candy Sampler (posted July 7, 2020)
The children who lived on Prairie Avenue in the late nineteenth and early twentieth centuries were doted upon and celebrated. There are many anecdotes about the littlest residents in Prairie Avenue Servants: Behind the Scenes in Chicago’s Mansions 1870-1920 recently reprinted by Glessner House (click here to purchase online). Households threw lavish parties on the occasion of a birthday or when friends or relatives visited from another part of the country. A children’s party was a chance for showcasing elaborate decorations, costumes, and of course, candy.
Commercially made candy was certainly available in Chicago at the turn of the last century, but lots of families still made their own. Frances Glessner had many cookbooks featuring candy recipes in her collection. She mentions making candy with the servants for parties several times in her journals as well. We know that at Glessner House, everyone was in on the fun. This week you will be treated to recipes and instructions for five types of candy. All of these can be made at home, and trust me, they are all really fun and delicious. If you have a summer birthday in your house, think about making homemade candy for the festivities. It’s a great way to get the whole family involved.
Honey Taffy
At their summer home in New Hampshire, Mrs. Glessner kept bees, therefore we know that honey was readily available to Mattie year-round. There are mentions of taffy pulls in the journals, so honey taffy made sense. This recipe is easy and fun and messy; just perfect for small helpers.
1 cup white sugar (please always use cane sugar, not sugar beet sugar)
1 cup honey
½ cup water
¼ teaspoon salt
1 teaspoon vanilla
Butter (a few Tablespoons to butter the pan and your hands)
Parchment paper and wax paper, yes both if you have it, can use parchment for wrapping if you don’t have wax but don’t use wax paper for the pan, it will melt!
A candy thermometer if you have one but you can do it without, Mattie did!
Put all the ingredients except the vanilla into a saucepan. Stir to blend then put the spoon away. Do not stir while the candy is cooking! Place over a medium heat and cook. Meanwhile line a cookie sheet that has a rim on it with parchment paper and rub the paper with butter. As the mixture heats up, the sugar will melt, and it will begin to bubble. If you have a candy thermometer, you are looking for 265°. Mattie would have had a small bowl of cold water next to the stove. When she suspected it was ready (this takes about 7-10 minutes), she would plop a drop of the mixture into the water. It cools quickly and will form a little disk of candy that will hold its shape but still be pliable.
When it reaches the hard ball stage, or 265°, remove from heat and immediately pour the whole mess onto your prepared pan. This is not the part for the children. Candy is very hot and will burn if you are not careful. The good news is that the candy cools quickly. If it spreads too close to the edge of your pan, simply lift up the paper and tilt it so it runs back towards the center. It will be cool enough to touch in five minutes or so. Now the fun begins.
Make certain your hands are freshly washed and you have taken off all jewelry. Butter your hands and lift up the taffy and pull on it. Two people pulling together is fun. Stretch it out until it almost breaks then fold it over itself and repeat. You are working air into the taffy and further cooling it at the same time. When it is totally cool, stretch it into ropes about ½ inch thick and cut with scissors.
Take a piece of waxed paper about the size of a playing card and wrap up the candy, twisting the ends. To further decorate you can wrap a piece of colored foil or wrapping paper around just the center. You could also make your own labels by printing on a color printer or decorating with crayons or markers. I just cut up some foil cupcake liners and made my wraps with that. They look very cheery. Honey taffy is sweet and chewy and sticky but really good! As with all these recipes, remember to brush your teeth afterwards.
This recipe will make about two dozen pieces of candy about the size of a small tootsie roll.
Cocoanut Meringues
These might be considered a cookie rather than a candy, but they are so simple and delicious that you will wonder how you lived your life without this recipe. They look very pretty on the candy sampler tray and are a lightly sweet treat for those that are not big fans of sugar.
3 egg whites, room temperature
¼ teaspoon cream of tartar (if you don’t have it, these will be fine without but it does help the egg whites hold their shape)
½ cup raw or white sugar, don’t use brown
1 teaspoon vanilla
½ cup grated cocoanut, unsweetened is preferred. If you use sweetened, please reduce the sugar to ⅓ cup
Parchment paper or paper cupcake liners
This is so easy you won’t believe it. Line two or three cookie sheets with parchment paper or set out about 30 paper cupcake liners. With an electric mixer, whip the egg whites and cream of tartar until they change from clear to white, then gradually add the sugar and vanilla. Continue whipping until they are very stiff and will hold their shape. Mattie would have used a wire whisk or a dover eggbeater, the kind with a handle and a crank. When the eggs are fully whipped, carefully fold in the cocoanut.
With a spoon or a small ice cream scoop, plop the mixture onto the parchment paper covered cookie sheet or into the cupcake cups. Bake in a very slow oven, 250° for at least an hour. You want a slight brownish tinge to the tops, and they will feel solid when you touch them. When you take them out of the oven, slide the paper out of the pans with the meringues still attached. When they are cool you can just peel them off the paper. These are very forgiving! If they aren’t quite done, or they become soggy in this humid weather we are having, simply pop them back in the oven for 5-10 minutes and they’ll be crisp and perfect again.
Some people like to hide a chocolate chip or a jellybean inside each one before they are baked. This makes for a fun surprise! The Prairie Avenue families would have made a game out of what is found inside the meringues. For instance, the child who finds the green jellybean gets the first pony ride. Yes, Mattie had jellybeans on Prairie avenue 120 years ago! Jellybeans date back to before the Civil War.
This recipe will make approximately 30 cookies about the size of a ping pong ball.
Cream Cheese Mints
4 ounces cream cheese, room temperature
1 Tablespoon unsalted butter, room temperature
4 cups powdered sugar, sifted
Various food colorings (yes, Mattie was able to buy food coloring)
Various extracts such as peppermint, vanilla, butter rum, anise, etc.
Beat the cream cheese and butter until blended. Gradually add the sugar until a stiff dough is formed. This will look and feel exactly like playdough. Divide into as many bowls as you want to have colors and flavors. This time I did purple with anise extract, red with cinnamon extract and orange with orange extract (the orange ones aren’t in the pictures though). You can use any colors and flavors you like.
With a small knife or other flat tool, blend a few drops each of flavoring and color into the dough. For a tie-dyed look, don’t blend all the way and you will have streaks of concentrated color which looks pretty neat. If you have candy molds you can press the dough into them and let them dry and harden overnight. You can also roll with a rolling pin and cut into squares or use small cookie cutters. You can mold little animals or any other shapes that you might do with playdough. Let dry overnight to harden.
This recipe will make about a hundred dice-sized candies.
Sponge Toffee
1 cup raw or white sugar
3 tablespoons golden syrup, treacle, Alaga syrup, or corn syrup, light or dark
Dash of salt
3 teaspoons baking soda
1 Tablespoon vanilla
Sheet of aluminum foil
Butter for buttering the aluminum foil
Candy thermometer if you have one
8 ounces of bittersweet or semisweet chocolate, chips, a bar, or melting disks will all work
If you have eaten at Chicago Pizza and Oven Grinder, you have been given a tiny piece of this candy when you pay your bill. Just as for the taffy, put the sugar, syrup, and salt into a saucepan. Stir until just blended then leave it alone on a medium flame while you butter a sheet of aluminum foil. Measure baking soda and vanilla into prep bowls. You will not have time to measure them out when it is time to add them. If you are using a candy thermometer, heat mixture to 280°. If you are using Mattie’s method, drop a tiny bit of the mixture into a bowl of cold water and test for hard crack. That means the candy instantly hardens when it hits the water and is the consistency of a JOLLY rancher candy.
As soon as it reaches the correct temperature remove from heat and immediately add the baking soda and vanilla and stir like mad! It will foam and bubble up and change colors to a light brown. The instant it is fully blended pour the entire mixture onto the buttered aluminum foil. It will spread quickly. Stand right there and watch it. As soon as it stops running towards the edges, this is the blink of an eye so don’t walk away, butter a sharp knife and make a grid pattern like you are cutting a pan of brownies about 1 inch square each. You are scoring the candy. The hot candy will “heal” itself, but the lines will still show. When it is all cool, break apart along the score lines.
Melt chocolate in the microwave or in a double boiler (Ellie Hint: you don’t need a real double boiler. Just find a saucepan that will hold one of your small metal mixing bowls, fill the pot with water up to the level that the bottom of the bowl touches, et voila! A double boiler!). Dip your candy in melted chocolate using a fork or a candy dipping tool (Ellie Hint: I have never invested in a candy dipping tool. I use a two-tined meat fork; works perfectly and it gets lonely because it is generally only used on holidays to carve turkeys. It is happy to be useful.). Place candy on waxed paper or directly into foil or paper miniature muffin cups. This candy literally melts in your mouth. The baking soda causes bubbles of air to form inside. It is truly kitchen chemistry magic that the whole family will love! It is just as delicious without having been dipped in chocolate, so try it both ways.
This recipe will make about 25 squares with some misshapen edge pieces for the cooks to eat.
Marzipan
¾ cup ground almonds or almond flour
2 cups powdered sugar, sifted
1 egg white, for maximum safely, use pasteurized egg whites or powdered egg white or meringue powder, all can be found in most grocery stores
½ teaspoon almond extract
1 teaspoon vanilla
Colored sugar
Various items for stems such as vanilla beans, mint stems and leaves, and curled celery
This is the most fun of all the candy recipes! Very easy and you get to eat your mistakes. What’s not to love? Mattie would have just used a raw egg white and if the eggs are pasteurized that’s still ok today. But to be extra safe use powdered egg whites or meringue powder. The box will tell you the ratio of powder to water to create the equivalent to one egg white. You can also buy liquid egg whites in the refrigerator section at the grocery store, these have been pasteurized and are fine to use. Mix the almonds with the egg white and extracts and gradually add the powdered sugar. You want a very stiff dough, like playdough or putty.
Just as with the dough for the mints, divide into as many sections as you like. I did four. Color with food coloring but do not flavor. You want the nice almond flavor to come through. Now, play. Shape your dough as you desire and roll in colored sugar the same or another color as the tinted dough. (Ellie Hint: when you have the form you want, wet your hand with a few drops of water and roll the form one more time. The colored sugar will stick much better this way.)
Traditional German marzipan is often molded into the shapes of fruits so that’s what I did. I made cherries with small pieces of vanilla bean for stems; kumquats with a matchstick sized piece of celery for a stem; and purple and green grapes with curled celery for the vines and mint stems for the stems.
To curl the celery, lay one stalk of celery flat on the cutting board and peel off segments with a vegetable peeler. They will curl automatically. Place into a bowl of ice-cold water and they will curl further. Remove from the ice water after about ten minutes and place on several layers of paper towel. Change the paper towel at least twice and shake off any excess water. Leave to dry while you are making your grapes. When you are done, use the curliest pieces as your grape vines.
Mattie and the other Prairie Avenue cooks would have worked very hard on candy sampler trays for children’s parties. Everything had to be edible, thus using other foods as the stems and coming up with fun things to make would be a challenge as well as a really fun day in the kitchen. Marzipan can also be pressed into candy molds. If you look closely at the photo you will see that I pressed marzipan into a cameo candy mold and filled the mold with the rest of the dipping chocolate thus making cameo candy.
I look forward to hearing what fun you had in the kitchen making any or all of these recipes.
Kirsch Punch (posted June 30, 2020)

Kimball House sits directly across the street from Glessner House, at 1801 S. Prairie Avenue. Mattie Williamson would certainly have known the Kimball’s cook. The servants had an unseen communications system amongst themselves; trading ingredients and tools, sharing recipes and solutions, and helping out when a large party was coming.
In Mary Alice Molloy’s Prairie Avenue Servants: Behind the Scenes in Chicago’s Mansions 1870-1920, recently reprinted by Glessner House (available online here), the roles of the servants are examined. The book features an imaginary dinner served to a visiting party at the end of the nineteenth century. The guests were served a glorious repast:
“First comes the soups, one dark, one white, served with sherry. Next is a delicate local lake fish well smothered in a sauce and served with a Rhine wine. You find this a very nice change from the oysters served absolutely everywhere. The beef course arrives with vegetables and champagne. After a cooling sorbet of frozen kirsch punch comes the poultry, quail tonight, served with a crisp salad. Finally there is plum pudding drowned in cognac, ice cream and small confections, black coffee and cordials.”
Let us select one item from this menu to make this week. Did I hear you say, “frozen kirsch punch?” Fabulous. I was hoping that would be your desire.
Punch has a rich and storied origin. We find variations in cookbooks going back to the eighteenth century. Many cultures have their own version, with the word to go with it. It is said to derive from the Hindi word, panch, which means five. The Farsi word for five is panj, so there might be some debate there. This is to signify the number of ingredients, and it was originally made with tea, crushed fruit, acidic fruit juice or liquor, sugar and spices. It is Eastern in origin, but we know it came as far west as Sweden in the early 1700s and was called Punsch.
To simplify; in Chicago in the late nineteenth century a punch was a blended drink consisting of crushed fresh fruit, juice of same or other fruits, sugar, alcohol when desired, spices, and occasionally an effervescence. It might also contain crushed ice and be served in a bowl to be eaten with a spoon. It takes the place of a sorbet as a palate cleanser between two heavy courses as it does in the above menu imagined on Prairie Avenue. Today, we call it a smoothie, or a slushie. Everything old is new again!
Punches were exceedingly popular in the nineteenth and early twentieth centuries. For non-temperate households, it was a way to introduce a small amount of alcohol into the menu without the guest becoming overserved. For temperate households, it was a way to showcase the breadth of the kitchen skills to create a concoction that was both sweet and acidly refreshing between courses.
Kirsch Punch
1 cup cherries, pitted
1 cup fresh or canned pineapple, with juice
1 lemon - juice lemon, grate peel, remove pulp, discard white pith and membrane (may substitute 2 limes or one orange)
½ inch of vanilla bean or 1 tsp vanilla
1 stick cinnamon
½ cup kirschwasser or kirsch, a slightly bitter cherry based liqueur. Not to be confused with cherry brandy. If you use cherry brandy, omit all sugar. Temperate recipe: use unsweetened dark cherry juice. It will be delicious, and very healthy!
½ bottle champagne, cava, or prosecco. Temperate recipe: use seltzer, ginger ale or any pale sparkling soda.
Place the cherries, pineapple, lemon juice, lemon peel and pulp in saucepan. Add ¼ cup sugar, vanilla bean, and stick of cinnamon. If using vanilla extract instead of vanilla bean, please add at the end and do not cook with the fruit. Cook until all the fruit has completely fallen apart. Allow to cool, strain. A modern cook might use a blender to mix all the pulp into the whole, but Mattie would have strained through many sieves to remove all the pulp creating a nearly clear juice. Chill thoroughly.
Add kirsch or cherry juice to the chilled fruit juice, mix in crushed ice and champagne or other bubbles. Serve in small glasses with a sprig of mint for garnish.
As for all the other courses…enjoy anything with this but Mattie would have at least roasted a chicken and put together a simple salad and some homemade bread. Next week, get ready for candy.
To learn more about the history and architecture of the Kimball house, watch this 10-minute YouTube video, posted June 30, 2020.
Prairie Avenue Progressive Dinner Week 4:
Tiny Cheesecakes (posted June 23, 2020)

Here you are at the final stop on the Prairie Avenue progressive dinner. You saved room, didn’t you? If you missed the previous weeks’ soup, fish, entrée, and salad courses, please scroll down to view them.
Fourth and Final Stop: Dessert. Everyone has just enjoyed a glorious repast at Glessner House at 1800 Prairie Avenue and is leisurely making their way to Keith House at 1900 for a little something sweet. This recipe was adapted by Ellie from The Prairie Avenue Cookbook by Carol Callahan.
Frances Glessner’s menus do not include any mentions of cheesecake during Mattie Williamson’s tenure (1892-1912), however, the Keith House’s cook might have included it as one of her specialties. Cheesecakes have a long history and many adaptations and variations. There are several versions in Mrs. Glessner’s cookbooks.
A bit about cheesecake. First of all, it’s not really cake, it’s pie. Think about it: there is generally no flour, no leavening, and it has a crust. Sounds like pie to me! The recipe we are going to make this week isn’t even really pie, it is actually candy. Read on!
Most American cooks would not consider making cheesecake without cream cheese. You can use ricotta or mascarpone as the Italians do, but I digress. This, and most other recipes for cheesecake that you have ever seen call for cream cheese. But guess what cheesecake does not need? Sugar. Seriously. Fabulous things can be done with a savory cheesecake. Perhaps we’ll make that sometime soon. But for now, tiny desserts for a summer evening.
Cream cheese is a mixture of mild cheese and cream and has been part of a cook’s repertoire since the ancient Greeks. Everyone made it themselves until the latter part of the 19th century when a New York dairyman named William Lawrence perfected a method and began to mass-produce an American version of Neufchatel cheese. He named it “Philadelphia” because that city was known at the time for fine milk and dairy products. The company was sold a few times, finally landing in the Kraft family of products where it remains today.
This recipe for Tiny Cheesecakes is unusual because it is not baked, making it perfect for a summer evening in Chicago. The other thing I like about it is that it is extremely versatile and lends itself to helpers, such as partners or children who might not always participate in cooking tasks. Have fun! Make tiny cheesecakes and decorate them however you like. Send me your pictures. I would love to see how you adapt this recipe to your tastes and talents.
Tiny Cheesecakes
8 ounces cream cheese
1 cup butter
2 cups unbleached white flour
½ cup raw sugar, brown sugar is fine, if you prefer honey or maple syrup, please increase the cream cheese to 10 ounces and the flour to 2 ¼ cups
1 Tablespoon vanilla
¼ cup heavy cream for dipping, you may substitute whole or evaporated milk
Garnishes such as graham cracker crumbs, chopped nuts, cocoanut, melted chocolate, candied ginger, chocolate cookie crumbs, gummy bears, etc.
This very easy, no-bake cheesecake is so much fun to make and decorate. Involve the whole family and let everyone garnish their own! Bring the cream cheese and butter to room temperature. Blend thoroughly until very smooth. Add sugar, flour and vanilla and mix. Plop mixture onto waxed paper or parchment and cover with another sheet of same. Roll until about ¾ inches thick. Place on cookie sheet in refrigerator at least 6 hours.
Remove from fridge and get creative! Slice into rectangles or cut with cookie cutters into desired shapes. Working quickly, dip into cream and then into desired topping. If using melted chocolate, dip very quickly or use a pastry brush to paint the chocolate on so as not to melt the cheesecake. Dip or dredge with various toppings. Decorate with fresh fruit if desired. Return to refrigerator until ready for service. This is a great bite-sized dessert and can be served on a tray or in individual paper cupcake liners. The Keith House cook would have served these as pictured, on doilies. She would place many plates about the house so the guests could help themselves. If serving this for a party today, you might consider placing them in individual paper muffin cup liners so guests will not come into contact with more than one treat at a time.

The home of Elbridge and Harriet Keith at 1900 S. Prairie Avenue is the only surviving house on the street to pre-date the Great Chicago Fire. It was built in 1870 and the third floor, with its Mansard roof in the Second Empire style, was added about a decade later. Click here to watch a YouTube video about the architecture and history of the house.
Prairie Avenue Progressive Dinner Week 3:
Lobster á la Newberg and Tomato Salad (posted June 16, 2020)

Welcome to the third stop on the Prairie Avenue progressive dinner. If you missed the previous weeks’ soup and fish courses, please scroll down to view them.
Third Stop: Entrée and Salad. You and your companions will depart the Shortalls’ at 1600 and leisurely stroll to Glessner House at 1800 Prairie Avenue. Frances Glessner will be doing some of the actual cooking herself! On your left as you enter the home is a short flight of stairs, descend them to enter the schoolroom which has been beautifully decorated and repurposed tonight as a buffet station. Mattie has completed all the preparations in the kitchen so that Frances Glessner can prepare one of her very favorite dishes, Lobster á la Newberg. You will follow this rich dish with a light and lovely stuffed tomato salad which Mattie made ahead and kept cold in the ice box. These recipes were adapted by Ellie from several cookbooks in Frances Glessner’s collection.
Lobster á la Newberg
Serves 4
Four lobster tails or all the meat from one large or two small lobsters (you may substitute a dense fish such as halibut, shrimp, scallops, or, believe-it-or-not firm tofu! Trust me, it’s delicious!)
2 Tablespoons butter
1 tsp salt
½ tsp white pepper (do not substitute black pepper, if you do not have white, omit)
1 tsp paprika with extra for sprinkling on top
½ cup sherry or sweet white wine
3 egg yolks beaten until very light
1 cup heavy cream, may substitute evaporated milk, undiluted
1 Tablespoon cornstarch
Chop the raw lobster meat into small pieces. In a chafing dish or saucepan, melt the butter. Add the lobster and stir briskly. The lobster will be cooked almost instantly, the meat will turn from translucent gray to white and the pink edges will become bright red. Add the sherry and cook about five more minutes. Add salt, white pepper and paprika. Beat the egg yolks until very light, add cornstarch and cream and gradually add all this mixture to the lobster, stirring constantly. If using a stove, turn the heat down as low as possible and continue to stir as the mixture thickens. This will take about 15 minutes. You must keep stirring to prevent the sauce from clumping up as the eggs cook. You want a thick sauce, halfway between gravy and pudding. You may serve this over rice, toast points, or noodles. Mrs. Glessner has requested service in crepes for the progressive dinner.
Crepes (Do not be afraid! This is wicked easy and you’ll be so impressed with yourself; not to mention how impressed those you are dining with will be!)
2 large eggs, at room temperature
¾ cups whole milk
⅔ cups champagne, sparkling wine, cava, prosecco, hard cider or sparkling non-alcoholic wine or cider (Ellie hint: What you are going for is sugar and bubbles, even ginger ale will work)
¼ teaspoon salt
1 cup unbleached white flour
2 Tablespoons light oil; peanut, grape seed, soybean, etc. Not olive oil, the flavor is too strong. You will need an additional few teaspoons for cooking, so don’t put the bottle away yet.
Waxed paper or parchment paper. Mattie would have used oiled brown paper
Put all the liquid into a blender if you have one. If not, blend with a mixer or wire whisk until very light. Add the flour and salt and combine thoroughly. Add the oil and blend completely. Put the mixture into the refrigerator for at least 2 hours.
To make the crepes, remove mixture from fridge and put into something with a pour spout such as a Pyrex measuring cup or small pitcher. You will want to make the crepes first before the lobster. They will keep layered with waxed paper in between and they will be warmed when filled with the lobster. You need not be concerned about keeping them warm. Using a saucepan that is at least 8 inches in diameter, heat the pan. Add a tiny bit of oil and brush with a pastry brush or paper towel to coat the inside of the pan. You want a medium heat to your pan. Get ready. You will wreck the first one for certain. I usually wreck the first two or three, but it gets easier. They’re still edible. Pour a scant three Tablespoons of batter into your pan and swirl it around to coat as much of the pan as possible. Watch closely, the edges will cook first and start to dry out and turn light brown. Look for small bubbles near the center, when you see these, it is time to turn the crepe over. Using a thin spatula or a butter knife, lift one edge of the crepe, slide your tool under the crepe in the center and quickly flip over. If the edge curls under, don’t worry, if you catch it quickly you can unfold it. Cook until you see the bubbles again then invert the pan over a piece of waxed paper. The crepe will just fall right out, trust me. Cover with another sheet of waxed paper and begin again. Remember to lightly oil the pan each time. This recipe will make about a dozen 8” diameter crepes. They will keep refrigerated for several days if you don’t eat them all up right away, which you will, so why am I bothering telling you how to keep them?
When your filling is done, take crepes one at a time, fill with about half a cup of filling in the center. Fold both sides towards the center. Two or three filled crepes is a good serving. If you have extra crepes, think about filling them with Nutella, fruit, or just lemon juice and powdered sugar for a lovely dessert.
As regular readers of this column know, Frances Glessner left us with a treasure trove of information in the form of her handwritten menus. She served 5-8 courses for her formal dinners and a salad course was always included between the entrée or roast course and the dessert. This salad is the one that appears most often so here it is for you just the way Mattie would have made it.
Stuffed Tomato Salad
Serves 4
Four tomatoes about the size of your fist
six stalks of celery
1/3 cup mayonnaise (homemade if you can manage it**)
chopped chives or other green herb and paprika for garnish
small lettuce leaf for plating if desired
First step, history lesson: 19th and early 20th century cooks ALWAYS peeled their tomatoes, always, every time, without fail, even when served cooked. So, folks, you must peel your tomatoes to be completely authentic. Yes, it is a gigantic pain and we do not bother anymore but just in case you want to learn something, here is how you do it. Remove the green stems from your tomatoes if they are there, place into a bowl that will fit all of them comfortably. Boil a kettle of water and pour it over the tomatoes, filling the bowl. Leave it alone until the water has cooled enough to put your hand in. Take the tomatoes out one at a time. You will notice that the skin has split in several places. Grab a piece of the split skin and gently peel it away from the tomato, et voila! Peeled tomatoes. Now don’t you feel silly making such a fuss? Cut the top off the tomato and hollow it out. Be very gentle and take care not to break the tomato, a grapefruit spoon works pretty well to get all the meat out. (Ellie Hint: I hear you saying, “why don’t you just hollow out the tomatoes before you peel them? Wouldn’t that be easier?” Yes, but it doesn’t work, they fall apart completely and then you have to change the menu to spaghetti. I’ll bet you wonder how I know this.)
While you were waiting for your tomato water to cool you should have finely, and I mean really finely, chopped your celery. You want little pieces the size of a pencil eraser. Mix with mayonnaise. Fill your tomatoes with the celery mixture. Dust the top with paprika and some finely chopped chives, tarragon, parsley, or anything bright green that you enjoy. Serve in a small bowl or on a lettuce leaf.
**If you want instructions on Ellie’s homemade mayonnaise, write elliepresents@gmail.com and I’ll walk you through it. It is not difficult!
Join us next week for dessert at Keith House.
Prairie Avenue Progressive Dinner Week 2:
Fish Gratin, Risotto and Steamed Asparagus (posted June 9, 2020)
Welcome to the second stop on the Prairie Avenue progressive dinner. If you missed last week’s soup course, please scroll down to view it.
Second stop: Fish Course. You have just strolled the short block from the Harveys’ house at 1702 S. Prairie Avenue to the Shortalls’ house at 1600. Here you will enjoy a substantial fish course with a side dish and a vegetable. For our modern cooks, this can be a complete meal with the possible addition of some crusty bread and a nice chilled glass of whatever you prefer. These recipes were adapted by Ellie from Carol Callahan’s Prairie Avenue Cookbook.
Fish Gratin
1 pound whitefish, any type (I used Tilapia but any mildly flavored fish will work)
1 minced shallot or half a sweet onion finely chopped
2 Tablespoons butter, plus one more for dotting the top before baking
2 Tablespoons flour
1 cup of vegetable broth (I like the bouillon cubes made by Knorr. Mattie would have made her own by putting a chopped onion, several small carrots and two stalks of celery in two cups of water and stewing slowly for an hour. This is easy and cheap if you have the ingredients. Pour off broth and discard vegetables.)
½ cup sherry
4 finely chopped mushrooms
1 teaspoon chopped fresh parsley, dried is fine
1 cup breadcrumbs
¼ cup grated Parmesan cheese
Season your fish with salt and pepper or any seasoning you like, cayenne pepper, white pepper, paprika, whatever suits your taste. Cover and bake at 325° until done, about 20 minutes. Meanwhile melt 2 Tablespoons of butter in saucepan, add shallot or onion and cook until soft and brown, add flour and make a roux. Gradually add the vegetable stock stirring constantly. Add mushrooms and parsley and the sherry and simmer until thick. This will take about the same amount of time that it takes the fish to bake. Mattie would have done both of these operations at the same time. When the fish is done and the stock is thick, break up the fish and place into individual gratin dishes, ramekins or one small casserole dish. At Glessner House we have oval copper dishes that serve this purpose (see photo). Pour the sauce over the fish in your dishes. Mix the breadcrumbs with the Parmesan cheese and sprinkle over the entire top, dot with tiny pieces of butter (Ellie Hint: if you slice a Tablespoon of butter, wrap it in waxed paper and freeze it, you can then cut it into 16 little tiny dices which will be perfect for dotting the top). Place in oven and bake at 350° for about 15 minutes. You may choose to turn the oven to broil for the last 2 or 3 minutes to get a nice crispy brown crust.
Risotto
½ cup chopped onion or shallot
2 Tablespoons butter
1 ½ cups stewed canned tomatoes with juice (this is one 12 ounce can)
At least 1 cup of hot water. Just boil in kettle and leave in there to use as needed
1 cup uncooked rice, Arborio rice is best for this, but any will work
Finely grated cheese, Parmesan, Romano, Asiago, any hard white cheese you like
Mattie would have done this on another burner at the very same time she was making the fish and its sauce. It can be done. I did it too, you just must pay close attention and stir with two hands at the same time. If that seems daunting, make the risotto first and keep it warm in the pan, then the fish, so everything can be ready to eat at the same time. Melt the butter, add the tomatoes, stir thoroughly. The original recipe calls for adding some smoked meat such as ham or turkey, chopped, which you certainly might do at this point if you prefer. Pour the rice into the tomato mixture and add ¼ cup of hot water to start. Keep your water hot so that you are never adding cold water, that will slow the cooking time. Stir constantly and keep watching. As the rice absorbs the moisture, add more water. The rice will be done in 20-30 minutes. Taste a small bit to be certain the rice is cooked. The mixture is done when the rice is cooked and the surrounding sauce will hold its shape loosely when plated.
Steamed Asparagus
To make a lovely plate consider steaming a few stalks of asparagus and placing in a triangle, spoon your risotto in the center of the triangle and it will not spread and make a mess on the lovely plate with your fish gratin. Asparagus is extremely delicate, and most people cook it wrong, and too long. Just barely steam it until a knife will go in easily, 2-3 minutes. Remove from heat and serve immediately or plunge into cold water to stop cooking. Right before service you can re-steam for just a minute to reheat and it will be perfectly cooked.
This dish is the second course for our Prairie Avenue Progressive Dinner, but you can make a meal of it by adding some crusty bread and perhaps a small salad. If you do everything at the same time, as Mattie would have, you can have this meal on the table in less than 40 minutes. For dessert, I might suggest some simple sorbet or just fresh fruit salad garnished with mint.

John G. Shortall, who immigrated to the United States from Dublin, Ireland at the age of six, was an attorney and one of the founders of Chicago Title & Trust Company. He built his home at 1600 S. Prairie Avenue in 1884, with Laban B. Dixon serving as architect. This was Shortall’s second home on Prairie Avenue, the first having been built in the 1860s after his marriage to Mary Staples. Mary was the daughter of John Staples, who built the first house on the street in 1852. The Shortalls’ son, also named John, later built a house at 1604 S. Prairie Avenue, and raised his children there. As such this may well have been the only family on Prairie Avenue to have had four generations live here. Shortall devoted himself to the humane treatment of animals and was a founder of the American Humane Society and the founder and long-time president of the Illinois Humane Society.
Prairie Avenue Progressive Dinner Week 1:
Mushroom Soup (posted June 2, 2020)

Welcome to June from Glessner House. This month we are focusing on Prairie Avenue, and Frances Glessner has asked for Mattie’s assistance with a progressive dinner during the year of the World’s Columbian Exposition - 1893. This would be a huge event where guests would be invited to walk from house to house on Prairie Avenue, enjoying one course of their dinner at each residence. Each week this month we will feature one dish from this experience. We so wish we could be serving this in person to everyone as they stroll Prairie Avenue on a lovely summer evening dressed in their finest. Since that is not possible, neighbors will be able to pick up a recipe card in the courtyard between the hours of 9:00am and 5:00pm daily.
First stop: Soup Course. You will begin your journey at 1702 S. Prairie Avenue, the home of Turlington and Belle Harvey. According to Prairie Avenue Cookbook: Recipes and Recollections from Prominent 19th Century Chicago Families, edited by Glessner House curator Carol Callahan in 1993:
“The freshest mushrooms on Prairie Avenue came from the Harvey family, who grew mushrooms in their stable. Mushrooms were carefully bedded in the sweepings of the stable and tended by the coachman. Then they were gathered, broiled, and served under glass by the cook.”
Mattie would have been able to walk up the street and trade something she had made for fresh mushrooms from the Harveys’ cook. She might have also used their recipe for mushroom soup. Mrs. Glessner always included a soup course in her dinners. Please enjoy this with your dinner, or even as your dinner with some crusty bread and a fresh salad.
You will need:
¾ pint (about 1 ½ cups) chopped fresh mushrooms, dice very fine but save one perfect mushroom to use as a garnish
5 ½ cups chicken or vegetable broth. You may use a prepared broth cube or my favorite Better than Bouillon which is available in most groceries. If you make your own, Brava/Bravo you. Cook a chicken (three or four chicken pieces, preferably with bone), or celery, carrots and onion with 2 tsp salt and a little pepper in 2 quarts of water, strain, and voila, broth.
1 Tablespoon flour
1 Tablespoon butter
¼ teaspoon salt
dash of pepper
Chop your mushrooms very fine, saving an especially nice looking one for garnish; set that one aside. Stew mushrooms in one cup of broth for ten minutes. Add four more cups of broth to the stewed mushrooms. Meanwhile make a roux with butter and flour melting butter and stirring in flour. Do not let it brown. Add ½ cup of the broth and stir until you have a creamy slurry. Take about a cup of the broth from the mushrooms and stir into your roux then put the whole thing back into the pot and stir.
For a very smooth soup use an immersion blender, if you have one, to smooth out the soup. Mattie would have forced the entirety through a fine mesh screen or food mill. You might also use a blender but only fill it halfway full before blending otherwise you will have a huge mess (I’ll bet you wonder how I know this). Return the smoothed soup to your pot and reheat.
While it is reheating take your one perfect mushroom and slice it into as many slices as you have guests. When you plate the soup, place one perfect slice of mushroom in the center of the bowl and top with a small sprig of parsley and two toasted rounds of bread for a lovely presentation.
The soup would have been the first course for this Prairie Avenue progressive dinner, perhaps with a few hors d’oeuvres. Today, we can make a meal of soup, crusty bread, and perhaps a light salad. Enjoy your soup, visit with your friends, and get ready to walk down the street for the next course.

The Harvey house was the oldest house on Prairie Avenue, having been completed in 1853 in the Italianate style. Turlington Walker Harvey (president of the Harvey Lumber Company and founder of the company town of Harvey, Illinois) purchased the house in 1880, significantly enlarging it and remodeling it in the fashionable Second Empire style. The Glessners purchased the house in 1899 and demolished it soon after to construct twin townhouses on the site for their two children, George and Frances.
The Wonderful World of Rhubarb (posted May 26, 2020)
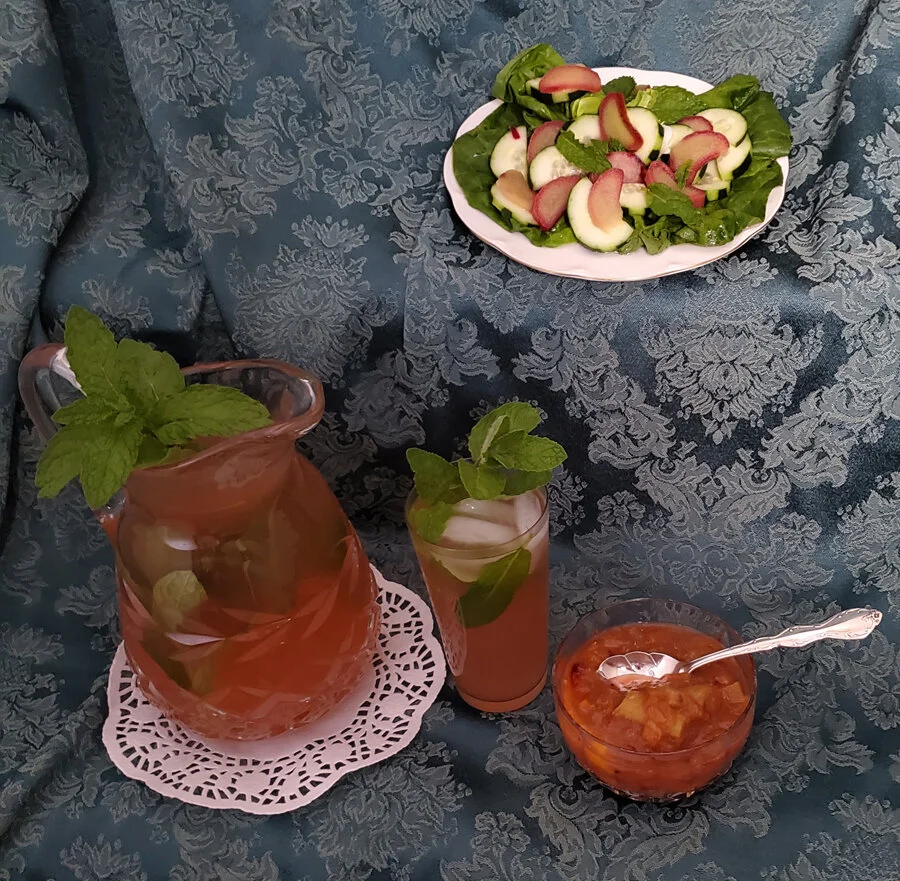
How about a tiny history lesson? It has to do with printing, graphics, and the era between Guttenberg and the internet that was dominated by books.
Cookbooks were an early 19th century boon to the publishing industry. Those who planned dinners or cooked food loved to read things written by others who also did. Mrs. Beeton’s Book of Household Management, The Easiest Way to Housekeeping and Cooking by Helen Campbell, Miss Beecher’s Domestic Receipt Book, and The Twentieth Century Cookbook and Practical Housekeeping. So many of these sorts of books. I have read not yet too many of them and I own more than I should. Frances Glessner collected many cookbooks and they continue to be a source of inspiration and understanding in the Mattie Williamson story.
I find in my cookbooks, two fairly good explanations of how historic cooks used rhubarb. One is from Mrs. Beeton’s and the other from The Twentieth Century Cookbook. Guess what? Although the descriptions of rhubarb are not identical, the illustrations are. The exact same image of rhubarb with the same font in the caption is used in Mrs. Beeton’s, first published in 1859 in England, and The Twentieth Century Cookbook and Practical Housekeeping published in Chicago in 1900. Believe it or not there were stock photos (or rather etchings) even then. Who knew?
So, I am looking up rhubarb for this week’s column. “Why rhubarb Ellie?” Well, because it was around this time every year that the Glessner family and their servants would travel to the summer home in New Hampshire, The Rocks. Mattie would have been with them most of those trips between 1892 and 1912. What would her first culinary job be upon arrival? Rhubarb! Rhubarb is the first spring plant to really come in. And when it comes in, it comes in fast and furious and must be dealt with quickly lest it spoil. What to do with rhubarb!
Here follow three possible options for the modern cook. Mattie would certainly have made the marmalade and the drink but only perhaps the salad. I would like to think that a competent cook, which she certainly was, would find savory options for this abundant crop. The salad recipe I include here has an Eastern origin, but I can see Mattie doing this, I really can. Cucumbers show up in countless menus. We know mint was abundant and lemons are ubiquitous. She could have made the salad, too. I look forward to hearing how your family enjoys it and the other two ideas as well.
Rhubarb Water
4 stalks of rhubarb
½ cup sugar
2 quarts boiling water
½ tsp vanilla
fresh mint to garnish
ice
Clean the rhubarb thoroughly removing any dirt or sand and cutting off the rough ends. Slice in 1-2 inch slices but do not skin or peel. Place in a crock and cover with sugar. Let sit while water boils. Pour boiling water over fruit and cover with a large plate or lid. Let sit until cool. Add vanilla. Strain* and bottle. Serve very cold over ice with a sprig of mint for a refreshing summer drink.
*To be extremely frugal, save the rhubarb you strained off and add it to your marmalade!
Rhubarb Salad
4 stalks of rhubarb
1 small cucumber
1 Tablespoon sea salt, any salt will do in a pinch
1 dozen sprigs of mint
1 Tablespoon lemon juice
Leaf of lettuce for plating
Slice the rhubarb very thin. Blanch for no more than 30 seconds in boiling water until translucent. This is a very quick process but is necessary. The boiling water removes a great deal of the sourness of the rhubarb. Just a quick dip in and out of the boiling water in a colander or sieve will accomplish this. Set rhubarb aside in ice water. Slice the cucumbers very thin. You may want to remove only stripes of skin so they have a pattern to them in the salad. Mix the sliced rhubarb with the cucumbers and cover with salt. Let stand one hour. Thoroughly rinse and drain. Taste for salt and soak longer in cold water if still too salty. Drain and mix with lemon juice and fresh mint. Serve over lettuce as an excellent accompaniment to fresh fish.
Rhubarb Marmalade
8 stalks (about 2 pounds) of fresh rhubarb
4 oranges, any type, but blood oranges give extra color
1 cup sugar
½ cup maple syrup or honey
3 Tablespoons vanilla
Wash the rhubarb thoroughly removing any dirt or sand and cutting off the rough ends. The outer layer will be very tough where it is the reddest. Carefully string off the toughest parts leaving as much red color as you can. Slice in 1 inch slices and place into a large pot. Peel the oranges, remove seeds, and place the segments into the pot with the rhubarb. Remove as much of the white pith from the skin as you can and discard the pith, saving the orange peel. Slice the peel into thin strips and add to the mixture. Add the sugar and cook, covered for about two hours, checking frequently and stirring to make certain that the bottom is not burning. At the end of two hours the mixture should be very soupy and all the fruit will have cooked down. There should be flecks of red rhubarb as well as streaks of orange rind. Uncover, add the maple syrup or honey and cook uncovered another hour, stirring frequently. Remove from heat, stir in vanilla. Place into glass jars, seal and waterbath can for 15 minutes. If you do not wish to can your marmalade, it will keep quite well in a bistro glass with a plastic lid or and glass jar with a screw top. But keep refrigerated always unless you water bath can. Your marmalade will be excellent on toast or even on ice cream as I am certain John Glessner would have liked it.
Ladies’ Luncheon Sandwiches (posted May 19, 2020)

Ahhh, the humble sandwich! Staple of school lunch pails, picnics, and deli counters. The sandwich can be elevated to aristocratic status for a ladies’ luncheon. In February 1895, Frances Glessner held her monthly luncheon for the Monday Morning Reading Class, it is the only class luncheon menu to survive.
She did not specify what sort of sandwiches were to be served, giving Mattie an opportunity to be creative. That will be the focus of the column, unless of course you want to hear about sweetbreads (the thymus gland and pancreas from a calf or lamb, also on the menu) No? I thought not. Moving on…
Mattie would probably have made three or four types of sandwiches served on different breads, in different shapes, some open face and others with tops, and always with special garnishes. She would have planned one with egg, one with a meat or cheese, one with a vegetable and one perhaps that was on the slightly sweet side. This would round out the ladies’ plates and look oh so pretty on Mrs. Glessner’s blue and white china, used exclusively for the class luncheons.
Keeping in mind that you are all trying to cook with what is already on hand, here are my Ladies’ Luncheon Sandwich suggestions:
Curried Egg Salad
(if you have never put curry powder in your egg salad, start now!)This goes a long way, start with two eggs, hard cooked, increase other ingredients if you want to make a larger batch.
2 slices of bread cut into fancy shapes
2 hard cooked eggs (Ellie Trick! Steam your raw eggs in a colander over boiling water with a lid on for exactly 12 minutes. Rinse immediately and plunge into ice water. They will be perfectly cooked and no green ring!)
1 Tablespoon mayonnaise, homemade, store bought, whatever you have on hand (didn’t you save those packets from the deli?). If you do not have mayo, whip up 1 Tablespoon of olive or other vegetable oil with 1 teaspoon of vinegar and a dash of salt, use this.
1 teaspoon mustard, Dijon if you have it
1 teaspoon white pepper, black is a stronger flavor, use less
1 Tablespoon curry powder
1 teaspoon honey, maple syrup or ½ teaspoon of sugar
dash of salt
Mix all together. Mattie would have made an exceptionally smooth paste of the egg salad, almost the consistency of custard. Today we like a more artisanal chop. Trust your own taste. Spoon or spread onto artfully shaped slices of bread, open face, and garnish with anything green; basil leaf, dill fronds, a leaf of baby spinach, whatever you have, be creative.
Cheese Canapes
Four slices of bread cut into shapes, no crust
½ cup of grated cheese, cheddar is preferred but any type will work
1 Tablespoon melted butter
1 Tablespoon vinegar, any type, Balsamic will darken the mixture but that’s fine
½ tsp white pepper, less if using black
½ tsp cayenne pepper or red pepper flakes (use the little packet that came with the pizza, you save those, right?)
½ tsp mustard powder (if using prepared mustard, use 1 teaspoon and reduce the vinegar just a bit)
Mix this until very smooth; a blender works well. Mattie would have pushed through a sieve, food mill or colander. You want it very smooth. Spread onto your bread shapes carefully. If you are serving immediately, put the canapes under the broiler for the count of 20 and serve hot. Garnish with an olive slice, bit of shredded carrot or celery or anything that strikes your fancy. This might be the perfect use for that wayward jar of pimentos you have in the pantry.
Lettuce Sandwiches
Four slices of bread, any type
Several leaves of lettuce as frilly and green as you can get, baby spinach is ok, too
Unsalted butter, softened
Spread the butter onto the bread and layer the lettuce on. Top with an additional slice of buttered bread. Cut all the crusts from the bread then cut the sandwiches into long rectangles or delicate triangles, whichever lends itself to the bread shape you have. Cook gets to eat the crusts. The Twentieth Century Cookbook and Practical Housekeeping ©1894 Smiley Publishing Company suggests, “Various sandwiches can be thus made by using instead of the lettuce, the plumed tops of young white celery, or nasturtium leaves, or young dandelion leaves, or peppergrass, or water-cress and so on.”
Jelly Sandwiches
In the 1970s I used to babysit for two lovely little girls named Hannah and Mindy Vorwerk. This was their favorite sandwich. Little did I know then that it was a truly historic sandwich offering that ladies loved at luncheons in the 19th century. It was, I found it in many cookbooks. I can promise this will still be a big hit with modern children and adults alike.
Four slices of bread
2 Tablespoons softened butter, salted is better for this but unsalted is fine
4 ounces or half a brick of cream cheese, softened to room temperature (Ellie trick! Spread the cream cheese on a saucer, cover with plastic wrap, fill a cereal bowl with very hot water, place on top of the plastic wrap covered cream cheese. It will be soft as butter in about 5 minutes!)
4 Tablespoons of any jelly or jam you like. Mattie would have made jelly from the fruit grown at The Rocks in New Hampshire. Apricot is my very favorite so that is my suggestion, but any jelly or jam will work.
¼ cup of chopped almonds, walnuts, or pecans if desired
Spread all four slices of bread with softened butter, then spread with cream cheese. The cream cheese needs to be very soft to do this (See Ellie Trick! In the ingredients list). Then, spread the jelly or jam, not quite to the edge. Top each slice with chopped nuts if desired then put the sandwiches together and press tight. This is important, press together very firmly. Cut off the crusts (Cook gets the crusts). Cut into shapes. My kids always liked butterflies, but use your judgement. No one should stay in a bad mood after eating this sandwich.
Mattie would have served these sandwiches on tiered trays or individual plates. The second course for this luncheon would have been the sweetbreads with biscuits, followed by dessert. Tea and perhaps lemonade would probably have also been served.
Strawberry Shortcake (posted May 12, 2020)

Strawberry shortcake conjures up memories of summer afternoons, picnic lunches, and for some of us, Grandma’s table. As with banana bread and stuffing, everyone’s grandma has a different take on her shortcake; and she is always right! There are essentially three kinds of shortcake. The first, and probably oldest, is actually a biscuit, perhaps with a tiny bit of sugar, but baked like a biscuit and topped with fresh strawberries, sprinkled with sugar and topped with whipped cream. The second is more of a cake, containing eggs, leavening, and much more sugar. It is also served with sliced berries and whipped cream. The third is what one finds so often today in the grocery store in little cellophane packages. It is, in reality, a sponge cake. Think the body of a Twinkie if that analogy works for you. It contains separated eggs with the whites whipped before incorporation and is very sweet.
As with many dishes in American culinary history, the evolution of shortcake is part time and part location. In 1885, Frances Glessner served shortcake to H.H. Richardson, architect of the house. She wrote in her journal:
“We invited Mr. Richardson and Mr. Shepley to dine here and gave them a nice dinner. Asparagus, cream soup, claret, baked white fish, New Orleans sauce, cucumbers, radishes, spring chickens, peas, gooseberry sauce, pickles, olives, cheese salad, crackers, almonds, champagne, strawberry shortcake, apricots, cherries, strawberries, coffee. Mr. Richardson enjoyed his dinner – and said the pie (shortcake) was the nicest thing he ever ate. He made a little pencil sketch for us of the house.”
Based on the time-period, 1885 shortcake would have been of the second variety. This is the recipe that is believed to have been used that day. The event predates Mattie’s time with the Glessners, but this may have been the recipe her predecessor used. You will need:
6 Tablespoons of cold butter cut into small pieces; keep the butter cold after cutting
2 cups cake flour (If you cannot find cake flour these days, simply sift all-purpose flour three or four times. Even better, whir it up in your blender to reduce the size of the particles. Cake flour is more finely milled than all-purpose flour.)
3 Tablespoons sugar, white, raw or brown are all acceptable
1 Tablespoon baking powder
1 teaspoon salt
1/3 cup heavy cream (can substitute evaporated milk, undiluted)
2 large eggs
Sift all the dry ingredients at least three times until very well blended (by the way, you should always sift three times but hardly anyone ever does. Try it, you will be surprised how much it aids your baking!) Mix the cream or milk with the eggs until very well blended. Mix your cold butter into the flour mixture with a pastry blender or two knives until the particles are the size of grains of rice. Make a well in the center of your dry ingredients and butter and pour in the milk and eggs. Blend well until a dough is formed. Turn the dough onto a lightly floured board or pastry cloth. Roll until about an inch thick and cut into squares, triangles or use a biscuit cutter to make rounds. Place gently on a well-greased or parchment paper-lined baking sheet, lightly brush with milk or cream and sprinkle with sugar (raw or white, not brown). Bake at 400° for 15-20 minutes. Were I you, I would check at 12 minutes. Do not overbake. Once cool enough to handle, slice in two horizontally. Layer strawberries between the two slices, and also on top. Dollop whipped cream over all or simply sprinkle with sugar. Vanilla ice cream would not hurt a bit either!
Chafing Dish Cooking: Chicken a la Reine (posted May 5, 2020)

The chafing dish craze of the 1890s and early 1900s coincided perfectly with Mattie Williamson’s employ at Glessner House. Frances Glessner had no fewer than seven cookbooks specifically on chafing dish cookery. One of them is the Gorham Chafing Dish Cookbook which came with the purchase of a chafing dish. This leads me to believe that she owned one of these specifically, although it is not in the collection. The chafing dish in the photo is from my personal collection.
A chafing dish is the ancestress of today’s hotpot, with the fondue pot being the generation in between. It consisted of a metal stand (generally silverplate or copper) with a glass insert dish and a small reservoir underneath for an alcohol flame or small candle fire. It permitted simple cooking in the parlor or in bachelor quarters and was wildly popular. In Frances Glessner’s menu for a reading by George Riddle on January 20, 1893, her notations read, “Served in Schoolroom from chafing dish. Canvas back duck, lobster a la Newberg, caviar sandwiches, champagne, etc.”
I wanted to cover Lobster a la Newberg this week but was uncertain if most people have lobster readily at hand these days, so we are going to go with Chicken a la Reine instead. If you would like the lobster recipe, please write me and I am happy to send it.
First, get your “mis en place” in place (I LOVE saying that!). You will need:
Chafing dish, fondue pot, Instant Pot, or just a medium saucepan on a low flame, and a wooden spoon.
1 Tablespoon butter
2 Chicken breasts which have been boiled until tender and one pint (2 cups) of the water in which they were boiled. Were I you, I would salt the water and perhaps add a small sliced onion and a few slices of lemon to improve the flavor. You may also add some herbs such as chives, parsley or commercial poultry seasoning.
Salt and pepper to taste
The yolks of four hard boiled eggs, mashed
½ cup of bread or cracker crumbs, not panko, just ordinary crumbs
1 cup of milk or cream
Melt the butter and add two cups of the liquid from boiling the chicken. Stir until blended, season with salt and pepper as desired. Mash the egg yolks. Soak the breadcrumbs in the milk or cream until very soft and the liquid has been absorbed. Add the mashed egg yolks and the chicken finely diced. Mix all of this into the butter and water in the chafing dish and simmer at least five minutes until thick. If needed, thicken with the addition of more breadcrumbs. There is not a serving suggestion in this book, but I would suggest it be served over toast points or a mounded scoop of rice (use your ice cream scoop to mold the rice). A sprinkle of paprika or curry powder on top is very nice and quite appropriate.
Mattie would have done the prep ahead of time and brought all the ingredients to the Schoolroom on a tray so Frances Glessner, or one of her guests, could do the honors of cooking for the party.
This is a slightly different way of creating a roux or gravy and when you try it, I believe you will find it quite useful. Please let me know how it goes. Any protein, even lobster, can be substituted. If you are not teetotal, a splash of white wine is very nice with this dish, either in the dish, or in the cook. Enjoy!
Cocoanut Cake (posted April 29, 2020)

Emily Dickinson (1830-1886) was one of our nation’s greatest poets. Most people know that she did not receive recognition for her work until after her death. However, she did receive lots of acclaim for her baking. She was known to be an excellent baker and she won many awards for bread, rolls and cake. A cake that is often mentioned in association with her is a Cocoanut Cake (that is the correct 19th century spelling). In many books and articles about her, you will find reference to this cake being written on the back of one of her more well-known poems The Things that can Never Come Back are Several. In the spring of 2017, I had occasion to research, bake and serve this cake for an opening night event at the Music Box Theatre when a new film about her life was debuted.
There are, in fact, two cocoanut cake recipes. One is literally just a recipe, found on a folded piece of paper after her death. The other, the older recipe (we know it is older because it does not contain commercial leavening) is the one that is often mentioned as being on the back side of the poem. Except it wasn’t. The poem, like all of Miss Dickinson’s work, was written in pencil on a fascicle which is a tiny hand-made book that she stitched together herself to hold her work. Somehow, in all the years since her death the erroneous attribution of the cocoanut cake recipe to the back side of that poem occurred and every subsequent reference repeats the error. In fact, as I discovered when I began my serious culinary history research and went back to the original manuscript (collection of Amherst College) the recipe could not possibly be written on the back of the poem because the poem takes up both the front and back page of the same piece of paper. The poem was written on the facing page opposite the first page of the poem. As far as I know, I am the only historian who has ever pointed this out.
I hear you saying, “that’s very nice Ellie, but what in the world does it have to do with Mattie and the Glessners?” Well, I will tell you. When I was researching Mattie, I opened all of Mrs. Glessner’s cookbooks and one day I found a four-leaf clover in Mrs. Rorer’s Philadelphia Cookbook, published in 1886. The four-leaf clover was pressed between two pages in the cake section and, low and behold, there was a cocoanut cake recipe very similar to Emily Dickinson’s. Cocoanuts were available for sale in Chicago during Mattie’s time with the Glessners (1892-1912). A cocoanut cake is mentioned on at least one of Mrs. Glessner’s menus. In another of the books in the Glessner cookbook collection, The Grocer’s Encyclopedia, one finds gorgeous illustrations of food from Mattie’s era and the cocoanut illustration is stunning.
The Mrs. Rorer recipe is almost a perfect combination of the two Emily Dickinson recipes. The earlier Dickinson recipe does not contain any leavening other than 6 eggs. She doesn’t give any instructions, but a competent cook would know to separate the eggs and add the whipped whites at the end just before baking to get the lightest cake. The second recipe, the one that was found on its own, not in a fascicle with the poem, does contain leavening in the form of baking soda and cream of tartar. This tells a culinary historian that it was developed before commercial baking powder (which is a combination of those two ingredients) was readily available. By Miss Dickinson’s death in 1886, coincidently the same year Mrs. Rorer published her book, baking powder was quite common, and most cooks were no longer mixing it up themselves from its component ingredients. This is the recipe Mattie would have cooked from and served to Mrs. Glessner’s guests. Let’s bake a cake!
1 stick or half a cup of butter, softened to room temperature
2 ¼ cups sugar (less if you are using sweetened cocoanut)
5 eggs, separated
1 cup of whole milk, can use ½ cup evaporated milk mixed with ½ cup water, please don’t use skim or 2%
1 ¾ cups of flour
2 tsp baking powder
juice and grated rind of one lemon
2 cups of grated cocoanut (use a fresh cocoanut if you can for best results) unsweetened will give you a more authentic flavor if you cannot get fresh. If using sweetened, please reduce the sugar.
Separate the eggs. Whip the whites into a stiff meringue and set aside in a separate bowl. Using the same mixing bowl and mixer, beat the yolks with the sugar and butter until very light. Add the milk to the butter mixture. Sift the flour with the baking powder then add and beat until very creamy. Add the lemon juice and the grated lemon rind. Add the cocoanut. Gently fold the egg whites into the mixture. Pour into two pans with a capacity of about 18 liquid cups. You will have about 12 cups of batter and the pans should be about ¾ full. The original recipe says to bake “in two, square flat pans.” If you happen to have two 8x8 or 9x9 square pans, that would probably work. I also measured the contents of an 8” round cake pan, and you would need three of those. I chose to bake mine in a 10” round bundt cake pan. Bake at 350° for 45 minutes to an hour until knife or broomstraw inserted in center comes out clean. This cake will pair well with fresh fruit, especially berries or pineapple and a dollop of whip cream would not hurt it in the least.
1,2,3,4 Cake (posted April 22, 2020)

In researching Mattie’s character, I began with paging through all of Mrs. Glessner’s cookbooks. There are nearly 100, stored on shelves in the library. One day, I let out a “Whooop!” This was totally inappropriate for a historic house where guests were having a tour in another area, oops. But it was worth it. In Mrs. Rorer’s Philadelphia Cookbook, published in 1886, I found many, many marked recipes. These are recipes that have a pencil mark or notes near them. This is what you are looking for as a culinary historian. This book had absolutely been used! As I paged through carefully, I came across the thing that made me shout out loud. I found a four-leaf clover pressed in the book. In the cake section, believe it or not. I carefully pieced the clover together.
The recipes on those pages are for: Spice Cake, Hickory Nut Cake, 1,2,3,4 Cake, Plain Cup Cake, Cocoanut Loaf Cake, and Marble Cake. One of those must have been lucky for someone! I would like to believe it was the Cocoanut Loaf Cake because I have a special fondness for this cake but the easiest one to make is the 1,2,3,4 Cake. Let’s all try this at home now. You should have all the ingredients and it is not complicated, even if you are not a cook. Perhaps next week we’ll tackle Cocoanut Loaf Cake, just for luck!
The simple recipe is:
1 cup butter
2 cups sugar
3 cups flour
4 eggs
Mix and bake the same as pound cake. This might seem daunting for the modern cook. It’s really simple: cream butter (this means mixing it up until it is smooth, start with soft butter please), add sugar, then eggs, then flour. Were I you, I would add some vanilla (1 tsp, can substitute brandy or whiskey) or almond extract (1/4 tsp). If you use unsalted butter, please also add ½ tsp salt. Bake in a loaf pan (8.5”x4.5”x2.5” or anything you have that is roughly equivalent, a stainless steel or ceramic mixing bowl would work) at 350° for about 30 minutes, check at 20 minutes. Cake should mound up slightly, a knife inserted should come out clean. Cool, slice, serve. What would Mattie do? She would dress it on top with fresh fruit or jam and perhaps ice cream if she had it. It’s a simple recipe that should stand you well in these hard times!
Brown Bread (posted April 15, 2020)
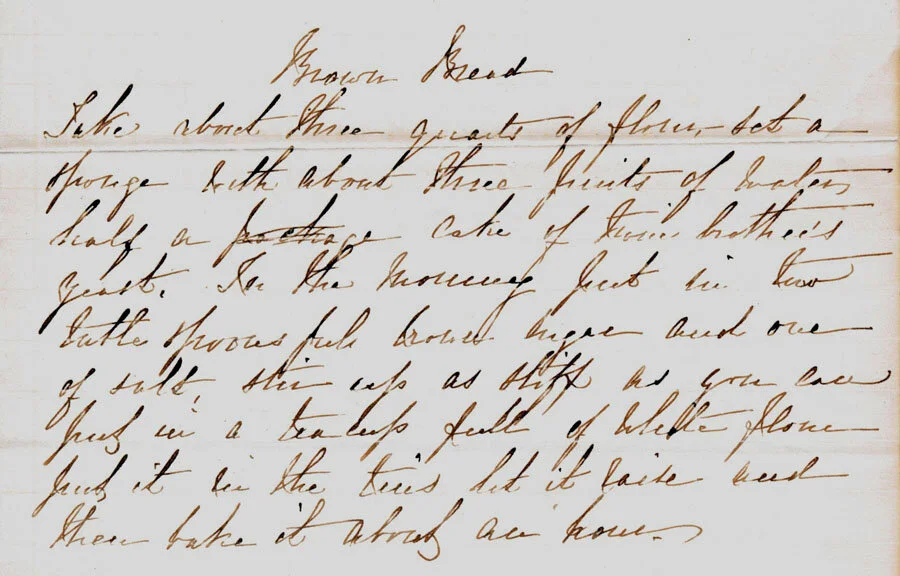
Recipe for brown bread in Mattie’s handwriting. Frances Glessner’s journal mentions Mattie winning prizes for her bread and rolls.
Original Recipe:
Take about three quarts of flour set a sponge with about three pints of water, half a cake of Twin Brother’s yeast. In the morning put in two Tablespoons of brown sugar and one of salt. Stir up as stiff as you can put in a teacup full of white flour, put it in the tins let it raise and then bake it about an hour.
For the Modern Cook:
You will want to make a smaller batch than Mattie (her recipe would have made enough to serve the entire Chicago Symphony Orchestra), so I have taken the liberty of reducing her recipe. This is the way I made it for the March 12, 2020 event at Glessner House, so I know it works.
4 cups whole wheat or rye flour
1 full cake of yeast, or one package or 2 ¼ teaspoons dry yeast
2 Tablespoons of brown sugar, maple syrup or molasses also works
1 teaspoon salt
½ cup unbleached white flour, some more for dusting
Take 2 cups of warm water (110-115°, warm bath-water temperature if you don’t have a thermometer. Do Not use actual bath water of course!) add yeast and a just a pinch of sugar for luck (don’t ask me why, just trust, it works). Let this mixture sit for about five minutes until it begins to bubble and foam a bit. Add to this yeast and water slurry the 4 cups of flour, stir briskly. Put this mixture into a large ceramic or glass bowl at least twice the size of the dough. The mixture will be sloppy and resemble heavy cake batter. Let sit overnight.
In the morning, add the sugar and salt and stir, then add enough unbleached white flour to make a dough you can knead. Start with ½ cup, add more until the dough is no longer sticky. Knead lightly and form into loaves in bread pans or round loaves. This is not a strong dough so make in small loaves or rolls. It will rise better if the surface area is smaller. Let rise again until double in bulk and bake at 350° for about 30 minutes until a top crust has formed that can be thumped and not leave an indentation. Cool in pans and then remove and slice for service. Store in waxed paper or Ziploc bags. Eat within a couple of days; yeah, like it will last!